
How I made my book④ Layout, Imposition, Ordering Paper
🌀 Hesitations & Confusions 🌀
I could not decide on the font & book size
B6 was my initial plan, but at that point, I thought it would be nice to give a copy to each individual that I wrote about. Most of them are over 75 years old, so the existing font was too small, and the book size had to be bigger.
I was talking to a friend whose grandfather read the newspaper with a magnifier. We came to the conclusion that if someone wants to read, then there’s a way.
I thought of Akiyoshi-san’s words, “It’s necessary to think about audiences for 10~15%, but you have to lose the rest.” I increased the font and book sizes by around 15%. I could not proceed to make the entire layout if the font and book sizes were not decided.The white frame around the images
I thought I could easily get rid of the white frame around the images by adjusting print settings. At a later point, I found out the white edges had to be cut manually. This affects the book size as well...Making the layout in two languages
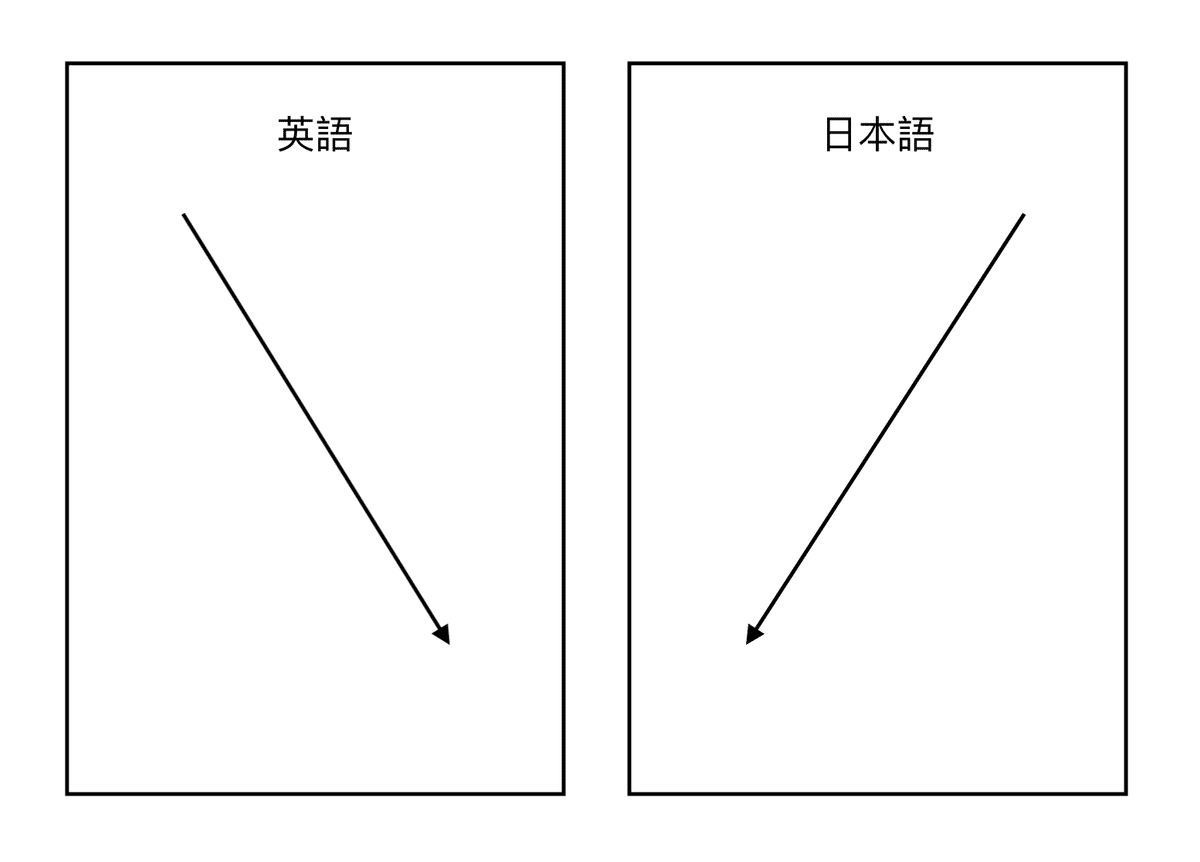
→ With the same font size, the Japanese text appeared larger than the English text, so I had to squint my eyes to make them the same size.
→ The space between lines (leading) should be the same for both Japanese and English fonts.
→ English and Japanese InDesign had different functions, for example, InDesign English version cannot write words vertically. When I found a way, the kerning became strange. Also, I couldn’t find “Justification” in the Japanese version.
What’s Imposition?
Imposition refers to arranging the data for each page on the paper in the correct order for printing. Nakagawa-san came to my sharehouse to run through the process.
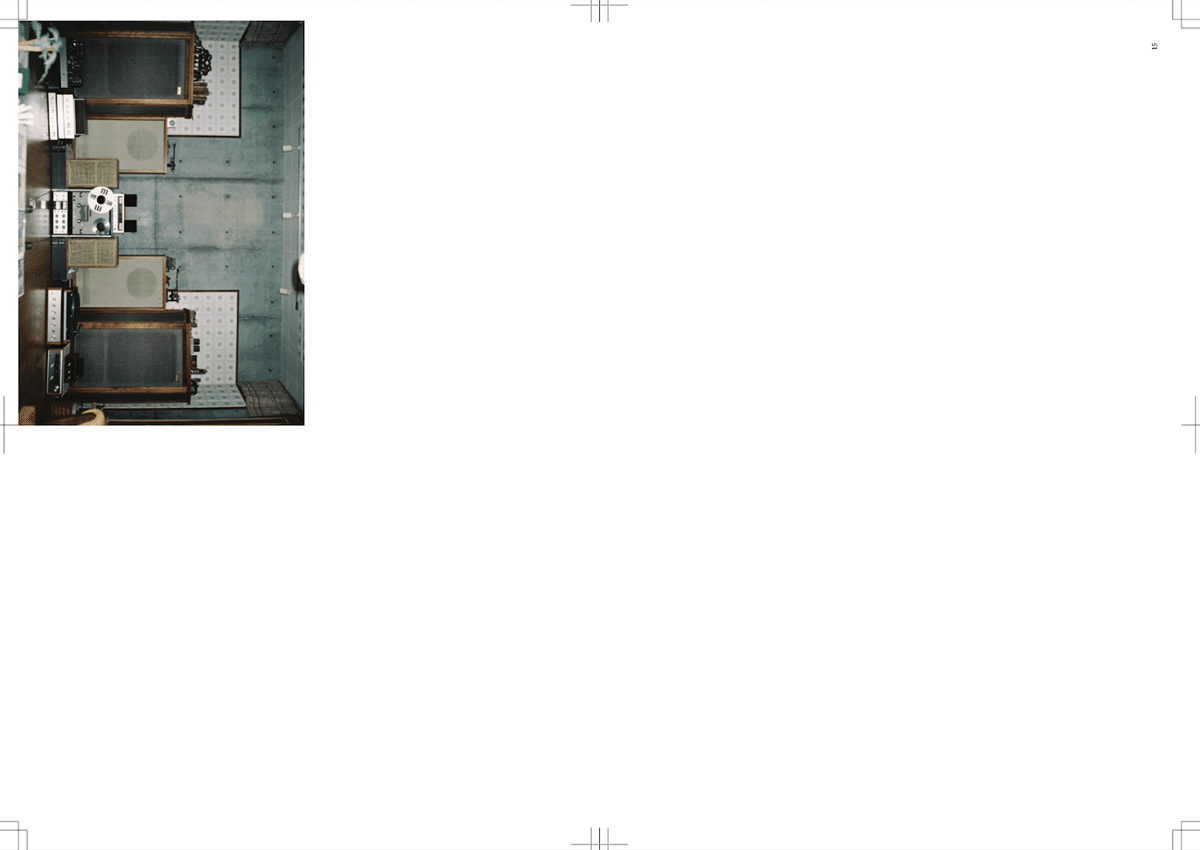
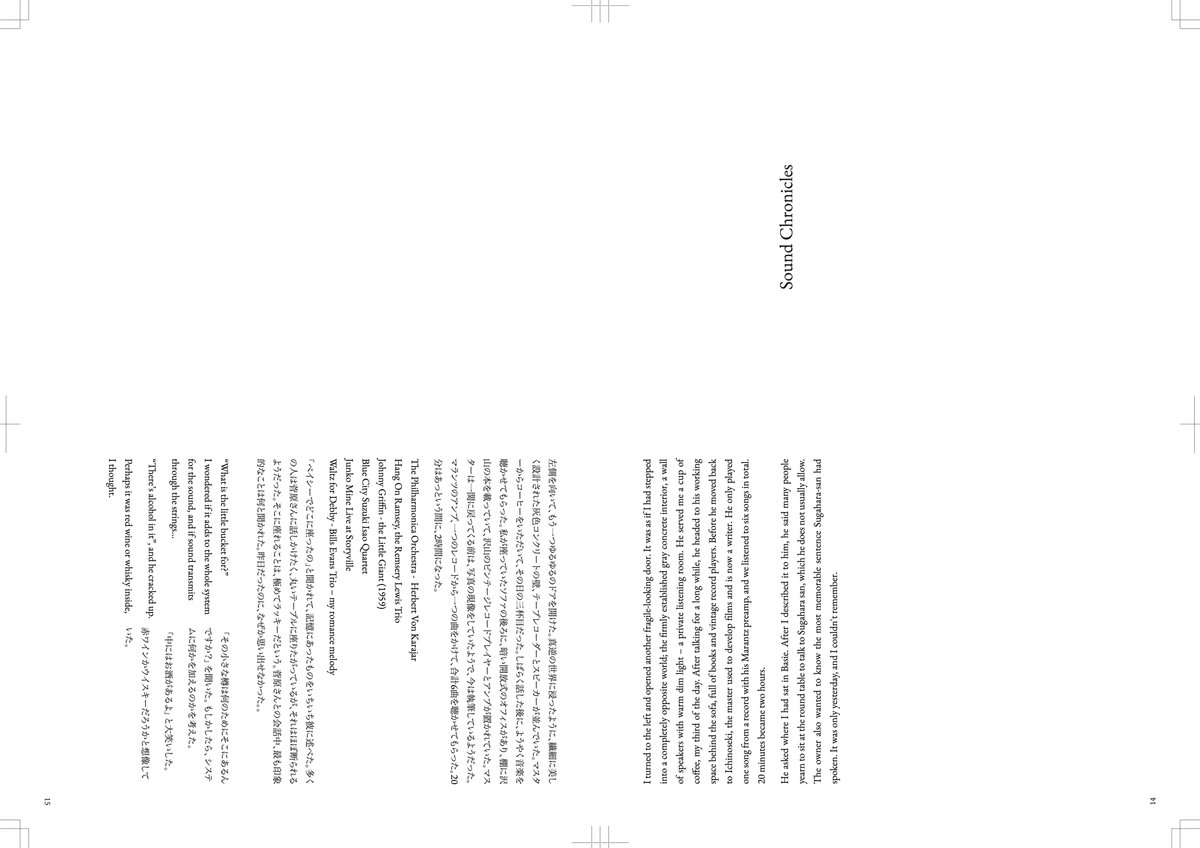
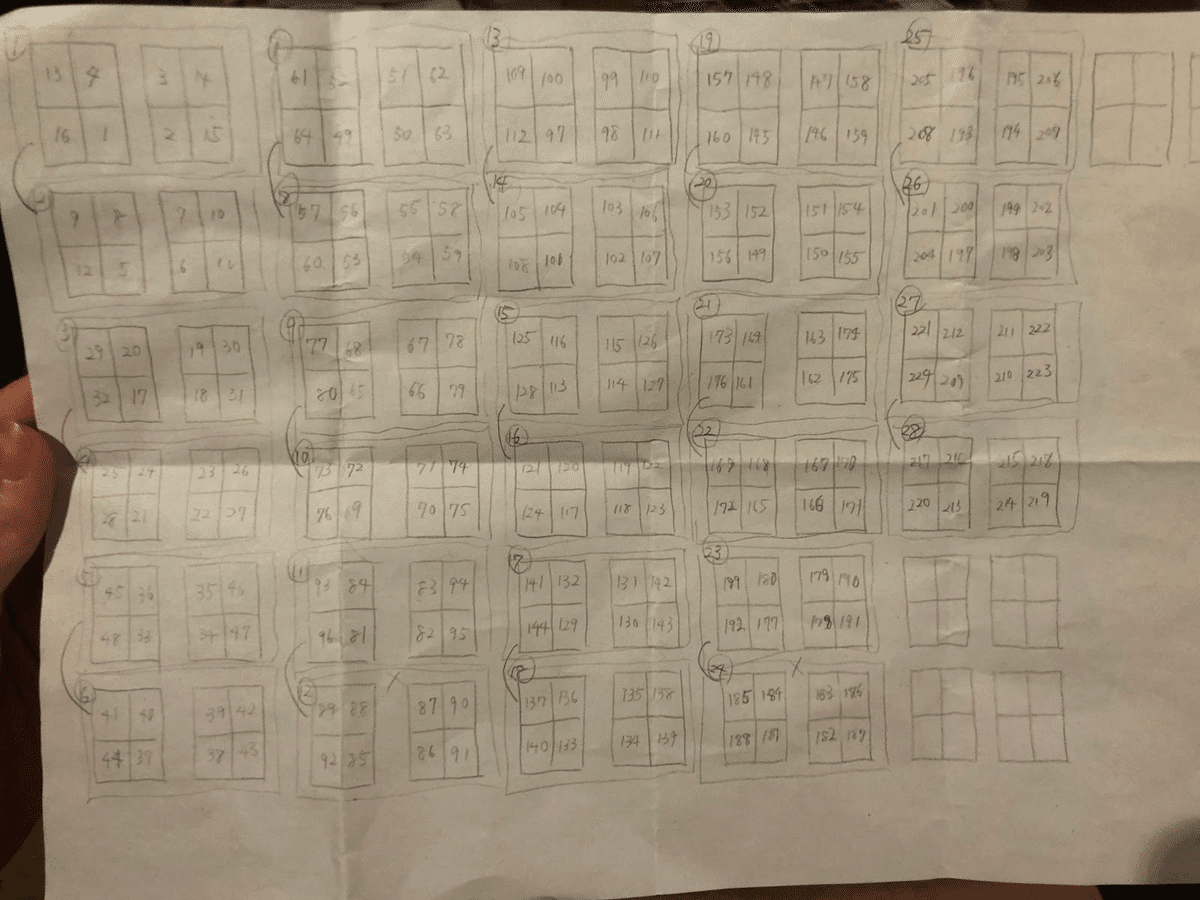
InDesign does the imposition automatically for A4. Then, it is necessary to do the imposition manually for A3. This process needs to be repeated twice: once for colour images file for laser, and once for a text-only file for risograph.
For example:
A3 File for Printing Laser
A3 File for Printing Risograph
Automatic Imposition (A4)
File > Print Booklet
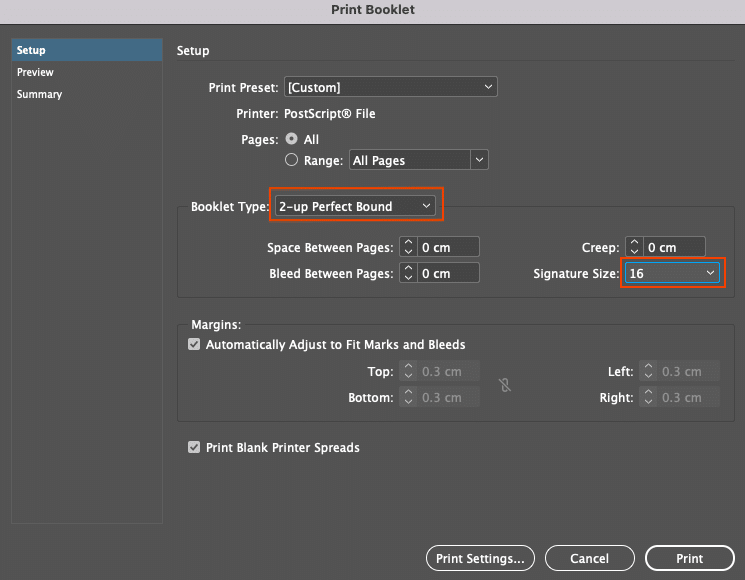
that fit within the specified signature size.
Print Settings
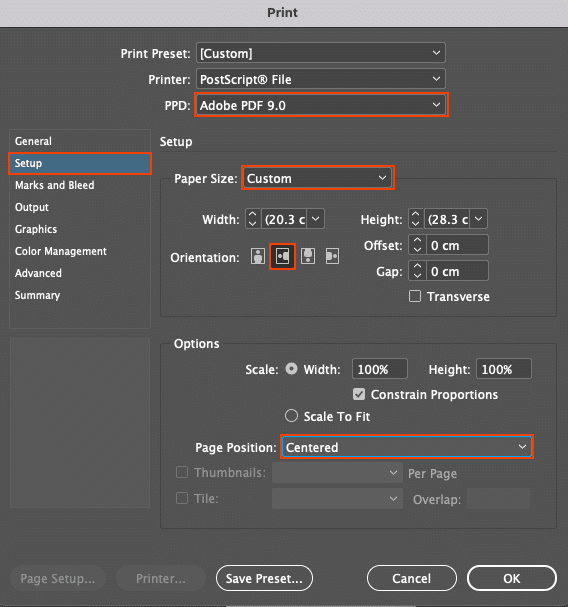
OK > Preview > Print
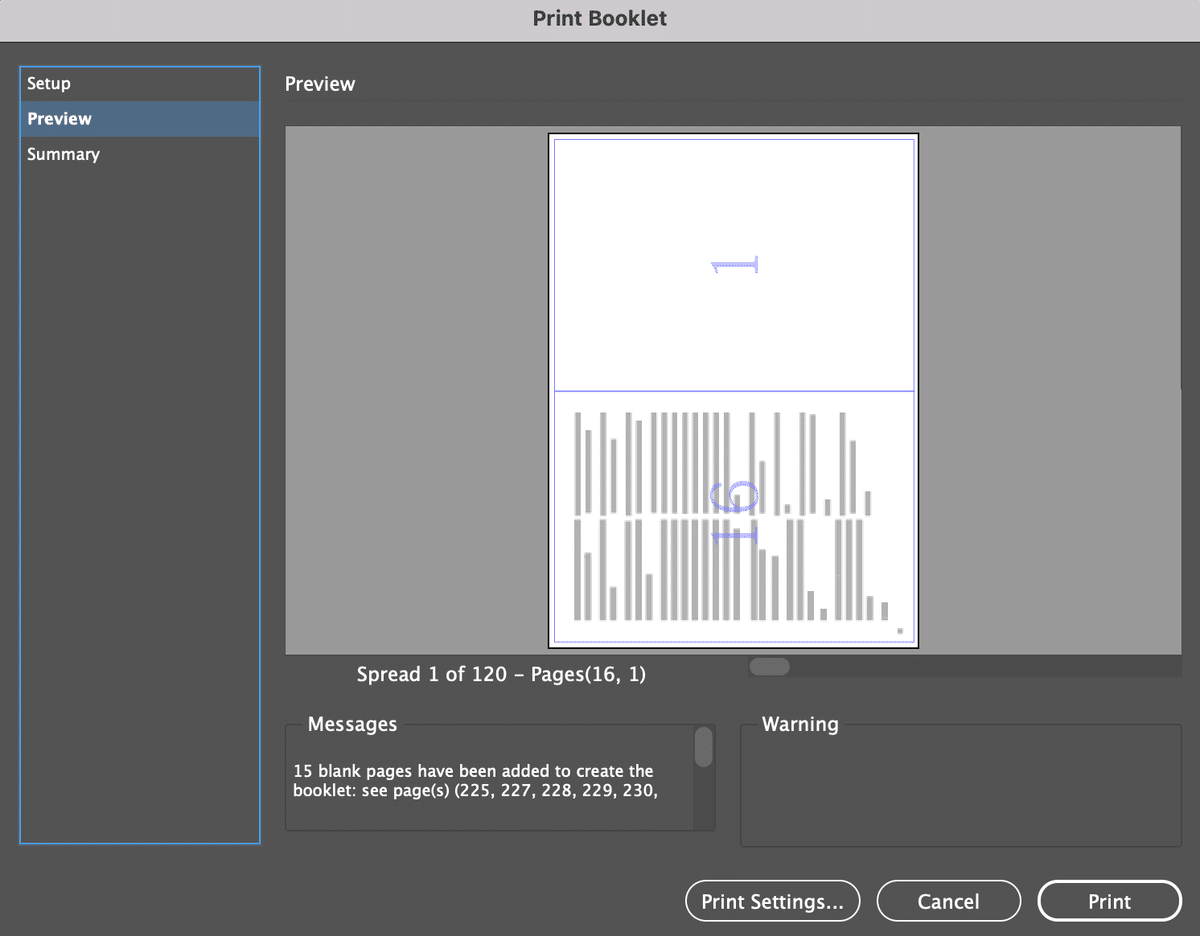
The exported file is saved as PostScript File, so it's necessary to convert to PDF.
You can change it with Acrobat Distiller and choose “Press Quality.”
Manual Imposition (A4 → A3)
Make a new file.
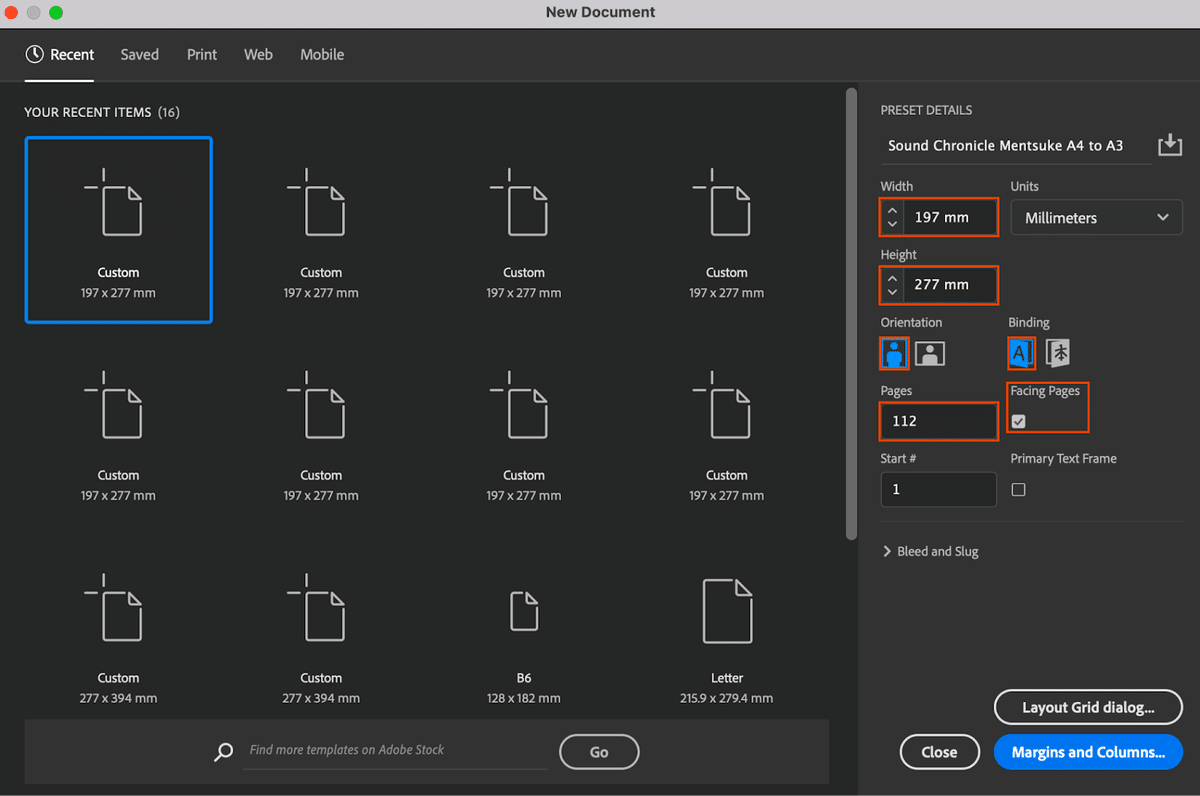
File > Place > Select PDF

Repeat the same pattern 1, 2, 3, 4 for the 112 pages. It lags easily due to the large files. When delay happens, it’s easy to make a mistake.
Rotate the 112 pages.
Document Set Up > Uncheck Facing Pages
Export the file. I used the below paper to check, if it’s wrong, redo! Perhaps it’s better to check while you’re doing the imposition.
Ordering Paper
Long grain paper - Thick type
28 pages (1 copy) x 9 copy (7 + back up 2) = 252 + backup 30 pages = 282 pages of A3 paper
Grain direction refers to the direction in which the fibers of the paper run, and there are horizontal and vertical grains. It is a crucial factor for folding paper, and making a mistake will make binding difficult.
A3 paper was ordered instead of A4 to control the cost of risograph printing. In risograph printing, a master is created for each page. The master is the expensive part, and the cost is similar for one and a hundred copies. Whereas the price of laser printing and machine-made washi paper increases per book.

“I'm getting my papers!”
Before going to Jimbocho, I was going for lunch with my housemate. “You're going out with this?”, he asked while cracking up.
“Yep! I'm getting loooooooots of paper. My back hurts, so I'm using this.”
“This is too much, I'm not going out with this.” He stopped me several times, so I had to return my suitcase...
I ordered a coffee next to the paper shop, what?? A cup of coffee for 1500 yen?? (3.5 times than usual specialty coffee)
When I arrived at the paper shop. There was my order sheet, but somehow they forgot my order...
The next day is printing, so the staff brought my papers straight to the printing shop.
