
Unity NetCode 入門 (1) - チュートリアル

Unityの「NetCode」のアプリの作り方を説明します。
・Unity 2019.3.14f1
・Unity NetCode 0.2.0
・Entities 0.11.1
・Hybrid Renderer 0.5.2
1. プロジェクトの準備
(1) Unityプロジェクトを名前「NetCube」、テンプレート「3D」で作成。
【注意】プロジェクト名は、自動生成される構造体の名前(NetCubeGhostSerializerCollection)に影響します。
(2) メニュー「Window → Package Manager」で「Package Manager」を開く。
(3) ウィンドウ上部の「Advances → show preview packages」をチェック。
(4) 「Unity NetCode」(0.2.0)を検索してインストール。
(5) 「Hybrid Renderer」(0.5.2)を検索してインストール。
これによって、「Entities」が依存関係として追加され、依存する関連パッケージ(Burst、Collections、Jobs、Mathematicsなど)が再帰的に追加されます。
2. ShareDataの準備
空のゲームオブジェクト「SharedData」を作成し、クライアントワールドとサーバーワールドで共有するオブジェクトを子として追加します。
今回は、「Plane」を共有オブジェクトとして追加します。

(1) Hierarchyウィンドウの「+ → Create Empty」で空のゲームオブジェクトを作成し、名前に「SharedData」を指定。

(2) 「SharedData」にコンポーネント「ConvertToClientServerEntity」を追加。
GameObjectをエンティティに変換して、クライアントワールドとサーバーワールドに配置します(デフォルトワールドには配置しない)。

(3) 「SharedData」を右クリックし、「3D Object → Plane」で、「Plane」を作成。

(4) 「Main Camera」のTransformを以下のように設定。
Position = (0, 4, -7)
Rotation = (50, 0, 0)
Scale = (1, 1, 1)
(5) 「Plane」のTransformを以下のように設定。
Position = (0, −1.5, 0)
Rotation = (0, 0, 0)
Scale = (1, 1, 1)
3. Ghostの準備
「Ghost」は、クライアントワールドとサーバーワールドでTransform等の属性を同期するオブジェクトです。
「Ghost」をシーンに生成(スポーン)する手順は、次のとおりです。
(1) Ghostプレハブの準備
(2) GhostプレハブをGhostCollectionに登録
今回は、「Cube」を「Ghost」として追加します。

4. Ghostプレハブの準備
(1) 「SharedData」を右クリックし、「3D Object → Cube」で、「Cube」を作成。
(2) 「Cube」をProjectウィンドウにドラッグ&ドロップし、プレハブ「Cube」を生成。

(3) Hierarchyウィンドウの「Cube」を削除。
(4) Projectウィンドウにスクリプト「MovableCubeComponent」を追加し、以下のように編集。
次に説明する「Ghost Authoring Comonent」で利用する「プレイヤーID」を保持するコンポーネントです。
using Unity.Entities;
using Unity.NetCode;

[GenerateAuthoringComponent]
public struct MovableCubeComponent : IComponentData
{
    [GhostDefaultField]
    public int PlayerId; // プレイヤーID
}
(5) プレハブ「Cube」に「MovableCubeComponent」を追加。

(6) プレハブ「Cube」に「Ghost Authoring Comonent」を追加。
「Ghost Authoring Comonent」は、プレハブの様々なコンポーネントのデータを同期する方法を設定します。
(7)「GhostAuthoringComonent」の下端のボタン「Upate component list」を押す。
プレハブを検査し、保持するコンポーネントの一覧がリストアップされます。各コンポーネントのデータの同期設定を行うことができます。
・MovableCubeComponent : プレイヤーID。
・Unity.Transforms.LocalToWorld : ローカル座標からワールド座標へ変換。
・Unity.Transforms.Rotation : 回転。
・Unity.Transforms.Translation : 位置。
(8) 「GhostAuthoringComonent」を以下のように設定。
・Default Client Instantiation Type : Owner Predicted
・Predicting player network id : MovableCubeComponent.PlayerId
・RootPath : /Generated

「Default Client Instantiation Type」は「クライアントインスタンス化種別」を指定します。
・ Interpolated : 補間済みとして扱う。
・ Predicted : 予測済みとして扱う。
・ Owner predicted : 所有クライアントは予測済み、他のクライアントは補完済みとして扱う。
「Predicting player network id」はプレイヤーIDを指定します。「RootPath」は「Ghost」のコードを生成するフォルダを指定します。
(9) 「Ghost Authoring Comonent」の下端のボタン「Generate code」を押す。
Generateフォルダにコードが生成されます。

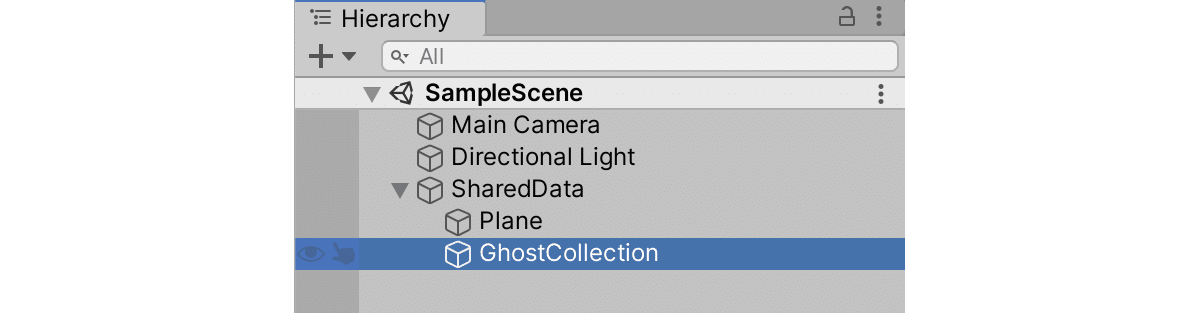
5. GhostプレハブをGhostCollectionに登録
「GhostCollection」を作成し、「Ghostプレハブ」を登録します。
(1) 「SharedData」下に空のGameObjectを作成し、名前に「GhostCollection」を指定。
(2) 「GhostCollection」に「GhostCollectionAuthoringComponent」を追加し、以下ように設定。
・RootPath : /Generated

(3)「GhostCollectionAuthoringComponent」の下端のボタン「Upate ghost list」を押す。
プロジェクトを検査し、保持するゴーストの一覧がリストアップされます。
(4) 「GhostCollectionAuthoringComponent」の下端のボタン「Generate collection code」ボタンを押す。
Generateフォルダにコードが追加されます。

7. Gameシステムの準備
クライアントとサーバーで接続して、クライアントからサーバにゲーム参加要求を送信し、サーバがCubeを生成するシステム群を作成します。
(1) Projectウィンドウにスクリプト「Game」を作成し、次のように編集。
using System;
using AOT;
using Unity.Entities;
using Unity.NetCode;
using Unity.Networking.Transport;
using Unity.Burst;

// デフォルトワールドでの制御システムの更新
[UpdateInWorld(UpdateInWorld.TargetWorld.Default)]
public class Game : ComponentSystem
{
    // Gameを1度だけ実行するためのフラグ
    struct InitGameComponent : IComponentData
    {
    }

    // 生成時に呼ばれる
    protected override void OnCreate()
    {
        // InitGameComponentを持つ場合のみGameを有効化
        RequireSingletonForUpdate<InitGameComponent>();

        // InitGameComponentを持つエンディティを作成し、Gameを実行
        EntityManager.CreateEntity(typeof(InitGameComponent));
    }

    // 1フレーム毎に呼ばれる
    protected override void OnUpdate()
    {
        // InitGameComponentを破棄して、Gameが再度実行されないようにする
        EntityManager.DestroyEntity(GetSingletonEntity<InitGameComponent>());

        // ワールドの反復
        foreach (var world in World.All)
        {
            var network = world.GetExistingSystem<NetworkStreamReceiveSystem>();
            if (world.GetExistingSystem<ClientSimulationSystemGroup>() != null)
            {
                // クライアントワールドはローカルホストにあるサーバーに接続
                NetworkEndPoint ep = NetworkEndPoint.LoopbackIpv4;
                ep.Port = 7979;
#if UNITY_EDITOR
                ep = NetworkEndPoint.Parse(ClientServerBootstrap.RequestedAutoConnect, 7979);
#endif
                network.Connect(ep);
            }
            #if UNITY_EDITOR || UNITY_SERVER
            else if (world.GetExistingSystem<ServerSimulationSystemGroup>() != null)
            {
                // サーバーワールドはクライアント接続のリッスンを開始
                NetworkEndPoint ep = NetworkEndPoint.AnyIpv4;
                ep.Port = 7979;
                network.Listen(ep);
            }
            #endif
        }
    }
}
◎ InitGameComponent
RequireSingletonForUpdate<T>()は、任意のコンポーネントを保つ場合のみシステムを有効化にする設定です。今回は、Gameを1度だけ実行するためのフラグとして「InitGameComponent」を使っています。
◎ Game
「Game」は、デフォルトワールド生成時に1回だけ実行されるシステムです。処理内容は、次のとおりです。
・クライアントワールドはローカルホストにあるサーバーに接続。
・サーバーワールドはクライアント接続のリッスンを開始(Unityエディタのみ)。
(2) スクリプト「Game」に以下のコードを追加。
サーバーにゲーム参加の準備ができていることを伝えるには、ゲーム参加リクエスト「RpcCommand」を生成して、サーバーに送信する必要があります。
// ゲーム参加リクエスト
[BurstCompile]
public struct GoInGameRequest : IRpcCommand
{
    // デモ用の未使用の整数
    public int value;

    // デシリアライズ
    public void Deserialize(ref DataStreamReader reader)
    {
        value = reader.ReadInt();
    }

    // シリアライズ
    public void Serialize(ref DataStreamWriter writer)
    {
        writer.WriteInt(value);
    }

    // 呼び出し実行
    [BurstCompile]
    [MonoPInvokeCallback(typeof(RpcExecutor.ExecuteDelegate))]
    private static void InvokeExecute(ref RpcExecutor.Parameters parameters)
    {
        // RPCリクエストの生成
        RpcExecutor.ExecuteCreateRequestComponent<GoInGameRequest>(ref parameters);
    }

    // 呼び出し実行の関数ポインタの取得
    static PortableFunctionPointer<RpcExecutor.ExecuteDelegate> InvokeExecuteFunctionPointer =
        new PortableFunctionPointer<RpcExecutor.ExecuteDelegate>(InvokeExecute);
    public PortableFunctionPointer<RpcExecutor.ExecuteDelegate> CompileExecute()
    {
        return InvokeExecuteFunctionPointer;
    }
}
(3) スクリプト「Game」に以下のコードを追加。
NetCodeがコマンドを処理することを確認するには、「RpcCommandRequestSystem」を作成する必要があります。
// ゲーム参加リクエストの転送システム
public class GoInGameRequestSystem : RpcCommandRequestSystem<GoInGameRequest>
{
}
(4) スクリプト「Game」に以下のコードを追加。
「GoInGameClientSystem」は、クライアントワールドで動作する、ゲーム参加リクエストの送信システムです。クライアントがサーバーと接続した時、ゲーム参加リクエストをサーバに送信します。
// ゲーム参加リクエストの送信システム
[UpdateInGroup(typeof(ClientSimulationSystemGroup))]
public class GoInGameClientSystem : ComponentSystem
{
    // 生成時に呼ばれる
    protected override void OnCreate()
    {
        // GoInGameClientSystemを持つ場合のみGoInGameClientSystemを有効化
        RequireSingletonForUpdate<EnableNetCubeGhostReceiveSystemComponent>();
    }

    // 1フレーム毎に呼ばれる
    protected override void OnUpdate()
    {
        Entities.WithNone<NetworkStreamInGame>().ForEach((Entity ent, ref NetworkIdComponent id) =>
        {
            // ゲーム参加リクエストの送信
            PostUpdateCommands.AddComponent<NetworkStreamInGame>(ent);
            var req = PostUpdateCommands.CreateEntity();
            PostUpdateCommands.AddComponent<GoInGameRequest>(req);
            PostUpdateCommands.AddComponent(req, new SendRpcCommandRequestComponent {
                TargetConnection = ent
            });
        });
    }
}
(5) スクリプト「Game」に以下のコードを追加。
「GoInGameServerSystem」は、サーバーワールドで動作する、ゲーム参加リクエストの受信システムです。クライアントからゲーム参加リクエストを受信した時、「Cube」を生成し、ゲーム参加リクエストを破棄しています。
// ゲーム参加リクエストの受信システム
[UpdateInGroup(typeof(ServerSimulationSystemGroup))]
public class GoInGameServerSystem : ComponentSystem
{
    // 生成時に呼ばれる
    protected override void OnCreate()
    {
        // EnableNetCubeGhostSendSystemComponentがある場合のみSystem動作
        RequireSingletonForUpdate<EnableNetCubeGhostSendSystemComponent>();
    }

    // 更新時に呼ばれる
    protected override void OnUpdate()
    {
        Entities.WithNone<SendRpcCommandRequestComponent>().ForEach((Entity reqEnt, ref GoInGameRequest req, ref ReceiveRpcCommandRequestComponent reqSrc) =>
        {
            // ゲーム参加リクエストの受信
            PostUpdateCommands.AddComponent<NetworkStreamInGame>(reqSrc.SourceConnection);
            UnityEngine.Debug.Log(String.Format("Server setting connection {0} to in game", EntityManager.GetComponentData<NetworkIdComponent>(reqSrc.SourceConnection).Value));
#if true
            // Cubeの生成
            var ghostCollection = GetSingleton<GhostPrefabCollectionComponent>();
            var ghostId = NetCubeGhostSerializerCollection.FindGhostType<CubeSnapshotData>();
            var prefab = EntityManager.GetBuffer<GhostPrefabBuffer>(ghostCollection.serverPrefabs)[ghostId].Value;
            var player = EntityManager.Instantiate(prefab);
            EntityManager.SetComponentData(player, new MovableCubeComponent {
                PlayerId = EntityManager.GetComponentData<NetworkIdComponent>(reqSrc.SourceConnection).Value
            });
            PostUpdateCommands.AddBuffer<CubeInput>(player);
            PostUpdateCommands.SetComponent(reqSrc.SourceConnection, new CommandTargetComponent {targetEntity = player});
#endif

            // ゲーム参加リクエストの破棄
            PostUpdateCommands.DestroyEntity(reqEnt);
        });
    }
}
8. CubeInputシステムの準備
クライアントからサーバーにキー入力を送信するシステムを作成します。
(1) Projectウィンドウにスクリプト「CubeInput」を作成し、次のように編集。
クライアントからサーバーへのキー入力の送信に利用するコマンドデータ「ICommandData」を定義します。これは、キー入力データのシリアライズとデシリアライズを担当します。
using Unity.Entities;
using Unity.NetCode;
using Unity.Networking.Transport;
using UnityEngine;

// キー入力データ
public struct CubeInput : ICommandData<CubeInput>
{
    public uint Tick => tick;
    public uint tick;
    public int horizontal;
    public int vertical;

    // デシリアライズ
    public void Deserialize(uint tick, ref DataStreamReader reader)
    {
        this.tick = tick;
        horizontal = reader.ReadInt();
        vertical = reader.ReadInt();
    }

    // シリアライズ
    public void Serialize(ref DataStreamWriter writer)
    {
        writer.WriteInt(horizontal);
        writer.WriteInt(vertical);
    }

    // ディリアライズ
    public void Deserialize(uint tick, ref DataStreamReader reader, CubeInput baseline,
        NetworkCompressionModel compressionModel)
    {
        Deserialize(tick, ref reader);
    }

    // シリアライズ
    public void Serialize(ref DataStreamWriter writer, CubeInput baseline, NetworkCompressionModel compressionModel)
    {
        Serialize(ref writer);
    }
}
(2) スクリプト「CubeInput」に以下のコードを追加。
コマンドストリームは、現在の位置と水平および垂直方向の動きで構成されます。RPCと同じように、「ICommandData」を設定して、処理する必要があります。
// コマンド送信システム
public class NetCubeSendCommandSystem : CommandSendSystem<CubeInput>
{
}

// コマンド受信システム
public class NetCubeReceiveCommandSystem : CommandReceiveSystem<CubeInput>
{
}
(3) スクリプト「CubeInput」に以下のコードを追加。
キー入力データのサンプリングを行い、サーバーに送信しています。
// キー入力データのサンプリング
[UpdateInGroup(typeof(ClientSimulationSystemGroup))]
public class SampleCubeInput : ComponentSystem
{
    // 生成時に呼ばれる
    protected override void OnCreate()
    {
        RequireSingletonForUpdate<NetworkIdComponent>();

        // GoInGameClientSystemを持つ場合のみSampleCubeInputを有効化
        RequireSingletonForUpdate<EnableNetCubeGhostReceiveSystemComponent>();
    }

    // 1フレーム毎に呼ばれる
    protected override void OnUpdate()
    {
        // localInputの取得
        var localInput = GetSingleton<CommandTargetComponent>().targetEntity;
        if (localInput == Entity.Null)
        {
            var localPlayerId = GetSingleton<NetworkIdComponent>().Value;
            Entities.WithNone<CubeInput>().ForEach((Entity ent, ref MovableCubeComponent cube) =>
            {
                if (cube.PlayerId == localPlayerId)
                {
                    PostUpdateCommands.AddBuffer<CubeInput>(ent);
                    PostUpdateCommands.SetComponent(GetSingletonEntity<CommandTargetComponent>(), new CommandTargetComponent {targetEntity = ent});
                }
            });
            return;
        }

        // キー入力データの生成
        var input = default(CubeInput);
        input.tick = World.GetExistingSystem<ClientSimulationSystemGroup>().ServerTick;
        if (Input.GetKey("a"))
            input.horizontal -= 1;
        if (Input.GetKey("d"))
            input.horizontal += 1;
        if (Input.GetKey("s"))
            input.vertical -= 1;
        if (Input.GetKey("w"))
            input.vertical += 1;

        // サーバーに送信
        var inputBuffer = EntityManager.GetBuffer<CubeInput>(localInput);
        inputBuffer.AddCommandData(input);
    }
}
9. MoveCubesystemシステムの準備
「CommandData」を読み取って、「Cube」を移動させるシステムを作成します。
(1) Projectウィンドウにスクリプト「MoveCubesystem」を作成し、次のように編集。
using Unity.Entities;
using Unity.NetCode;
using Unity.Transforms;

// Cube移動システム
[UpdateInGroup(typeof(GhostPredictionSystemGroup))]
public class MoveCubeSystem : ComponentSystem
{
    // 1フレーム毎に呼ばれる
    protected override void OnUpdate()
    {
        var group = World.GetExistingSystem<GhostPredictionSystemGroup>();
        var tick = group.PredictingTick;
        var deltaTime = Time.DeltaTime;
        Entities.ForEach((DynamicBuffer<CubeInput> inputBuffer, ref Translation trans, ref PredictedGhostComponent prediction) =>
        {
            if (!GhostPredictionSystemGroup.ShouldPredict(tick, prediction))
                return;
            CubeInput input;
            inputBuffer.GetDataAtTick(tick, out input);
            if (input.horizontal > 0)
                trans.Value.x += deltaTime;
            if (input.horizontal < 0)
                trans.Value.x -= deltaTime;
            if (input.vertical > 0)
                trans.Value.z += deltaTime;
            if (input.vertical < 0)
                trans.Value.z -= deltaTime;
        });
    }
}
10. 実行
実行すると、立方体が表示され、w(↑)a(←)s(↓)d(→)キーで移動できます。
アプリをビルドし、アプリ(クライアント)とUnityエディタ(サーバ)を同時に実行すると、2つの立方体が表示され、位置が同期されます。
