【Unity】GitHubとSourcetreeでバージョン管理と複数台開発を行う方法

Unityでバージョン管理と複数台のパソコンで開発したいなと思い調べてみるとGitHubとSourcetreeを使うと良いよ!みたいな記事が沢山出てきたので試してみたのですが尽く上手く出来なかったので忘備録として記載しておきます。
(私はGitHubやSourcetreeなどは一切使ったこともなくバージョン管理についても全く知識がない状態ですので誤りなどもあるかもしれません)
まず前提として
パソコンにGitをインストール済み
Gitのインストールはコチラを参考にしました。
https://www.curict.com/item/60/60bfe0e.html
GitHubのアカウントを取得済み
GitHubアカウントの取得はコチラを参考にしました。
https://qiita.com/ayatokura/items/9eabb7ae20752e6dc79d
Sourcetreeのアカウントを取得済み
Sourcetreeアカウントの取得はコチラを参考にしました。
https://yttm-work.jp/git/git_0002.html
としてください。
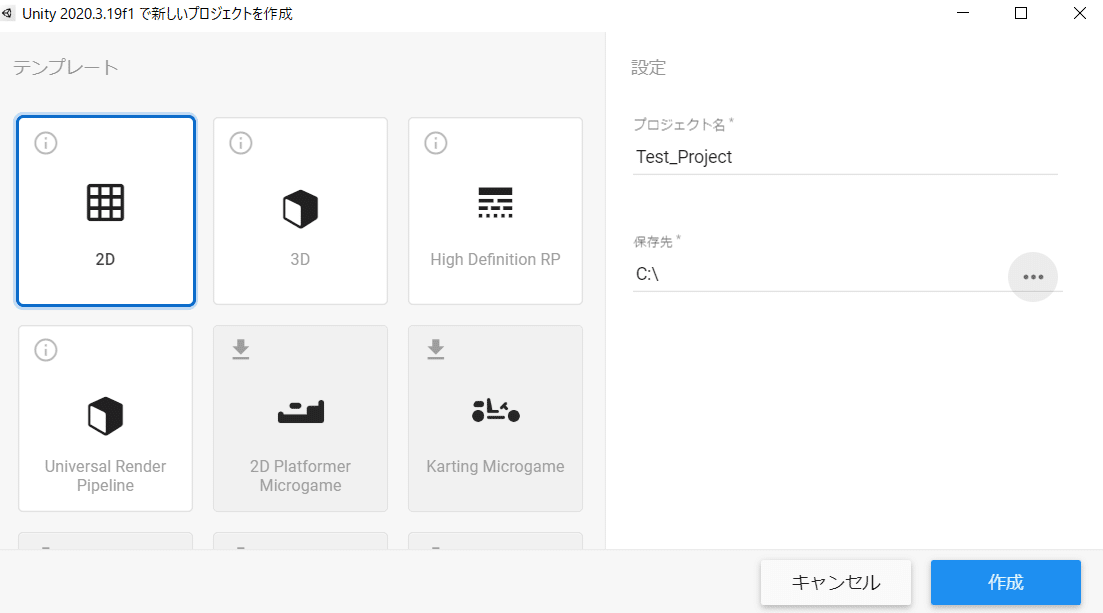
まずはUnityでプロジェクトを作成します。
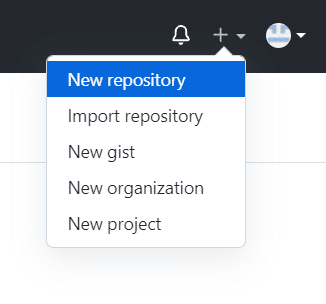
つぎにGitHubの方を設定していきます。 GitHubの自分のページにアクセスして右上のプラスボタンを押しNew repositoryをクリックします。
下記のような新しいrepository作成画面になるので
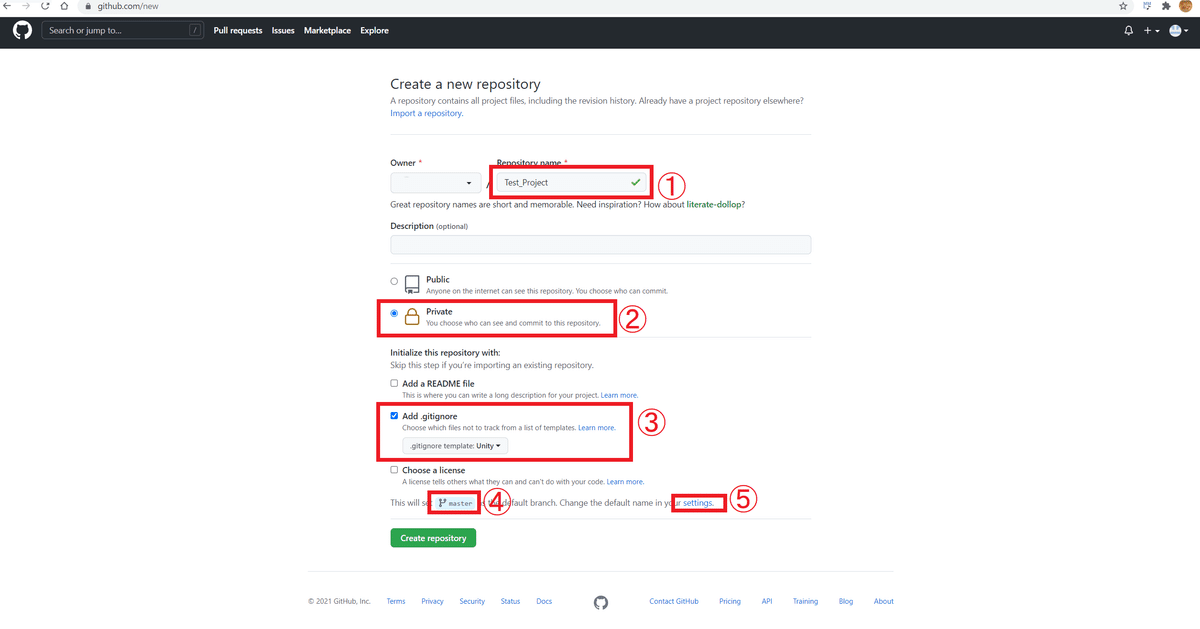
①今回のプロジェクトネームを入力します。
②Privateを選択。Publicだと誰でも見れるようになってしまう。
③Add.gitignoreをクリックして選択メニューからUnityを選びます。
この時④の部分がmainになっていると思います(masterになっていれば問題なし)
⑤のsettingsをクリックしてRepository default branchの画面にします。

ここがmainになっている思いますのでmasterと入力してUpdateをクリック。 もう一度repository作成画面に戻って④の部分がmasterになっていたらCreate repositoryを押して新しいrepositoryを作成します。
***追記:上記④⑤のmain/masterのくだりは現在はなくなっているようです
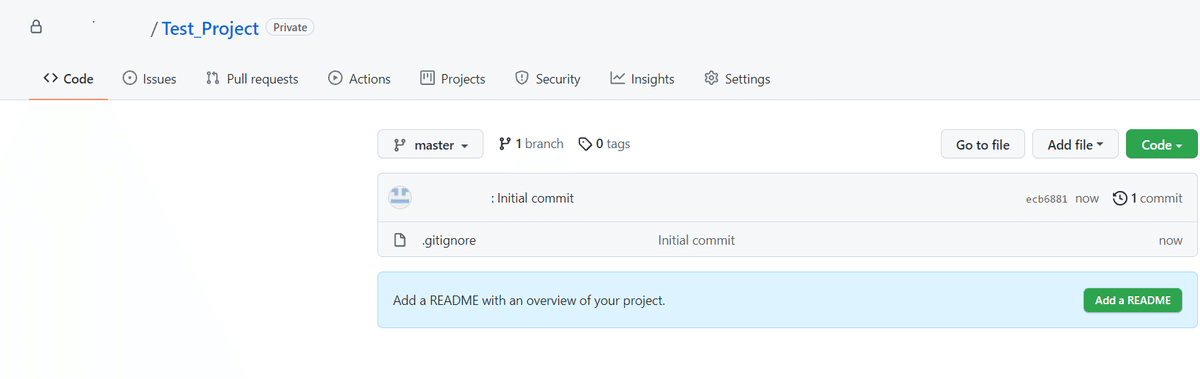
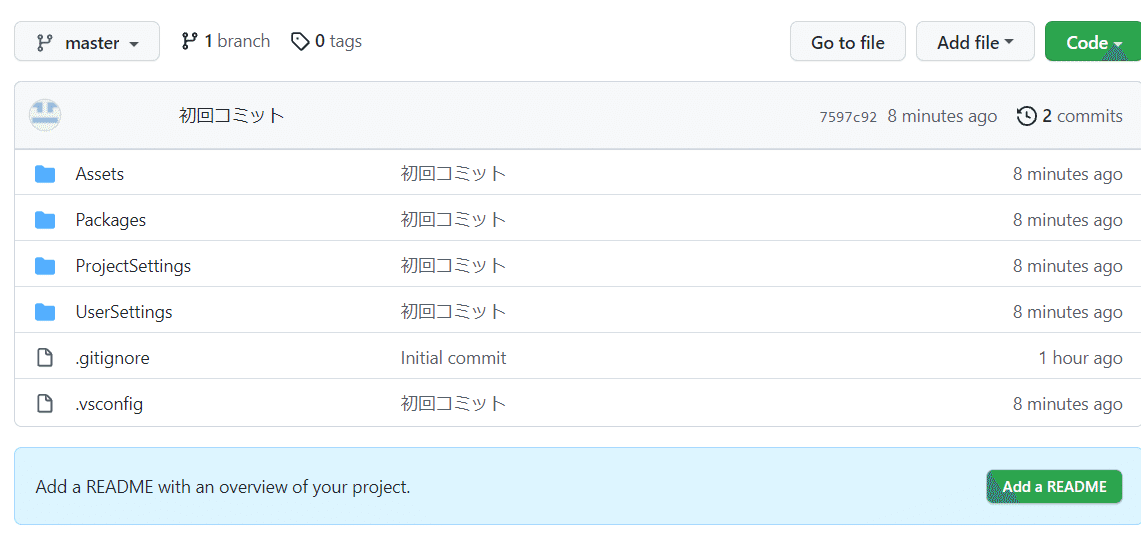
出来た画面はこんな感じ。まだ.gitignoreしかファイルがありません。
とりあえずコレでリモートリポジトリは作成出来たので、つぎにアクセス用のアクセストークンを作成します。
作成の仕方はGitHubの方に日本語で丁寧にやり方が書いてあるので参照して下さい。
https://docs.github.com/ja/authentication/keeping-your-account-and-data-secure/creating-a-personal-access-token
作成したトークンは後で使いますのでテキストとして保存しておきます。
次にSourcetreeの設定を行います。
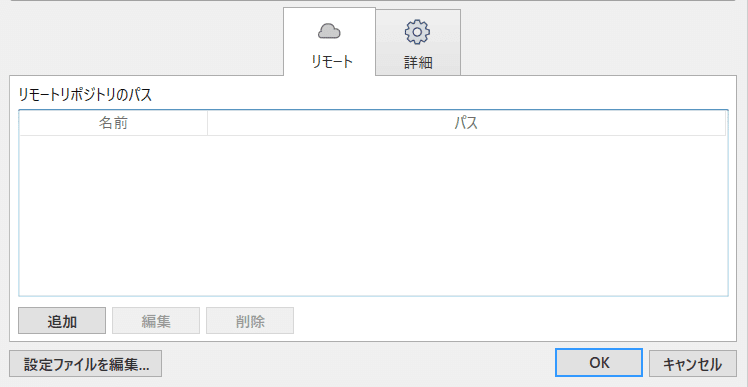
まずファイルメニューのツール→オプションを選択します。
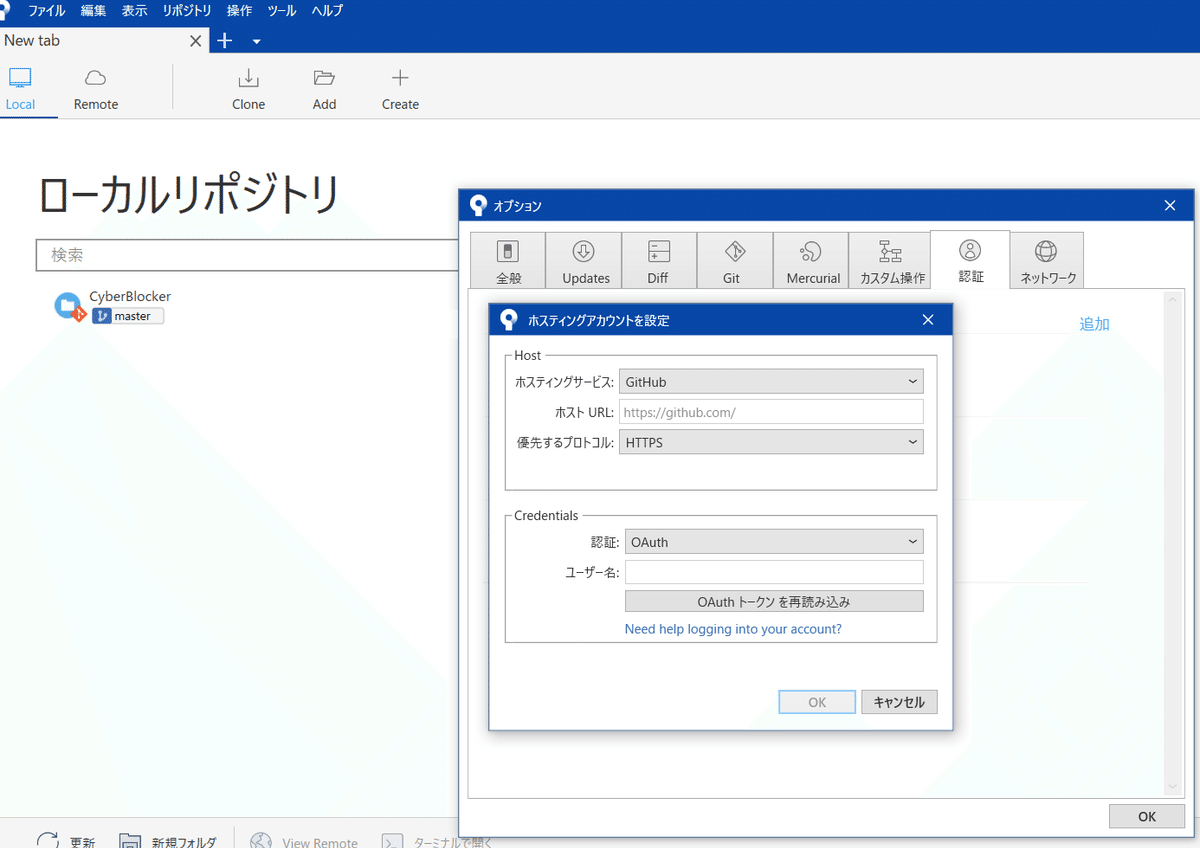
認証タグをクリックして追加を押します。
するとホスティングアカウントを設定という画面が出てきますのでホスティングサービスにはGitHubを、優先するプロコトルはHTTPSを、認証はOAuthを選択してOAuthトークンを読み込みをクリックするとブラウザが立ち上がって承認されると思います。追加されたアカウントをクリックしてデフォルトに設定しておきます。
最初の画面に戻ってCreateをクリックします。
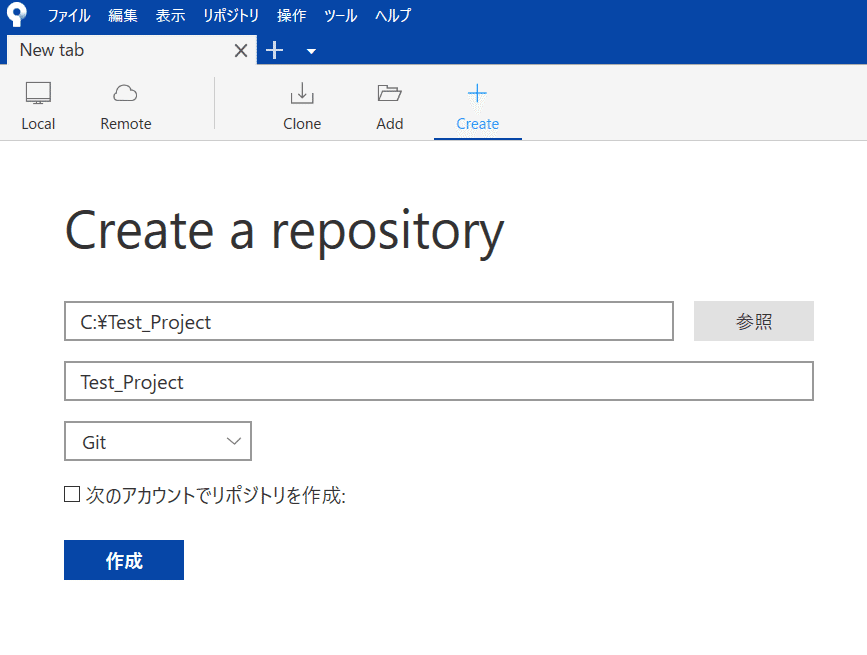
Unityで作成したTest_Projectフォルダを指定して作成をクリック。
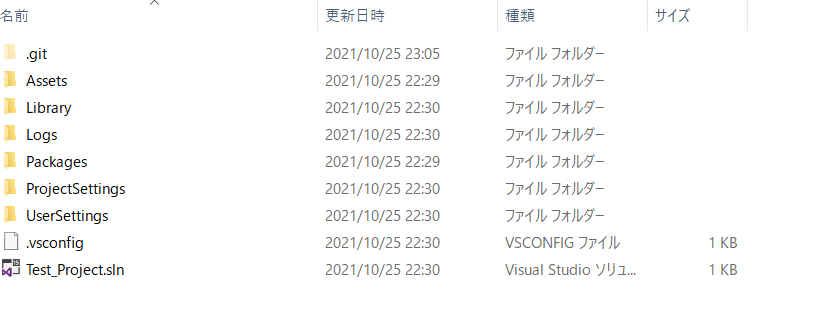
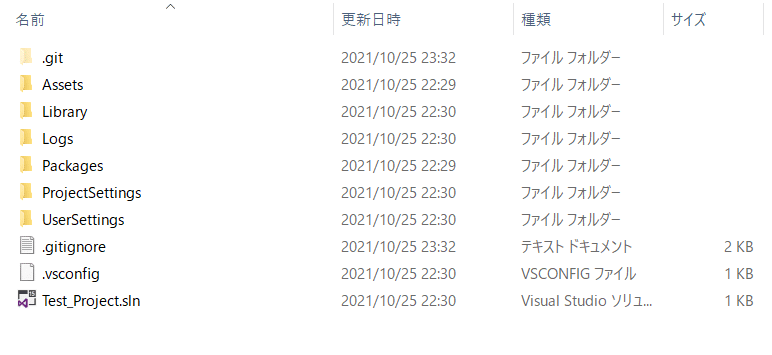
これでローカルリポジトリがTest_Project内に作成されました。
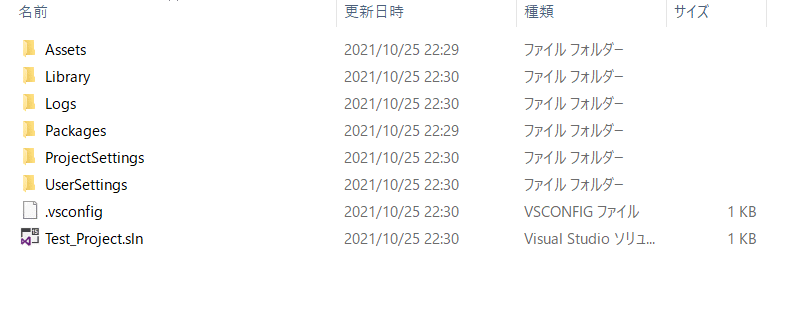
フォルダの中身はこんな感じ
現状ではローカルリポジトリとリモートリポジトリが繋がっていないので繋ぐ設定をします。
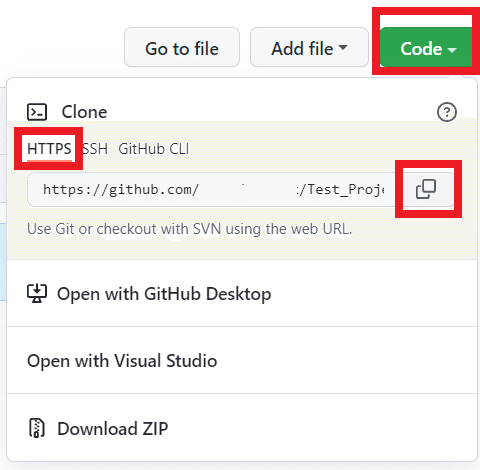
まずGitHubのTest_Projectのページに行きます。
緑色のCodeをクリックするとCloneメニューが出てきますのでHTTPSを選択してURLをコピーします。
次にSourcetreeに戻って・・・

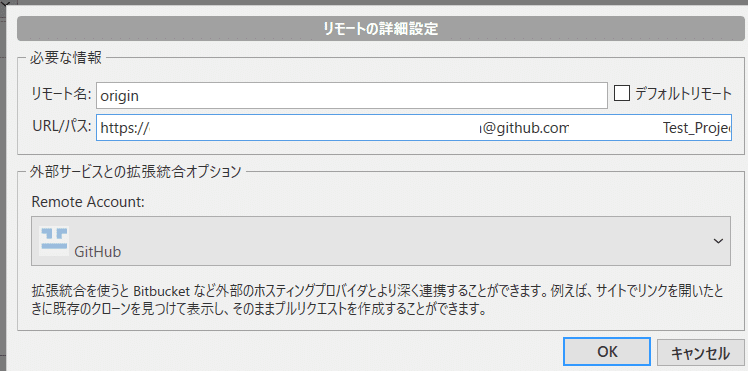
リモート名は何でも良いみたいですがoriginとするのが普通なようです。
URL/パスですが、先程GitHubのページでコピーしたURLを貼り付けます。
https://github.com/[ユーザー名]/Test_Project.gitとなっていると思います。
でもこれでは駄目で、先程作成しておいたアクセストークンを使います。
https://[アクセストークン]@github.com/[ユーザー名]/Test_Project.git
となるように入力します。
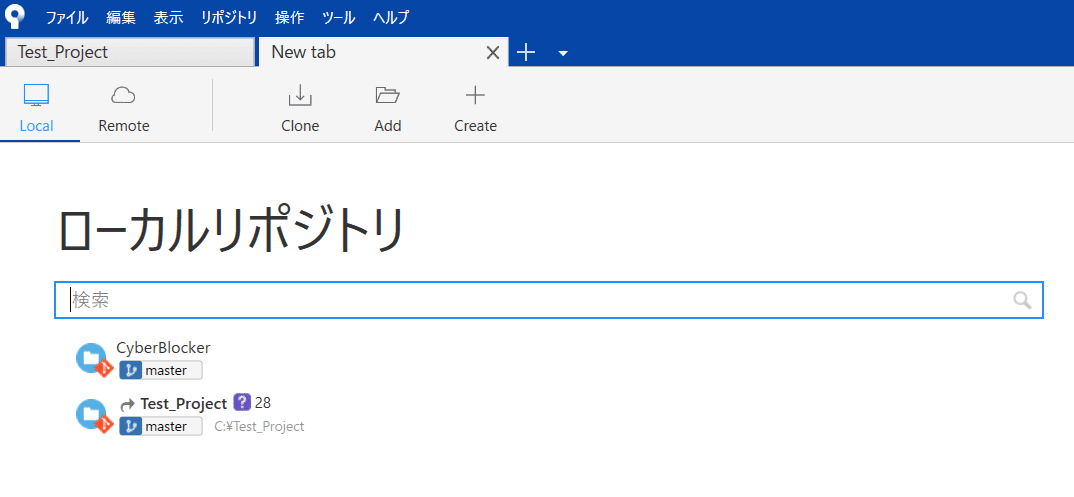
ここで一旦ローカルリポジトリの状態を見てみると
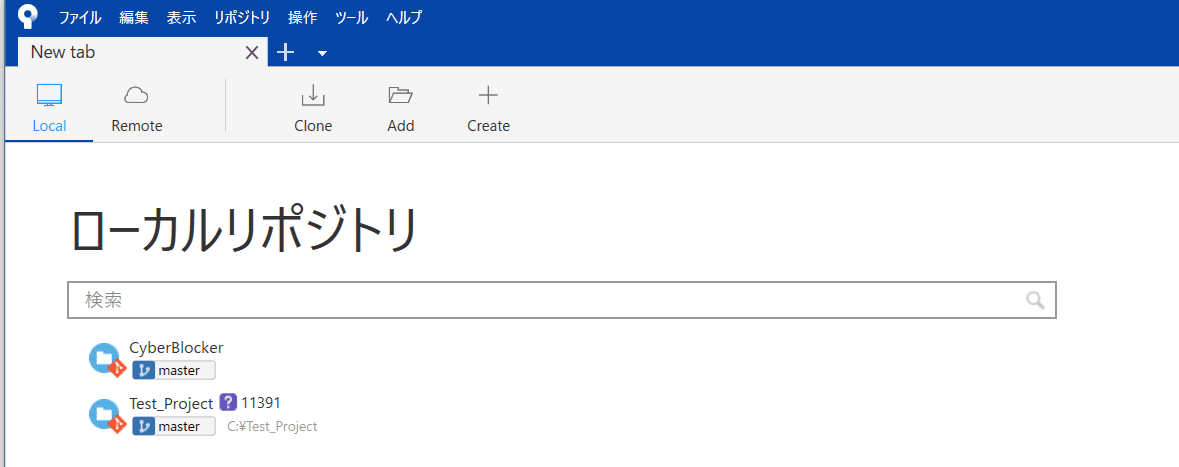
プロジェクト名のあとに11391みたいに大きな数字があると思います。
この数字を減らすために・・・
操作画面のプルをクリックします。
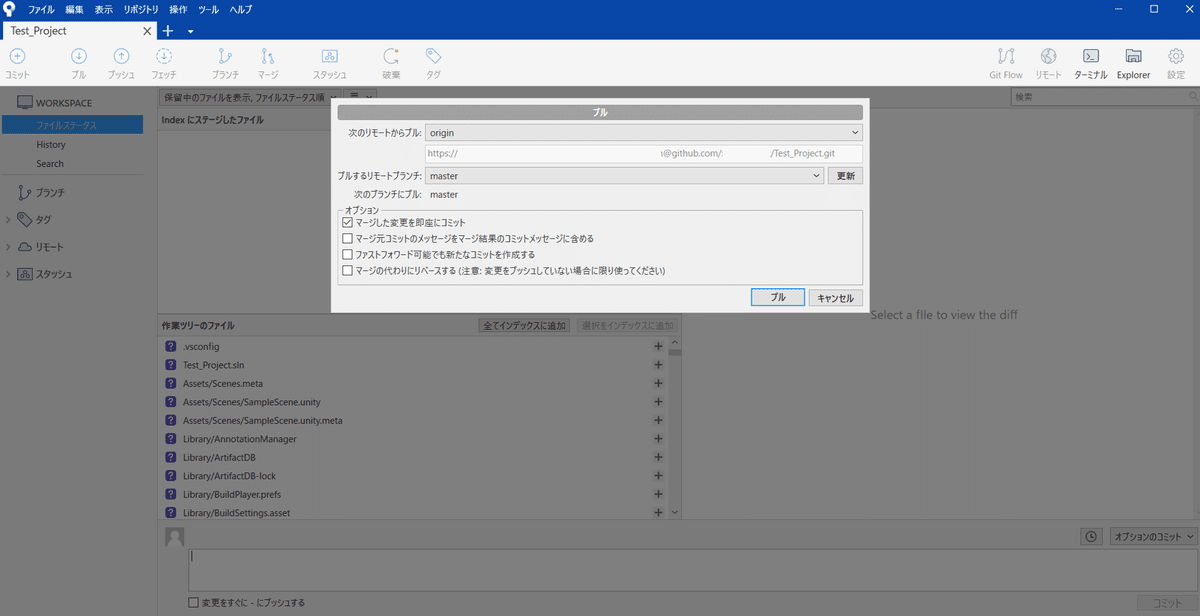
プルするリモートブランチの部分にmasterを選択してプルボタンをクリック。
masterの表示がない場合は更新を押せば出てくると思います。出てこない場合は何か設定を間違っていると思います。(アクセストークンが正しくないとか、OAuth認証がうまく行ってないとか)
上手くプル出来るとプロジェクトフォルダに.gitignoreファイルが増えていると思います。
これでリモートリポジトリからローカルリポジトリにファイルを持ってくる事が出来るようになりました。
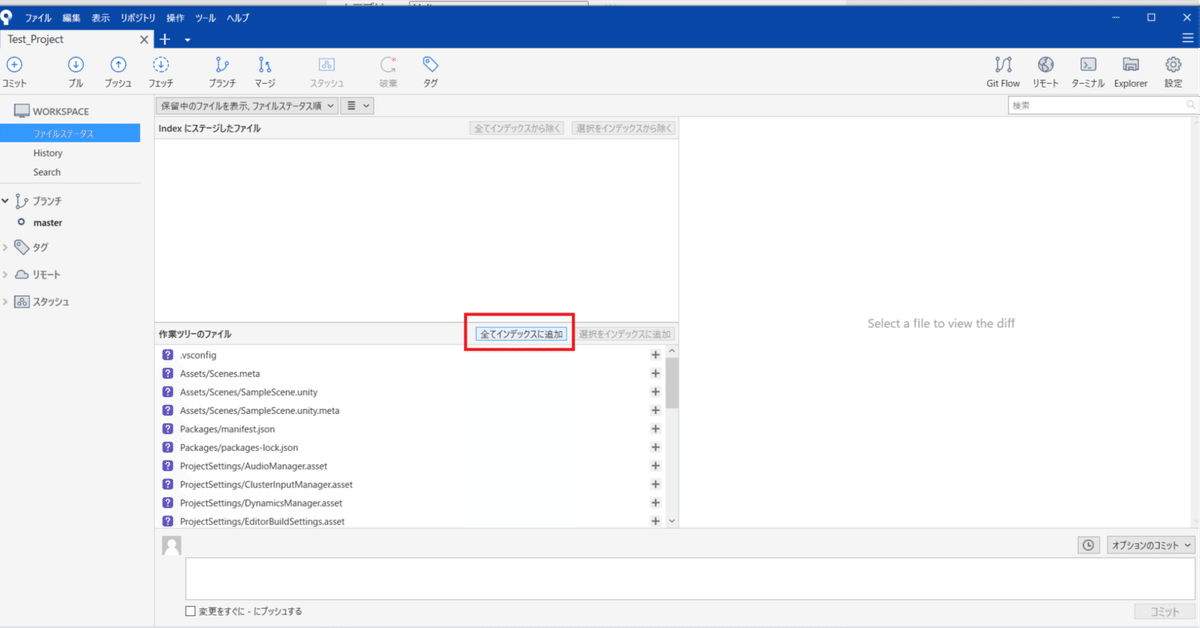
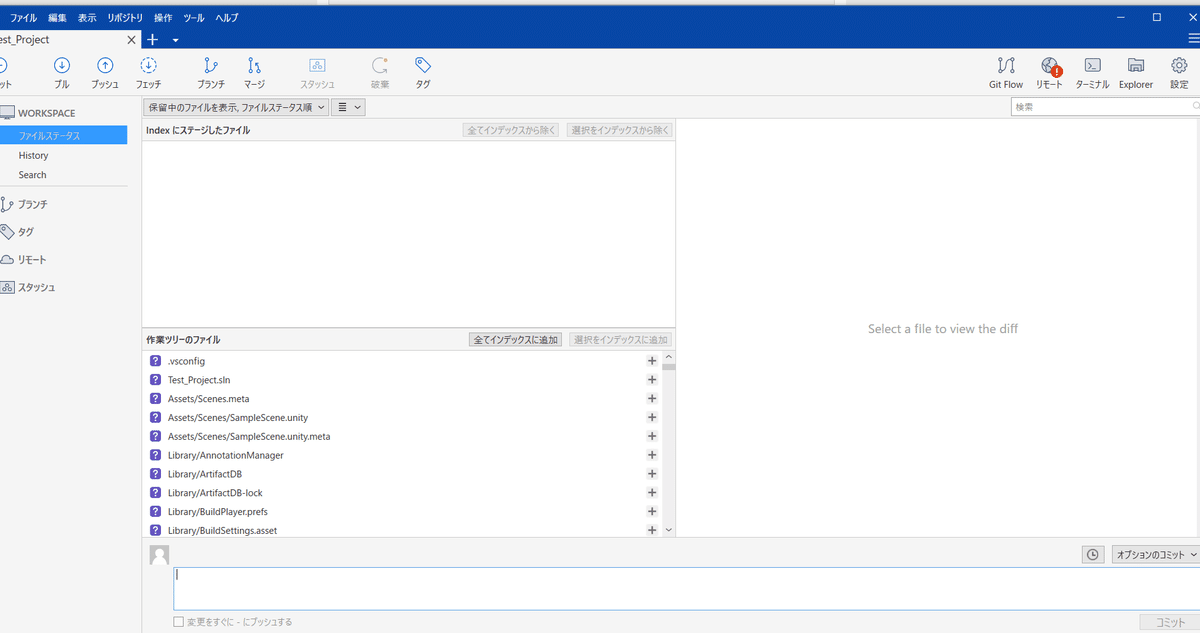
実際にコミットして行きます。

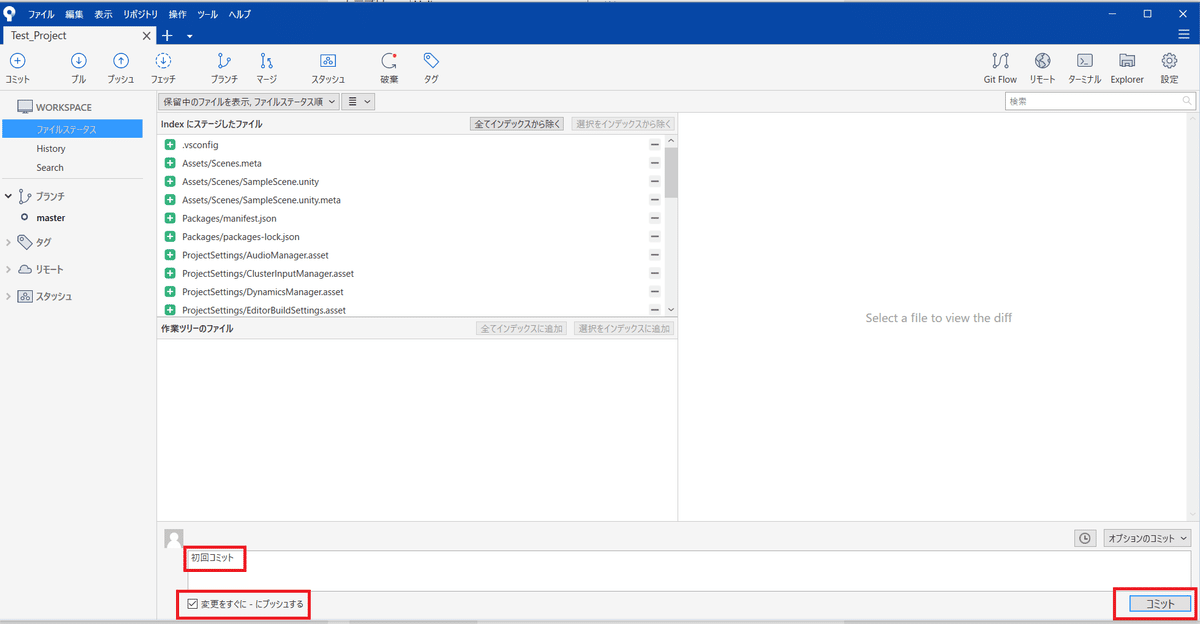
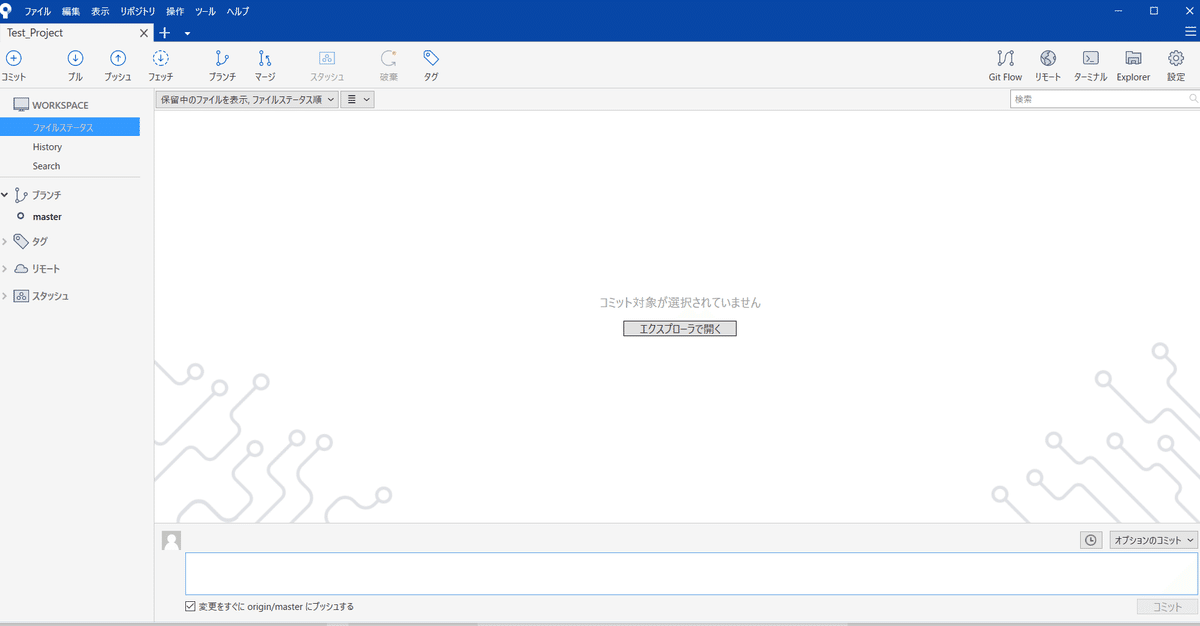
後はUnityで開発→変更部分がファイルステータスに追加されていく→キリの良い所で全てをインデックスに追加してコメント入れてコミットを繰り返すとHistoryが更新されていきます。
別のパソコンで開発したい!って時はクローンを作成すれば簡単です。
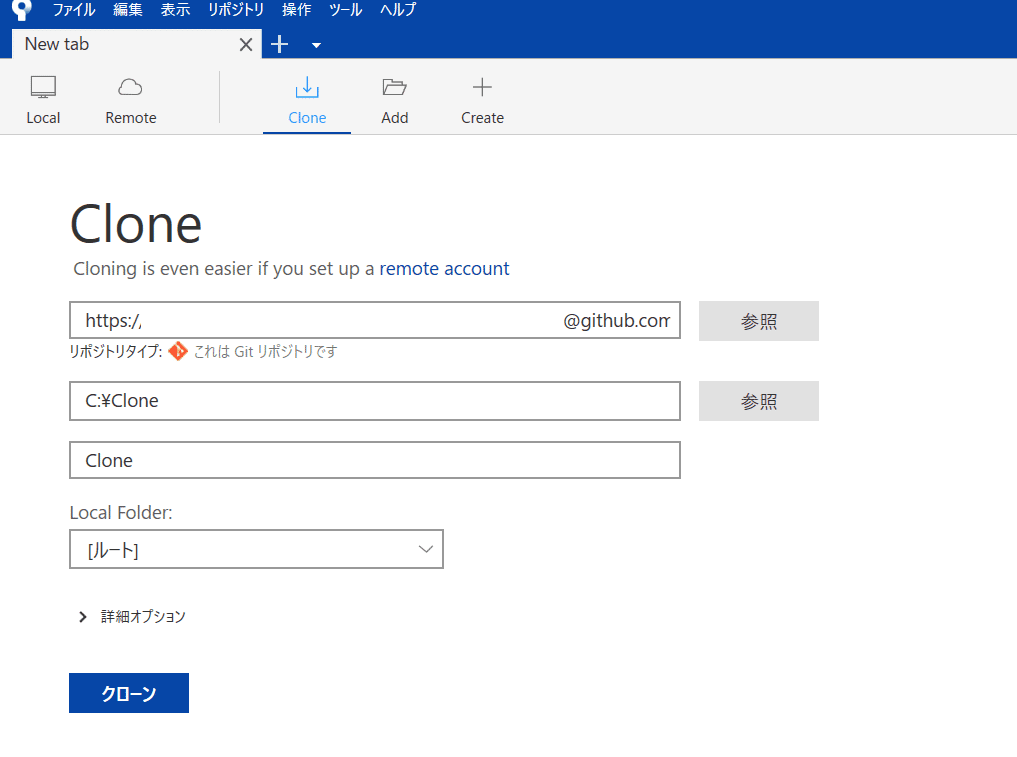
URLは先程のhttps://[アクセストークン]@github.com/[ユーザー名]/Test_Project.gitを入力します。
フォルダは任意の場所を指定してクローンをクリックすればOK
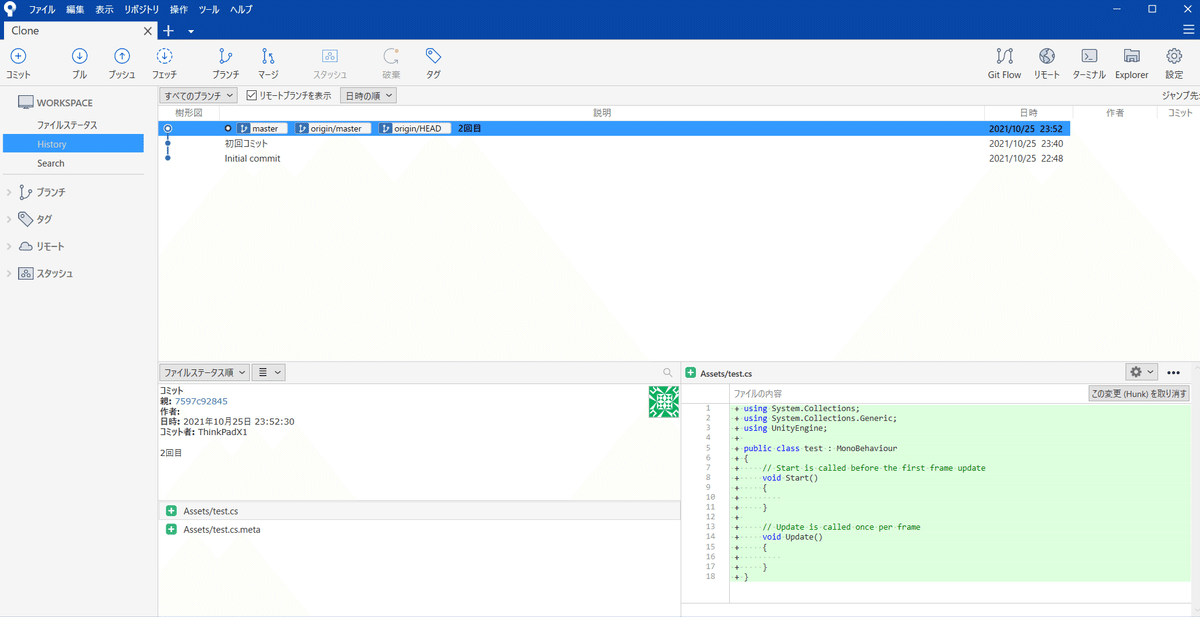
同じプロジェクトが別のパソコンでも使えるようになりました。
出来上がったフォルダからUnityを起動させれば同じプロジェクトが開発出来るようになります。