Meta Quest Pro で Passthrough API を試す

「Meta Quest Pro」 で「Passthrough API」を試したのでまとめました。
・Meta Quest Pro
・Oculus Integration v46.0
・Unity 2021.3.10f1
1. Passthrough API
「Passthrough API」は、現実世界と仮想世界をシームレスに融合し、MR(Mixed Reality : 複合現実)を実現することができるAPIです。
2. 開発環境の準備
Oculus Questアプリと同様です。
「Assets/Oculus/SampleFramework/Usage/Passthrough/Scenes」で、サンプルシーンが提供されています。
・AugmentedObjects
・Lighting
・OverlayPassthrough
・PassthroughHands
・PassthroughStyles
・SelectPassthrough
・SurfaceProjectedPassthrough
3. パススルーの有効化
パススルーを有効化する手順は、次のとおりです。
(1) 「OVRCameraRig」の「OVR Manager」の「General → Passthrough Capability Enabled」と「Insight Passthrough → Enable Passthrough」をチェック。

・Passthrough Capability Enabled : アプリでパススルーをサポートするか
・Enable Passthrough : アプリ実行中のパススルーのON/OFF
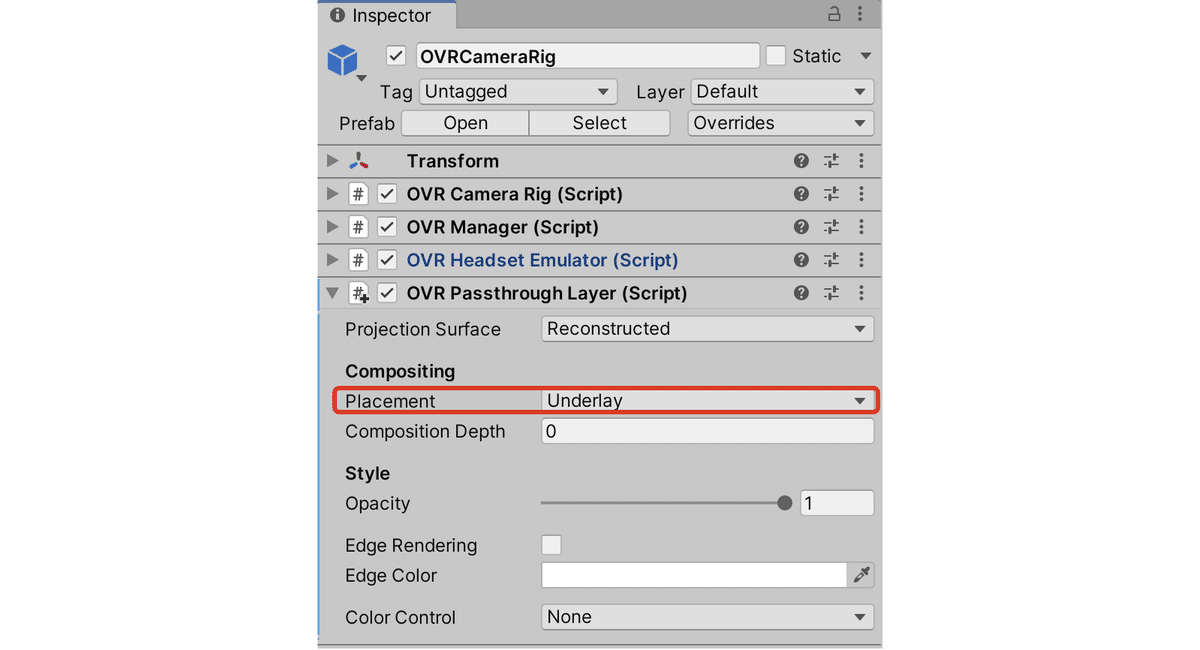
(2) 「OVRCameraRig」に「OVRPassthroughLayer」を追加し、「Placement」に「Underlay」を指定。
パススルー映像をSkyboxの裏に配置します。
(3) Unityのメニュー「Window → Rendering → Lighting → Environment」で「Skybox Material」に「None」、「Realtime Shadow Color」に透過色 (0, 0, 0, 0)を指定。

(4) 「CenteerEyeAnchor」(OVRCameraRigの孫)の「Camera → Background」に透過色 (0, 0, 0, 0)を指定。

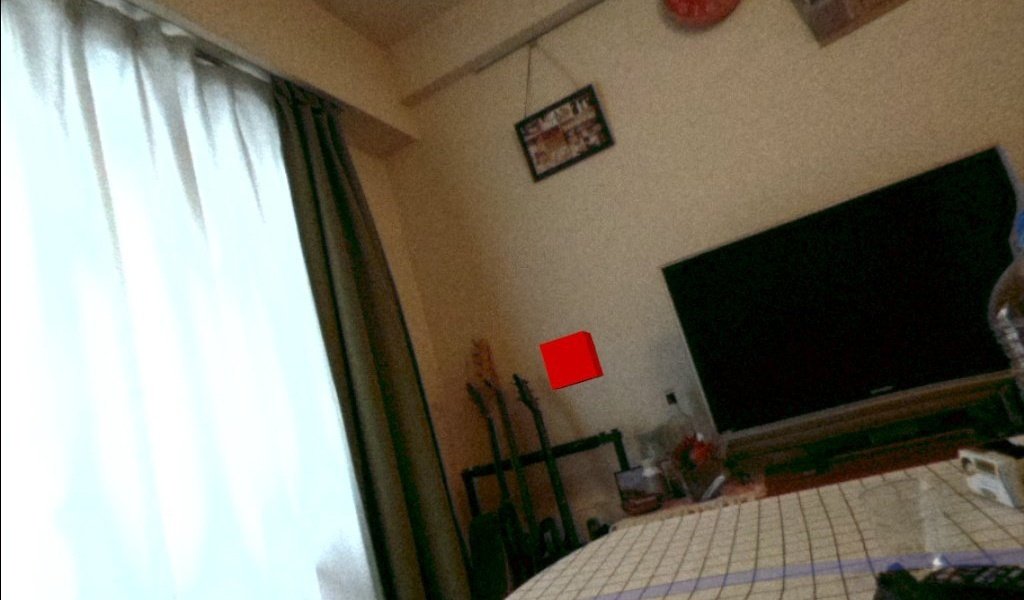
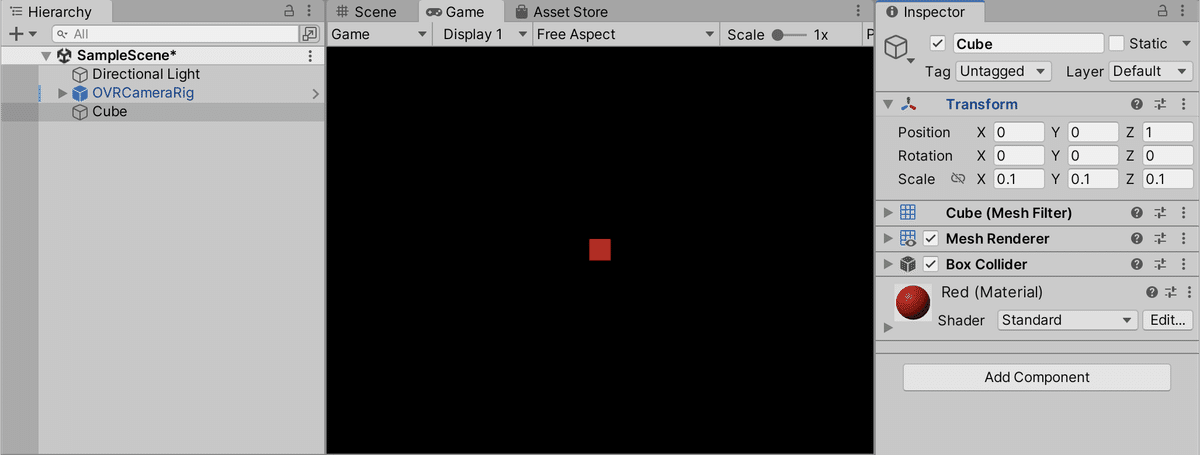
(5) 動作確認用に赤い立方体(Cube)を配置。
4. パススルーの実行
パススルーの実行手順は、次のとおりです。
(1) パススルー映像と立方体が表示されることを確認。