
【Unity】アバターを回転台に乗せたフィギュアのように撮影する方法

挨拶
こんにちは、こんばんは、おはようございます。
Unityしてますか?₺ƾ₺ƾけせらでございます。
今回は、Twitterで掲載したおもちちゃんのように、「アバターを回転台に乗せたフィギュアのように撮影する方法」についてご紹介したいと思います。
イメージとしては、以下のようなイメージです。
WIP almost done https://t.co/d8f6RELYKp pic.twitter.com/IGgWXvy8p5
— ₺ƾ₺ƾkesera2 (@kesera2_vrc) June 17, 2023
せっかく改変終わってWIP(Work in progress: 作業進捗)をあげようと思ったのに、TポーズのScene画面直撮りだとせっかくのアバターの魅力を引き出せないので、なんとかしたいなと思って思いついたのがこちらの手法になります。リアルだとフィギュアの撮影でよく使われる手法だと思います。
それでは、やっていきましょう!
準備編
Unity Recorderをプロジェクトに追加しよう
まず、UnityのGame画面を撮影するので、撮影する方法が必要です。
OBSとかAGD Recorderとかいろんな撮影ソフトがありますが、せっかくUnityを使っているので、Unity内で完結するようにしたいですよね。
Unityの公式アセットに「Unity Recorder」と呼ばれるものがあります。
今回はこちらを使用して撮影していきます。
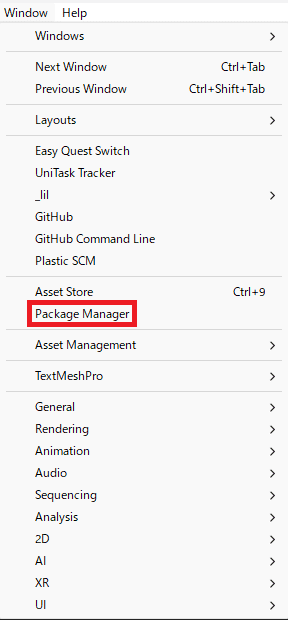
Package Manegerを開く
WindowタブからPackage Managerを開きます
Unity Recorderのインストール
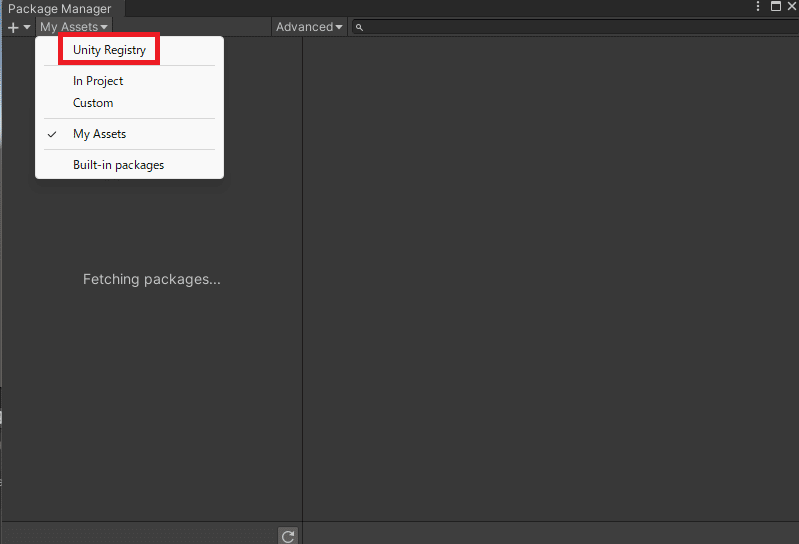
Package ManegerのパッケージリストからUnity Registryを選択します。
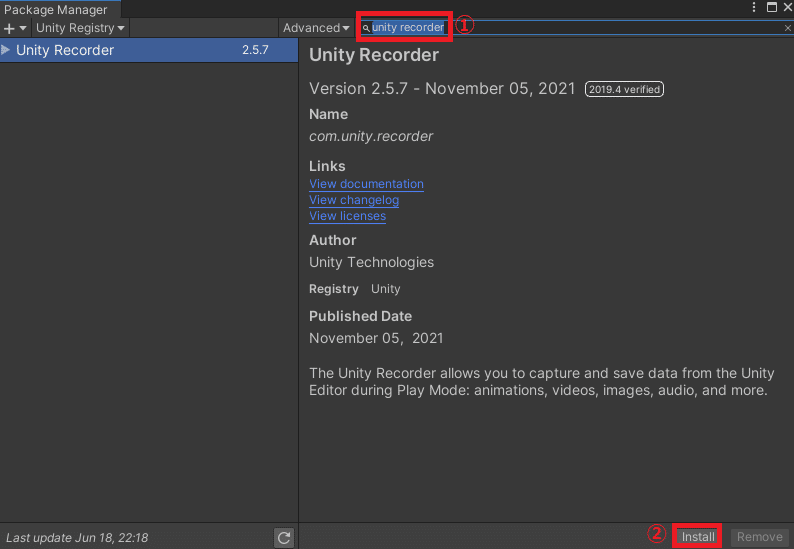
検索欄に「Unity Recorder」と入力(①)して、Installボタン(②)を押します。
インストールが終わったら、Up to Dateと表示されるはずです。
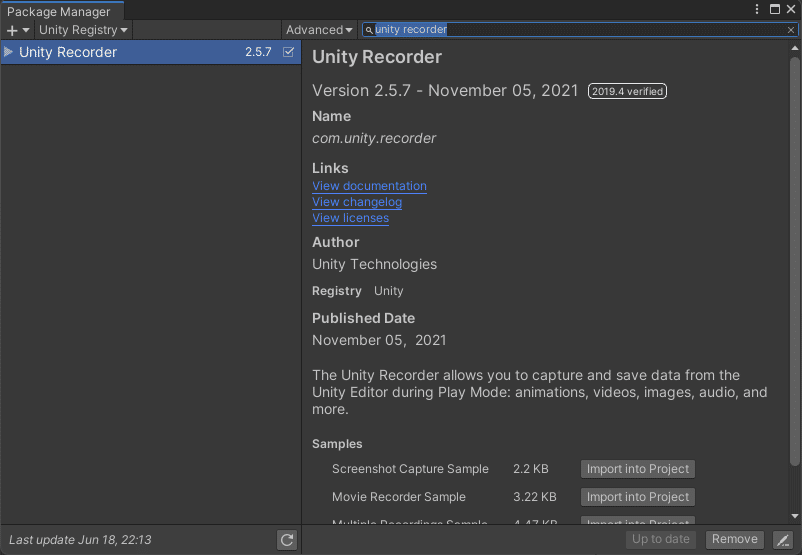
これで「Unity Recorder」のインストールは終わりです。
解説編
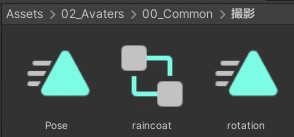
改変が終わったアバターを用意します。今回は、新しいレインコートと傘を手に入れてウキウキのおもちちゃんを用意しました。可愛いですね。

これからやることは、ポーズのアニメーションと、アバターを回転させるアニメーションを用意します。では、やっていきましょう。
ポーズのアニメーションを用意しよう
それでは撮影に使用するアニメーションを用意していきましょう!
改変のイメージから想像と妄想を膨らませてどんなポーズを取らせたいか考えます。

けせらはTwitterで公開したポーズはVery Animationというアセットを使って自作しましたが、あまりUnityに慣れていない方がポーズを自作するのは難しいと思うので、無料で公開してくださっているポーズのアニメーションをお借りするのをおすすめします。ねここや様のこちらの無料ポーズ詰め合わせは、Unityだけでアバターのサムネイルを作成するときも活躍してくれるのでおすすめです!
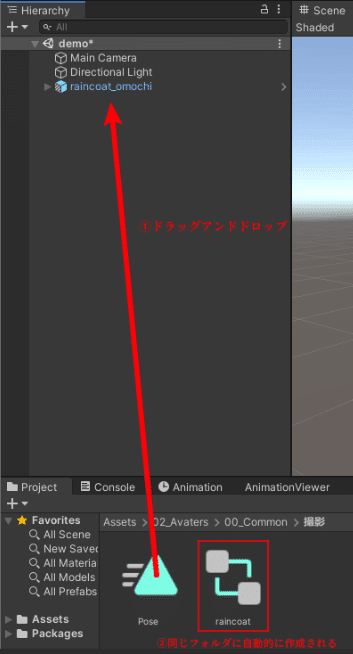
ポーズのアニメーションが用意できたら、Avatarのルートにアニメーションファイルをドラッグアンドドロップして、自動的に作成されるAnimator Controllerにポーズのアニメーションファイルを適用させます。
アバター回転用のアニメーションファイルを作成する
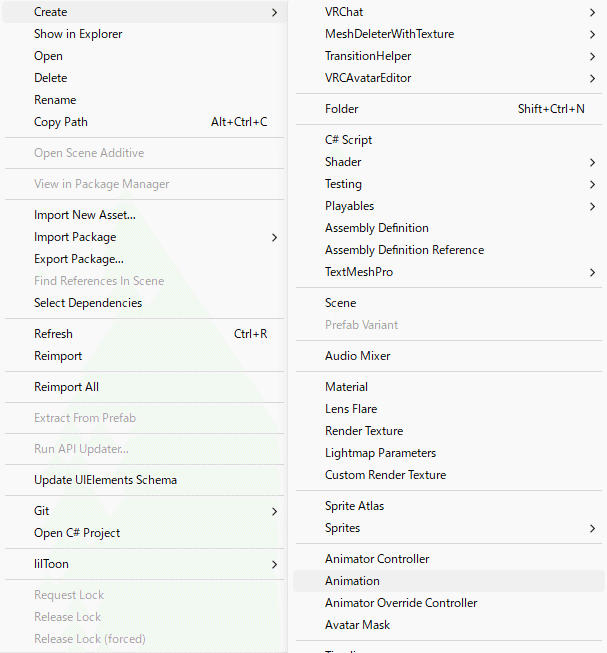
Projectウィンドウを右クリックして、空のAnimationファイルを作成します。
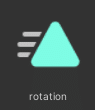
ファイル名をわかりやすいようにrotationとしました。
上記と同様にrotationをアバターのルートにドラッグアンドドロップします。そうすると、アバターのルートに設定されているAnimator Controllerにrotationのアニメーションファイルが登録され、アニメーションの編集をすることができます。
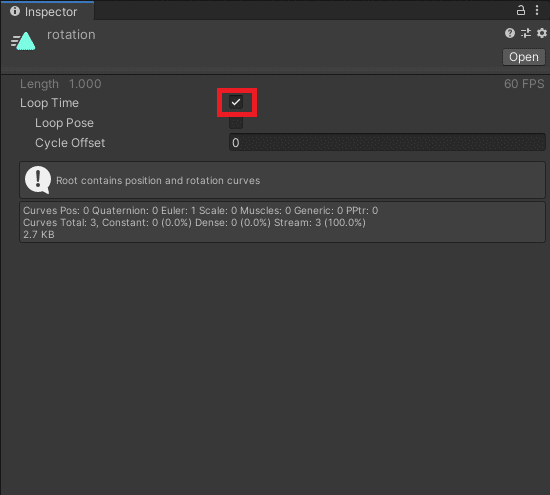
アニメーションファイルが作成できたら、プロジェクトウィンドウからアニメーションファイルを選択してLoop Timeにチェックを入れておいてください。
ちなみに、現在のフォルダの構成です。
回転用のアニメーションを編集する
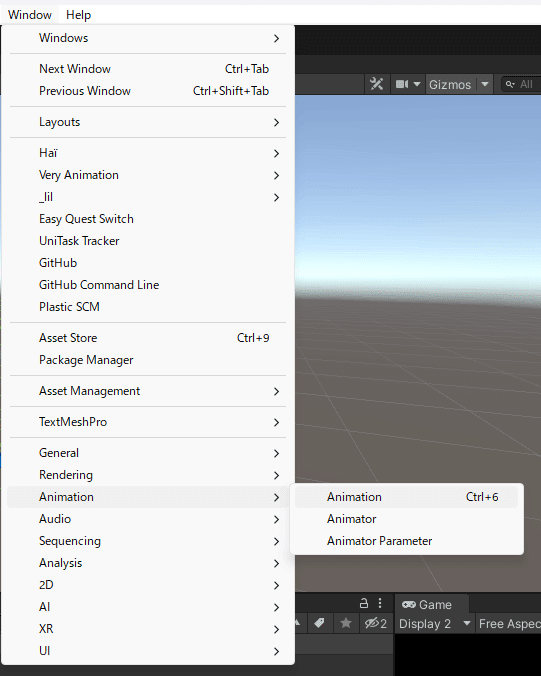
Animationウィンドウを表示するために、Window > Animation > Animationを選択するか、Ctrl + 6を押します。
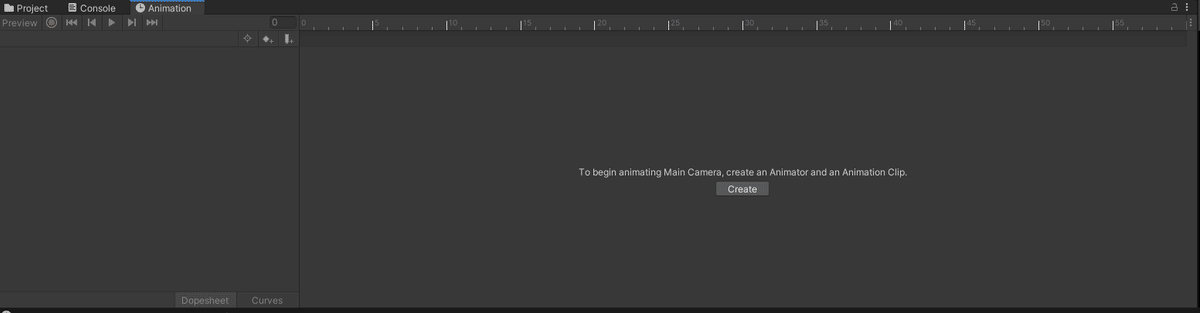
Animationウィンドウが表示されます。
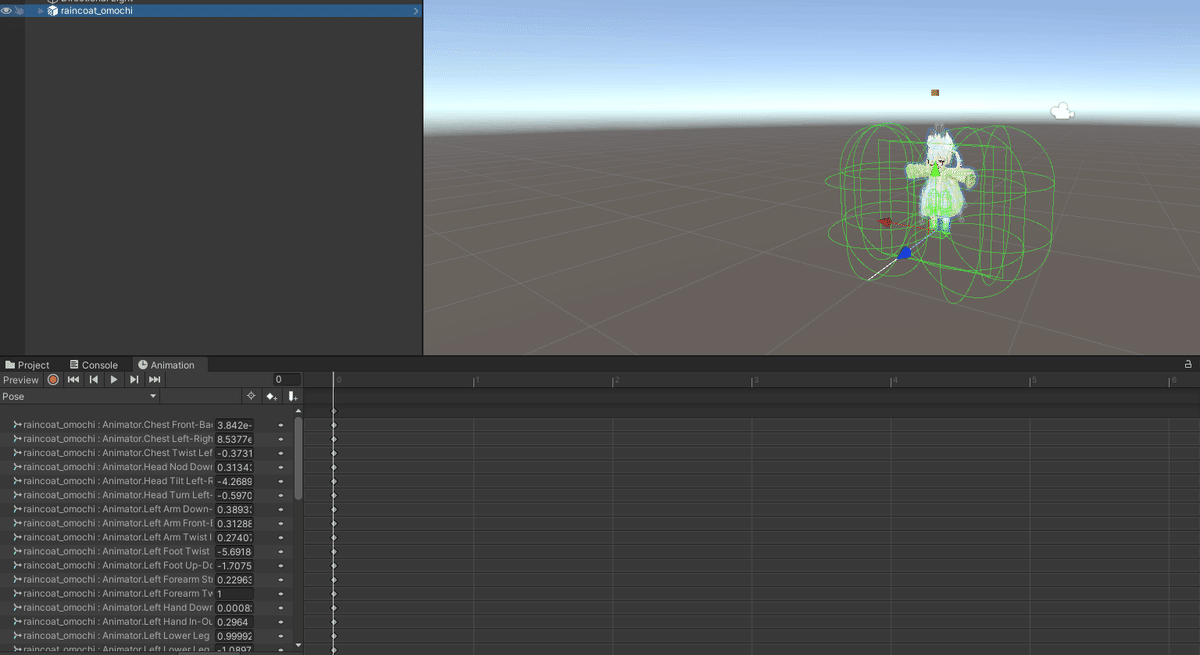
アバターのルートを選択すると、アバターのルートのAnimatorに登録されているアニメーションの内容が表示されます。
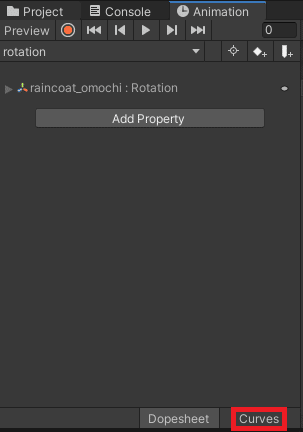
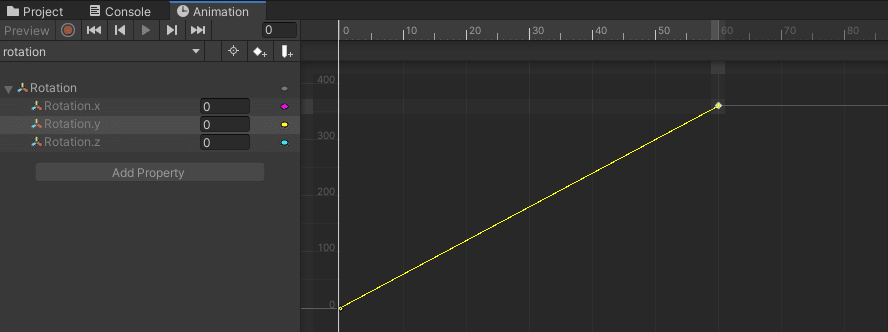
Animationウィンドウのセレクトボックスからrotationを選択します。
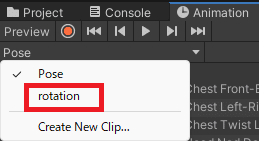
Add Property > Transform > Rotationからプラス(+)ボタンを押します。

Rotationの項目が追加されました。

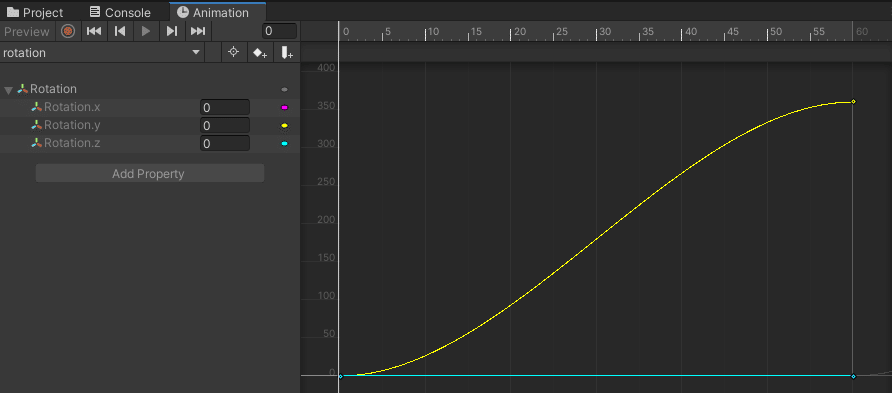
白いバーを60フレーム目のところまで移動させます。
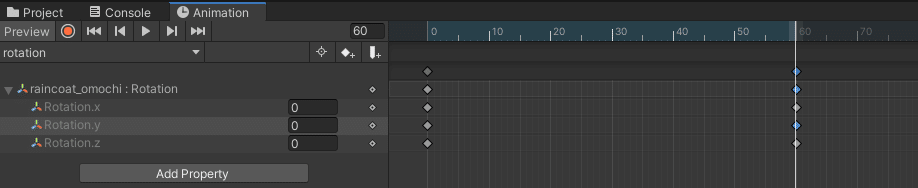
60フレーム目のyに360と入力します
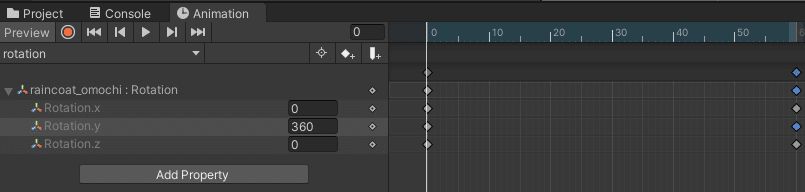
そうすると、0フレーム目のyは0で、60フレーム目のyは360といった状態になります。確認方法は、白いバーを動かして、30フレーム目に合わせると、360の半分なので180になっているかと思います。
ちなみに、Twitterに掲載した回転は3秒で1回転するようにしているので、一番上のキーを持って180のところに持っていくと3秒で1回転できるようになります。ご自身の撮影イメージに合わせてご調整ください。

一見ここで終わりのように見えますが、このまま編集を終えると、最初と最後だけゆっくり回って、均一に回らない状態になります。

上記の問題の原因は、アニメーションカーブがデフォルト状態で最初と終わりを緩やかに繋いでいる設定になっているからです。
アニメーションカーブを修正する
アニメーションカーブを修正することでこの問題を解決できます。
Animationの編集項目のDopesheetの隣にCurvesというのがあるので、押してみましょう。
こういう感じの画面になったかと思います。
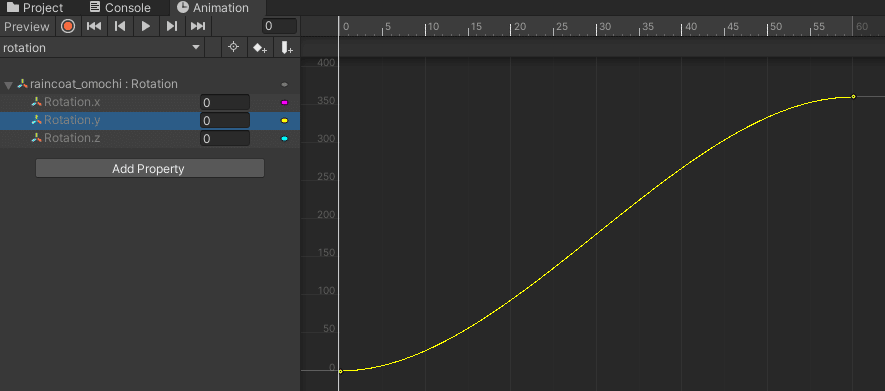
左のパネルからRotation.yを選択して黄色い線のみ表示させます。
0フレーム目のキーを右クリックして、Right Tangent > Lenearをクリックします。
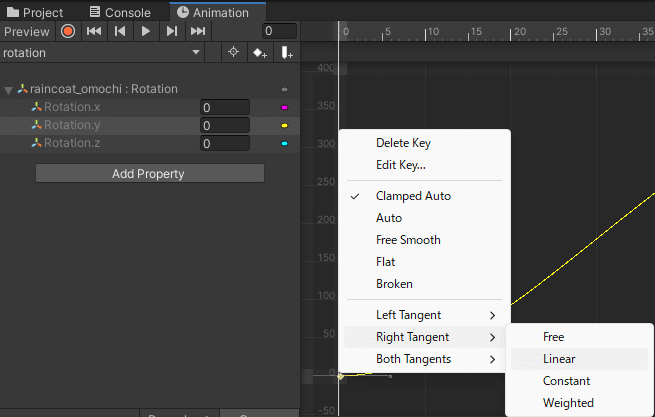
次に60フレーム目のキーを右クリックして、Left Tangent > Linearを選択します。
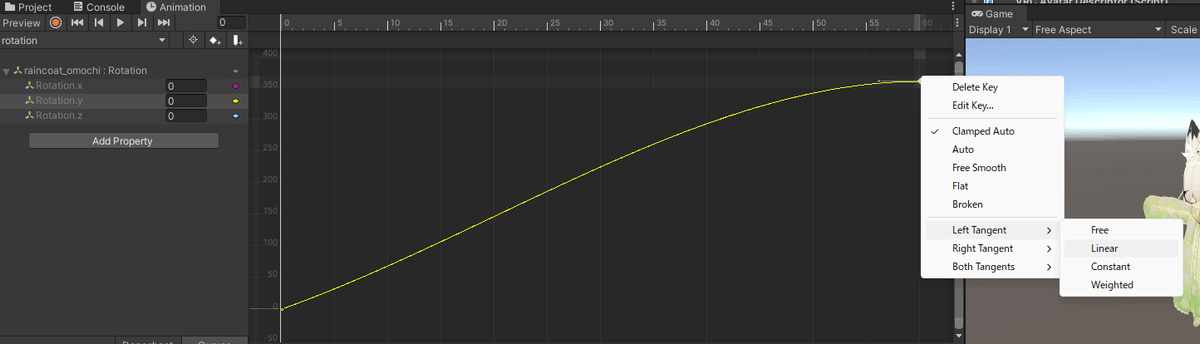
アニメーションカーブが直線になりました。これで均一に回転できます。
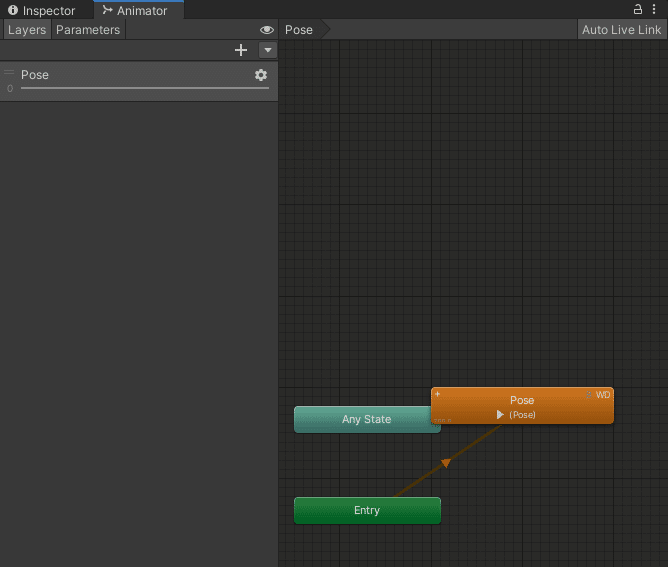
Animator Controllerを設定する
先程自動生成されたAnimator Controllerを"ダブルクリック"してAnimatorウィンドウを開いてください。
ポーズと回転のアニメーションを入れていれば、こんな感じになっているかと思います。
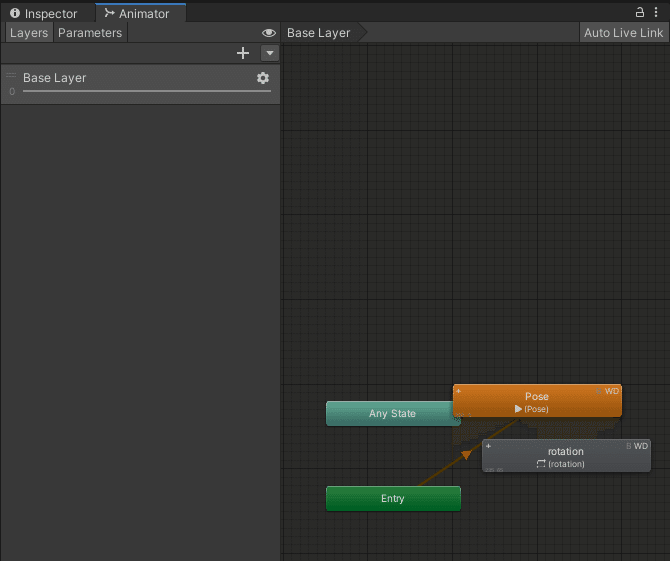
上のレイヤーの名前をPoseにして、rotationのステートをdeleteキーで削除しました。
新しいレイヤーを追加してレイヤー名をRotationとします。
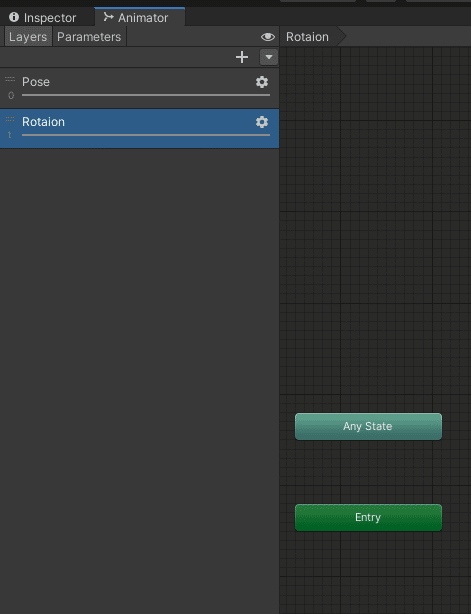
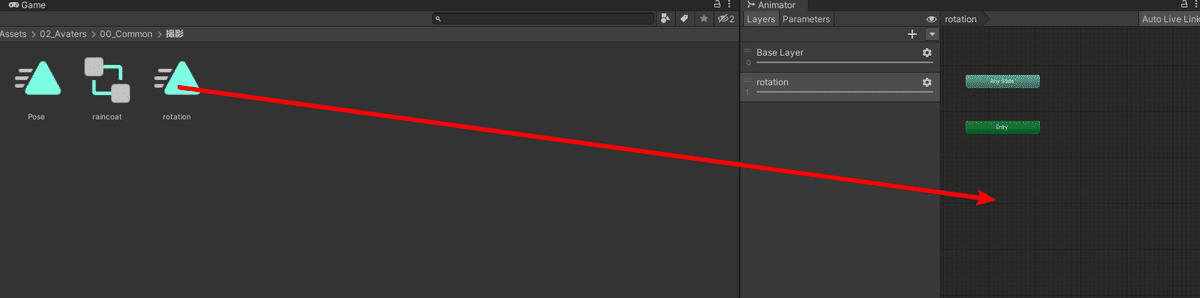
先程作ったrotationをAnimatorウィンドウのRotationレイヤーにドラッグアンドドロップしてステートを作成します。
rotationアニメーションが入った、rotationステートが作成されました。
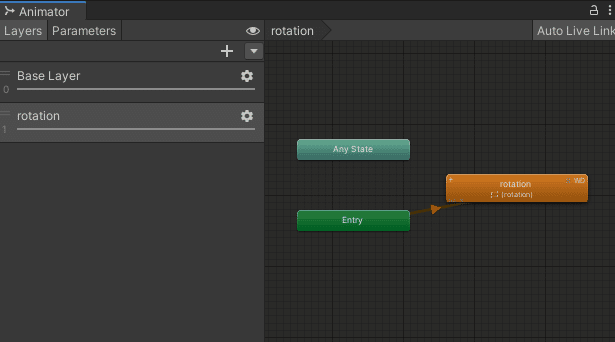
これでAnimation Controllerの設定は完了です。
カメラの設定をする
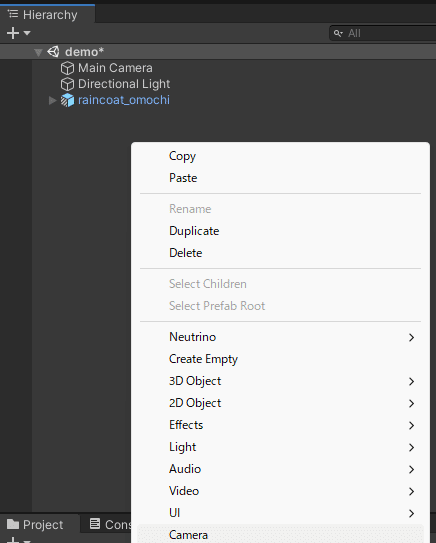
ヒエラルキーを右クリックしてカメラを追加します。
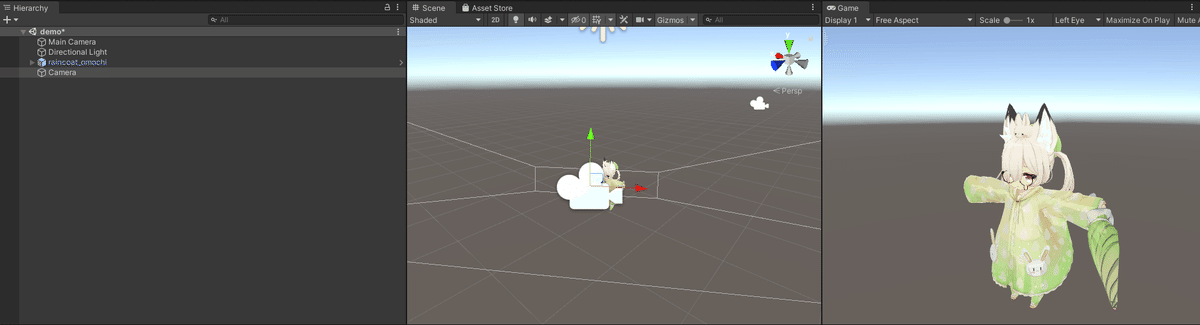
Gameウィンドウを見ながらカメラの位置と向きを調整します。画面を分割できるのでSceneとGameウィンドウを並べると効率的です。
ヒエラルキーからカメラを選択して、Clear FlagsをSkyboxからSolid Colorにしてお好きな色に変更します。今回は緑にします。
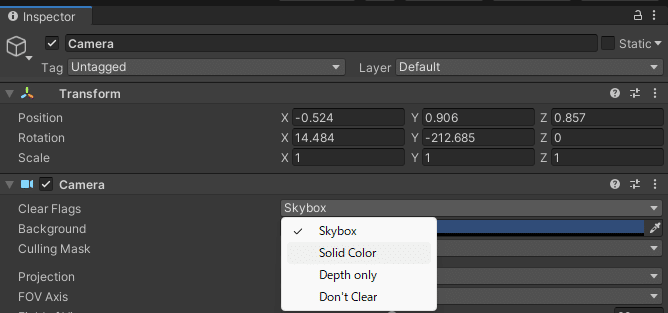
すると、Gameウィンドウの背景の色が指定した色に変更できるようになります。

カメラの設定は以上です。
録画する
再生ボタンを押してみましょう。アバターのルートにAnimatorが設定されているので、再生と同時にポーズと回転が始まるはずです。

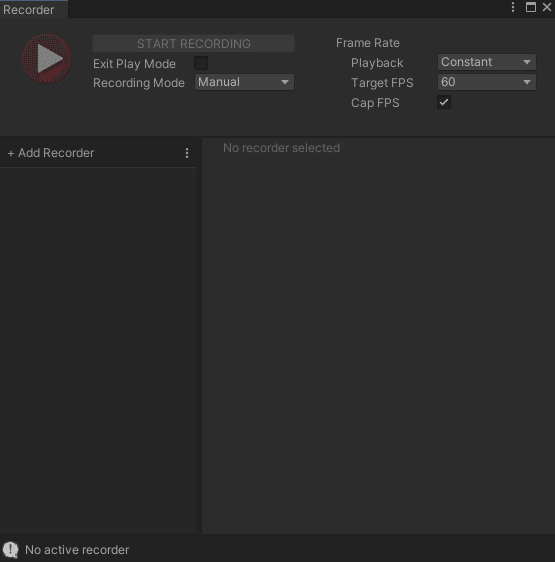
もうひと踏ん張りです。Window > General > Recorder > Recorder Windowを開きます。
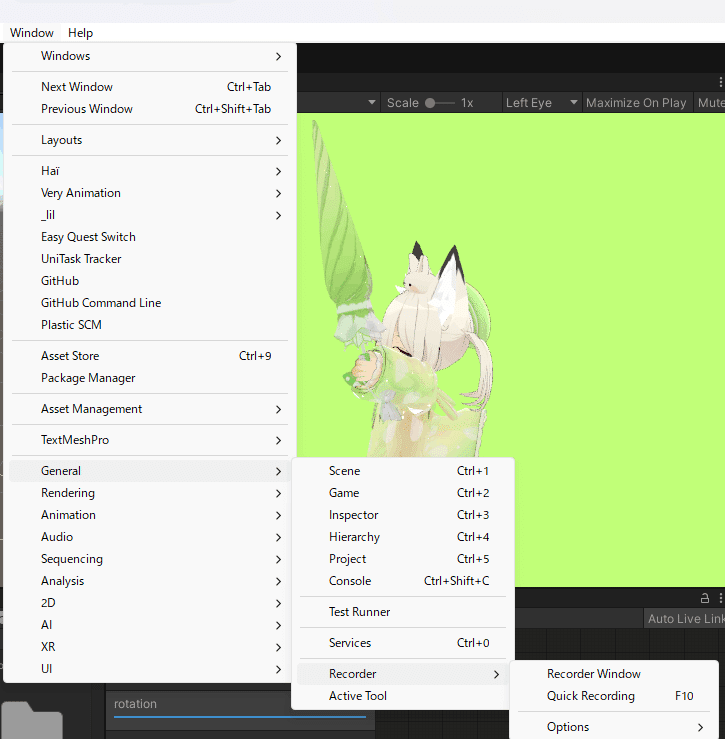
こんな感じの画面がでてきます。
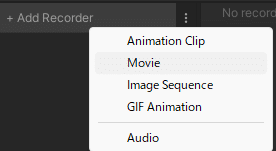
Add Recorderを押して、Movieを選択してください。
録画機能が表示されました。赤いまる三角ボタンかSTART RECORDINGを押してください。録画し終わったら再度同じボタンを押してください。
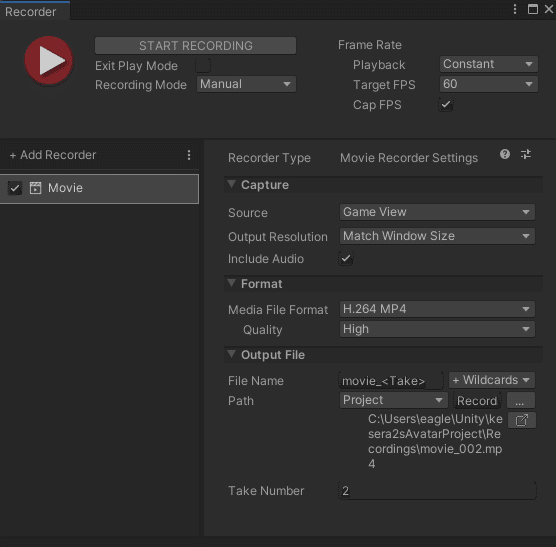
プロジェクトフォルダのRecordingsフォルダに録画したファイルが保存されているかと思います。
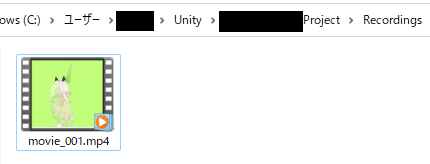
これで録画できましたね。編集してTwitterに投稿したら終わりです。
お疲れさまでした。
おまけ
皆様にはアバターにいろんなポーズを取らせて、皆さんの可愛いを表現してもらえたらと思います。ここまで読んで頂いた方に特別に、けせらがTwitterで掲載したレインコートおもちちゃんのポーズと、先程解説したRotationのアニメーションファイルを限定公開させていただきます。良かったら使ってください。なお、再配布・自作発言はNGです。
最後に
今回この記事が参考になったよーとか、勉強になった!と感じていただいた方は、もしよろしければ、Ko-fiでけせらにコーヒーを奢ってもらえると嬉しいです!海外の寄付サイトですが結構有名どころですので、心配はいりません。おいしいこーひーがのみたいです♪
ここまで読んでいただいてありがとうございました!
みなさんがUnityと和解、はたまた、お砂糖できる日を願っています。
それではまた、次回のnoteでお会いしましょうー!
まったねー!
著者 ₺ƾ₺ƾけせら( https://twitter.com/kesera2_vrc )