
モバイルアプリのE2E自動テスト導入:ツール選定〜インストール編

はじめに
弊社ではモバイルアプリの開発を行っており、より安心してリリースできるようE2E自動テスト導入を検討しています。
検討に際して調査を行いましたので、調査内容のまとめを記載します。
※アカウントの関係上、iOSの方がインストールできなかったため、当記事の対象はAndroidのみとなります(iOSについては別の機会に記載したいと思います)。
ツールの選定
E2E自動テストツール
今回のツール選定の必須要件として「無償であること」が第一に挙げられます。
この時点で選択肢が大幅に絞り込まれますが、最もよく使われているツールということで、Appiumを使用することにしました。
Appium使用に付随して必要となるツール
WebdriverIO
UIAutomator2
Android StudioとSDK
言語
導入しやすさの観点においてはJavaScriptでも良いかと思いましたが、Web側の開発で使用しているE2E自動テストツールとの兼ね合いも考慮して、TypeScriptを採用しました。
フレームワーク
今回の取り組みにおいて、成果物の動作仕様を確認するためにコードを読み解かなければわからない状況は避けたいと考えています。
そのため、動作仕様を記載したドキュメントを作成する必要があると思いますが、E2E自動テストを開発プロセスに組み込むまでに時間がかかってしまいます。
上記課題を解消するため、Cucumberを使用し、E2E自動テストと仕様書を同時に作成します。
※Cucumberはビヘイビア駆動開発(BDD)をサポートするフレームワークで、テキストで書かれたシナリオ(仕様)に沿ってテストを実行します
概要構成図

使用環境
macOS Sequoiaバージョン15.3.1
前提条件
node.jsインストール済
JDKインストール済
インストール
1.Appiumのインストール
npm install -g appium2.エミュレーター/シミュレーターへ動作スクリプトを送信するためのツールをインストール
appium setup※UIAutomator2(Android)、XCUItest(iOS)を個別にインストールする場合は下記を個別に実行
appium driver install uiautomator2appium driver install xcuitest3.Android Studio をインストール
以下よりダウンロードしてインストール
4.SDKインストール
①SDKマネージャーを開く

②「SDK Platforms」で使用したいOSを選択

③「SDK Tools」で下記を選択
Android SDK Build-Tools
Android SDK Command-line-Tools
Android Emulator
Android SDK Platform-Tools
Android SDK Tools(Obsolete)※「Hide Obsolete Packages」のチェックOFF
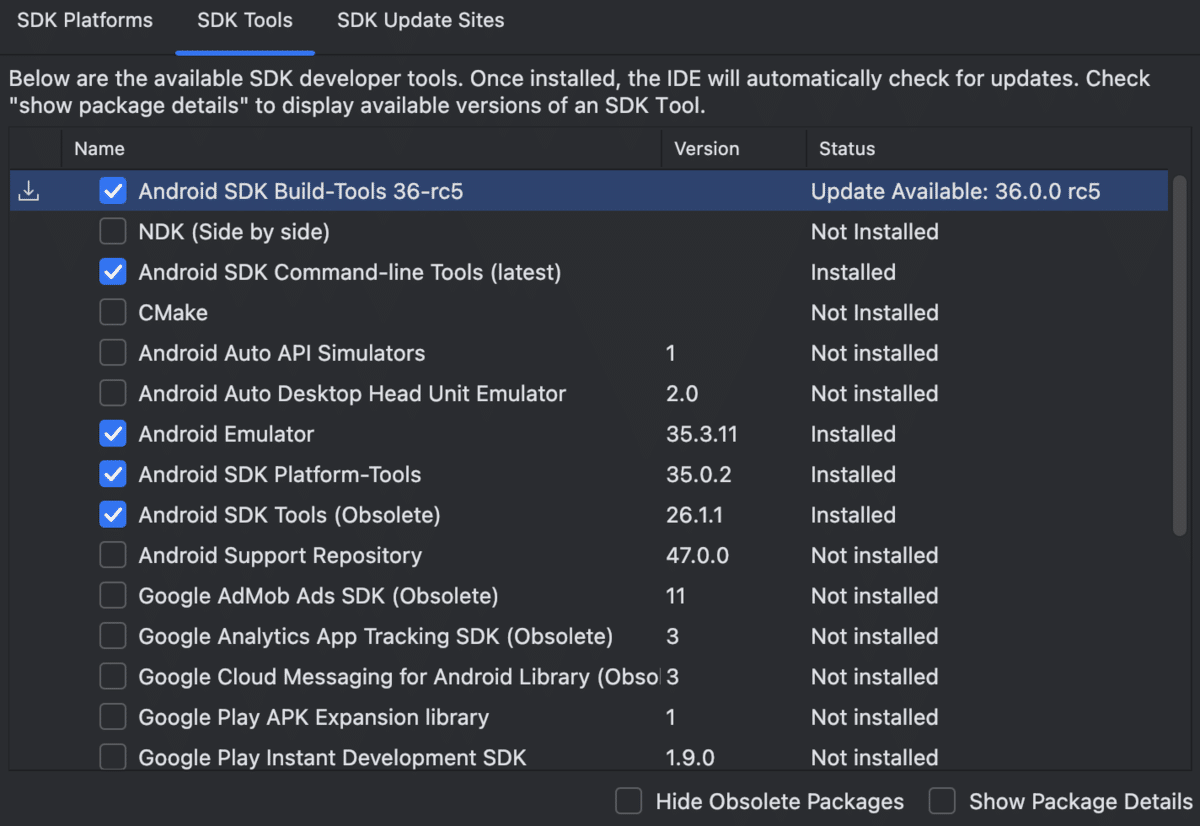
④「Apply」ボタン押下
5.環境変数の設定
#ANDROID_HOMEの設定

export ANDROID_HOME=$HOME/Library/Android/sdk

#JAVA_HOMEの設定(JDKのバージョンに応じて変更)

export JAVA_HOME=/Library/Java/JavaVirtualMachines/jdk-23.jdk/Contents/Home

#platform-toolsとJavaのbinにPathを通す

export PATH=$PATH:$ANDROID_HOME/platform-tools:$JAVA_HOME/bin

export PATH=$ANDROID_HOME/emulator:$PATH

export PATH=$ANDROID_HOME/cmdline-tools/latest/bin:$PATH
6.WebDriverIOのインストールと設定
①プロジェクトディレクトリ作成(ディレクトリ名は任意)
mkdir appium-test && cd appium-test②npm初期化
npm init -y③WebdriverIOのインストール
npm install --save-dev @wdio/clinpm install --save-dev @wdio/local-runner7.WebdriverIOの構成ファイルを作成
①構成ファイル作成コマンド実行(プロジェクトディレクトリで実行)
npx wdio config②質問に答える
A project was detected at "/Users/xxxx/config", correct?→yes
What type of testing would you like to do?→E2E Testing - of Web or Mobile Applications
Where is your automation backend located?→On my local machine
Which environment you would like to automate?→Mobile - native, hybrid and mobile web apps, on Android or iOS
Which mobile environment you'd like to automate?→Android - native, hybrid and mobile web apps, tested on emulators and real devices> using UiAutomator2(https://www.npmjs.com/package/appium-uiautomator2-driver)
Which framework do you want to use?→Cucumber (https://cucumber.io/)
Do you want to use Typescript to write tests?→yes
Do you want WebdriverIO to autogenerate some test files?→yes
What should be the location of your feature files? →デフォルトのままEnter
What should be the location of your step definitions?→デフォルトのままEnter
Do you want to use page objects (https://martinfowler.com/bliki/PageObject.html)?→yes
Where are your page objects located?→デフォルトのままEnter
Which reporter do you want to use?→spec
Do you want to add a plugin to your test setup?→未選択のままEnter
Would you like to include Visual Testing to your setup? For more information see https://webdriver.io/docs/visual-testing!→yes
Do you want to add a service to your test setup?→appiumのみ選択してEnter(複数選択のため、カーソルを合わせてスペースキー押下で選択状態にする)
Do you want me to run npm install→no
8.動作確認用apkファイルダウンロード
①格納先ディレクトリ作成(プロジェクトディレクトリで実行)
mkdir appsmkdir apps/Android②動作確認用apkをダウンロードしてapps/Androidに格納
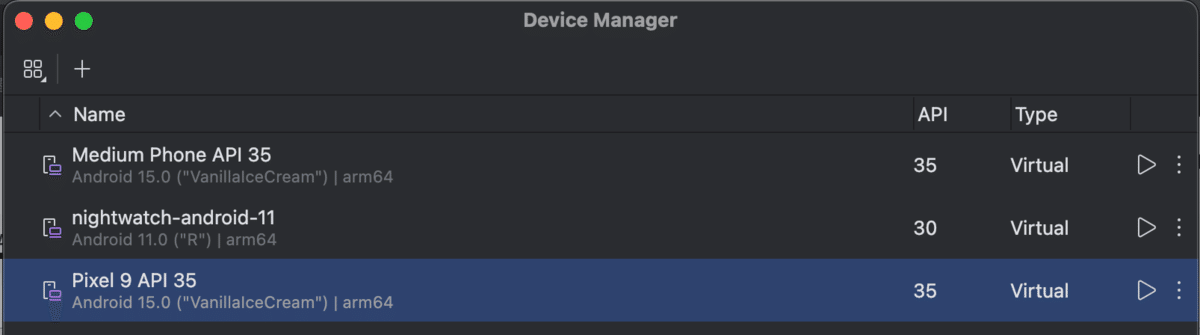
9.エミュレーター起動
①Android Studioで「Virtual Device Manager」を表示

②起動したいデバイスの▶️押下
③コマンドを実行してデバイス名確認(後続の設定ファイル編集時に使用)
adb devices下記実行結果の場合デバイス名は「emulator-5554」
List of devices attached
emulator-5554 offline
10.設定ファイル編集
①プロジェクトディレクトリ内の「wdio.conf.ts」をエディタで開く
②追記
import {join} from 'path';  //1行目に追記(export const configの外、別の箇所で使うため)

hostname: 'localhost',  //export const configの中に追記

path: 'wd/hub', //export const configの中に追記
③exportの変更
デフォルトのままだとエラーになるため以下の通り変更
export const config: WebdriverIO.Config = {

↓

export const config = {
④capabilitiesの変更
下記内容に書き換え
capabilities: [{

    appium:deviceName': 'emulator-5554',

    appium:platformVersion': '15.0',

    appium:app': join(process.cwd(),'./apps/Android/ApiDemos-debug.apk'),

    appium:automationName': 'UiAutomator2'

}],
⑤servicesの変更
下記内容に書き換え
services: [['appium',{

    command: 'appium',

    logPath: './config/logs/',

    logFileName: 'appium.log',

    args: {

        address: '127.0.0.1',

        port: 4723,

    },

},],],
動作確認
プロジェクトディレクトリで下記コマンドを実行し、デモアプリの画面が表示されたらインストール完了
※テストスクリプトがデフォルトのままのためコマンド実行結果はエラーとなる
npx wdio run wdio.conf.ts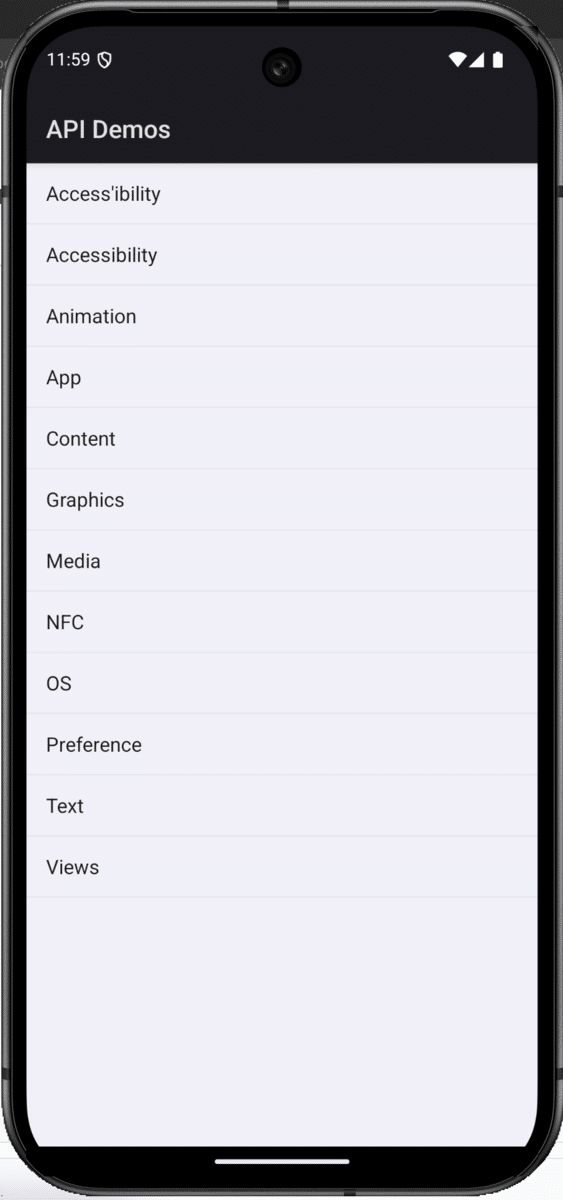
さいごに
続きは次の機会に記載します。
インゲージでは一緒に働く仲間を大募集中です。 以下の求人ページに希望職種がある方はぜひご応募ください!
いいなと思ったら応援しよう!
