
Unity初心者の2Dゲーム作りPart-3

henceです。
またも前回の続きです。
前回↓
制作
①Prefabをつくる
前回の最後で一応解説はしたが文字数の関係で雑になってしまったから改めて解説
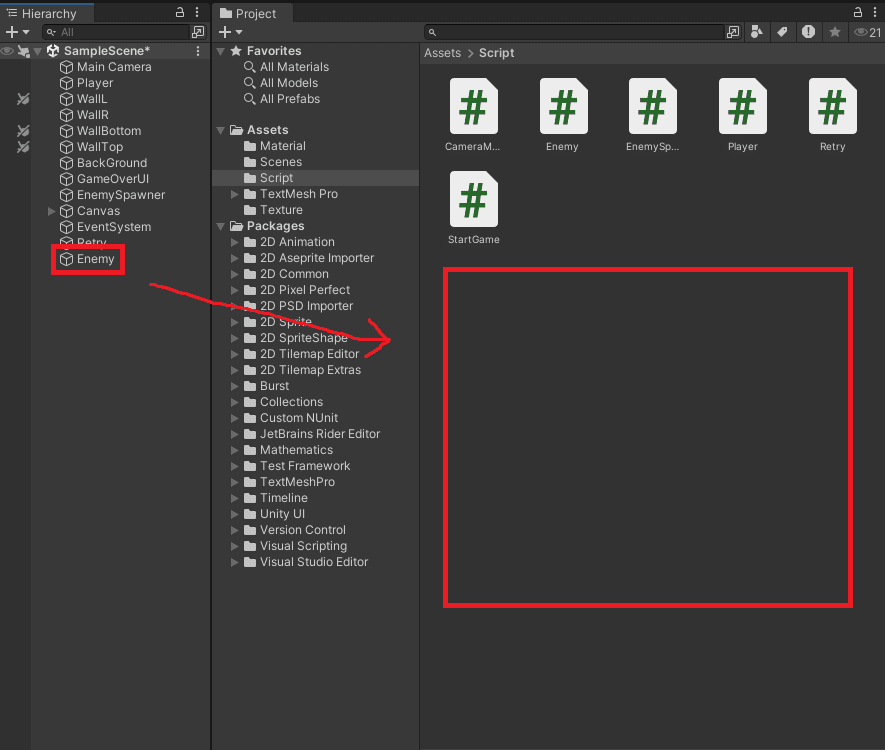
今回はEnemyオブジェクトのPrefabを作りたいので、前回説明した通り、HierarchyウィンドウにあるEnemyオブジェクトをProjectウィンドウの任意の場所にドラッグ&ドロップする。場所はScriptフォルダがおすすめ
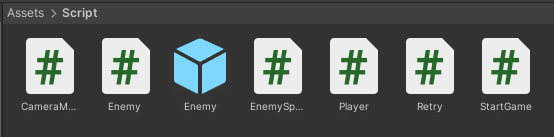
アイコンが違うかもだが下のような青い箱が追加されるはずだ
②敵のスポナーを作る
次に、前回作ったEnemySpawner.csを使ってスポナーを作る。
Hierarchyウィンドウで右クリから「Create Empty」を選択し、「EnemySpawner」という名前のオブジェクトを作る。
そのオブジェクトを選択して、Inspectorウィンドウで「Add Component」またはProjectウィンドウからEnemySpawner.csをドラッグ&ドロップしてコンポーネントを追加する。
こんな感じ
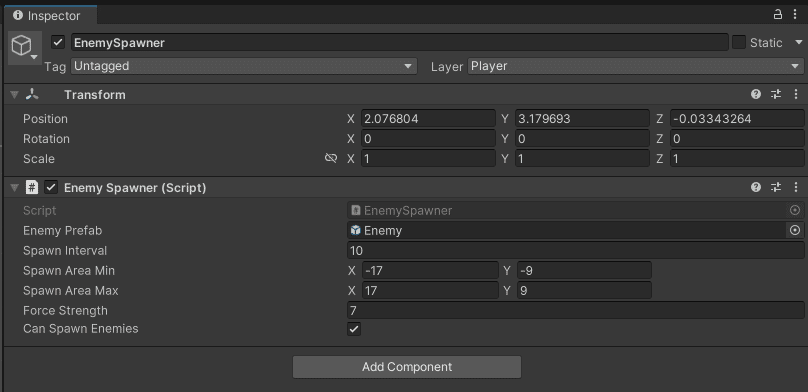
Prefabを設定しないといけないので、上の画像ではもう終わっているが、ProjectウィンドウからEnemyオブジェクトのPrefabを「Enemy Prefab」という欄にドラッグ&ドロップする。
また、HierarchyウィンドウにあるEnemyオブジェクトはおそらく消してよい。
次に「Spawn Interval」(スポーン間隔)を任意の値に設定する。単位は秒(s)
「Force Strength」も任意の値に設定する。これはどれぐらいの力で敵を動かすかになる。
動作確認
一度ここらへんで動作確認をしておくとよいかも。以下の点を確認しておけば大丈夫なはず
WASDキーでPlayerを上下左右に動かせる。
10秒おき(もしくは自分が設定した間隔)ごとにEnemyオブジェクトが増えていく
カメラ外に移動しようとしてもいけない(Wallオブジェクトがはたらいてる)
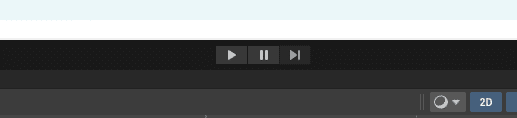
画面上部にこのようなボタンがあると思うので、▶マークを押して実行する。確認が終わったら同じところを押せば停止する。
③スコア表示するテキストを作る
画面上部にスコアが出るようにする。
まず、Hierarchyウィンドウで右クリして
UI -> Text - TextMeshPro を選択する。
「TextMeshPro」が表示されなかったら
①上のバーから「Window」→「Package Manager」
②Package Managerの左上を「Unity Registry」にする
③右上の検索バーで「Text」を検索して「TextMeshPro」を選択し、Installを押す
Hierarchyウィンドウ内にCanvasという名前の中に「Text(TMP)」という名前のものが作られる
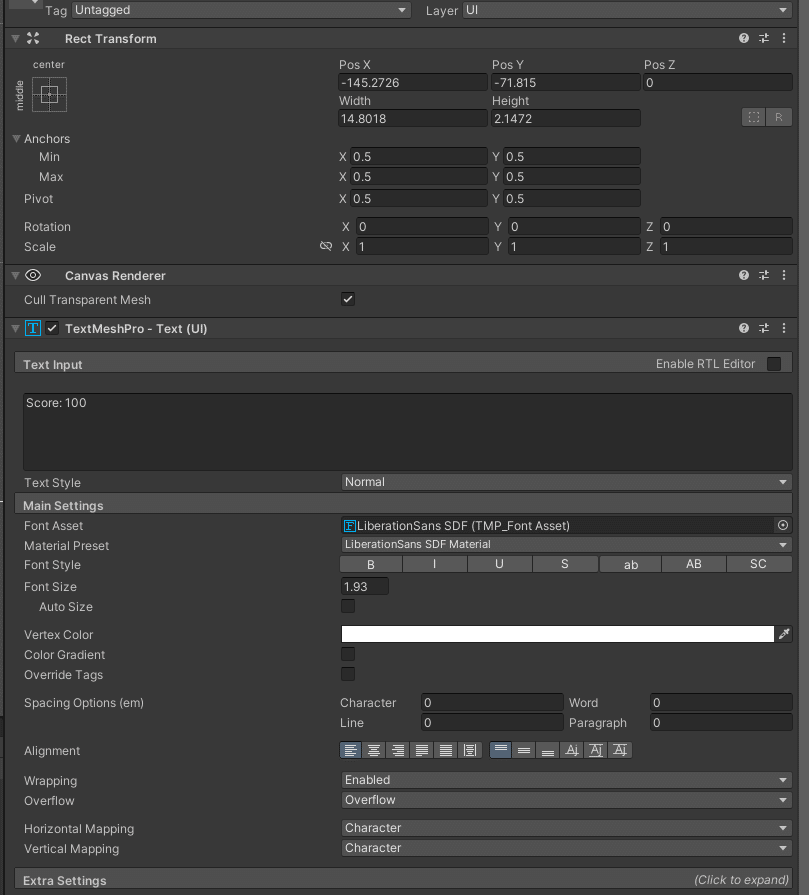
テキストを選ぶとInspectorウィンドウではこのようにいろんな情報が載っているはず。
上から順に
「Rect Transform」のPosX、PosY、PosZ、Width、Height、
「TextMeshPro -Text (UI)」のテキスト欄、Font Size
あたりを編集して自分の好みの位置(僕の場合は画面上部)に表示するようにする。それぞれの値はおそらく
PosX、Top、PosZ→テキストUIの座標みたいな
Width、Height→テキストUIのサイズ。Widthが幅、Heightが高さ
テキスト欄(画像の大きい黒い部分)→テキストUIに表示するテキスト。あとからスクリプトで変えるが、仮として「Score: 100」などと入力しとくとよい
Font Size→名前の通りフォントのサイズ
だと思う。
④スコア表示のスクリプトを作る
スコアを徐々に加算してそれを表示するスクリプトを作る。
今回はPlayer.csでテキスト表示を管理する。まず、Player.csを開き、クラスの最初に変数を以下のように追加する。
public int score = 0;
public float scoreRate = 1f;
private float elapsedTime = 0f;
public TextMeshProUGUI scoreText;
public bool Gaming = true;
それぞれの変数の役割
score→現在のスコアを代入する変数
scoreRate→厳密にいうと若干違うがどれくらいの頻度でスコアを増やすかの値
elapsedTime→時間経過でスコア加算をしていくので、時間を計測するための変数
scoreText→スコアを表示するテキストを指定する変数。これによってテキスト内容を変えられるようになる。
Gaming(bool型)→プレイヤーが死んだときなどにスコア加算を止められるようにするための変数。if文の条件式で使う。
次に、新しく以下のメソッドを追加する。
void ScoreCount()
    {
        if(Gaming)
        {
            elapsedTime += Time.deltaTime;

            if(elapsedTime >= 0.05f)
            {
                score += (int)scoreRate;

                UpdateScoreText();

                elapsedTime = 0f;
            }
        }
}戻り値はないので戻り値の型はvoid、
if(Gaming)(3行目)・・・Gaming = true なので、ゲームをしている間実行するようにする。
elapsedTime += Time.deltaTime→これが時間を計測するためのもの。フレーム毎にそのフレームの時間を加算する。具体的には、60FPSなら約0.016ずつ、30FPSなら約0.033ずつ増加する。
if(elapsedTime >= 0.05f)→0.05秒経過したら実行するというもの。 if文の中で
elapsedTime = 0f; (経過時間をリセットする)というコードがあるので、0.05秒おきに処理するようになってる。
score += (int)scoreRate→scoreの値を1追加する。scoreRateをなぜかfloat型にしてしまったので、int型に変えるために (int) と書いてるが、scoreRateをint型にしていれば(int)は書かなくてよい。
UpdateScoreText();は後ほど
◆補足
このコードでは、scoreRateを「0.05秒あたりにスコアをどれくらい追加するか」の値となっているが、「スコアを1追加するのにかける時間(何秒おきにスコアを1追加するか)」という値として利用したい場合、ScoreCountメソッドを以下のように書くとよい。
void ScoreCount()
    {
        if(Gaming)
        {
            elapsedTime += Time.deltaTime;

            if(elapsedTime >= scoreRate)
            {
                score ++;

                UpdateScoreText();

                elapsedTime = 0f;
            }
        }
    }
また、もう一つメソッドを追加する。
void UpdateScoreText()
    {
        scoreText.text = "Score: " + score.ToString();
    }
さっき後回しにしたUpdataScoreTextメソッドがこれ。
scoreText.textでテキスト内容を「Score: <現在のスコア>」の形で出力している。scoreはint型の変数なので.ToString()でString型に置き換えている。()を忘れないように。
次に、Player.csのUpdateメソッドに以下の文を追加する。
ScoreCount();これで先ほど書いたメソッドが毎フレーム実行されることになる。
⑤HP表示する
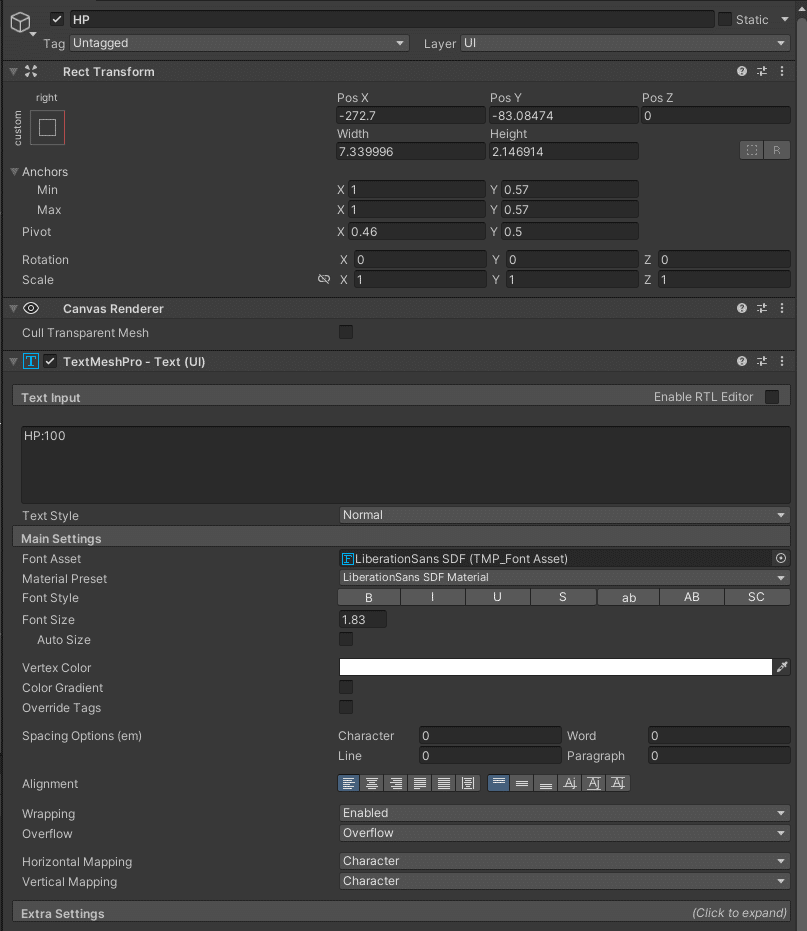
さっきと同じ方法でHP表示をする。
まず、HPを表示するテキストUIを作る。先ほどとおなじCanvasというオブジェクトの中に右クリで
UI -> Text - TextMeshPro から「HP」という名前のテキストUIを作る。
同じようにポジションや大きさ、フォントなどを変更し、テキスト内容を仮として「HP: 100」などのようにしておく。
次に、HPを変動させるスクリプトを作成する。
こちらもPlayerスクリプトに書くので、Player.csを開く。
1⃣変数を追加していく。
クラスの最初に以下を追加する。
public int maxHP = 100;
public int currentHP;
public TextMeshProUGUI hpText;maxHP→ゲーム開始時の体力
currentHP→現在のHPを入れる変数
hpText→HPを表示するテキストUIを指定するための変数
2⃣テキスト内容を変更するメソッドを追加する。
void UpdateHPText()
    {
        hpText.text = "HP: " + currentHP.ToString();
    }
こちらもさっきと同じで「hpText.text」でテキスト内容を変更している。
3⃣Startメソッド内にこの文を追加する。
currentHP = maxHP;そのまんまだが、現在のHP(currentHP)にmaxHPを代入する。Startメソッドは一度だけ実行されるので、currentHPがゲーム開始時maxHPにリセットされる。
4⃣HPを減らすメソッドを追加する。
public void TakeDamage(int damage)
    {
        currentHP -= damage;
        UpdateHPText();
    }
あとでEnemyスクリプトからこのメソッドを実行したいので、アクセス修飾子をpublicにする。引数としてint型の変数damageを受け取り、
currentHP -= damage; で現在HPからdamage分減算する。
UpdateHPTextメソッドを呼び出してテキスト内容を変更する。
5⃣敵との衝突判定を追加
敵との衝突判定は、Enemyスクリプトで実行する。Enemy.csを開き、最初に変数を追加する。
public int damage = 10;プレイヤーと衝突した時にプレイヤーのHPをどれくらい減らすかを設定する。
次に、このメソッドを追加する。
void OnCollisionEnter2D(Collision2D collision)
    {
        // 衝突したオブジェクトが"Player"タグを持っているかどうかをチェック
        if(collision.gameObject.CompareTag("Player"))
        {
            // 衝突したオブジェクトのPlayerスクリプトを取得
            Player playerScript = collision.gameObject.GetComponent<Player>();

            // プレイヤーのスクリプトが存在する場合、ダメージを与える
            if(playerScript != null)
            {
                // プレイヤーにダメージを与える
                playerScript.TakeDamage(damage);
            }
        }
    }
OnColliderEnter2Dメソッドは、そのオブジェクトのコライダーが別のコライダーに衝突した時に自動で呼び出されるメソッド。Updateメソッドなどで実行する必要はない。
最初の方のif文はコメントの通りで、衝突したオブジェクトが「Player」というタグを持っているかを確認する。タグについては後ほど解説。
Player playerScript = collision.gameObject.GetComponent<Player>();
→playerScriptという名前の変数に、Enemyオブジェクトと衝突したオブジェクトが持ってるPlayerコンポーネントを取得する。その次のif文 (playerScript != null) で衝突したオブジェクトにPlayerスクリプトが存在するか(null→存在しない)を判断する。
そして、そのif文の中に
playerScript.TakeDamage(damage);というコードを追加して4⃣で作ったメソッドを呼び出す。
⑥オブジェクトをアタッチする
これまで作ったスクリプトを一度保存して、PlayerオブジェクトのInspectorウィンドウを開く。

左側の変数がこのようになっていれば問題ない。
Hp Textの方にはHPを表示するテキストUIをドラッグ&ドロップしてアタッチする。
Score Textの方はスコアを表示するテキストUIを同じようにアタッチする。
同じようにEnemyオブジェクトのInspectorウィンドウも確認する。

このようになっていれば問題ない。数値などはデフォルトでいい人は何も変えなくていい。
⑦タグの指定
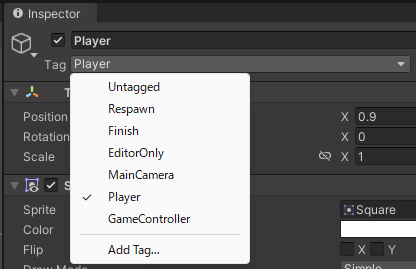
先ほど言ったPlayerオブジェクトにタグをつける作業をする。
Playerオブジェクトを選択したら、Inspectorウィンドウ上部にある、Tagという欄をクリックし、「Add Tag…」をクリックする。
すると、このような画面になる。
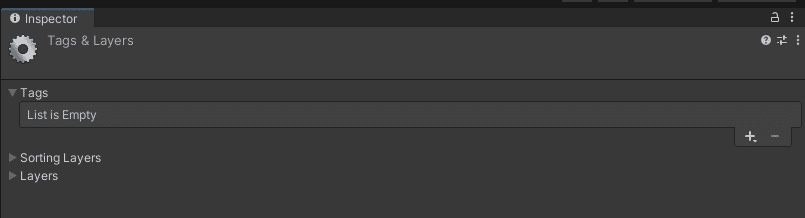
Tagsの欄の右下の+マークを押して、タグの名前を指定して「Save」を押す

もう一度Playerオブジェクトを選択して、Tagの欄を押すと「Player」という名前のタグができていると思うので、それを選択するとタグが指定される。
ここで動作確認をし、以下の点で問題がないか探す。
スコアが指定した速度で増えていく。
敵と衝突した時にHPが10、もしくは指定した分減る。
問題がなければよし
また長くなったので次のパートで。
ノシ
C#コード一覧
Enemy.cs
using System.Collections;
using System.Collections.Generic;
using UnityEngine;

// 敵キャラクターの動作を制御するクラス
public class Enemy : MonoBehaviour
{
    // 敵の移動速度
    public float speed = 5f;

    // 敵のRigidbody2Dコンポーネントを保持するための変数
    private Rigidbody2D _rigidbody;

    // 敵がプレイヤーに与えるダメージ量
    public int damage = 10;

    // Startはスクリプトが最初に実行されたときに呼ばれるメソッド
    void Start()
    {
        // Rigidbody2Dコンポーネントを取得して変数に保存
        _rigidbody = GetComponent<Rigidbody2D>();

        // ランダムな方向を生成
        Vector2 randomDirection = Random.insideUnitCircle.normalized;

        // ランダムな方向に速度を与えて、敵を移動させる
        _rigidbody.AddForce(randomDirection * speed, ForceMode2D.Impulse);
    }

    // Updateは毎フレーム呼び出されるメソッド(現在は使用していない)
    void Update()
    {
        // 今回の実装では使用していないが、ここに敵の動作やロジックを追加することが可能
    }

    // 他のオブジェクトと衝突したときに呼ばれるメソッド
    void OnCollisionEnter2D(Collision2D collision)
    {
        // 衝突したオブジェクトが"Player"タグを持っているかどうかをチェック
        if(collision.gameObject.CompareTag("Player"))
        {
            // 衝突したオブジェクトのPlayerスクリプトを取得
            Player playerScript = collision.gameObject.GetComponent<Player>();

            // プレイヤーのスクリプトが存在する場合、ダメージを与える
            if(playerScript != null)
            {
                // プレイヤーにダメージを与える
                playerScript.TakeDamage(damage);
            }
        }
    }
}
EnemySpawner.cs
using System.Collections;
using System.Collections.Generic;
using System.Runtime.CompilerServices;
using UnityEngine;

public class EnemySpawner : MonoBehaviour
{
    private const float MaxInclusive = 360f;
    public GameObject enemyPrefab; //出現させる敵のPrefab
    public float spawnInterval = 10f; //出現間隔
    public Vector2 spawnAreaMin; //出現エリアの最小座標
    public Vector2 spawnAreaMax; //出現エリアの最大座標
    public float forceStrength = 5f; //加える力の大きさ
    private List<GameObject> spawnedEnemies = new List<GameObject>();

    public bool canSpawnEnemies = true;
    private Coroutine spawnRoutine;

    // Start is called before the first frame update
    void Start()
    {

    }

    // Update is called once per frame
    void Update()
    {

    }

    public IEnumerator SpawnEnemyRoutins()
    {
        while(canSpawnEnemies)
        {
            //ランダムな位置を生成
            Vector2 randomPosition = new Vector2(
                Random.Range(spawnAreaMin.x, spawnAreaMax.x),
                Random.Range(spawnAreaMin.y, spawnAreaMax.y)
            );

            //敵を生成
            GameObject newEnemy = Instantiate(enemyPrefab, randomPosition, Quaternion.identity);

            //敵のRigidbody2Dを取得
            Rigidbody2D enemyRigidbody = newEnemy.GetComponent<Rigidbody2D>();

            //ランダムな方向に力を加える
            Vector2 randomDirection = Random.insideUnitCircle.normalized;
            enemyRigidbody.AddForce(randomDirection * forceStrength, ForceMode2D.Impulse);

            //次の生成まで待機
            yield return new WaitForSeconds(spawnInterval);

        }
    }
}
Player.cs(←なんかURLになった)
using System.Collections;
using System.Collections.Generic;
using Unity.VisualScripting;
using UnityEngine;
using TMPro;
using UnityEngine.UI;

public class Player : MonoBehaviour
{
    public Vector2 speed = new Vector2(0.05f, 0.05f);
    private Rigidbody2D _rigidbody;
    public int maxHP = 100;
    public int currentHP;
    public TextMeshProUGUI hpText;
    public int score = 0;
    public float scoreRate = 1f;
    private float elapsedTime = 0f;
    public TextMeshProUGUI scoreText;
    public bool Gaming = true;

    // Start is called before the first frame update
    void Start()
    {
        _rigidbody = GetComponent<Rigidbody2D>();
        currentHP = maxHP;
    }

    // Update is called once per frame
    void Update()
    {
        Move();
        UpdateHPText();
        ScoreCount();
    }

    void Move()
    {
        float moveX = 0f;
        float moveY = 0f;
        Vector2 playerPosition = transform.position;

        if(Input.GetKey("w"))
        {
            moveY += speed.y;
        }else if(Input.GetKey("s"))
        {
            moveY -= speed.y;
        }

        if(Input.GetKey("a"))
        {
            moveX -= speed.x;
        }else if(Input.GetKey("d"))
        {
            moveX += speed.x;
        }

        Vector2 newPosition = _rigidbody.position + new Vector2(moveX, moveY);

        _rigidbody.MovePosition(newPosition);
    }

    public void TakeDamage(int damage)
    {
        currentHP -= damage;
        UpdateHPText();
    }

    void UpdateHPText()
    {
        hpText.text = "HP: " + currentHP.ToString();
    }

    void ScoreCount()
    {
        if(Gaming)
        {
            elapsedTime += Time.deltaTime;

            if(elapsedTime >= 0.05f)
            {
                score += (int)scoreRate;

                UpdateScoreText();

                elapsedTime = 0f;
            }
        }
    }

    void UpdateScoreText()
    {
        scoreText.text = "Score: " + score.ToString();
    }
}