Unity+ROSに挑戦

以下の教材を見つけたので、今回はUnity+ROS挑戦してみました。
ROSとは
ROSとはたまに名前だけ目にしていたが、あまり詳しくなかったので簡単に調べました。ROSとはRobot Operating Systemの略でロボット開発用のオープンソースのライブラリです。以下は公式のWikiのリンクです。
はじめるための準備
ページ先頭のリンクのステップに従って作業を進めます。まずはGitからリポジトリをクローン。
>git clone https://github.com/unity3d-jp/Unity-ROS-MobileRobot-UI-Tutorial.git
Cloning into 'Unity-ROS-MobileRobot-UI-Tutorial'...
remote: Enumerating objects: 788, done.
remote: Counting objects: 100% (193/193), done.
remote: Compressing objects: 100% (149/149), done.
remote: Total 788 (delta 75), reused 121 (delta 42), pack-reused 595
Receiving objects: 100% (788/788), 25.18 MiB | 9.31 MiB/s, done.
Resolving deltas: 100% (271/271), done.
作業フォルダに移動。
>cd Unity-ROS-MobileRobot-UI-TutorialROS-TCP-Endpoint を取り込む。
git submodule update --init --recursive
Submodule 'ROS/src/ros_tcp_endpoint' (https://github.com/Unity-Technologies/ROS-TCP-Endpoint.git) registered for path 'ROS/src/ros_tcp_endpoint'
Cloning into 'C:/Users/xxxx/Unity/Unity-ROS-MobileRobot-UI-Tutorial/ROS/src/ros_tcp_endpoint'...
Submodule path 'ROS/src/ros_tcp_endpoint': checked out '993d366b8900bf9f3d2da444fde64c0379b4dc7c'
Docker Desktopのインストール
自分は別の機会で既にDocker Desktopをインストールしてあったので、詳細は割愛。
UnityとROSのセットアップ
3Dテンプレートを指定して「MobileRobotUITutorialProject」という名前のプロジェクトを作成する。次にGitHubからクローンしたROSフォルダの中で、Shiftキーを押しながら右クリックして「ターミナルで開く」を選択し、以下のコマンドを実行する。
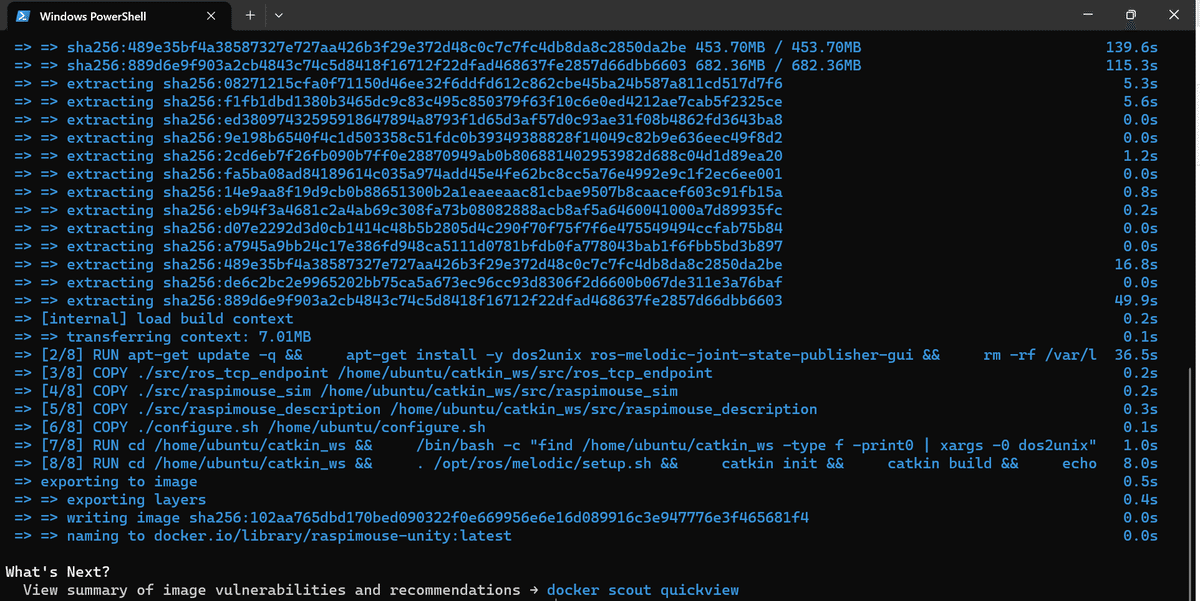
docker build -t raspimouse-unity:latest .実行ログの最後に「=> => naming to docker.io/library/raspimouse-unity:latest 0.0s」というメッセージが出力されていればイメージ作成が正常に完了。
Raspberry Pi Mouseのハードウェアモデルデータの読み込み
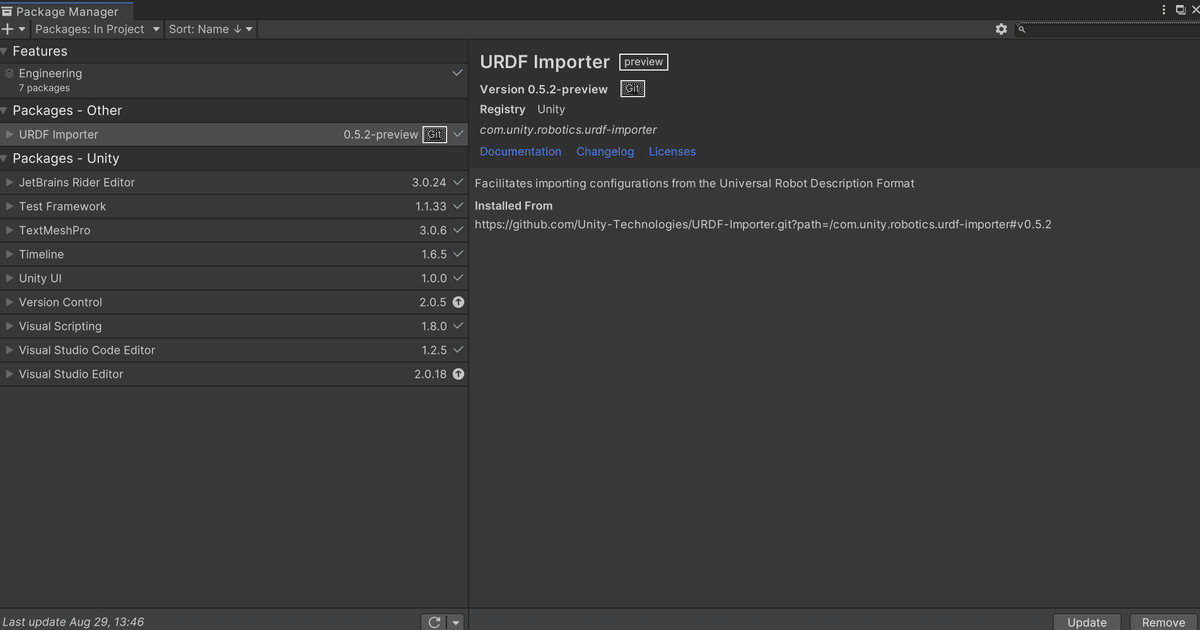
Package ManagerのAdd package from git URLより、URDF-ImporterのGitリポジトリへのURLを最新のタグを指定して入力し、Addをクリックしてインポートする。
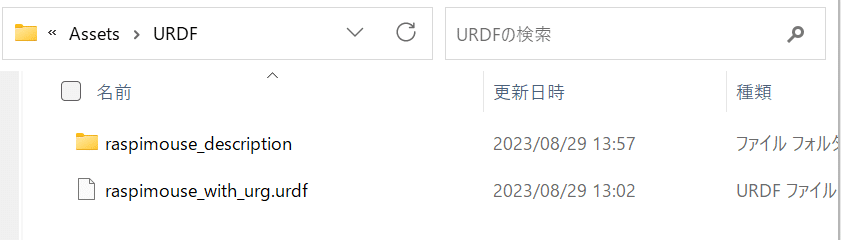
次にProjectのAssetsフォルダ内にURDFフォルダを作成し、作成したURDFをエクスプローラで開く。
そしてGitHubからクローンしたROSフォルダ内のsrc/raspimouse_descriptionをURDFフォルダへコピー、次にコピーしてきたraspimouse_descriptionフォルダ内のurdf/raspimouse_with_urg.urdfを作成したAssets/URDFへコピー。
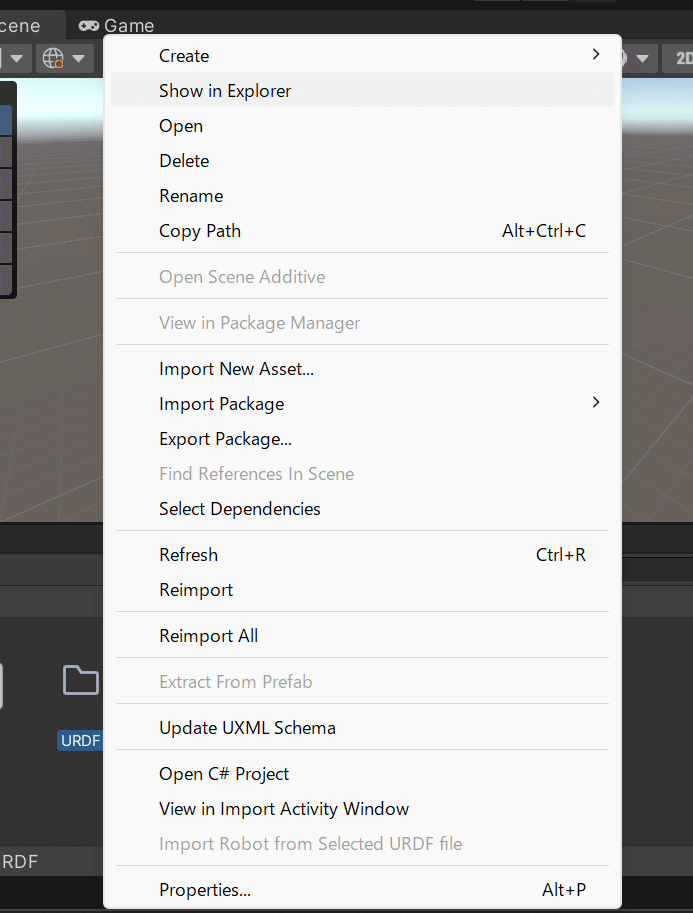
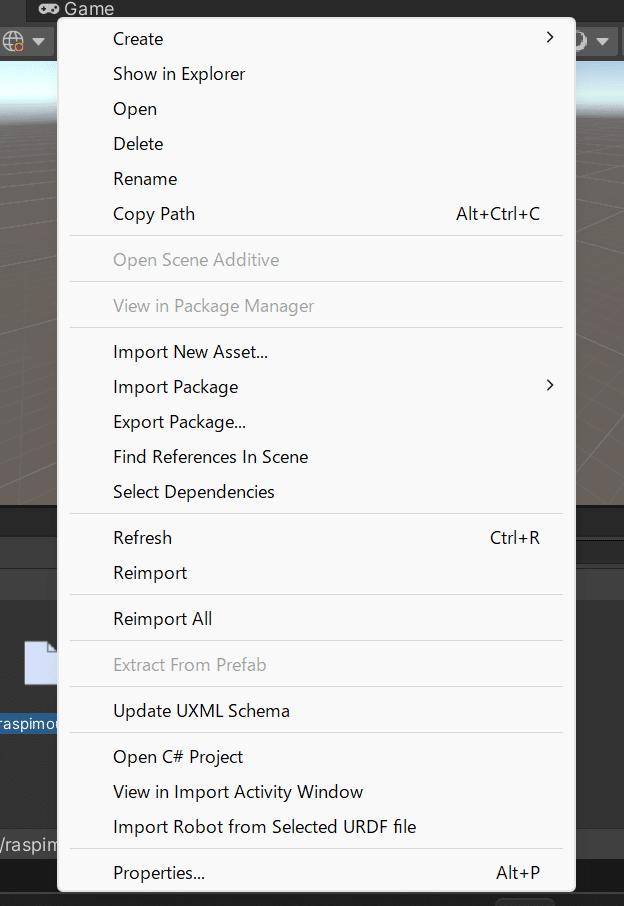
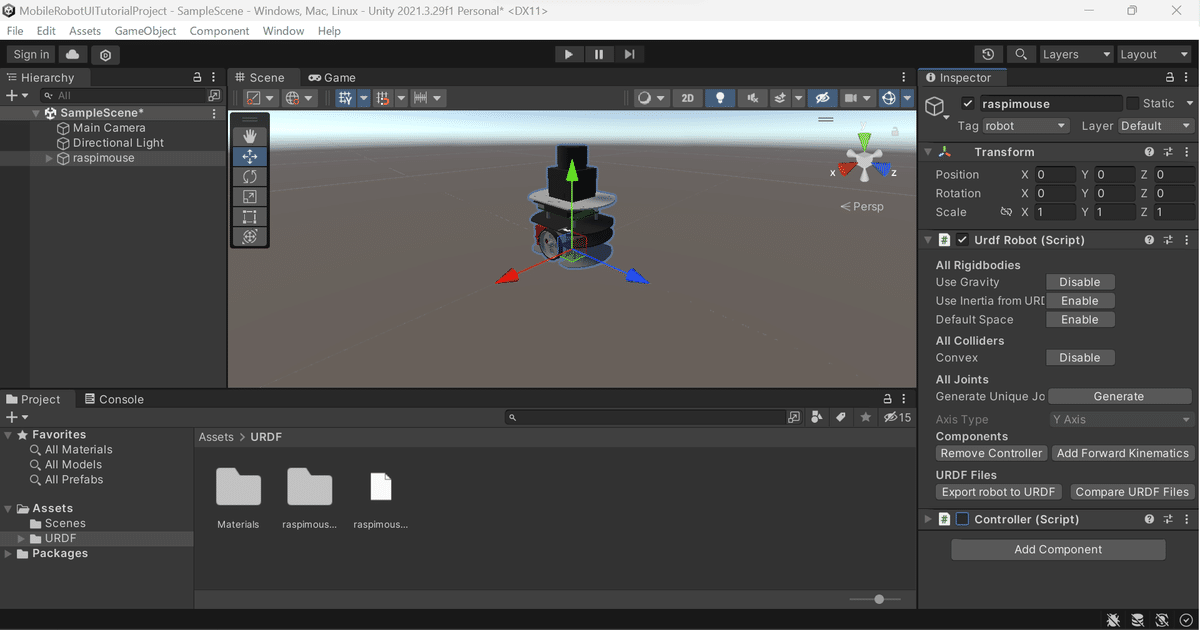
Unity EditorからAssets/URDF内のraspimouse_with_urg.urdfを右クリックしてImport Robot from Selected URDF fileをクリックする。
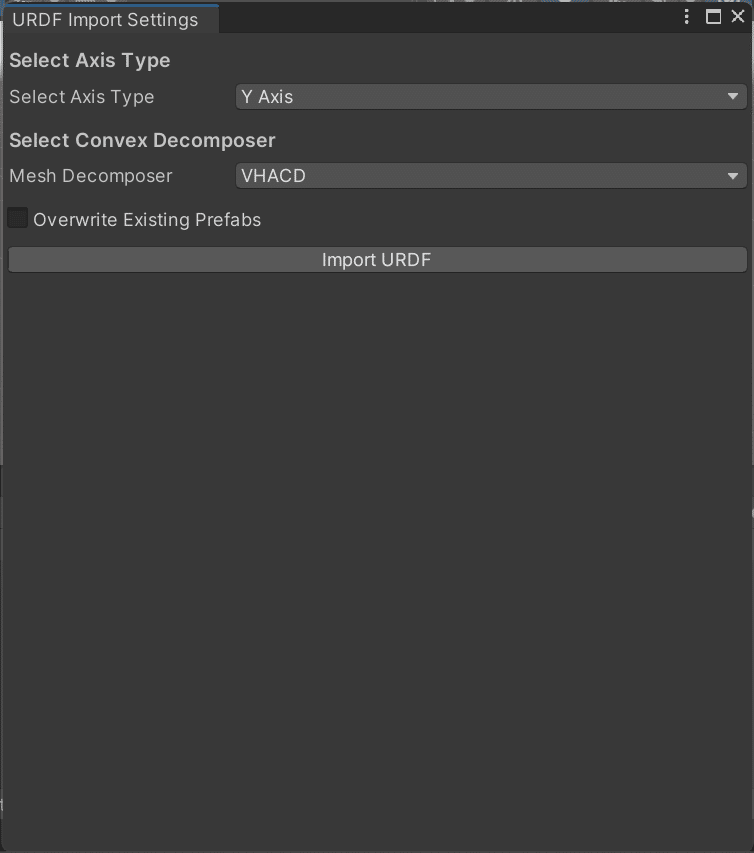
URDF Import SettingsでAxis TypeをY axisに、Mesh DecomposerをVHACDでImport URDFをクリックする。
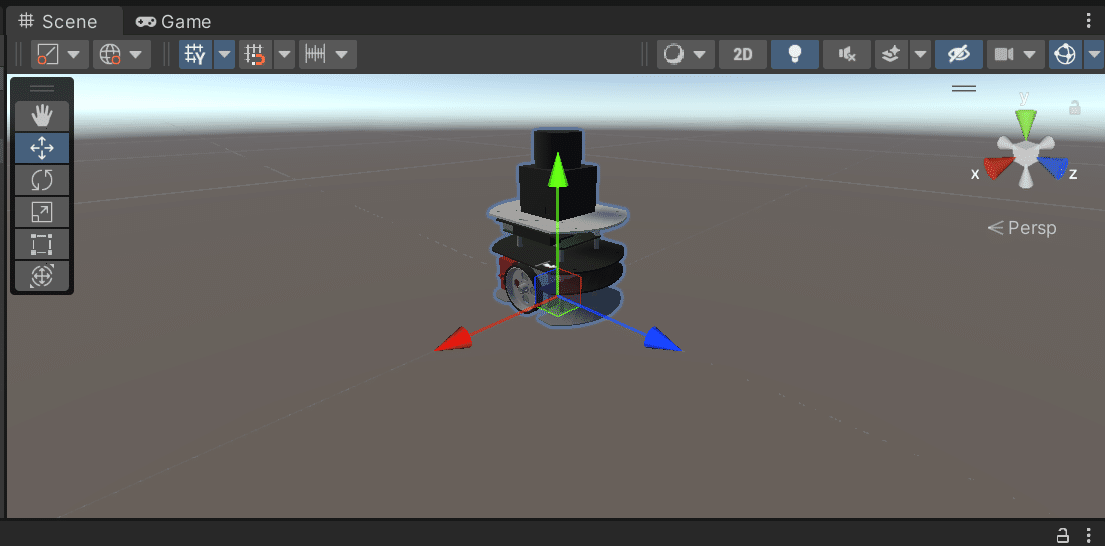
Importが完了するとSceneにRaspberry Pi Mouseが表示される。
Hierarchyから以下のオブジェクトを全て選択して、Articulation Bodyのチェックを外す(無効にする)。
・base_link
・right_wheel_link
・left_wheel_link
・urg_mount_link
・idar_link
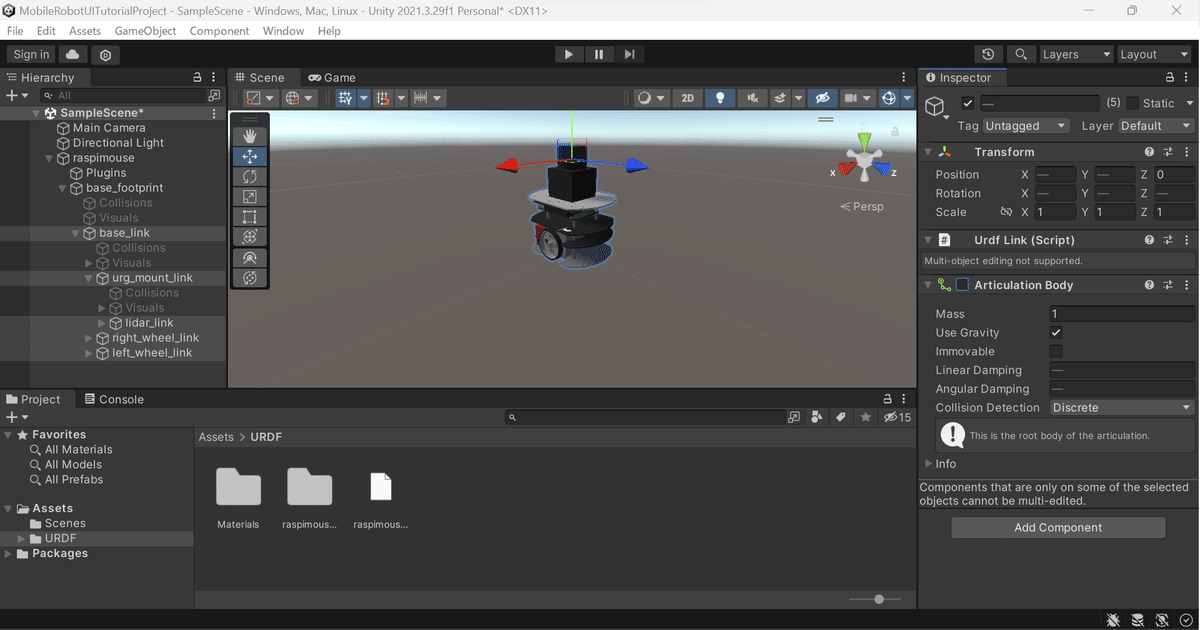
さらにraspimouseにアタッチされているControllerスクリプトのチェックを外す(無効にする)。
ロボット周辺環境のハードウェアモデル(World)データの読み込み
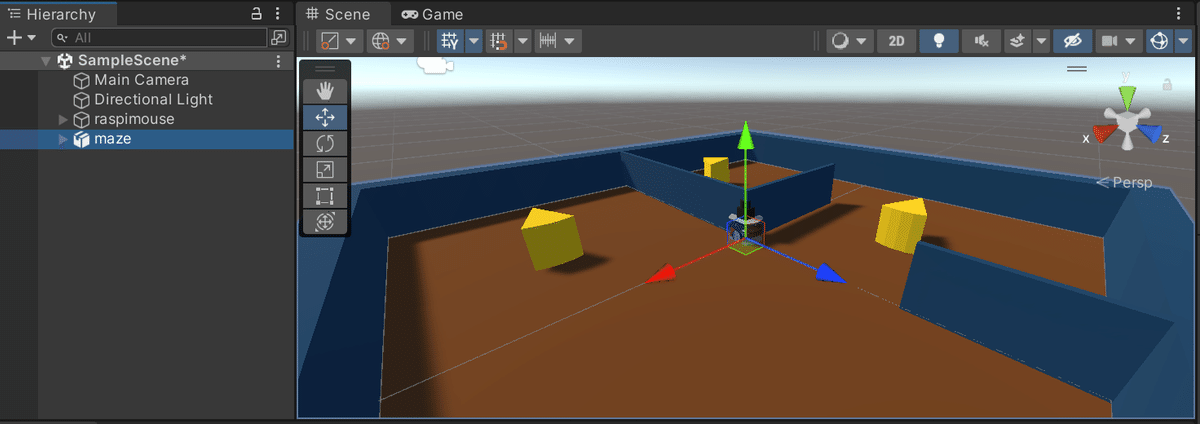
ProjectのAssetsフォルダ内にModelsフォルダを作成し、ROS/src/raspimouse_sim/raspimouse_gazebo/models/cheeze_maze_a/meshesフォルダ内のmaze.daeをModelsフォルダへコピー。そしてmaze.daeをHierarchyウィンドウに ドラッグアンドドロップでGameObjectとして配置すると、迷路が表示される。
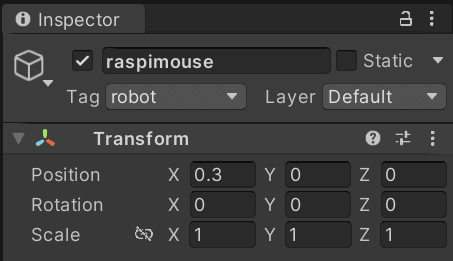
raspimouseオブジェクトのPositionのXを0.3に修正する。
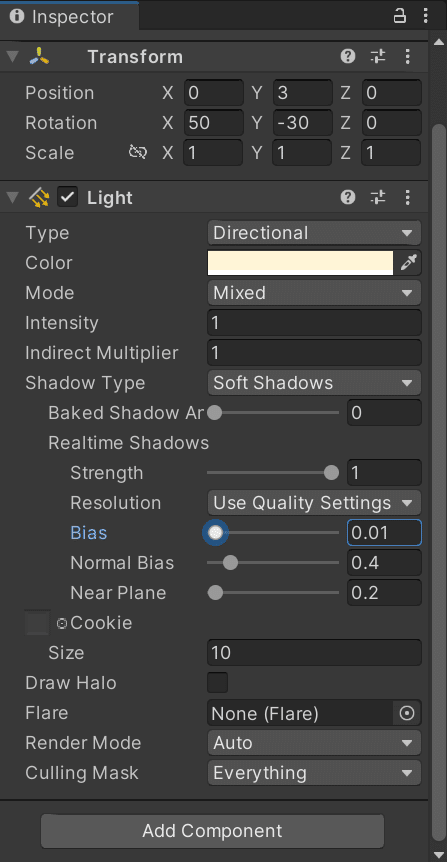
Directional LightオブジェクトのLightのBiasを0.01に修正する。
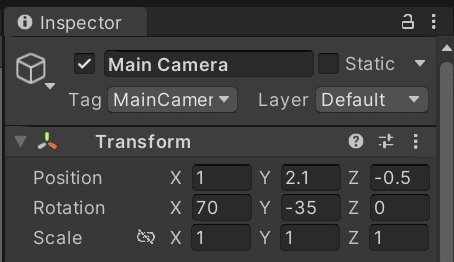
Main CameraのPositionとRotationを以下のように修正する。
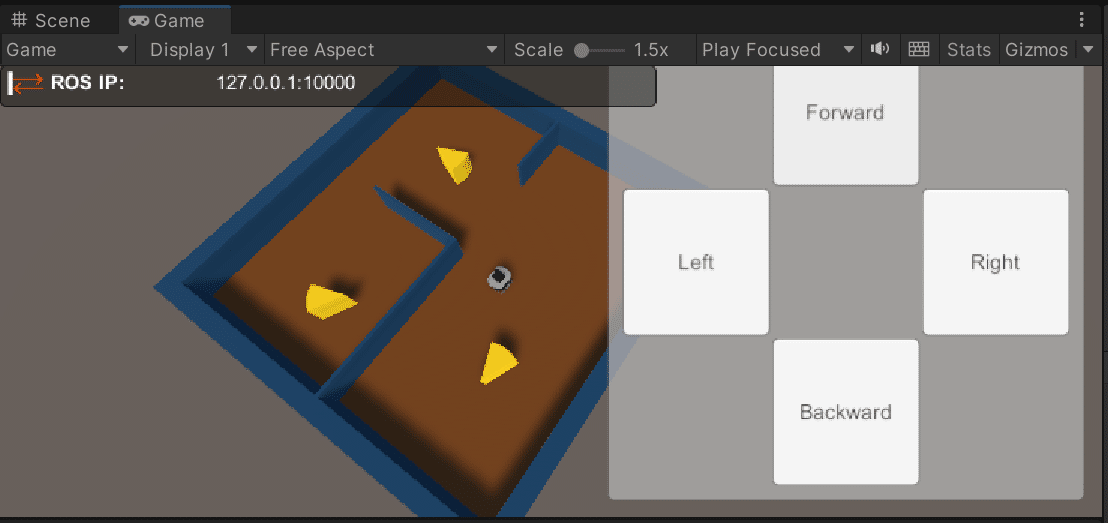
ロボット操作用ボタンの作成とUnityからGazebo上のロボットへ速度指令を送信
Package ManagerのAdd package from git URLより、ROS-TCP-ConnectorのGitリポジトリへのURLを最新のタグを指定して入力し、Addをクリックしてインポートする。
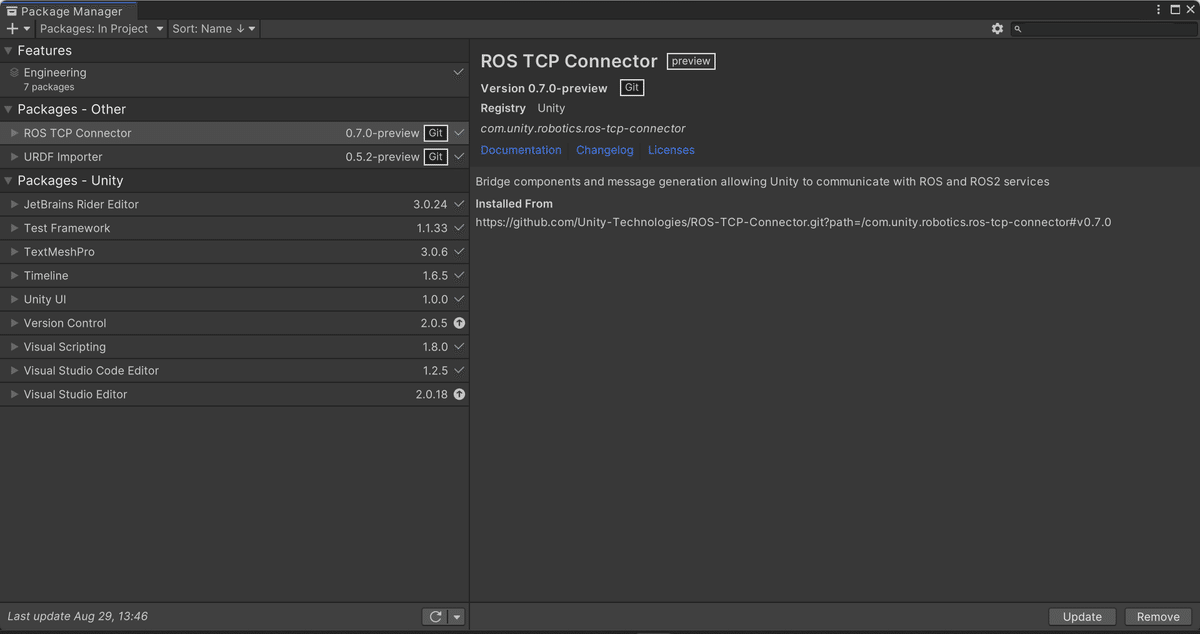
インポートが完了すると、メニューバーにRoboticsが追加されます。メニューバーからRobotics > ROS Settingsを開き、以下の設定となっていることを確認します。

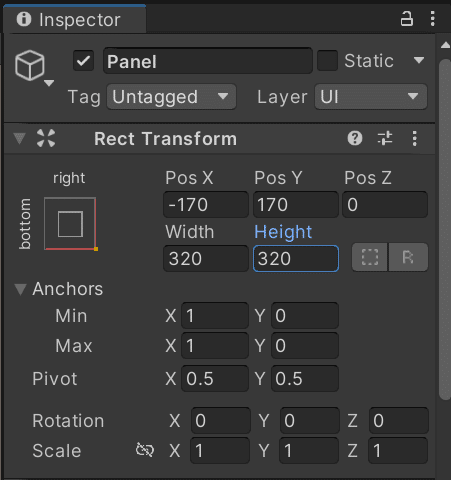
Hierarchyウィンドウを右クリックしてUI > Panelを選択。Inspectorで下記のように設定する。
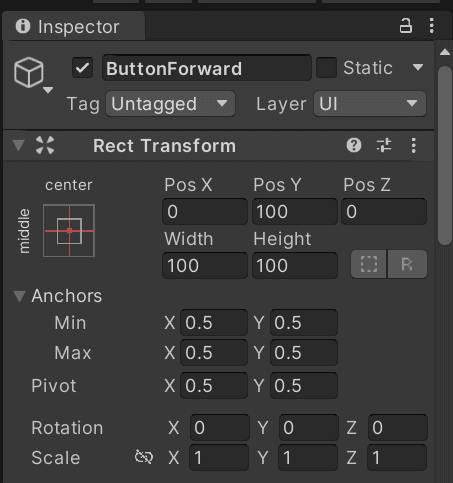
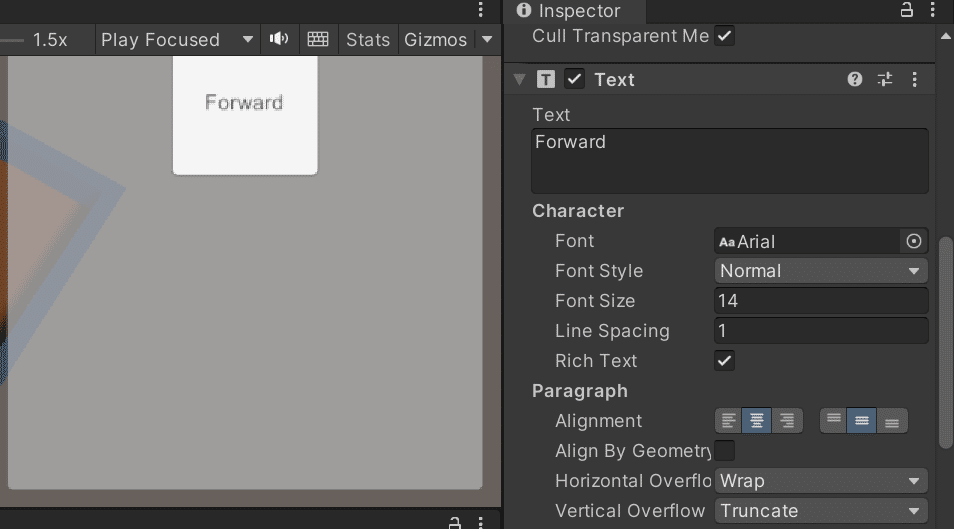
上で追加したPanelを右クリックしてUI > Button(Legacy)を選択し、ButtonForwardと名前をつける。Inspectorで下記のように設定する。
ButtonForwardオブジェクトの子のTextオブジェクトを選択し、Buttonのラベルを「Forward」に修正する。
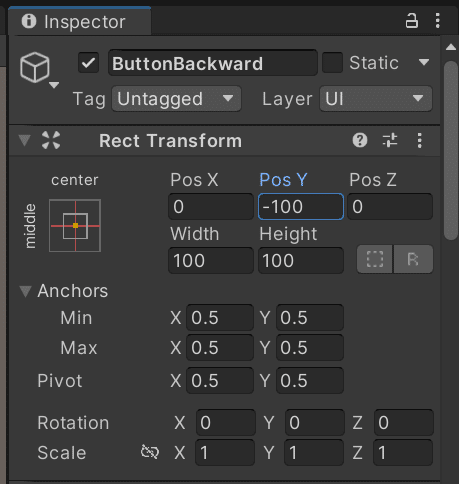
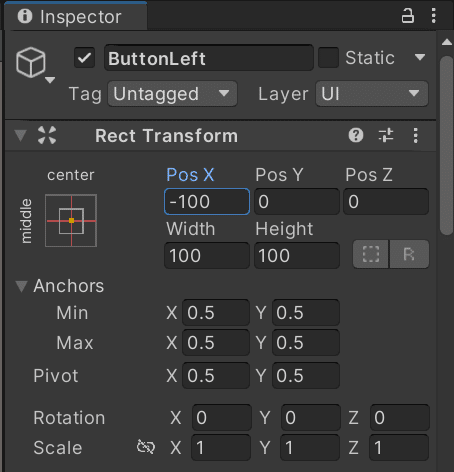
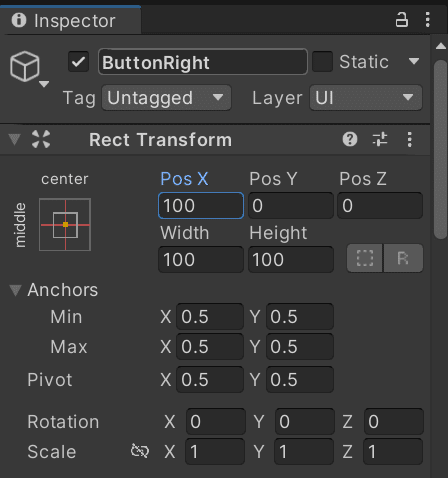
同様にBackward, Left, Rightのボタンも作成する。
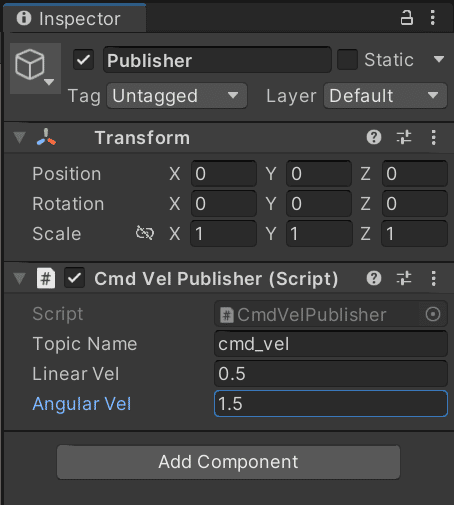
次にHierarchyウィンドウを右クリックしてCreate Emptyを作成し、Publisherにリネームする。UnityScripts/ScriptsフォルダをUnityプロジェクトのAssetsフォルダにコピー(Assets/Scriptsとして配置)する。そしてコピーしたScriptsフォルダ内のCmdVelPublisher.csを先程作成したPublisherオブジェクトにコンポーネントとして追加し、Inspectorから以下のように設定する。
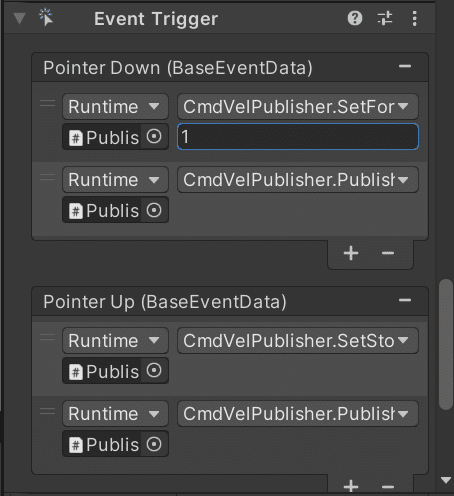
ButtonForwardのInspectorからEvent Triggerコンポーネントを追加し、以下のように設定します。同様に他のボタンも設定しますが、その際にBackwordの場合は最初のファンクションをCmdVelPublisher.SetBackwardVelに、LeftとRightのボタンはそれぞれCmdVelPublisher.SetLeftTurnVelとCmdVelPublisher.SetRightTurnVelにします。
Powershellを開いて、次にGitHubからクローンしたROSフォルダのディレクトリに移動して以下のコマンドを実行。
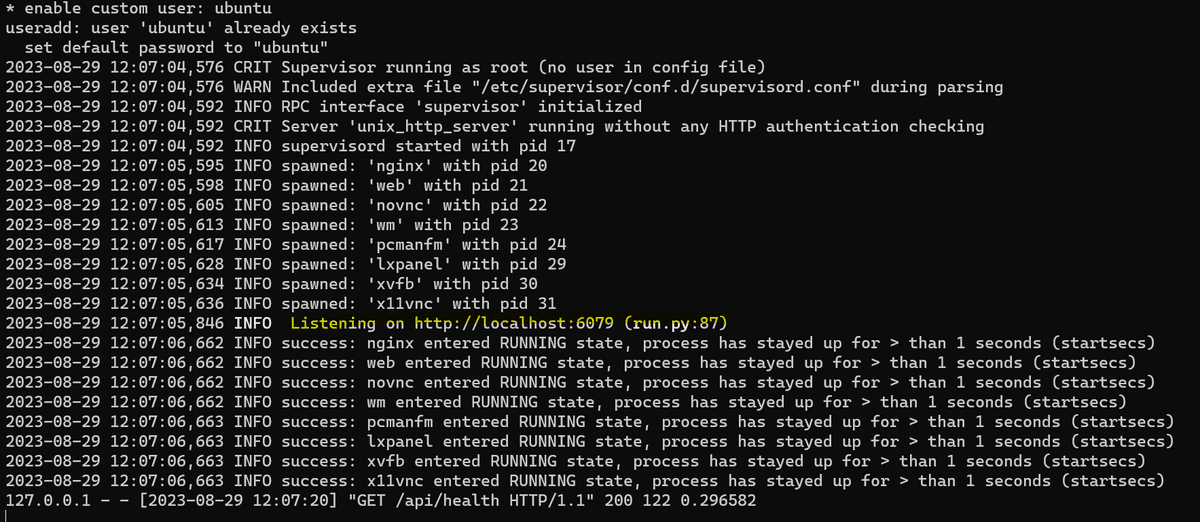
docker run --rm -it -p 10000:10000 -p 5005:5005 -p 6080:80 --shm-size=512m raspimouse-unity:latest
以下の黄色のメッセージが表示されていればコンテナが起動できている。
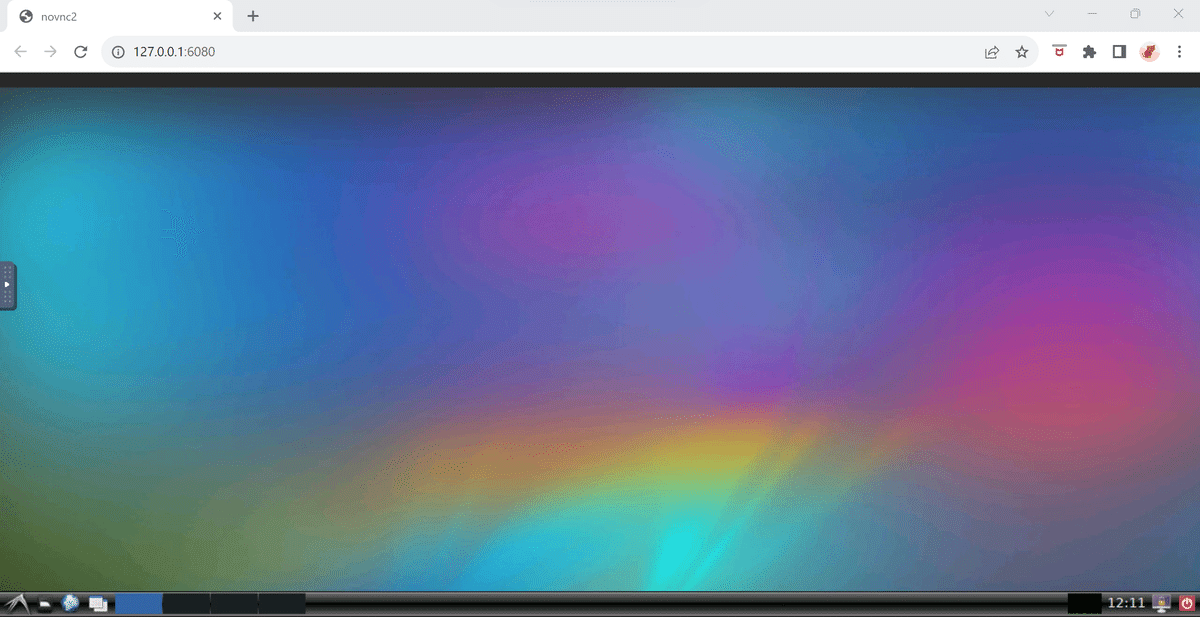
Webブラウザを開きhttp://127.0.0.1:6080にアクセスして、以下のページが表示されることを確認する。
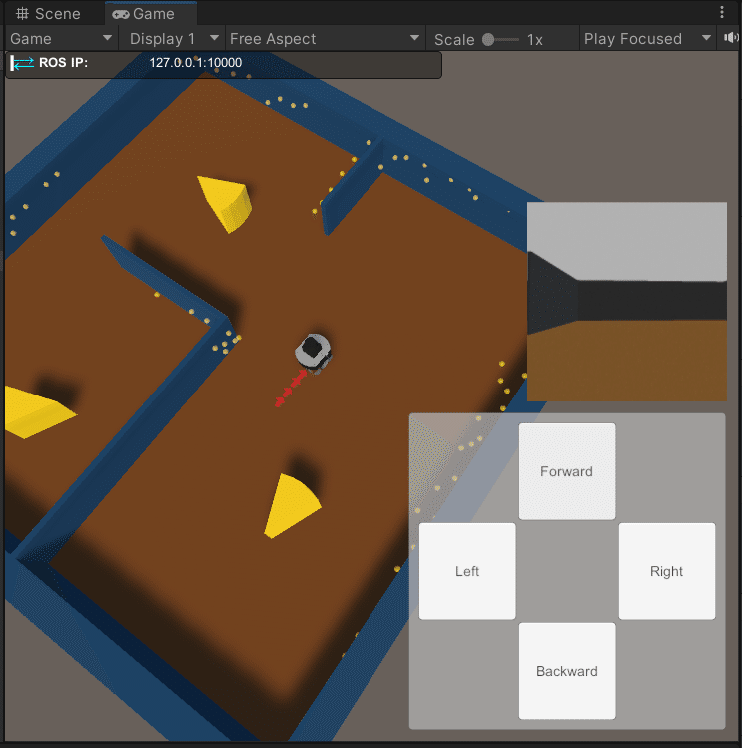
次にUnityで再生ボタンを押し、再生モードでプロジェクトを実行し、操作ボタンの動作確認をする。ボタンを押すと左上のLast Message Sentの欄が更新されるようだが、ROS-TCP-Connectorのバージョンによってはデバッグ用の詳細情報が表示されないようで、自分の場合も表示されなかった。
先程まで開いていたWebブラウザでLXTerminalを2つ起動し、一つ目のLXTerminalで以下のコマンドを実行すると、シミュレーターが起動することを確認する。
roslaunch raspimouse_gazebo raspimouse_with_cheeze_maze.launch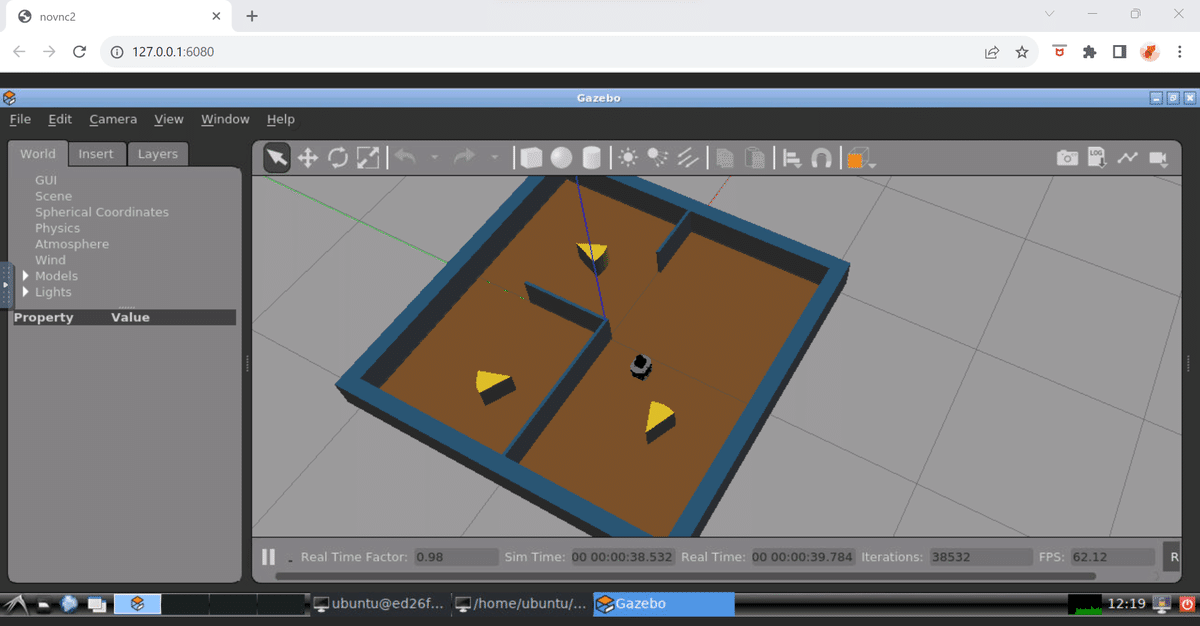
2枚目のLXTerminalで以下のコマンドを実行する。
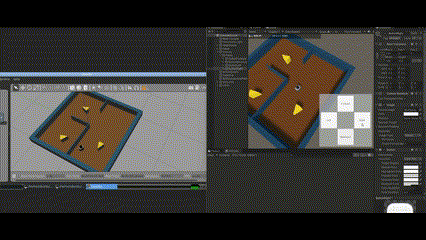
roslaunch ros_tcp_endpoint endpoint.launch再生モードのUnityでボタンを操作すると移動指令が送信され、Gazebo上のロボットが移動することを確認できる。ただしこの時点ではUnity上のロボットは動かない。
Raspberry Pi Mouse位置姿勢の可視化
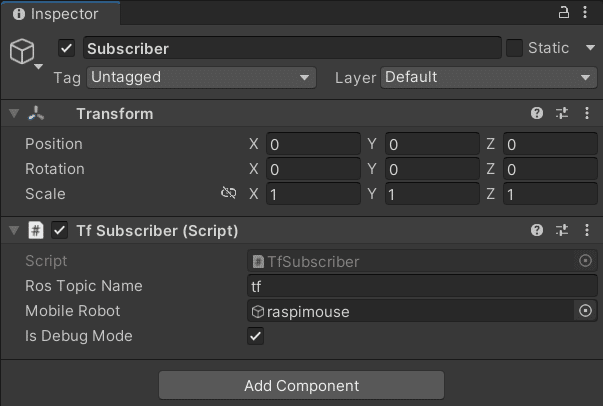
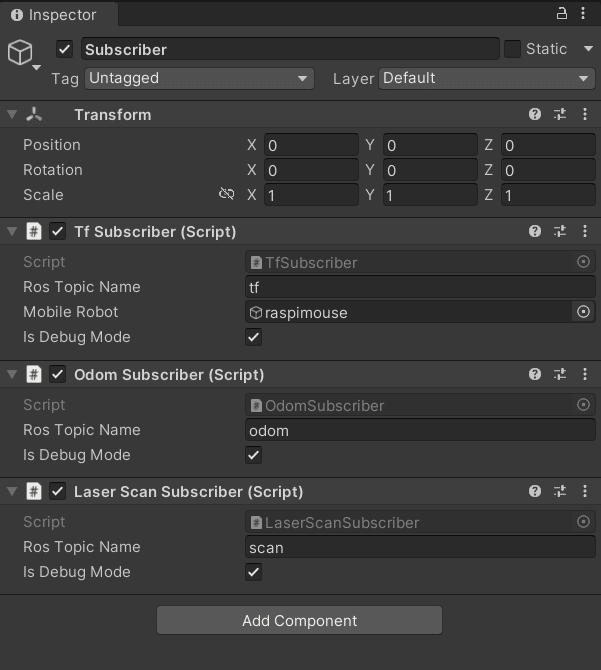
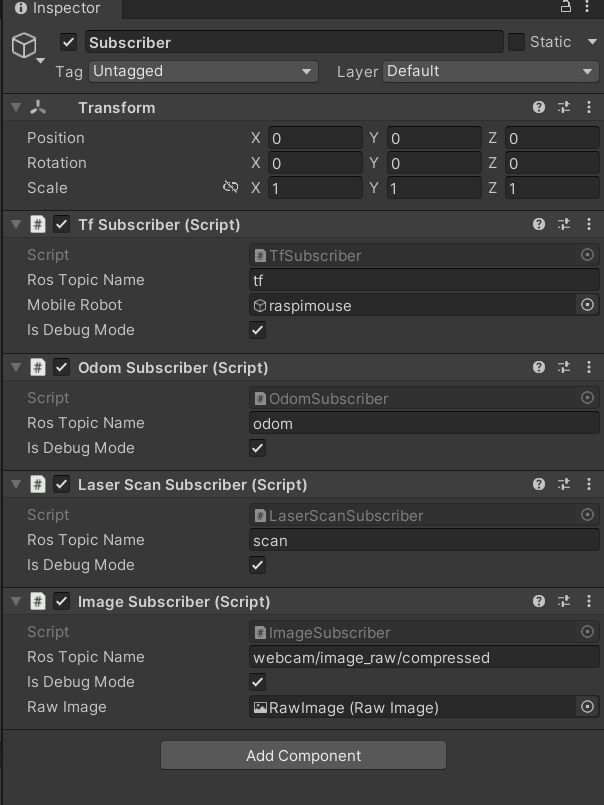
ここではロボットの動きをUnity上にも反映する方法が説明される。まずはROSから配信されるトピックを受信するために、サブスクライバをUnityに登録する。Hierarchyウィンドウを右クリックしてCreate Emptyを作成し、Subscriberにリネームします。そしてAssets/Scripts/TfSubscriber.csスクリプトをアタッチし、以下のように設定します。
そして再生モードのUnityでボタンを操作すると、今度はUnity上のロボットも同時に動くようになることが確認出来る。
オドメトリの可視化
ここではロボットのオドメトリを可視化を行います。オドメトリとは
単位時あたりの車輪の回転角の積分によって,移動ロボットの現在位置や姿勢を推定する自己位置姿勢推定法の一つ、詳細は以下のリンクを参照。
Assets/Scripts/OdomSubscriber.csをSubscriberオブジェクトにアタッチ。
UnityScripts/OdometryViewerフォルダをUnityプロジェクトのAssetsフォルダにコピー(Assets/OdometyViewerとして配置)する。そしてAssets/OdometyViewer/Scripts/OdometryViewer.csをraspimouseオブジェクトにアタッチして、以下のように設定する。
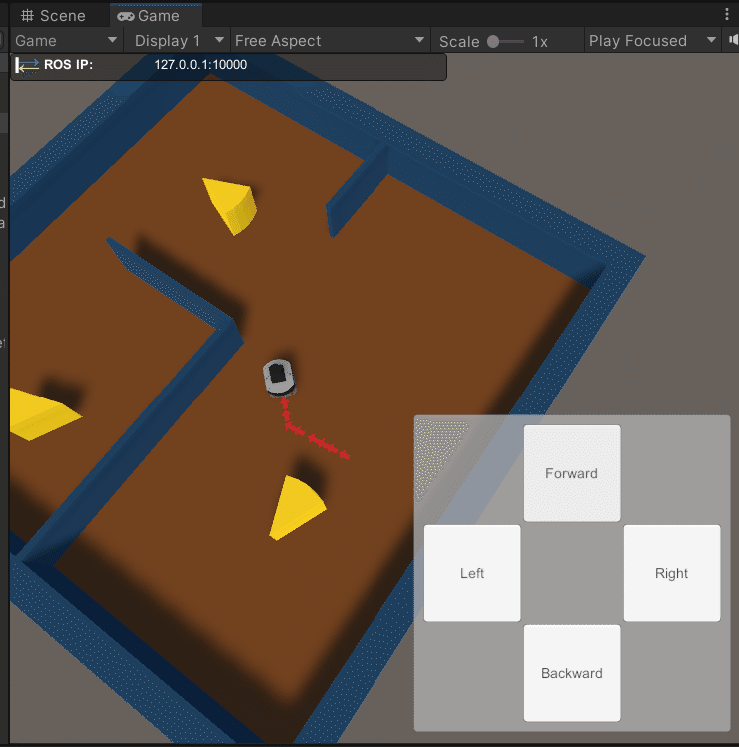
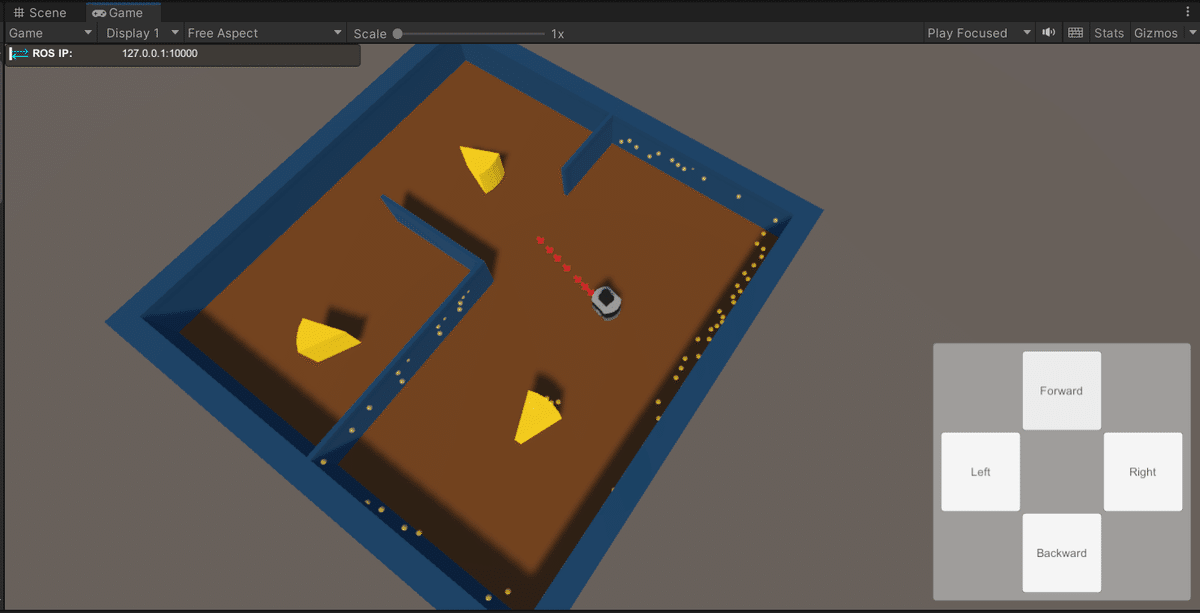
再生モードのUnityでボタンを操作するとオドメトリの可視化が行われていることが確認出来る。
LiDARデータの可視化
次にLiDARデータの可視化を行います。LiDARデータとは光を用いたリモートセンシング技術の1つで、対象物に光を照射し、その反射を光センサで取得するまでの時間を計測することで距離を計測することで得られた3次元データのことである、詳細は以下のリンクを参照。
Assets/Scripts/LaserScanSubscriber.csをSubscriberオブジェクトにアタッチ。
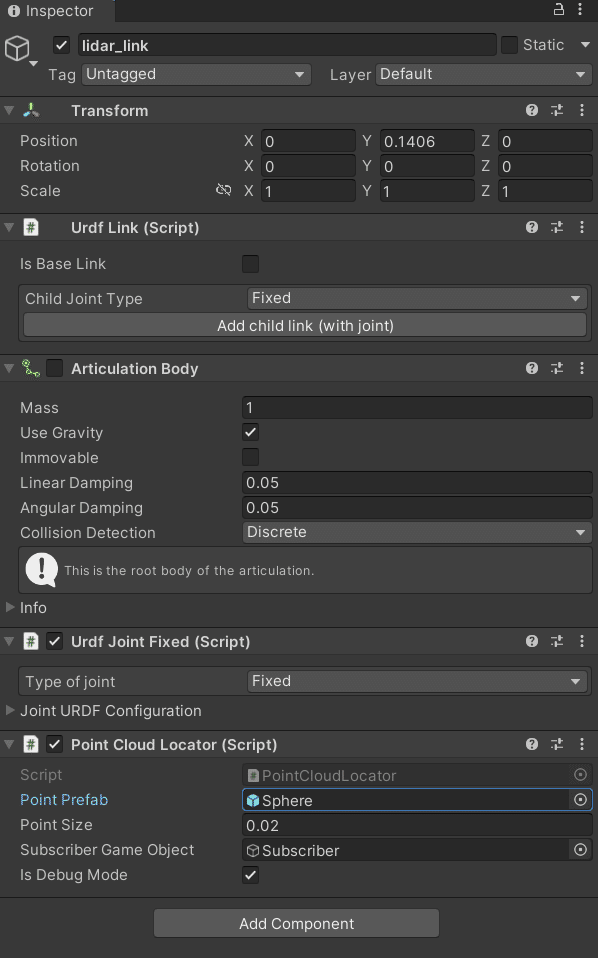
UnityScripts/PointCloudフォルダをUnityプロジェクトのAssetsフォルダにコピー(Assets/PointCloudとして配置)し、以下のように設定する。
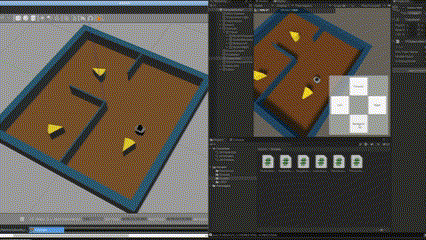
再生モードのUnityでボタンを操作するとLiDARデータの可視化が行われていることが確認出来る。黄色の点群がLiDARデータ。
カメラデータの可視化
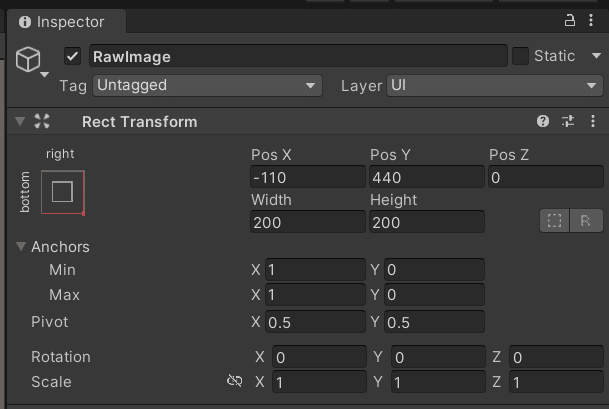
最後のステップではカメラデータの可視化を行う。Canvasオブジェクトを右クリックして、UI > RawImageを作成し、以下のように設定を行う。
Assets/Scripts/ImageSubscriber.csをSubscriberオブジェクトにアタッチし、以下のように設定を行う。
次にDockerを起動して、WebブラウザでLXTerminalを2つ起動します。一つ目のLXTerminalで以下のコマンドを実行する。
roslaunch raspimouse_gazebo raspimouse_with_cheeze_maze.launch camera:=true2枚目のLXTerminalで以下のコマンドを実行する。
roslaunch ros_tcp_endpoint endpoint.launchUnityを再生モードで実行すると、RawImageにGazebo側のカメラ映像がRawImageに表示されていることが確認出来る。
感想
ROSとそれに関連する事柄(オドメトリやLiDARデータ等)を知ることが出来たので良かった。