
DIY イレクターパイプでミニサイクルポート

年末年始投稿ラッシュ1記事目です
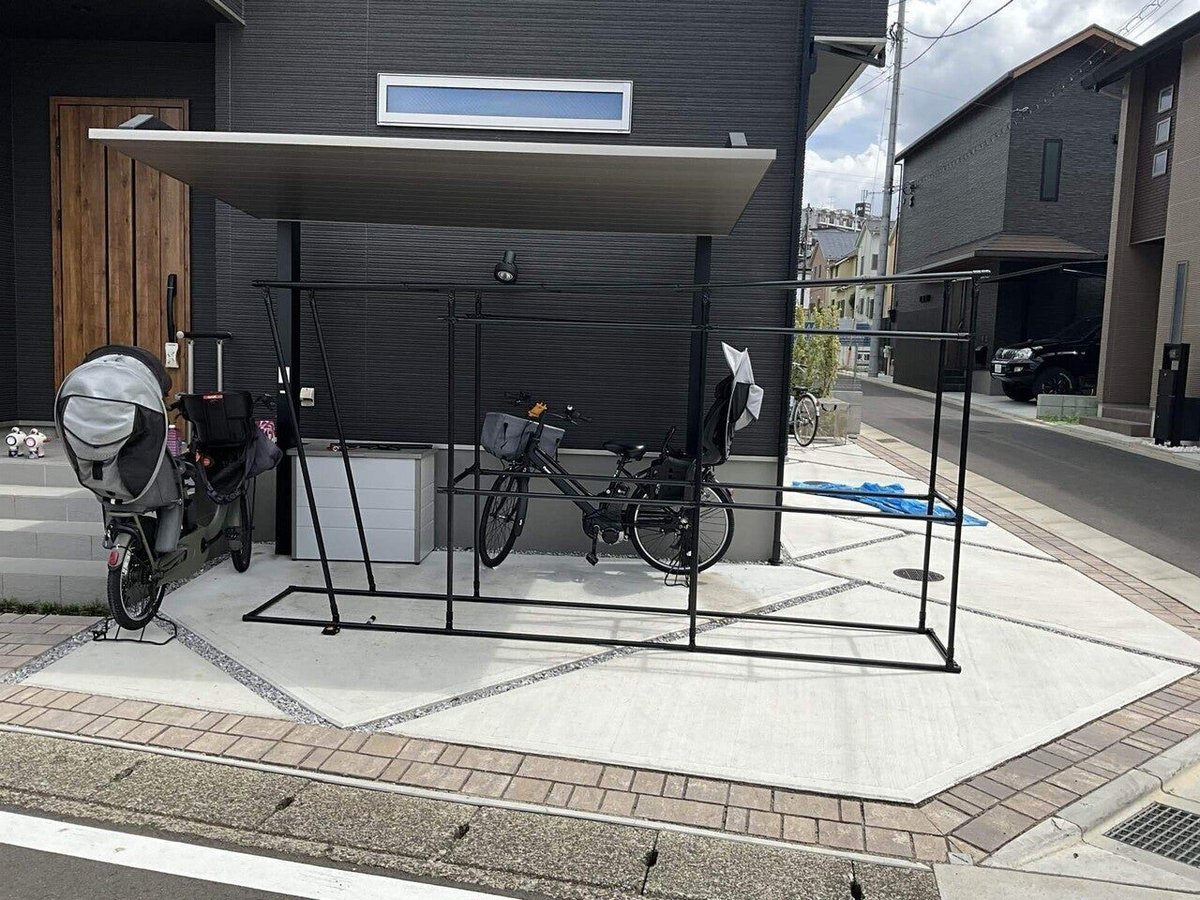
我が家を建てる際に工務店にサイクルポートは付けて貰ったのですが
それとは別に小さい自転車やアウトドアグッズを保管する場所を家の裏手に欲しかったのですが、60cmの幅となると市販品には無かったので自分で作ることにしました。

イレクターパイプとは
雨天環境での使用と考えると防錆効果と台風きても平気な頑丈さが欲しいと思い調べていたらホームセンターにも売っているイレクターパイプという物がスチールパイプに、プラスチックを被覆してあり丈夫で錆にも強いです。
後良いのが、イレクターパイプを作っている矢崎化工株式会社に作りたい物や寸法などの情報を送ると図面を送ってくれます。雨が降った時に水が置くに流れて欲しいのでリクエスト段階で水の流れもお願いして手前が少しだけ高く勾配もつけて貰ってます。
部材の手配
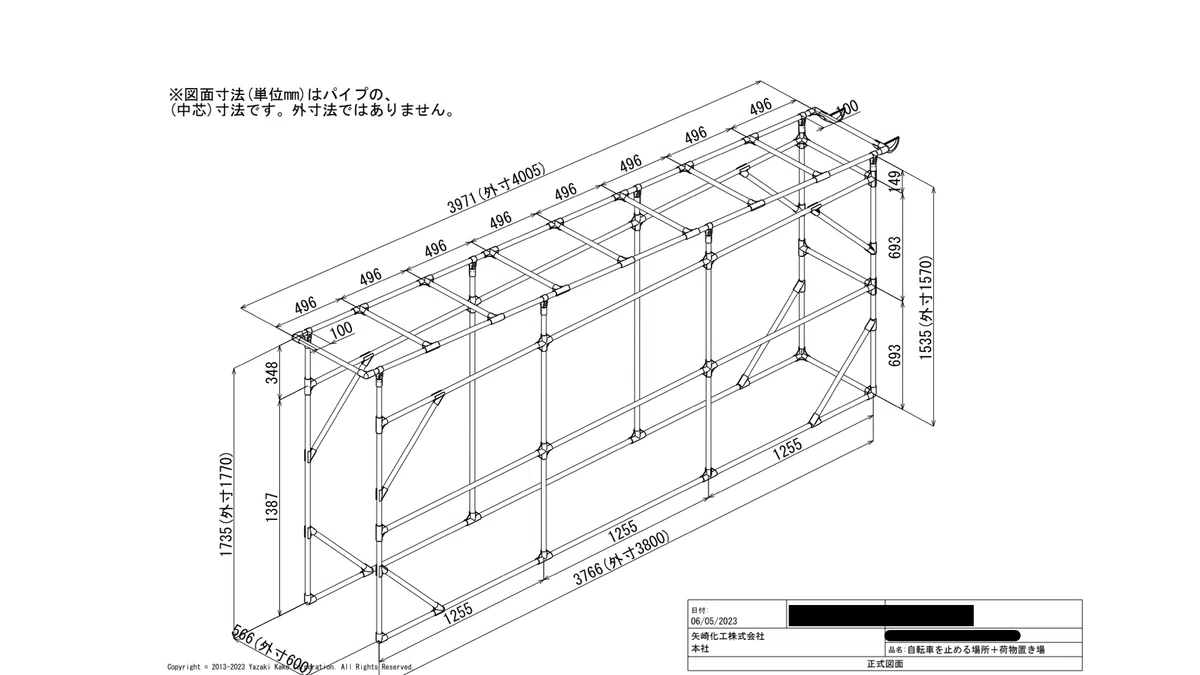
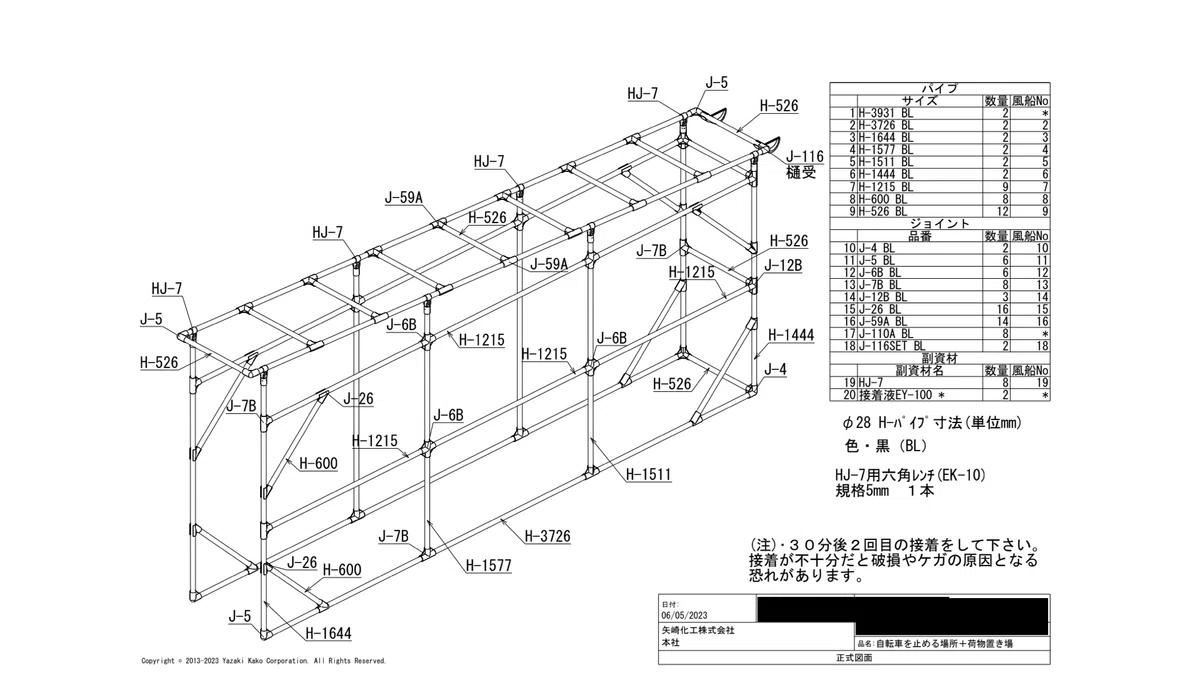

近所のホームセンターで買うと決まった長さしかなくカットするのと余りが勿体無いのですが、オンラインで矢崎化工で頼めば長さも指定で切って届くのでオーダーしました。不足したものとかある時はホームセンターを活用。

接続パーツはプラスチック+接着剤のタイプか金属+ボトルでした。前者だと後ほどつけ外しなど難しいので値段は上がるのですが金属ボトルで固定することにしました。
組み上げ
仮組
最初少しだけ弱めで最後に絞めるのが調整効いて良さそうです。
屋根設置

波板は幅が655mmだったので幅ギリギリで長さも10尺でほぼそのままのサイズだったのでちょうどでした。表裏もあるので注意。


フックボルトは5波間隔で置くのがお決まりらしいです。
設置場所準備

設置した時に下のパイプが埋まって平坦な方が使い勝手良いので設置場所の砂利を取りました。本来は風の日対策に基礎も必要ですが重量そこそこあるのとジャストサイズ過ぎて動けないので砂利で固定でいけそうです。

設置


側壁追加

完成
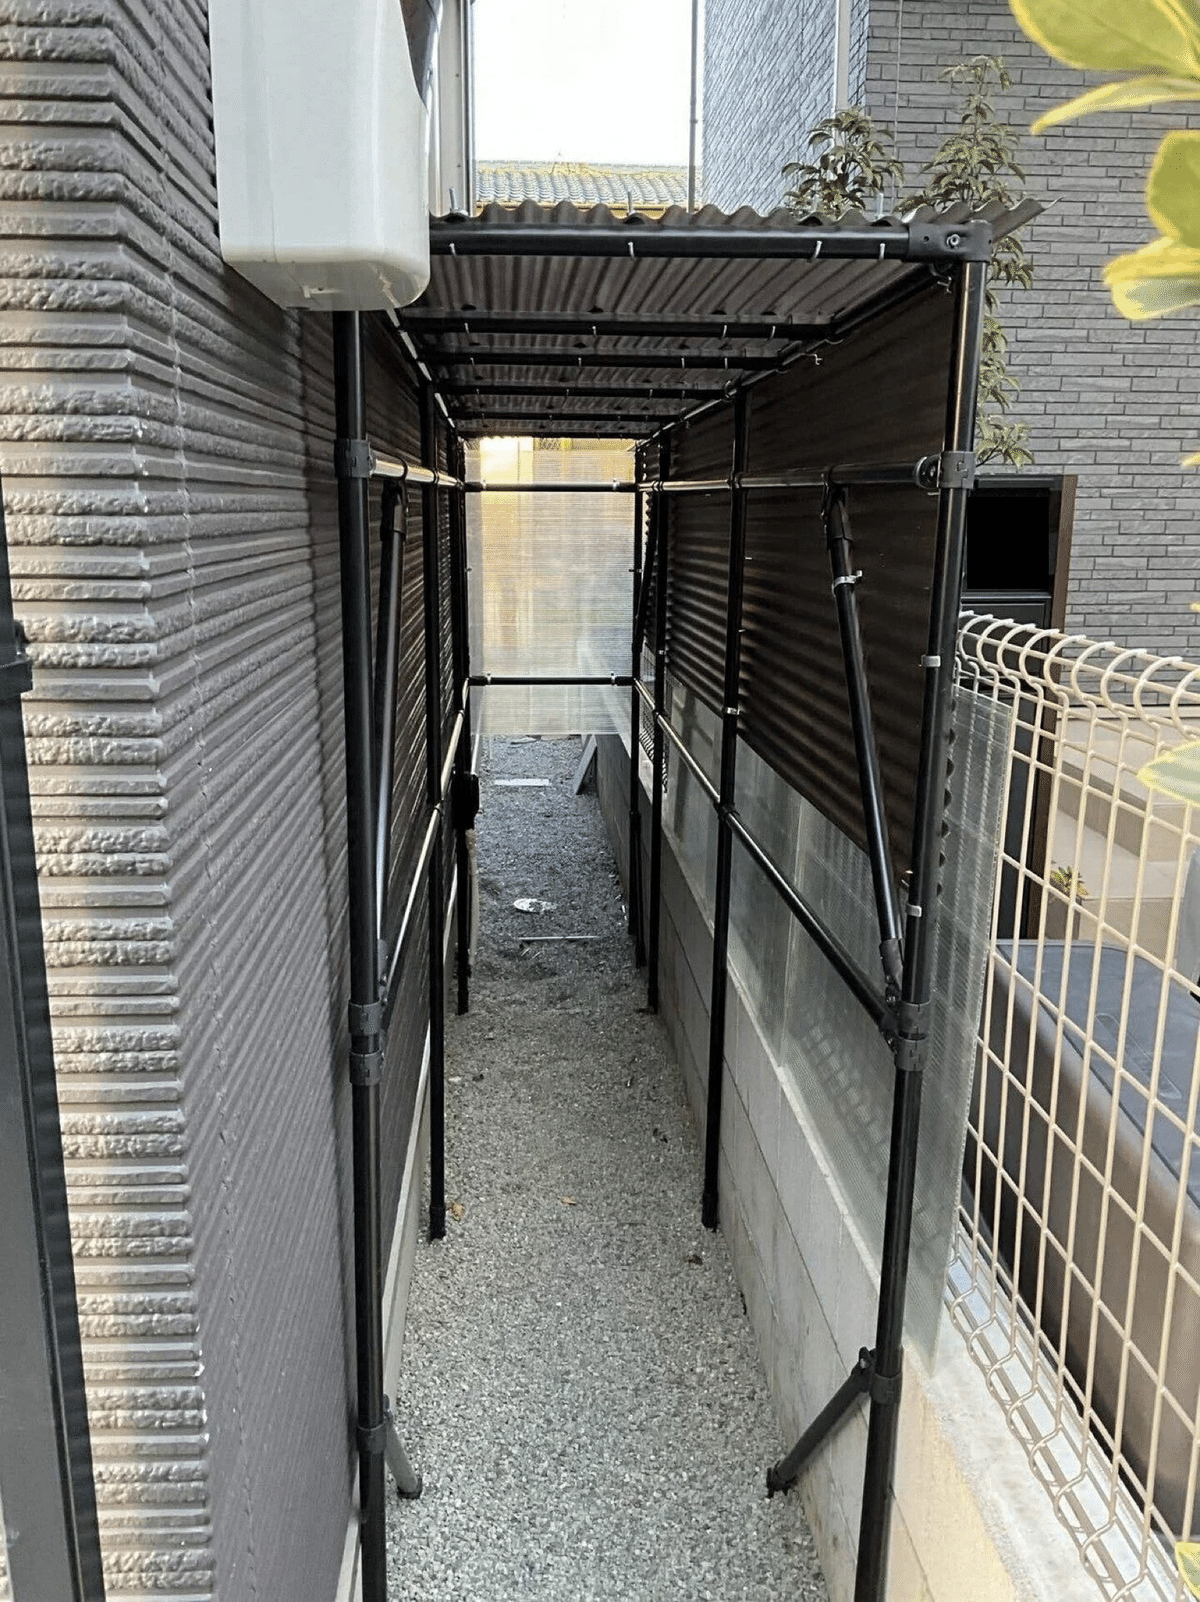
重量があり組み上げてから中に入れるの大変だったので、真ん中で分離できる形にしておけば良かったなというのは反省点ですが概ね想定の形にできたので満足です。