SwiftUI Tutorialsを見ながら、SwiftUIを学習する①
はじめに
Swiftを触り始めて10ヶ月経ちました。Storyboardでの実装がメインですが、そろそろSwiftUIベースで実装してみたくなりましたので、Apple Developer公式にあるSwiftUIの概要 - Xcode - Apple Developerを参考に学習したことを記載して行こうと思います。
使用環境
● OS:macOS Big Sur 11.3.1
● Xcode:12.5
● Swift:5.4
● SwiftUI
今回学習したこと
プロジェクトファイルの作成
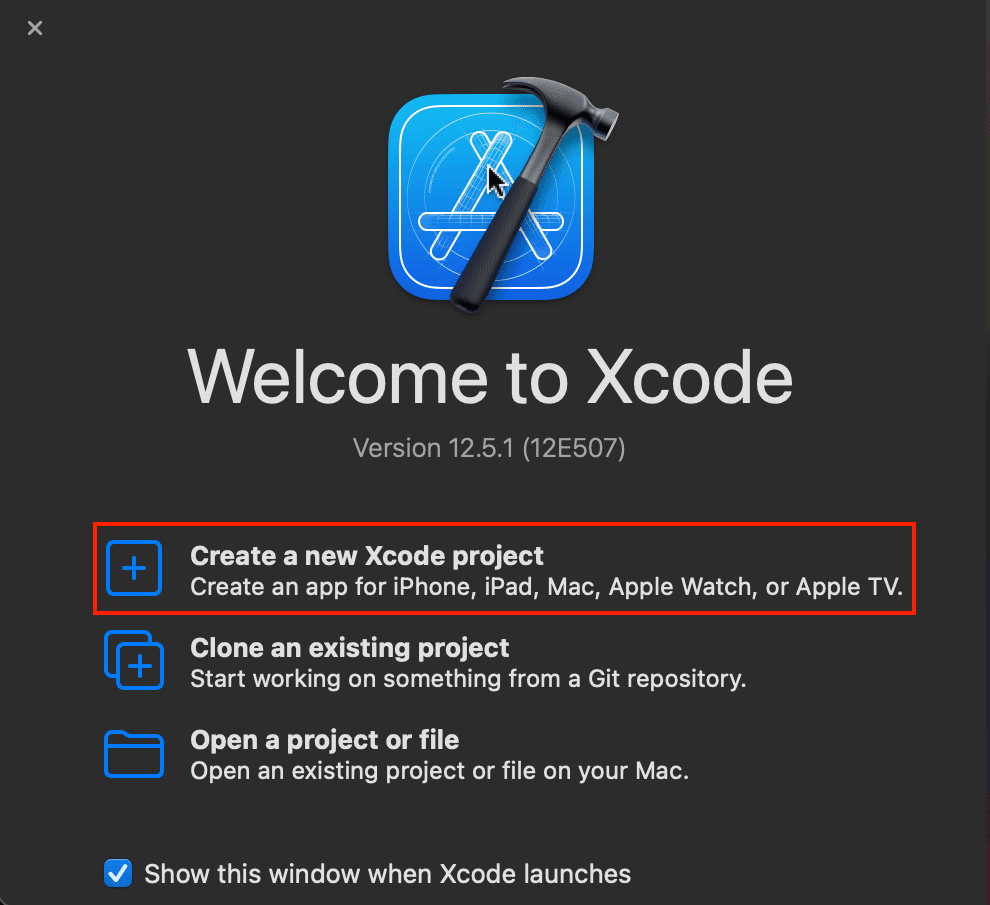
1.Xcodeを起動して、「Create a new Xcode project」を押下する。

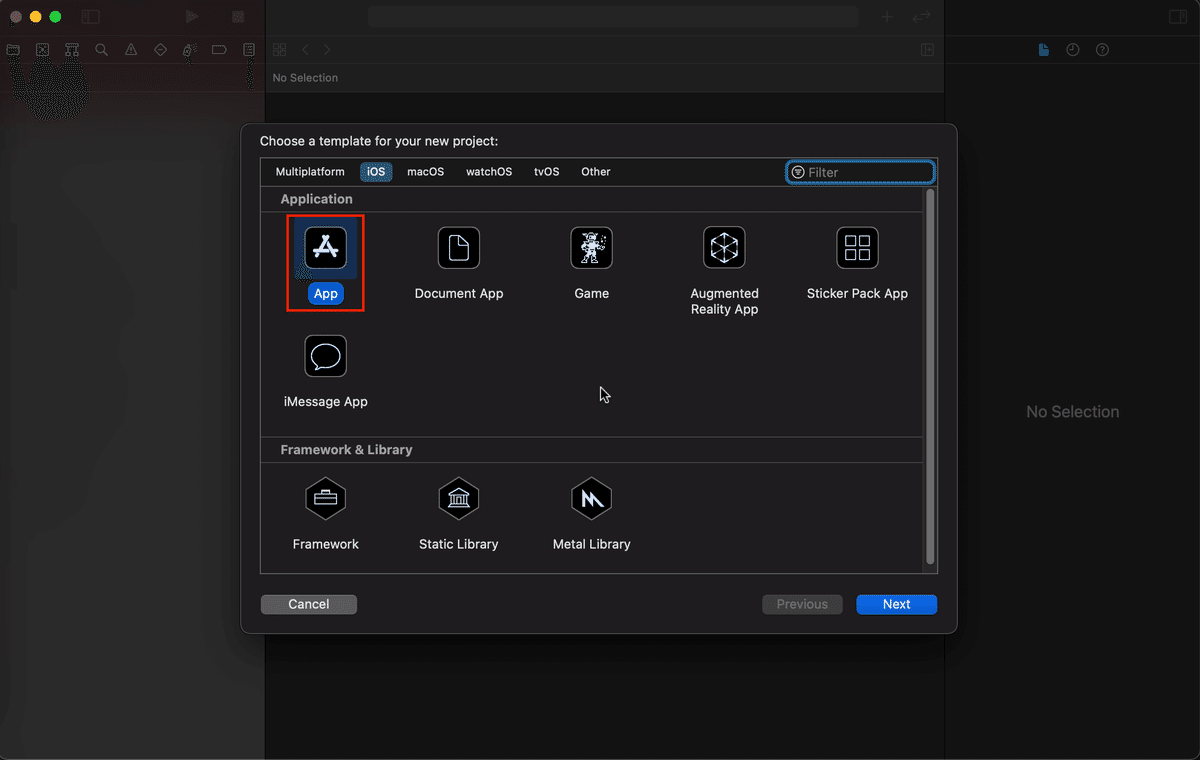
2.「App」を押下する。

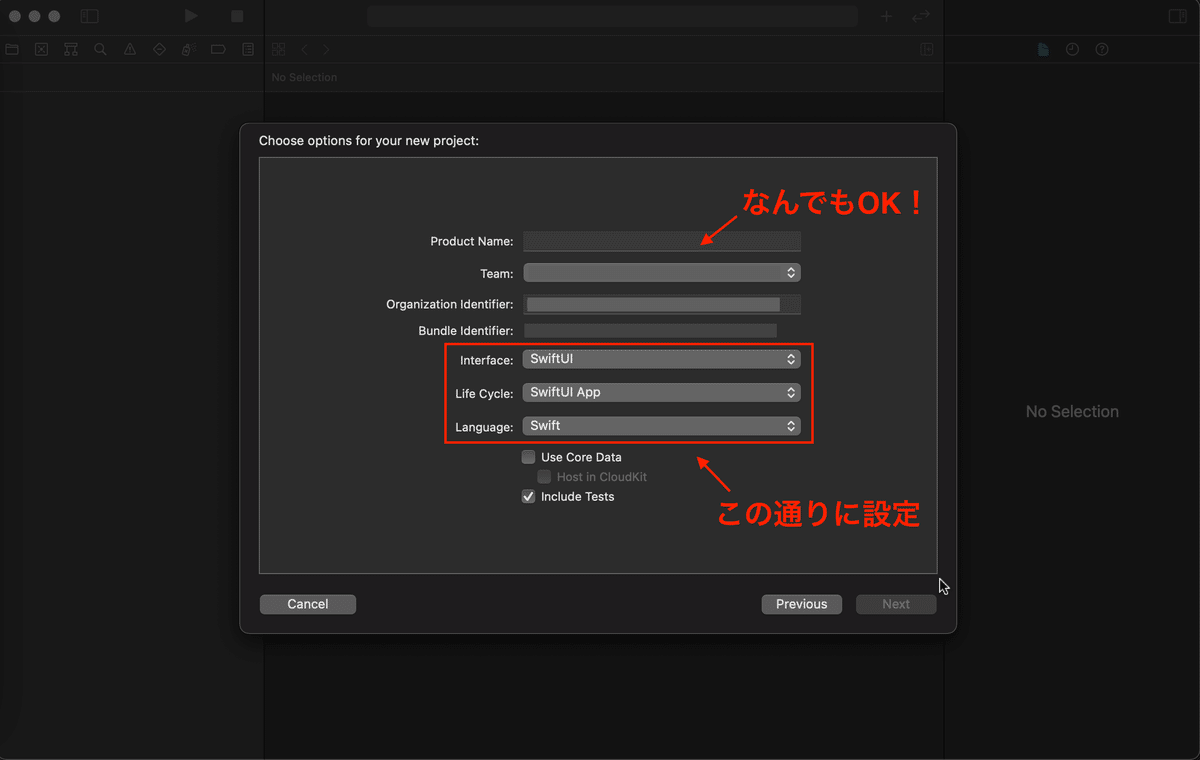
3.Interfaceに【SwiftUI】、LifeCycleに【SwiftUI App】、Languageに【Swift】を選択し、Nextを押下する。

これでプロジェクトファイルの作成が完了です。
テキストの表示
下記にテキスト表示用のソースコードの例を記載してます。
Text("Hello, world!") // preview画面の中央に"Hello, world!"が表示される。Text("Hello, world!")
.font(.title) // "Hello, world!"のフォントタイプが【.title】になる。Text("Hello, world!")
.foregroundColor(Color.green) // "Hello, world!"のテキスト色を緑になる。ボタンの表示
Button(action: {
    // ボタンを押下した時の処理内容をここに記載する。
}, label: {
    Text("Button") // ボタンの表示内容を設定する。
})
Viewの呼び出し
View用のファイルを新規作成し、呼び出します。
// 呼び出し元View
struct TextView: View {

    var body: some View {
        Text("TextView")
    }
}
// 呼び出し先View
struct ContentView: View {
var body: some View {
TextView() // structをインスタンス化し、呼び出す。
}
}各UIをまとめて表示
VStack(縦にUIを構成する。)
VStack { // 垂直方向にUIを纏める。
    Text("Hello, world!")
        .font(.largeTitle)
        .foregroundColor(Color.yellow)
    Text("Hello, world!")
    Button(action: {
        btnLbl1 = "Hello, world!!!!"
        }, label: {
            Text(btnLbl1)
        })
}
.padding() // パディング幅を加える。
HStack(横にUIを構成する。)
HStack { // 水平方向にUIを纏める。
    Text("Hello, world!")
        .font(.largeTitle)
        .foregroundColor(Color.yellow)
    Button(action: {
        btnLbl1 = "Hello, world!!!!"
        }, label: {
            Text(btnLbl1)
        })
}
.padding() // パディング幅を加える。
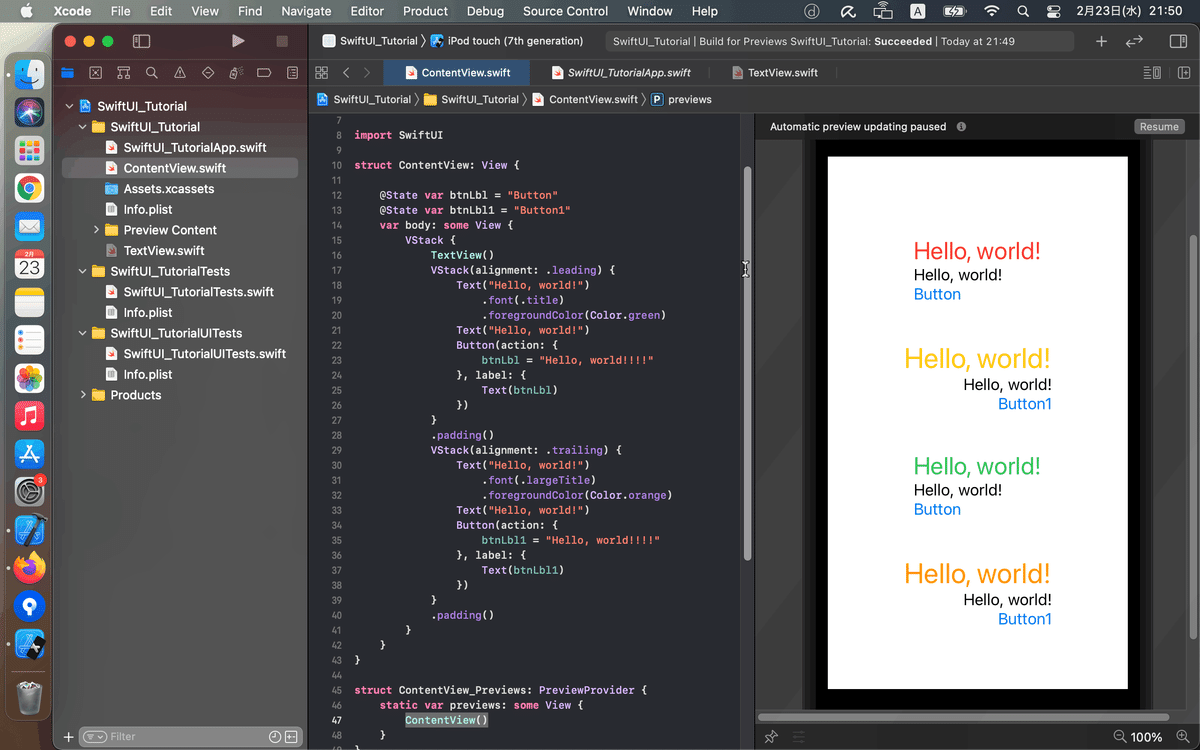
ソース全体

ContentView.swift
import SwiftUI

struct ContentView: View {

    @State var btnLbl = "Button"
    @State var btnLbl1 = "Button1"
    var body: some View {
        VStack {
            TextView()
            VStack(alignment: .leading) {
                Text("Hello, world!")
                    .font(.title)
                    .foregroundColor(Color.green)
                Text("Hello, world!")
                Button(action: {
                    btnLbl = "Hello, world!!!!"
                }, label: {
                    Text(btnLbl)
                })
            }
            .padding()
            VStack(alignment: .trailing) {
                Text("Hello, world!")
                    .font(.largeTitle)
                    .foregroundColor(Color.orange)
                Text("Hello, world!")
                Button(action: {
                    btnLbl1 = "Hello, world!!!!"
                }, label: {
                    Text(btnLbl1)
                })
            }
            .padding()
        }
    }
}

struct ContentView_Previews: PreviewProvider {
    static var previews: some View {
        ContentView()
    }
}
TextView.swift
import SwiftUI

struct TextView: View {

    @State var btnLbl = "Button"
    @State var btnLbl1 = "Button1"
    var body: some View {
        VStack {
            VStack(alignment: .leading) {
                Text("Hello, world!")
                    .font(.title)
                    .foregroundColor(Color.red)
                Text("Hello, world!")
                Button(action: {
                    btnLbl = "Hello, world!!!!"
                }, label: {
                    Text(btnLbl)
                })
            }
            .padding()
            VStack(alignment: .trailing) {
                Text("Hello, world!")
                    .font(.largeTitle)
                    .foregroundColor(Color.yellow)
                Text("Hello, world!")
                Button(action: {
                    btnLbl1 = "Hello, world!!!!"
                }, label: {
                    Text(btnLbl1)
                })
            }
            .padding()
        }
    }
}

struct TextView_Previews: PreviewProvider {
    static var previews: some View {
        TextView()
    }
}
おわりに
今回は以下に関して、学習しました。
● プロジェクトファイルの作成・設定
● Text()の使い方
● Button()の使い方
● VStack、HStackの使い方
● 別ファイルで作成したViewをメインViewに表示
ソースコードを雑に書いてしまったので、反省してます…(>人<;)
次回から丁寧に書く様にします(^o^)/
