
ComfyUIからPyramid-Flowで遊ぶメモ

このメモを読むと
・Pyramid-Flowでの動画生成を試せる
検証環境
・OS : Windows11
・Mem : 64GB
・GPU : GeForce RTX™ 4090
・ローカル(pyenv+venv)
・python 3.10.12
・2024/10/M時点
Pyramid-Flow
ローカル環境で動作可能な動画生成AI
MITライセンスです。(商用利用も可)
試してみましょう!
事前準備
ComfyUIを使って作業を行うため、まずはこちらを導入します。
環境構築
とても簡単です!
1. ComfyUIを最新化し、仮想環境立ち上げ
cd ComfyUI
git pull
.venv\scripts\activate
2. 追加のコンポーネント導入
cd custom_nodes
git clone https://github.com/kijai/ComfyUI-PyramidFlowWrapper.git
cd ComfyUI-PyramidFlowWrapper
pip install -r requirements.txt
cd ..
git clone https://github.com/Kosinkadink/ComfyUI-VideoHelperSuite.git
cd ComfyUI-VideoHelperSuite
pip install -r requirements.txt
3. 追加パッケージのインストール
pip install protobuf4. 追加ファイルダウンロード用のスクリプト(pyファイル)作成
cd ../..
type nul > snapshot_dl.py
# 下記をスクリプトとして保存
# path/to/your/ComfyUI/snapshot_dl.py
###
import os
from huggingface_hub import snapshot_download
base_dir = os.path.dirname(os.path.abspath(__file__))
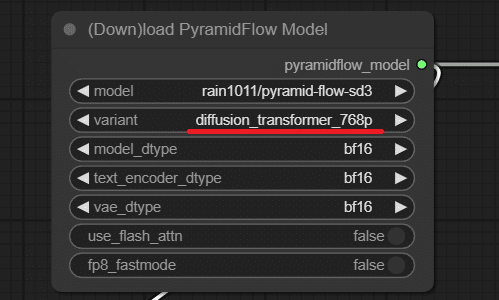
model_path = os.path.join(base_dir, "models", "pyramidflow", "pyramid-flow-sd3")
snapshot_download("rain1011/pyramid-flow-sd3", local_dir=model_path, local_dir_use_symlinks=False, repo_type='model')5. スクリプトを実行し、追加ファイルをダウンロード
python snapshot_dl.pyComfyUI
├ snapshot_dl.py
├ custom_nodes
│ ├ ComfyUI-PyramidFlowWrapper
│ └ ComfyUI-VideoHelperSuite
└ models
└ pyramidflow
└ pyramid-flow-sd3
├─── causal_video_vae ( 2 Files )
├─── diffusion_transformer_384p ( 2 Files )
├─── diffusion_transformer_768p ( 2 Files )
├─── text_encoder ( 2 Files )
├─── text_encoder_2 ( 2 Files )
├─── text_encoder_3 ( 4 Files )
├─── tokenizer ( 4 Files )
├─── tokenizer_2 ( 4 Files )
└─── tokenizer_3 ( 4 Files )
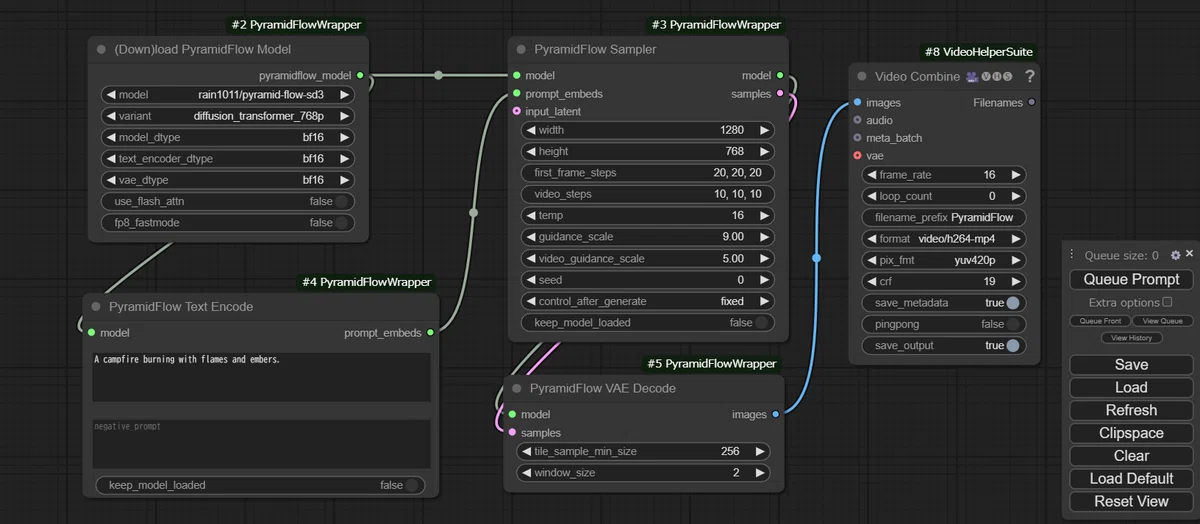
6. 画像(ワークフロー)のダウンロード
こちら から画像をダウンロードします。

完了です!
Pyramid-Flowを動かしてみる
動画を生成してみましょう。
1. 下記コマンドにて、ComfyUIを起動
python main.py
2. 先ほど保存した画像をUI画面へdrag&dropし、ワークフロー呼び出し

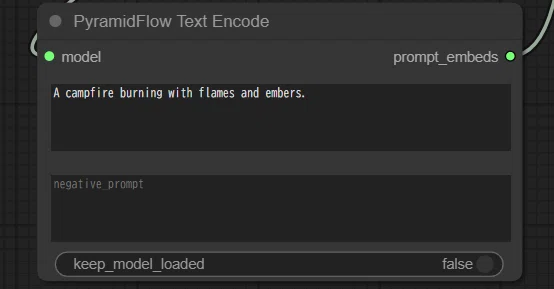
3. 解像度を選択し、好きな生成文(prompt)を記述
4. 生成開始

5. できた
Pyramid-Flow pic.twitter.com/1mOkrY3srF
— おれっち (@__olender) October 11, 2024
消費VRAM 10GBくらいでした。
おわり
テキストから動画を生成できた。
まだ使いこなせておらず、生物系は悪夢のような動画がよく生成されます。
感覚的に、無機物の生成は比較的うまくいくことが多いです。
i2v にも対応できるようで、次回はそちらも試してみたい。
おしょうしな
参考にさせていただきました。ありがとうございました。