segment-anything-2で遊ぶメモ
このメモを読むと
・segment-anything-2を試せる
・動画からオブジェクトを抜き出せる
検証環境
・OS : Ubuntu 22.04(WSL on Windows11)
・Mem : 64GB
・GPU : GeForce RTX™ 4090
・ローカル
・python 3.10.12
・2024/8/B時点
segment-anything-2
Meta(旧Facebook)が提供するセグメンテーションモデル。
動画から高い精度で任意のオブジェクトを抽出できるようです。
試してみましょう!
事前準備
cuda+cudnnが必要なので、今回はDockerを活用してお手軽に構築します。
DドライブにUbuntuを入れるメモ | おれっち
UbuntuにDockerを入れるメモ | おれっち
DockerでGPUを使うメモ
環境構築
とても簡単です!
作業環境はWSL上のUbuntuです。
1. Docerfileとdocker-compose.ymlを作成します。
Dockerfile
FROM nvidia/cuda:12.3.1-devel-ubuntu22.04
RUN ln -sf /usr/share/zoneinfo/Asia/Tokyo /etc/localtime
RUN apt -y update && apt -y upgrade
RUN apt -y install python3 python3-pip python3-venv python3-tk git libopencv-dev wget
RUN apt -y update && apt -y upgrade
RUN ln -s /usr/bin/python3.10 /usr/bin/python
RUN pip install --upgrade pip
WORKDIR /app
docker-compose.yml
services:
  app:
    build: .
    tty: true
    stdin_open: true
    volumes:
      - ./:/app
      - /tmp/.X11-unix:/tmp/.X11-unix
    shm_size: 8g
    runtime: nvidia
    environment:
      - NVIDIA_VISIBLE_DEVICES=all
      - NVIDIA_DRIVER_CAPABILITIES=all
      - DISPLAY=${DISPLAY}
    ports:
- "8888:8888" 
2. 上記Dockerを立ち上げcuda環境を構築
cd ~/DevWS/cuda
docker compose up -d
docker compose exec app bash
3. リポジトリをインストールし、ディレクトリ移動
git clone https://github.com/facebookresearch/segment-anything-2.git
cd segment-anything-2
4. 仮想環境を作成し、環境切替
python -m venv .venv
source .venv/bin/activate
5. 追加パッケージのインストール
pip install -e ".[demo]"6. 追加weightのダウンロード
cd checkpoints
./download_ckpts.sh
完了です!
segment-anything-2を試してみる
動画から物体を抜き出してみましょう。
動画を用意
好きな動画を用意し、/segment-anything-2 直下へ保存します。
今回はpixabayから選んできました。
スクリプトを用意
下記スクリプトを、/segment-anything-2 直下へ保存します。
引数 video_path を用意した動画のパスへ変更します。
# run.py

import os
import re
import torch
import numpy as np
import cv2
from tqdm import tqdm
import matplotlib.pyplot as plt
import tkinter as tk
from PIL import Image, ImageTk
from sam2.build_sam import build_sam2_video_predictor

# パラメータ
# 遊びたい動画ファイルのパス
video_path = "./sample.mp4"

def get_click_coordinates(image_path):
    # 画像上のクリック座標を取得
    def on_click(event):
        nonlocal coordinates
        coordinates = [event.x, event.y]
        root.quit()
    root = tk.Tk()
    image = Image.open(image_path)
    photo = ImageTk.PhotoImage(image)
    canvas = tk.Canvas(root, width=image.width, height=image.height)
    canvas.pack()
    canvas.create_image(0, 0, anchor=tk.NW, image=photo)
    canvas.bind("<Button-1>", on_click)
    coordinates = None
    root.mainloop()
    root.destroy()
    return coordinates

def make_frames(video_path, output_dir):
    # 動画をフレームに分割
    cap = cv2.VideoCapture(video_path)
    frame_paths = []
    frame_count = 0
    while True:
        ret, frame = cap.read()
        if not ret:
            break
        frame = cv2.cvtColor(frame, cv2.COLOR_BGR2RGB)
        frame_path = os.path.join(output_dir, f"{frame_count:05d}.jpg")
        Image.fromarray(frame).save(frame_path, quality=95)
        frame_paths.append(frame_path)
        frame_count += 1
    cap.release()
    return frame_paths

def apply_mask(out_mask, obj_id, frame_path, tmp_dir="./output", random_color=False):
    # マスクを画像に適用
    original_image = Image.open(frame_path).convert("RGBA")
    if random_color:
        color = np.concatenate([np.random.random(3), np.array([0.6])], axis=0)
    else:
        cmap = plt.get_cmap("tab10")
        cmap_idx = 0 if obj_id is None else obj_id
        color = np.array([*cmap(cmap_idx)[:3], 0.6])
    h, w = out_mask.shape[-2:]
    mask_image = out_mask.reshape(h, w, 1) * color.reshape(1, 1, -1)
    mask_image = Image.fromarray((mask_image * 255).astype(np.uint8), mode="RGBA")
    mask_image = mask_image.resize(original_image.size, Image.NEAREST)
    result = Image.alpha_composite(original_image, mask_image)
    os.makedirs(tmp_dir, exist_ok=True)
    name, _ = os.path.splitext(os.path.basename(frame_path))
    output_filename = f"masked_{obj_id}_{name}.png"
    output_path = os.path.join(tmp_dir, output_filename)
    result.save(output_path, format="PNG")
    return

def create_video(image_folder, output_dir, output_video, fps=30):
    # マスキング画像を集約し、動画を作成
    images = [img for img in os.listdir(image_folder) if img.startswith("masked_1_") and img.endswith(".png")]
    images.sort(key=lambda x: int(re.findall(r'\d+', x)[-1]))  # 数字でソート
    if not images:
        print("No matching images found.")
        return
    frame = cv2.imread(os.path.join(image_folder, images[0]))
    height, width, layers = frame.shape
    fourcc = cv2.VideoWriter_fourcc(*'mp4v')
    output_path = os.path.join(output_dir, output_video)
    video = cv2.VideoWriter(output_path, fourcc, fps, (width, height))
    for image in images:
        video.write(cv2.imread(os.path.join(image_folder, image)))
    video.release()
    print(f"Video creation completed: {output_path}")
    return

def main():
    torch.autocast(device_type="cuda", dtype=torch.bfloat16).__enter__()
    if torch.cuda.get_device_properties(0).major >= 8:
        torch.backends.cuda.matmul.allow_tf32 = True
        torch.backends.cudnn.allow_tf32 = True

    sam2_checkpoint = "./checkpoints/sam2_hiera_large.pt"
    model_cfg = "sam2_hiera_l.yaml"
    predictor = build_sam2_video_predictor(model_cfg, sam2_checkpoint)

    output_dir_name = "./result"
    frames_dir_name = "temp_frames"
    tmp_dir_name = "tmp_images"
    ann_obj_id = 1  # このIDで注釈されたオブジェクトを追跡

    video_name = os.path.splitext(os.path.basename(video_path))[0]
    output_dir = os.path.join(output_dir_name, video_name)
    frames_dir = os.path.join(output_dir,frames_dir_name)
    tmp_dir = os.path.join(output_dir,tmp_dir_name)
    os.makedirs(tmp_dir, exist_ok=True)
    os.makedirs(output_dir, exist_ok=True)
    os.makedirs(frames_dir, exist_ok=True)
    frame_paths = make_frames(video_path, frames_dir)
    click_coords = get_click_coordinates(frame_paths[0])

    # 注釈されたオブジェクトを追跡
    inference_state = predictor.init_state(video_path=frames_dir)
    predictor.reset_state(inference_state)
    points = np.array([click_coords], dtype=np.float32)
    labels = np.array([1], np.int32)
    _, out_obj_ids, out_mask_logits = predictor.add_new_points(
        inference_state=inference_state,
        frame_idx=0,
        obj_id=ann_obj_id,
        points=points,
        labels=labels,)
    video_segments = {}  # フレームごとのセグメンテーション結果
    for out_frame_idx, out_obj_ids, out_mask_logits in predictor.propagate_in_video(inference_state):
        video_segments[out_frame_idx] = {
            out_obj_id: (out_mask_logits[i] > 0.0).cpu().numpy()
            for i, out_obj_id in enumerate(out_obj_ids)}

    # レンダリング
    vis_frame_stride = 1
    for out_frame_idx in tqdm(range(0, len(frame_paths), vis_frame_stride), desc="Applying masks", unit="frame"):
        for out_obj_id, out_mask in video_segments[out_frame_idx].items():
            apply_mask(out_mask, out_obj_id, frame_paths[out_frame_idx], tmp_dir)
    create_video(tmp_dir, output_dir, 'output_video.mp4')

if __name__ == "__main__":
    main()
実行
用意したスクリプトを実行します。
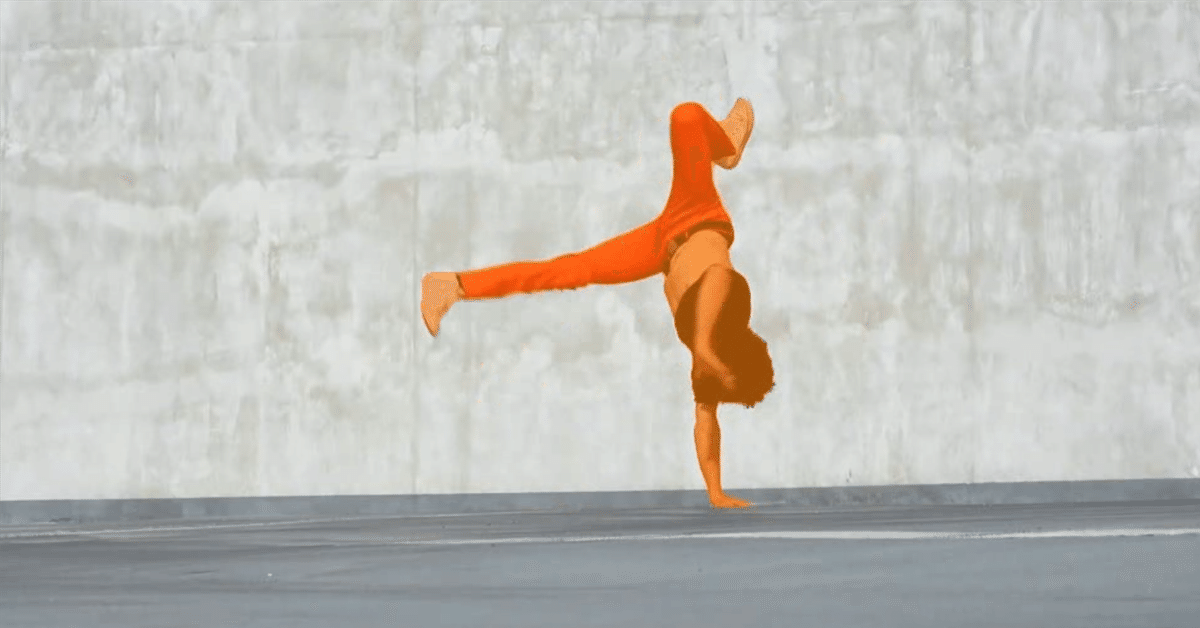
python run.py選択した動画のサムネイルが表示されるので、抜き出したい物体をクリックします。
結果
./result へ結果が出力されます。
ぐるぐーる pic.twitter.com/hTqbt9lCUu
— おれっち (@__olender) August 3, 2024
おまけ
こんなエラーが出たら
OSError: [WinError 126] 指定されたモジュールが見つかりません。 Error loading "C:\Users\owner\AppData\Local\Temp\pip-build-env-4mypfhm_\overlay\Lib\site-packages\torch\lib\fbgemm.dll" or one of its dependencies.
1. こちらから libomp140.x86_64_x86-64.zip をDLし解凍
2. C:\Windows\System32 へ libomp140.x86_64.dll を格納

これでエラーがなくなります。
おわり
動画をから物体をセグメンテーションできた。
ここまで精度が高いと物体切り抜き作業がかなり捗りそう。
画像生成のV2Vにも応用できそうですね。
ConfyUIを使えばもっとお手軽にいろいろ試せるようなので、そちらも導入して実験してみたいと思います。
