
Part2 Djangoのall-authライブラリでユーザー認証からソーシャルアカウントログイン

この記事はPart1 Djangoのall-authライブラリでユーザー認証からソーシャルアカウントログインの続きです。
独自テンプレートを準備する
自身でテンプレートを用意していればいつでも見た目の変更ができるので用意しましょう。
templatesフォルダの中にaccountフォルダを作り、その中に
login.html
logout.html
signup.html
verification_sent.html
email_confirm.html
password_reset.html
password_reset_done.html
password_reset_from_key.html
password_reset_from_key_done.html
を作りましょう。
ついでにtemplatesフォルダの中にsocialaccountフォルダも作りましょう。
templates/account/login.html
{% extends 'base.html' %}

{% block content %}
<h1>ログイン</h1>
<form method="post">
 {% csrf_token %}
 {{ form.as_p }}
 <button type="submit">ログイン</button>
 <p><a class="button" href="{% url 'account_reset_password' %}">パスワードをお忘れですか?</a></p>
 <p><a class="button" href="{% url 'index' %}">トップページへ</a></p>
</form>
{% endblock %}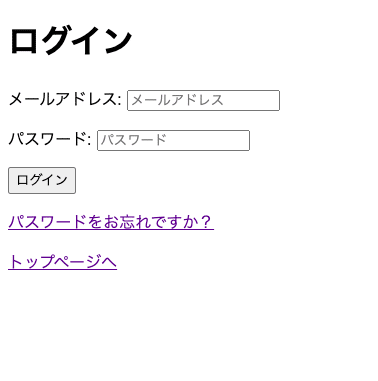
templates/account/logout.html
{% extends 'base.html' %}

{% block content %}
 <h1>ログアウト</h1>
 <form method="post" action="{% url 'account_logout' %}">
   {% csrf_token %}
   {% if redirect_field_value %}
   <input type="hidden" name="{{ redirect_field_name }}" value="{{ redirect_field_value }}"/>
   {% endif %}
   <button type="submit">ログアウト</button>
 </form>
{% endblock %}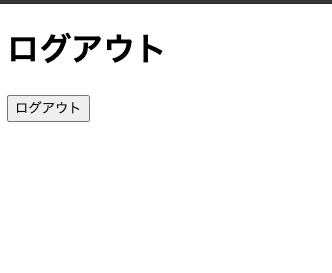
templates/account/signup.html
{% extends 'base.html' %}

{% block content %}
 <h1>新規登録</h1>
   <form method="post">
     {% csrf_token %}
     {{ form.as_p }}
     <button type="submit">登録</button>
  </form>
 <a href="{% url 'account_login' %}">ログイン</a>
 <p><a class="button" href="{% url 'index' %}">トップページへ</a></p>

{% endblock %}
templates/account/verification_sent.html
{% extends 'base.html' %}

{% block content %}
   <h1>確認メールを送信しました</h1>

   <p>受信ボックスを確認してください。</p>

{% endblock %}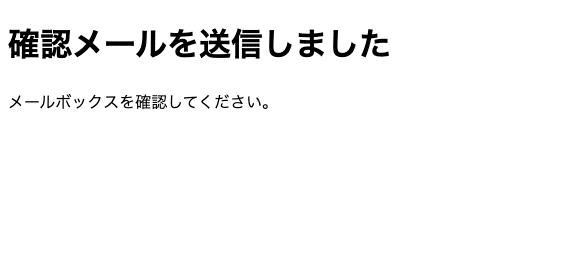
templates/account/email_confirm.html
{% extends 'base.html' %}

{% load account %}

{% block content %}
<h1>メールアドレスの確認</h1>

{% if confirmation %}

{% user_display confirmation.email_address.user as user_display %}

<p>{{ user_display }}様、以下のメールアドレスが正しければ確認をクリックしてください。<a href="mailto:{{ confirmation.email_address.email }}">{{ confirmation.email_address.email }}</a></p>

<form method="post" action="{% url 'account_confirm_email' confirmation.key %}">
{% csrf_token %}
   <button type="submit">確認</button>
</form>

{% else %}

{% url 'account_email' as email_url %}

<p>このメールアドレスの認証期限が過ぎました。もう一度<a href="{{ email_url }}"></a></p>

{% endif %}

{% endblock %}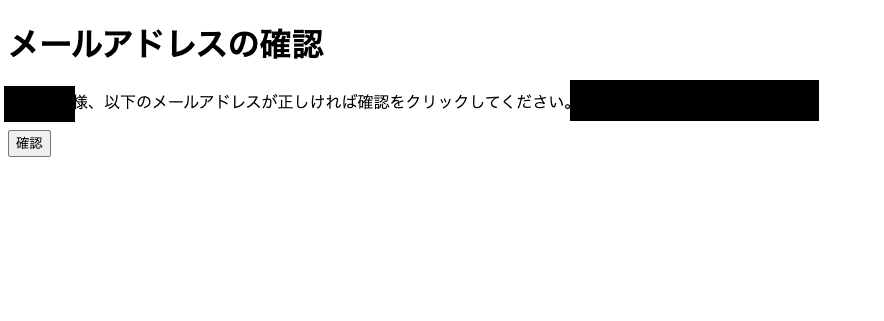
templates/account/password_reset.html
{% extends 'base.html' %}

{% block content %}
 <h1>パスワード再設定</h1>
   {% if user.is_authenticated %}
     {% include "account/snippets/already_logged_in.html" %}
   {% endif %}

 <p>パスワードをお忘れですか? メールアドレス入力後、パスワードリセットメールをお送りします</p>

 <form method="POST" action="{% url 'account_reset_password' %}" class="password_reset">
   {% csrf_token %}
   {{ form.as_p }}
   <input type="submit" value="送信" />
 </form>

{% endblock %}
templates/account/password_reset_done.html
{% extends 'base.html' %}
{% block content %}
 <h1>パスワード再設定</h1>
 <p>パスワード再設定用のメールを送信しました。<br>
 メール受信箱をご確認ください。</p>
{% endblock %}
templates/account/password_reset_form_key.html
{% extends 'base.html' %}

{% block content %}
 <h1>{% if token_fail %}不正なトークンです{% else %}パスワード変更{% endif %}</h1>

 {% if token_fail %}
   {% url 'account_reset_password' as passwd_reset_url %}
   <p>このリンクは既に使用されています。<a href="{{ passwd_reset_url }}">パスワードリンクを再発行する</a></p>
 {% else %}
   {% if form %}
     <form method="POST" action="{{ action_url }}">
       {% csrf_token %}
       {{ form.as_p }}
       <input type="submit" name="action" value="変更"/>
     </form>
   {% else %}
     <p>あなたのパスワードは変更済みです</p>
   {% endif %}
 {% endif %}

{% endblock %}
templates/account/password_reset_from_key_done.html
{% extends 'base.html' %}

{% block content %}
 <h1>パスワードの変更が完了しました。</h1>
 <p>ログインしてください。<a href="{% url 'account_login' %}">ログイン</a></p>
{% endblock %}
templates/socialaccount/signup.html
{% extends "base.html" %}
{% block content %}
<h1>新規登録</h1>
<p>あなたは "{{account.get_provider.name}}"アカウントを使ってログインします。下のフォームを入力してください。
"{{site.name}}"</p>
<form class="signup" id="signup_form" method="post" action="{% url 'socialaccount_signup' %}">
{% csrf_token %}
{{ form.as_p }}
{% if redirect_field_value %}
<input type="hidden" name="{{ redirect_field_name }}" value="{{ redirect_field_value }}" />
{% endif %}
<button type="submit">新規登録 »</button>
</form>
{% endblock %}見栄えもすっきりしました。
ソーシャルアカウントでログイン
今回はgoogleを使用してログインしていきます。
まずはsettings.pyにallauth.socialaccount.providers.googleを追加します。
INSTALLED_APPS = [
   'django.contrib.admin',
   'django.contrib.auth',
   'django.contrib.contenttypes',
   'django.contrib.sessions',
   'django.contrib.messages',
   'django.contrib.staticfiles',
   'accounts',
   'django.contrib.sites',
   'allauth',
   'allauth.account',
   'allauth.socialaccount',
   'allauth.socialaccount.providers.google', # 追加
]
ログインページにgoogle用のリンクをセットします。
templates/account/login.html
{% extends 'base.html' %}

{% block content %}

{% load account socialaccount %}

{% get_providers as socialaccount_providers %}

{% if socialaccount_providers %}

  <div class="socialaccount_ballot">

    <ul class="socialaccount_providers">
      {% include "socialaccount/snippets/provider_list.html" with process="login" %}
    </ul>

  </div>

{% include "socialaccount/snippets/login_extra.html" %}

{% else %}
<p>まだアカウントをお持ちでない方は<a href="{{ account_signup_url }}">新規登録</a>してください</p>
{% endif %}

<h1>ログイン</h1>
<form method="post">
 {% csrf_token %}
 {{ form.as_p }}
 <button type="submit">ログイン</button>
</form>
<p><a class="button" href="{% url 'account_reset_password' %}">パスワードをお忘れですか?</a></p>
<p><a class="button" href="{% url 'index' %}">トップページへ</a></p>
{% endblock %}
includeで読み込んでいる socialaccount/snippet/はallauthライブラリが既に持っています。編集したい人はファイル名をコピーして編集しましょう。
githubページで全ての詳細が確認できます。
allauthのgithubページ
Google Cloud Platformの設定
Google Cloud Platform(GCP)はgoogleアカウントを持っている人はすぐに使えますが、持っていない人はGoogleアカウントを作りましょう。
Google認証するにはgoogle APIの設定が必要になります。
設定が完了するとClient idとSecret keyが発行されるのでそれをDjangoに登録します。
GCPにアクセスするために次のリンクをクリックしましょう。
個々によって多少ページの表示に違いがあると思いますが、赤枠をクリックして新しいプロジェクトを作ります。
画像の文字は全て英文になっていますが、わかりにくい方は一番左にあるアイコンを見て行うことをお勧めします。

NEW PROJECTをクリック

プロジェクト名はデフォルトでも自身でわかりやすい名前を付けてもらっても構いません。LocationはNo organizationで大丈夫です。
CREATEをクリックしたらプロジェクトの完成です。

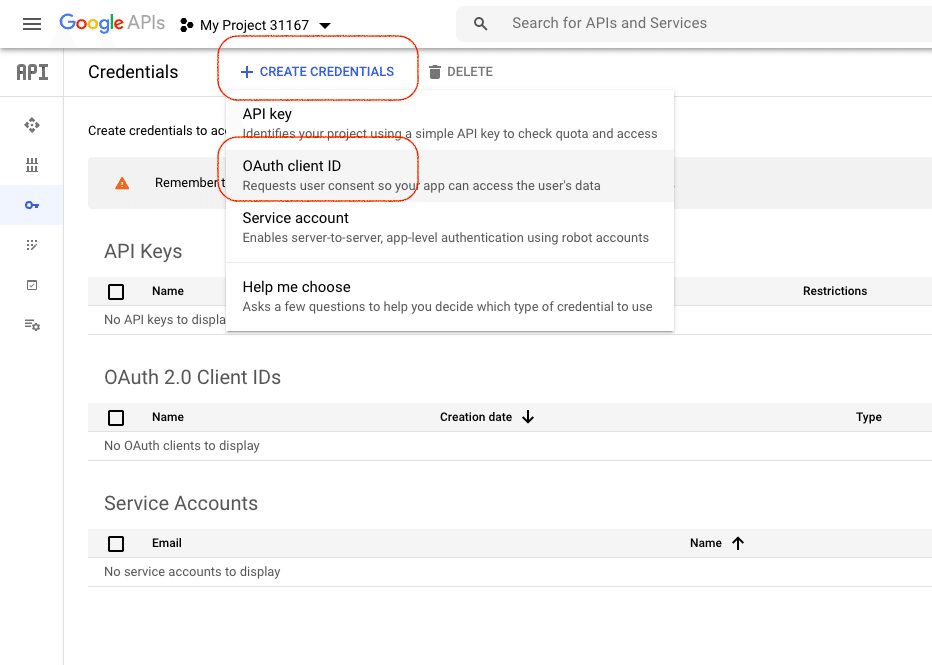
ダッシュボード画面に戻ってきたら先ほど作ったプロジェクト(My Project 31167)に移動もしくは既に移動されています。(API とサービス)そのページのCredentialsをクリックします。

+CREATE CREDENTIALS → OAuth client IDをクリックします。
Configure consent screen をクリックします。

External → CREATE

App name と User support emailを入力します。

Application home pageはローカルのhttp://127.0.0.1:8000を入力します。
Developer contact informationにメールアドレスを入力してSAVE AND CONTINUE をクリックします。

そしてScopes と Test userは何も入力せずにSAVE AND CONTINUEをクリックします。

最後のSummaryでBACK TO DASHBOARD をクリックします。

ダッシュボードに戻り再びCredentialsをクリックします。
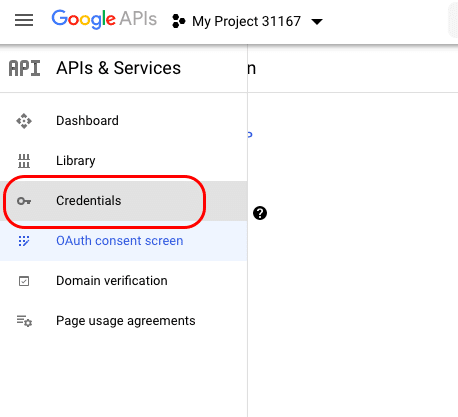
そして+CREATE CREDENTIALS → OAuth client IDをクリックします。

Application typeをWeb applicationにして、 Nameに任意の名前を入力します。 Authorized redirect URIsのURIsにallauthライブラリが指定しているURIsを貼り付けます。http://127.0.0.1:8000/accounts/google/login/callback/
以下のページで確認できます。
https://django-allauth.readthedocs.io/en/latest/providers.html#google
最後に画像には写っていませんが一番下のCREATINGボタンをクリックします。

これでClient idとSecret keyが取得できました。

Client idとSecret keyをDjangoに保存
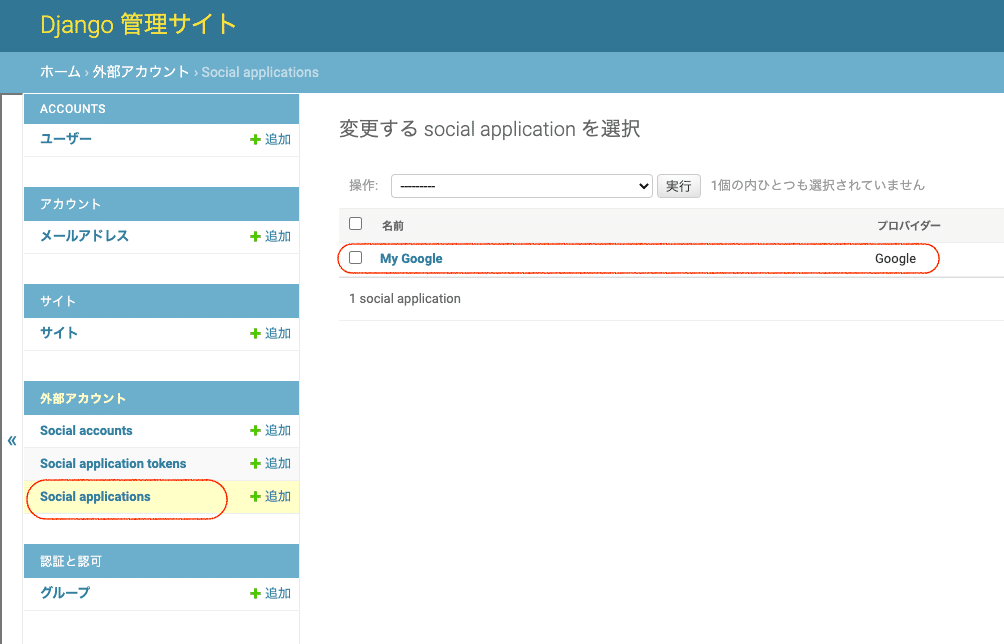
admin画面を開き外部アカウントのsocial applicationをクリックします。
そして、画面右上のsocial application を追加をクリックして中身を入力します。
名前の項目に好きな名前を入力し取得し、先ほど取得したClient idとSecret keyを入力しSitesも右の枠に移動させ保存ボタンをクリックします。

保存後の表示画面。
これでDjangoにClient idとSecret keyを保存することができました。
APIを有効にする
取得したClient idとSecret keyをDjangoに保存したら、google APIを有効にしておきます。※既に有効にしている人はこの手順を飛ばしてください。
GCPの画面に戻り画面左サイドバーのDashboardをクリックします。

ENABLE AND SERVICESをクリックします。

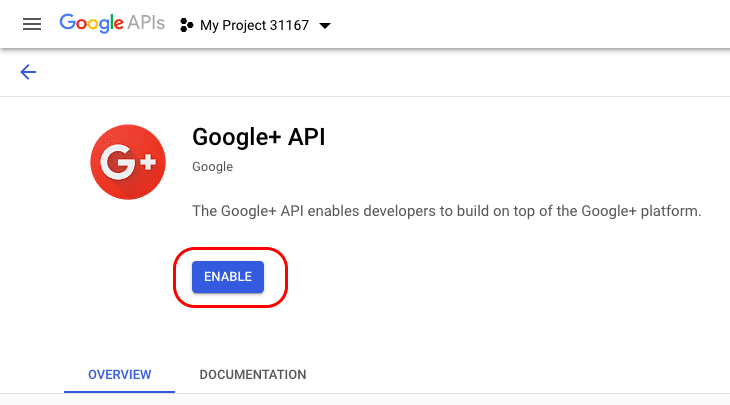
検索バーに "google plus" と入力したらGoogle APIが表示されるのでクリックします。

ENABLEをクリックしたらAPIが使用できます。
これで全ての準備が整いました。
Google認証の確認
ターミナルでサーバーを起動させます。
python manage.py runserverログインしている人はログアウトしてログインページに遷移します。

使用したいGoogleアカウントを選択します。

既にアカウントを持っている人はそのまま下のページのように簡単にログインできます。

最後に
2回に分けてallauthを使用したDjangoの認証を解説しました。
allauthは様々なアカウントでログインできるので試してみてください。
あとpart1で作ったカスタムユーザーモデルでいろいろフィールドを追加するともっと幅が広がります。