【保存版】SVG徹底解説!アニメーション・フルオンチェーンNFTを作ろう!

こんにちは、CryptoGamesの高橋です。
クリスペの会社で働いています。
本日は、アニメーション・フルオンチェーンNFTを作成するためにSVGについて学んでいきます。
なお、こちらの記事は無料で公開していますので、ご自由にご利用いただけます。
また、記事の作成にあたり、次の2つの記事を大いに参考にしました。
また、フルオンチェーンNFTの作成については、こちらの記事をご参照ください。
0 SVGとは?
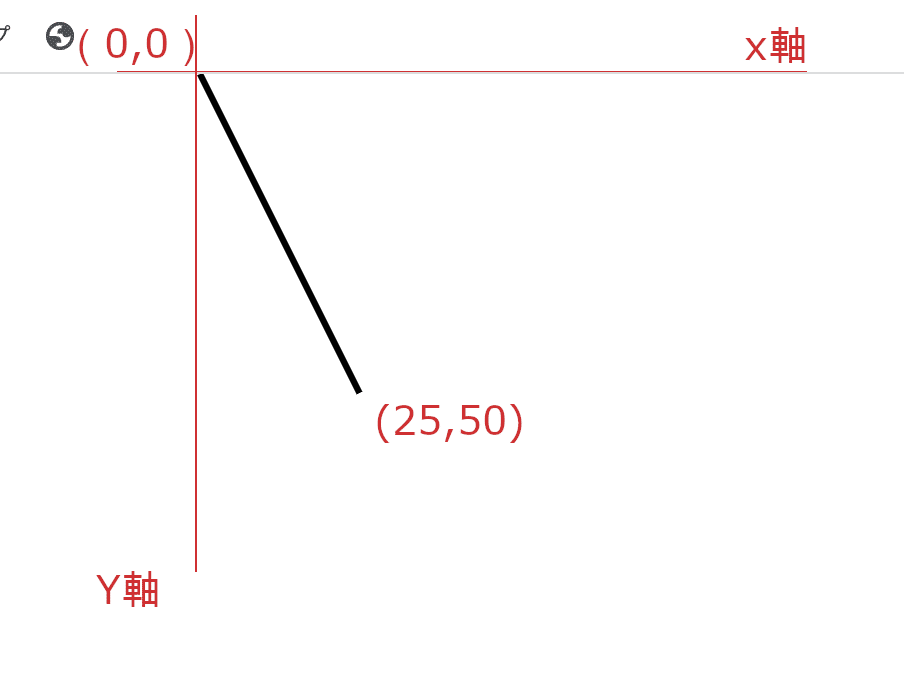
svgとはXY座標で描画されたファイルです。
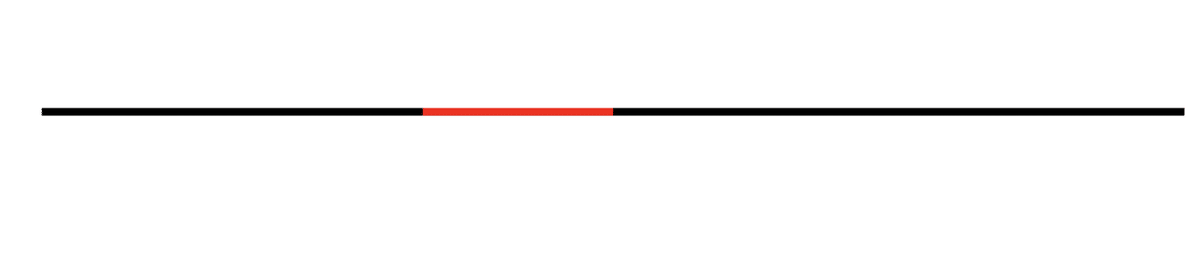
例えばこんな画像です。
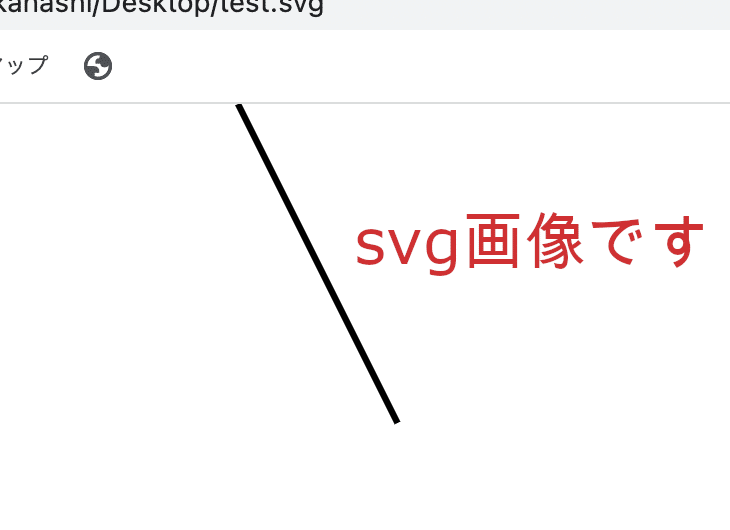
一見、pngファイルと同じようですが、実はこの中身は下のようなコードで書かれています。
<svg xmlns='http://www.w3.org/2000/svg' viewBox='0 0 200 200'>
 <path stroke="black" stroke-width="1" fill="none" d="M 0 0 L25 50" />
</svg>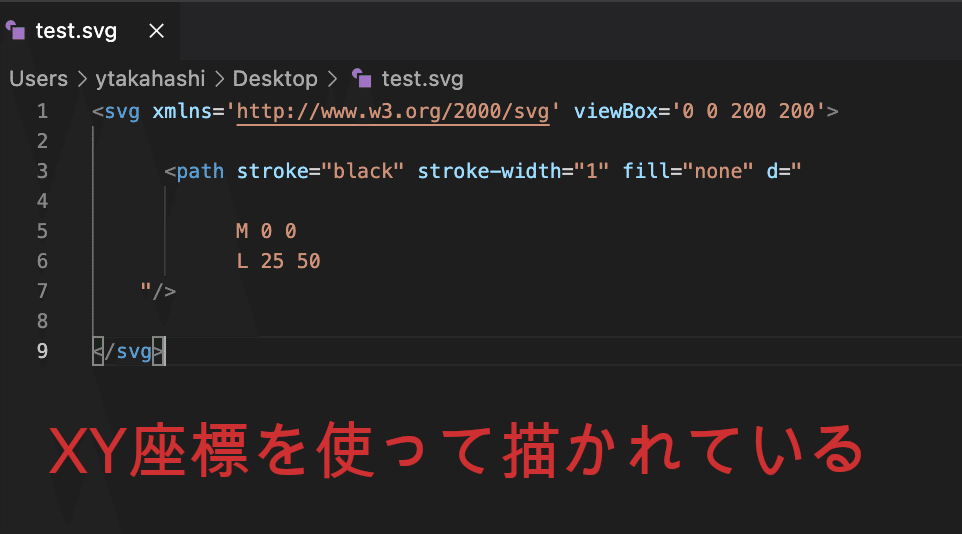
では、具体的にどのように描かれているのかを見てみましょう。ぜひ、ご自身でも「.svg」のsvgファイルを作ってみてください。
1 pathタグについて
図形を描く時には「path」タグを用います。「d=」以降で、どんな図形を描くのかを指定していきます。
なお、四角形、丸などの決まった形には別のタグを使う方が便利です。
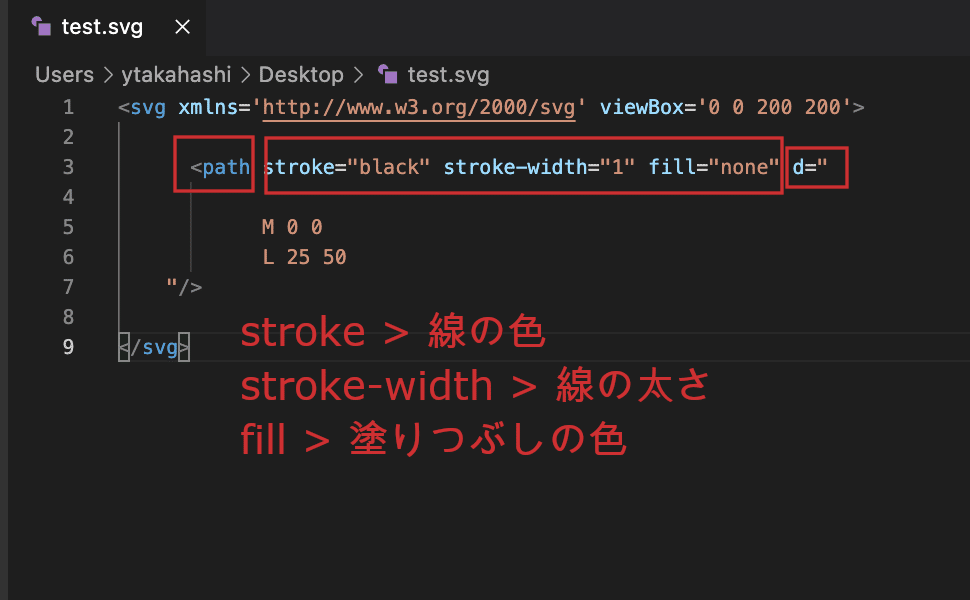
ちなみに、上のように
① stroke > 線の色
② stroke-width > 線の太さ
③ fill > 塗りつぶしの色
を表します。
2 M(大文字)について(スタート位置)
大文字のMはスタートの位置を表します。

つまり、この位置が(0,0)であることがわかりました。

3 L(大文字)について(直線を引く)
大文字のLは直線を引くという意味です。
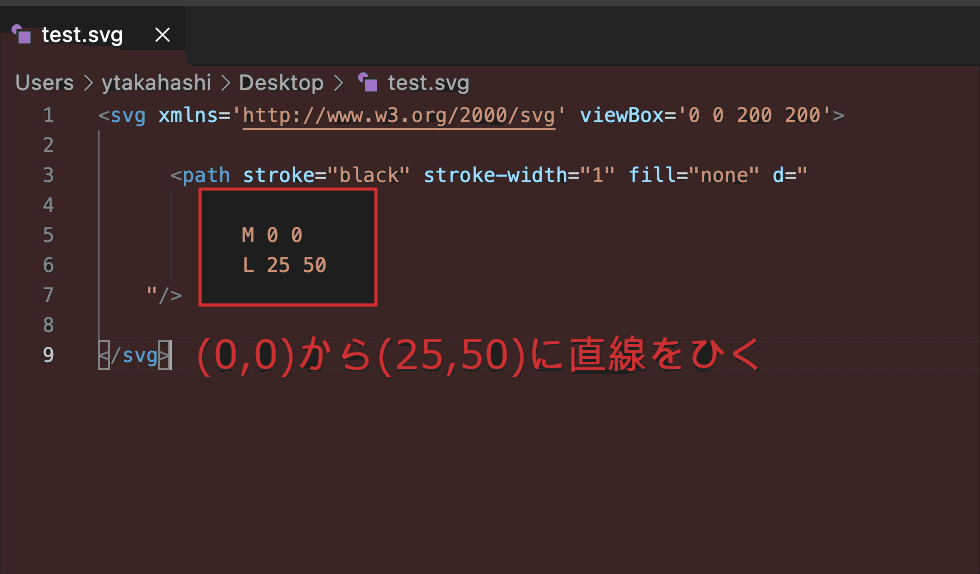
つまり、こんな感じだったのですね。
4 l(小文字)について(直線を引く)
では、この下のように小文字のlにした場合、どうなるでしょうか。
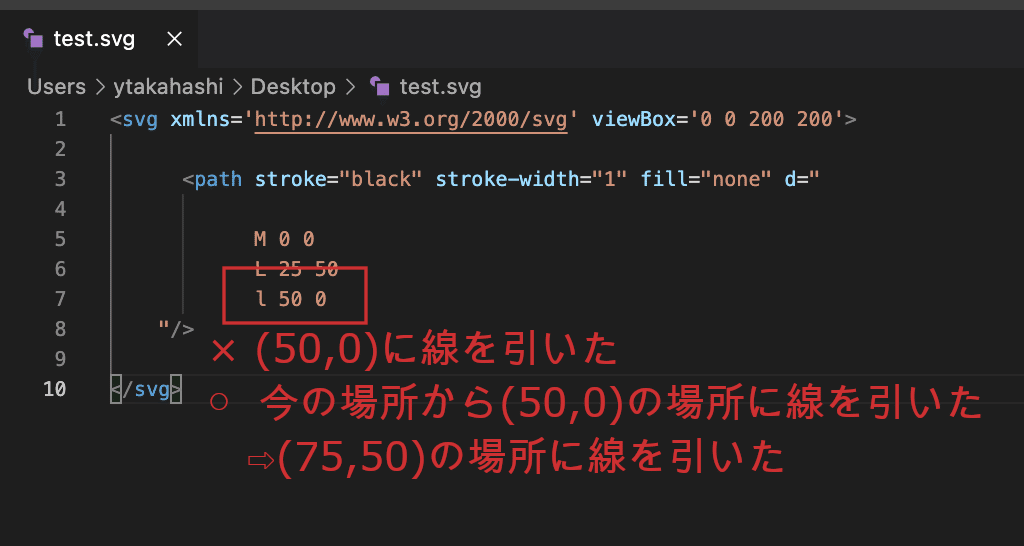
大文字 ⇨ 絶対参照
小文字 ⇨ 相対参照
になります。難しそうですが、言っていることは簡単です。
① L(50,0)
⇨(50,0)の場所に向かって線を引く
② l(50,0)
⇨今の場所から (50,0)の場所に向かって線を引く
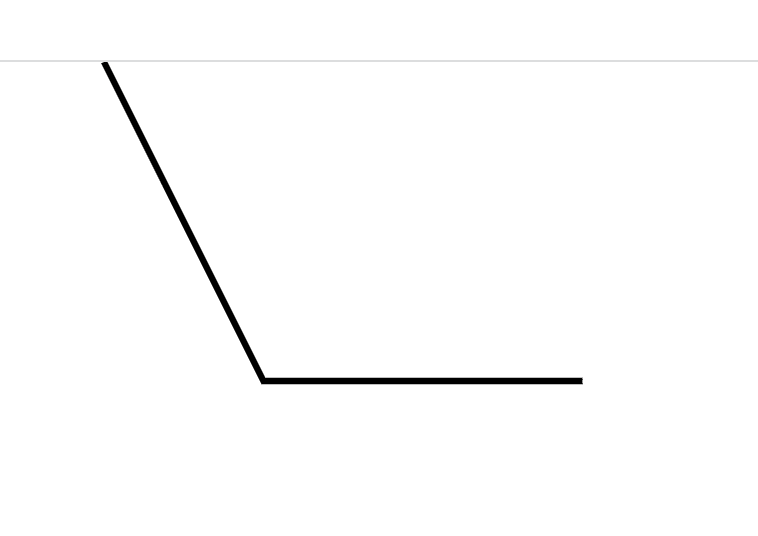
こんな風になりました。予想はあっていましたか??
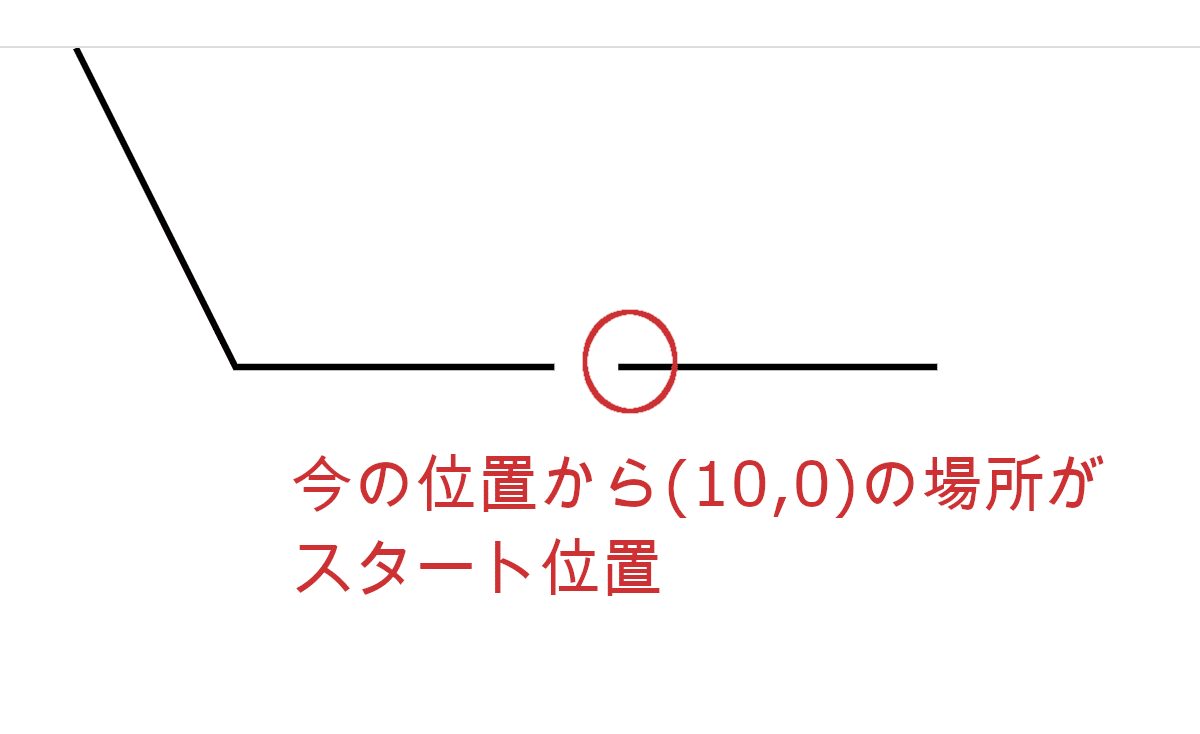
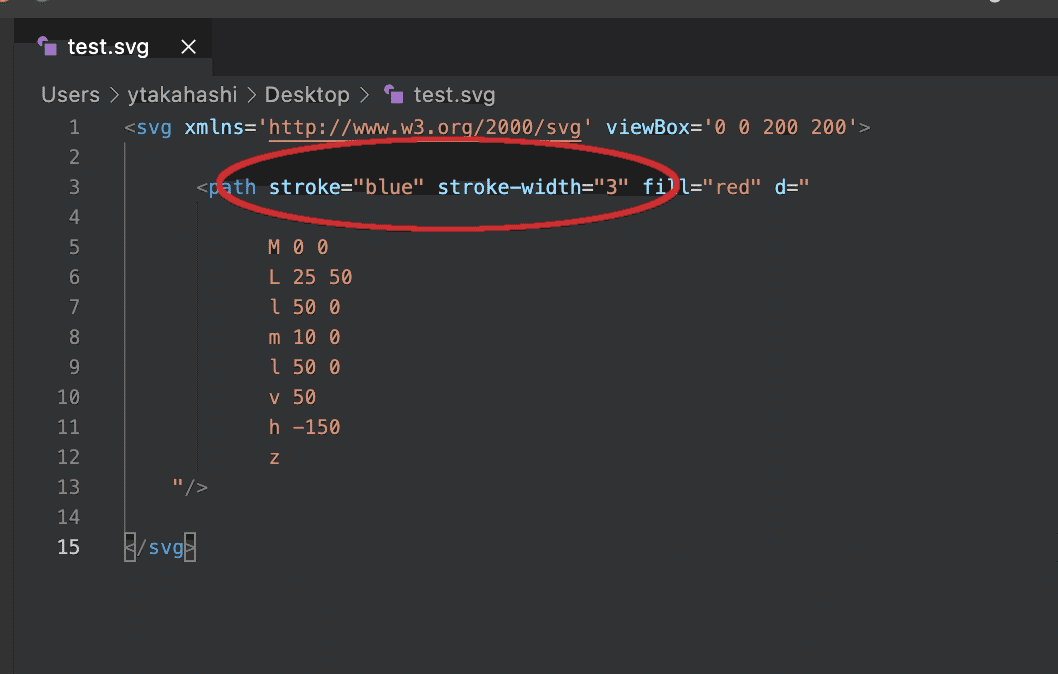
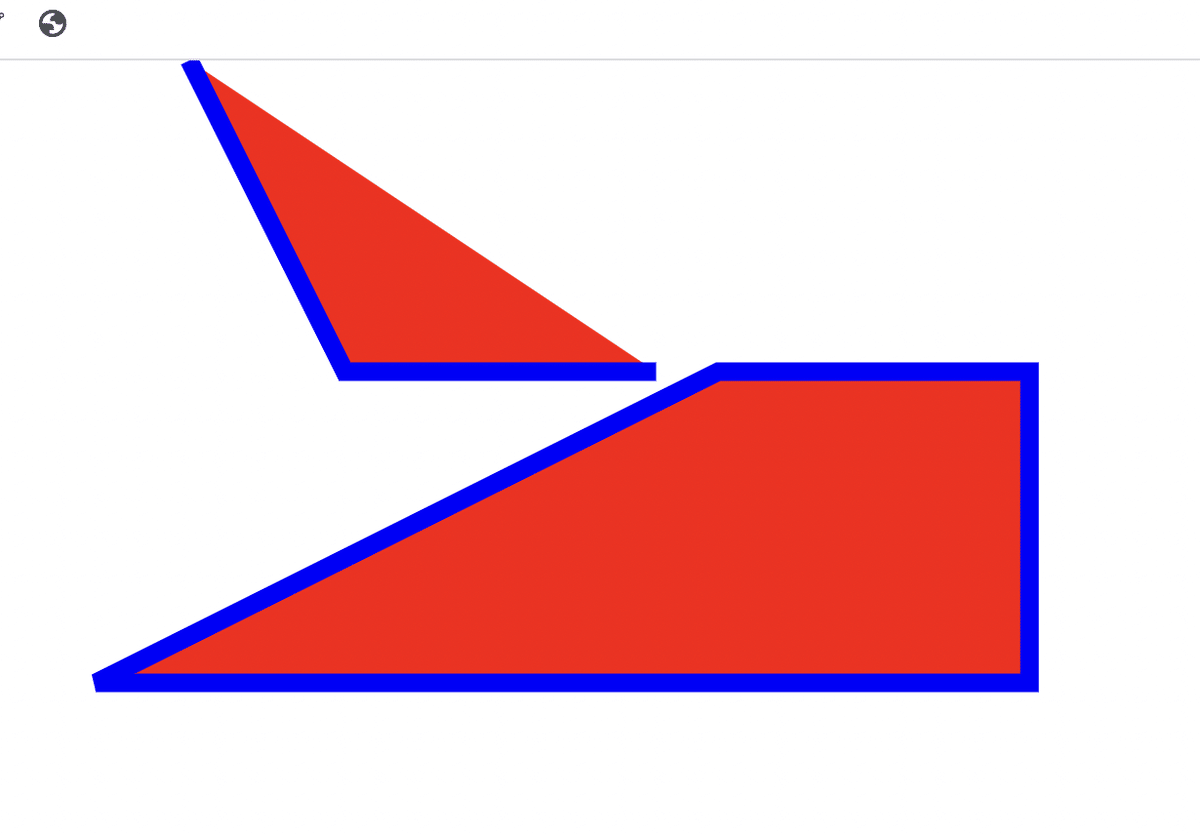
5 m(小文字)について(スタート位置)
下についてはどのようになりますでしょうか。
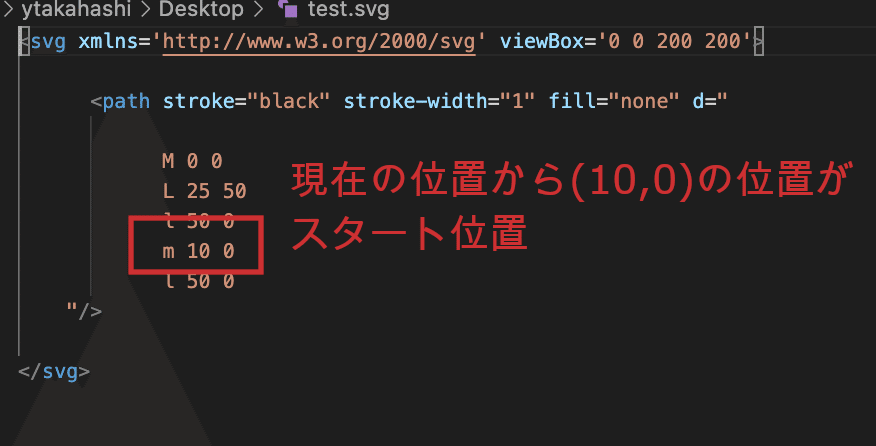
やはり小文字は相対参照なので、今の位置から(10,0)の位置がスタート位置になります。
6 Vについて(垂直線を引く)
大文字と小文字の関係については他も同じです。
ここからはわかりやすいように基本小文字でやっていきます。
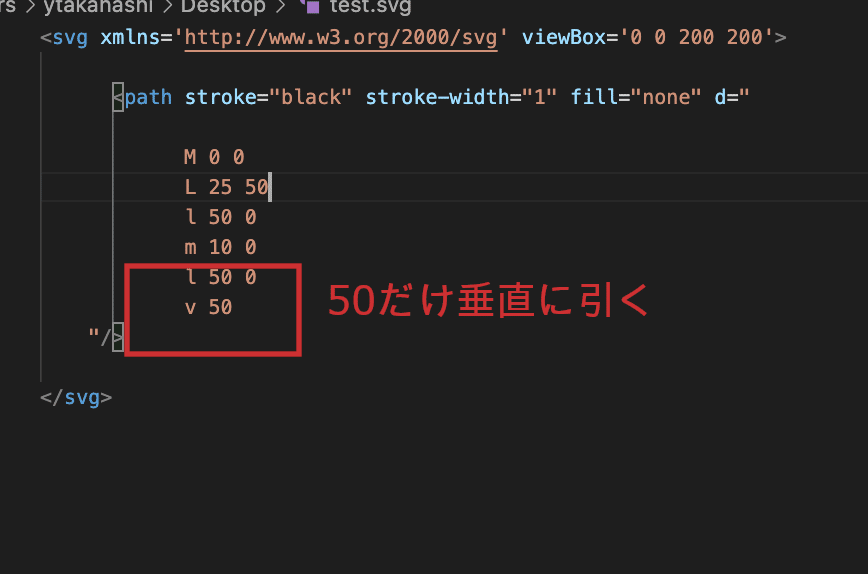
垂直に引くので、下のようになりました。
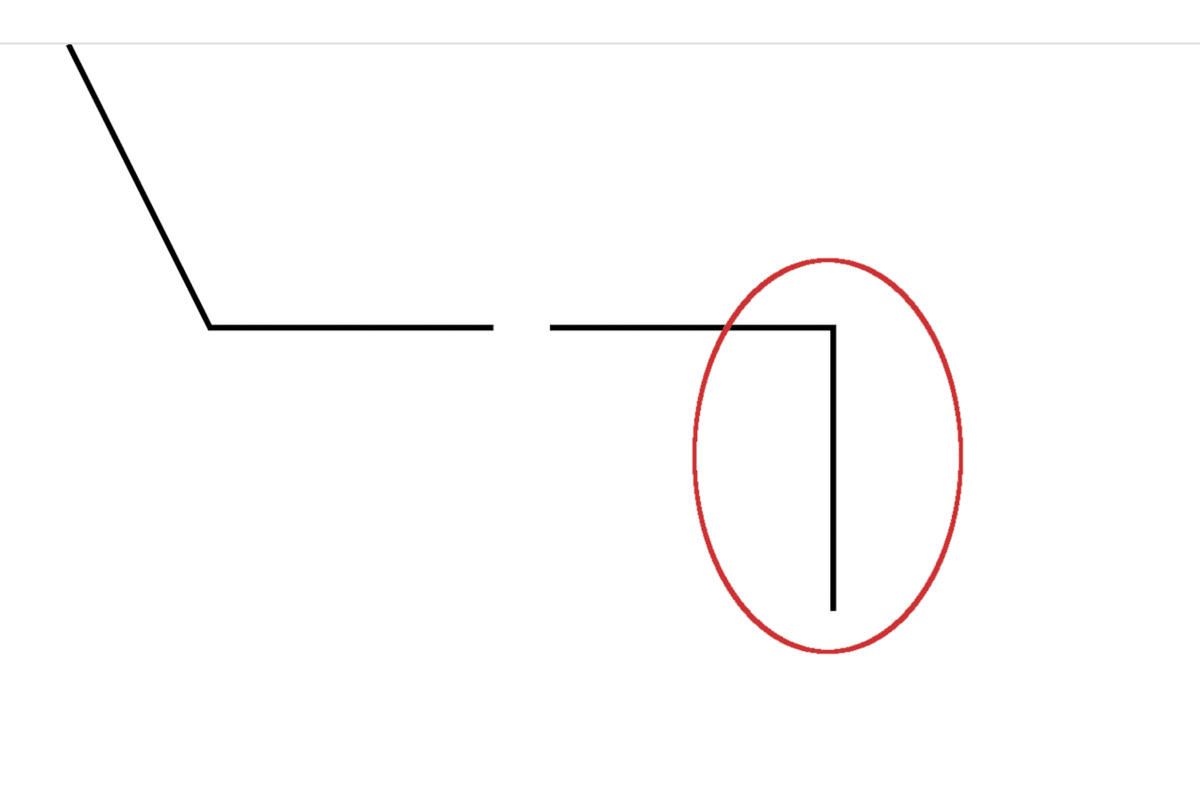
7 Hについて(水平線を引く)
Hは水平に引きます。
なお、こんな感じでマイナスの指定も可能です。
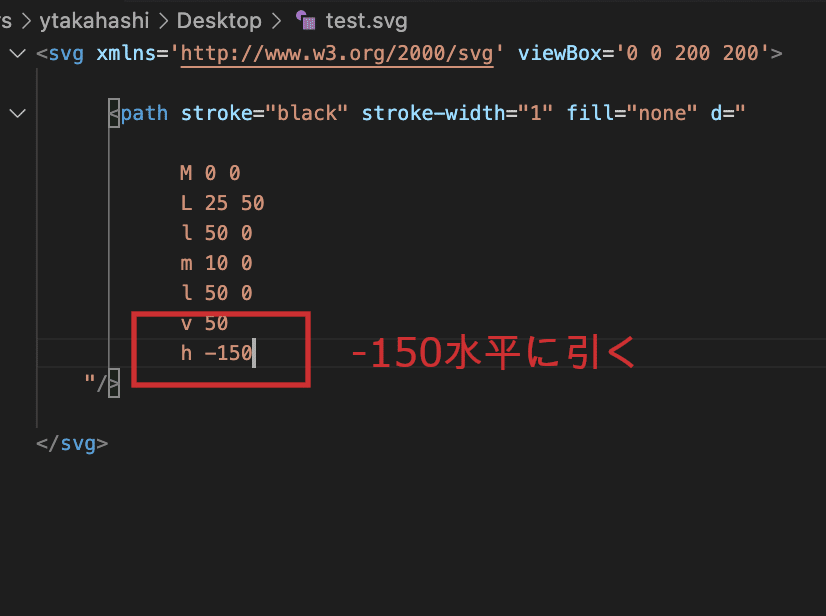
こんな感じで引けました。

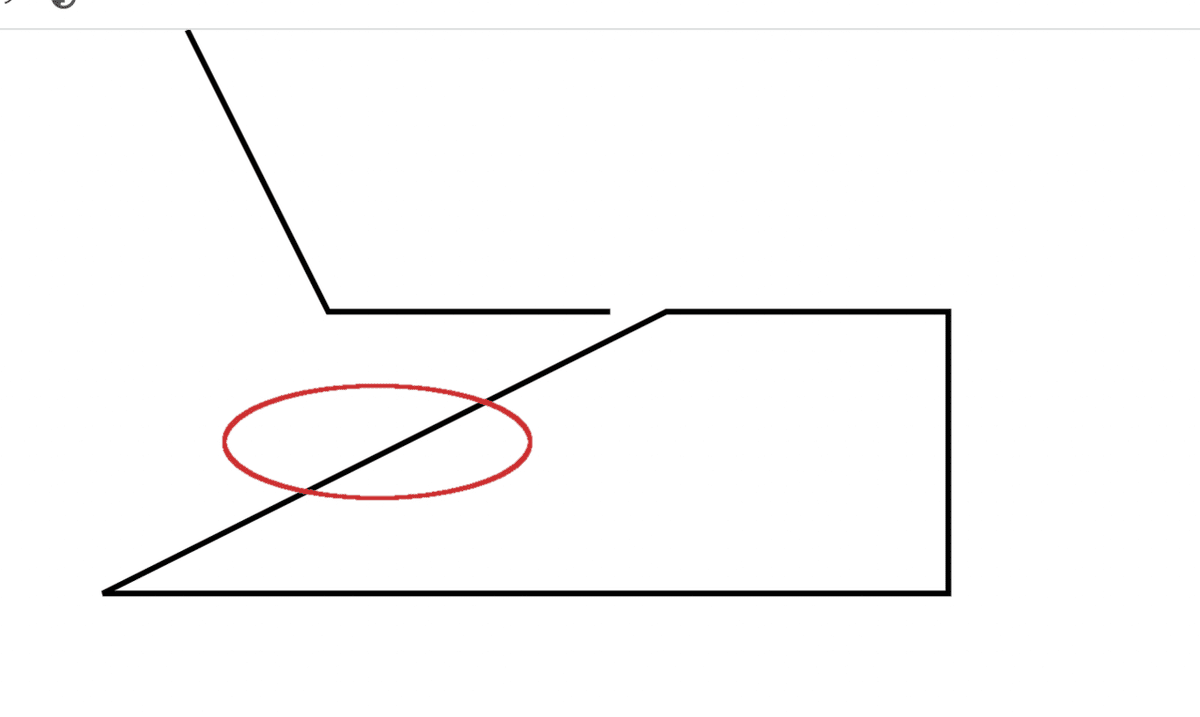
8 Zについて(スタート位置に結ぶ)
zは直近のスタート位置(M,m)に直線で結びつけます。
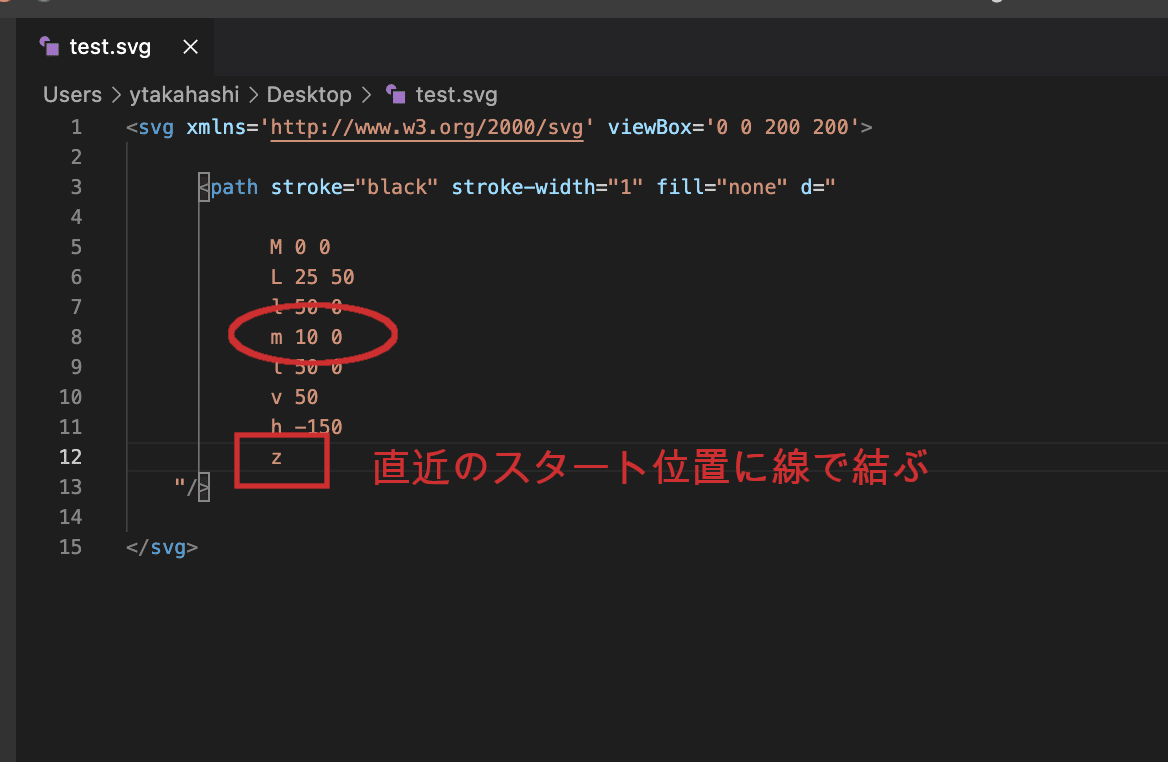
こんな感じですね。
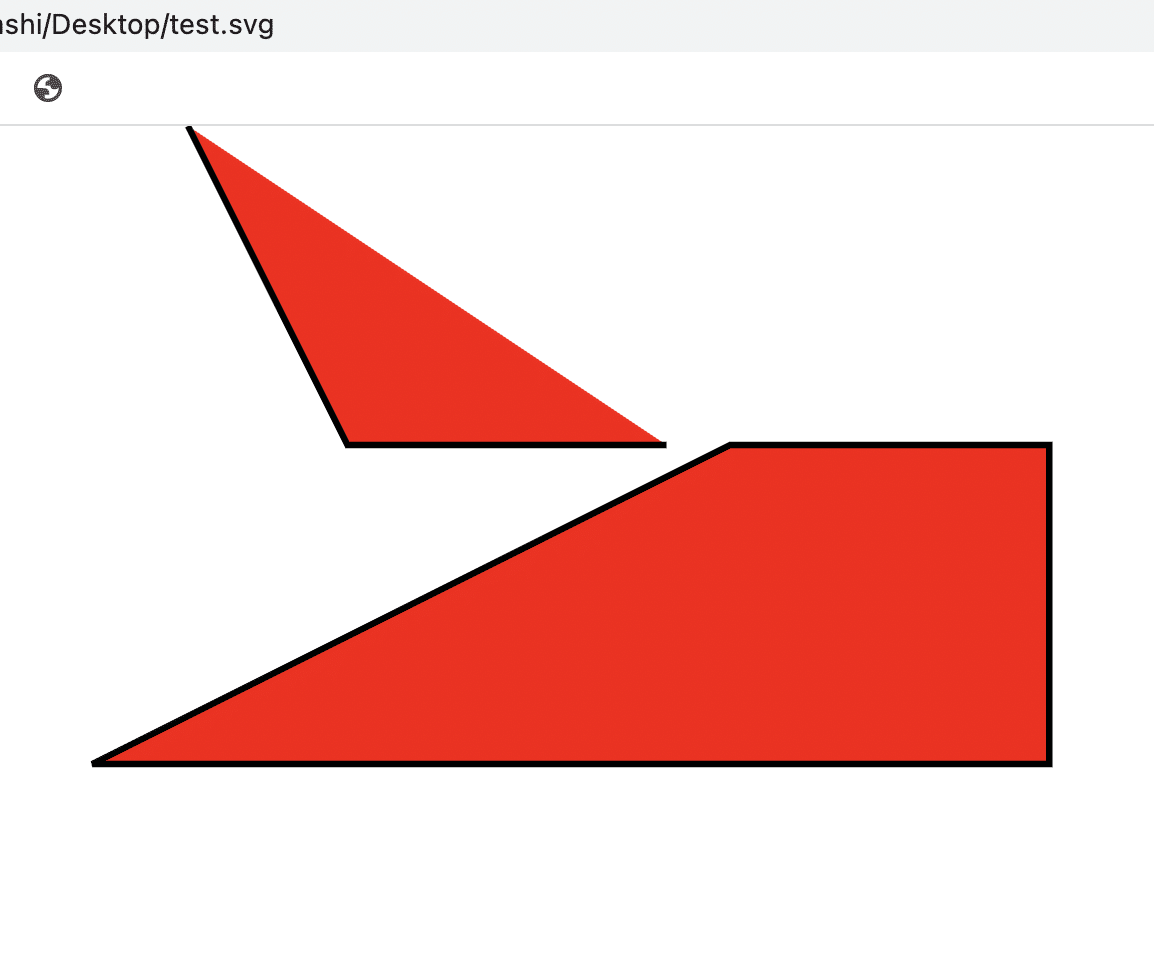
9 fillについて(塗りつぶし)
図形が囲まれたので、第一章で出てきたfillについても見ていきましょう。
こんな風に指定すると
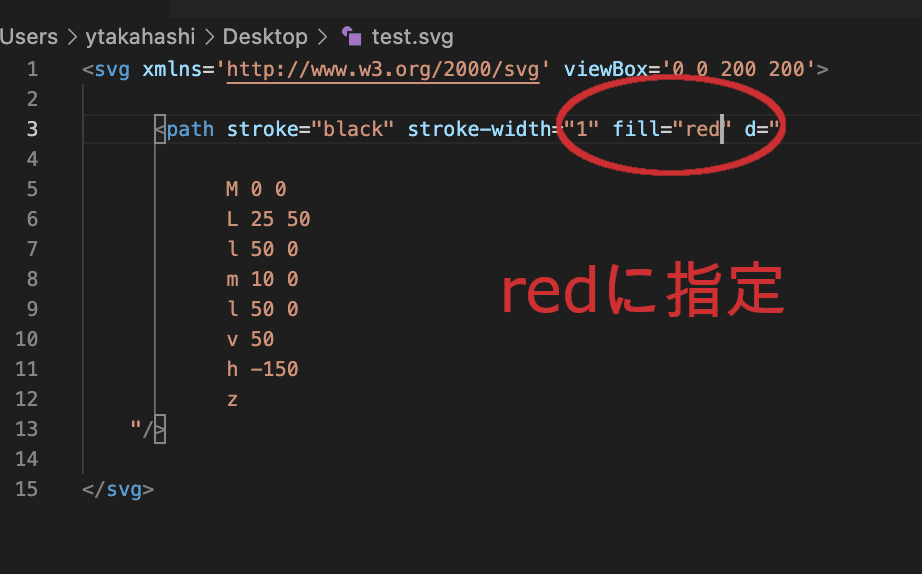
こんな風に、囲まれた部分が赤くなりました。
10 stroke,stroke-widthについて
せっかくなのでstroke,stroke-widthも見てみましょう。
下のように設定してみました。
こんな感じになりました。予想通りでしたでしょうか?
11 Qについて(曲線をひく)(2次ベジェ曲線)
少し見にくくなってきましたので、先ほどまでのコードを消しました。
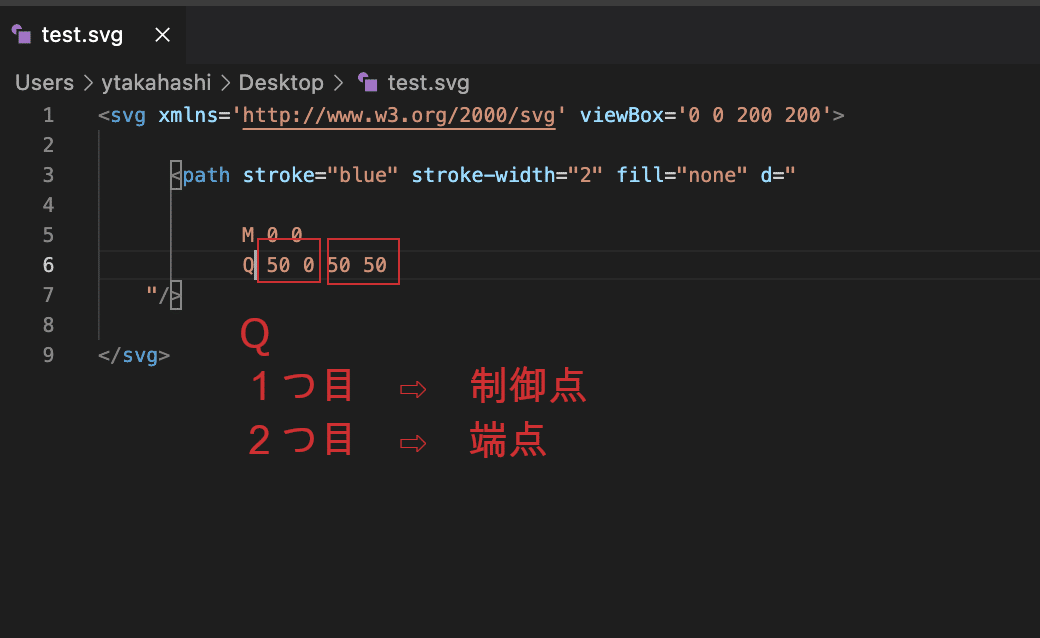
Qは曲線を引きます。
ポイントは座標が二つ必要ということです。
例 Q 50 0 50 50
しかも上のように、空白でしか区切られていないのでわかりにくいです。
上の場合、スタート位置はMの(0,0)であり、それに対する二つの座標は
1つ目 (50,0) ⇨制御点と言います。
2つ目 (50,50) ⇨端点と言います。
おそらく、実際の画像をみる方がわかりやすいかもしれません。
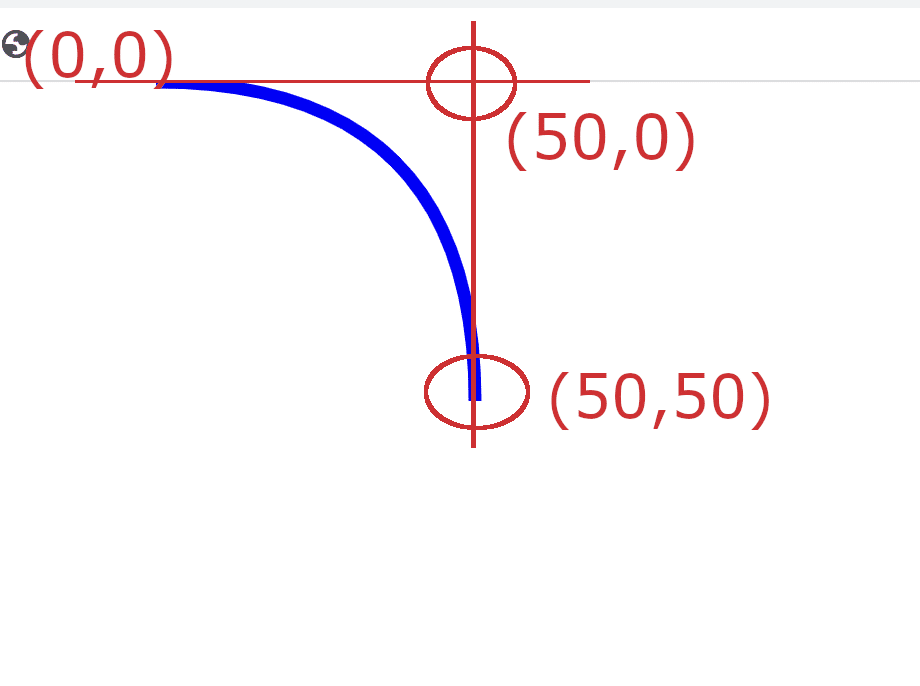
こんな感じになりました。
イメージが湧きましたでしょうか。
こんな風に2つの点を元に曲線を引くので、2次ベジェ曲線と言います。
12 Cについて(曲線をひく)(3次ベジェ曲線)
11章の応用です。
結局、制御点がもう一つ増えただけですね。
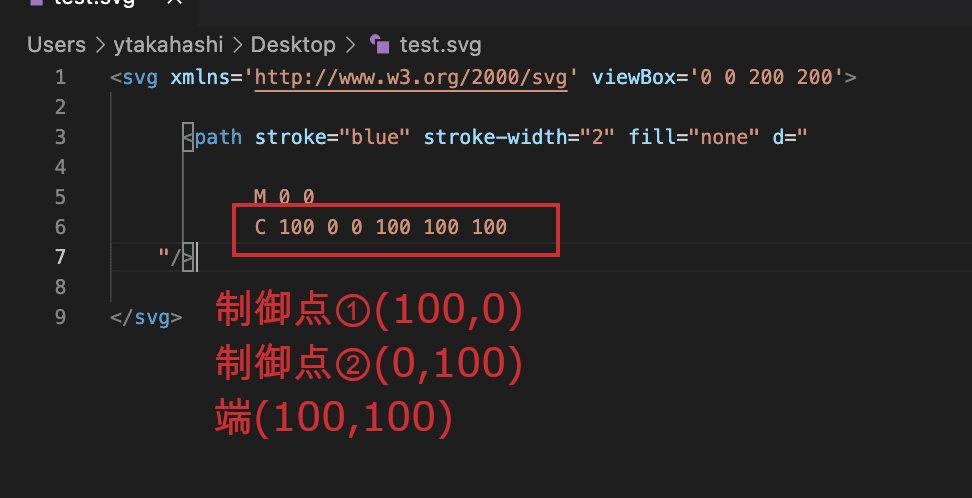
こんな感じになりました。
イメージ通りでしょうか。

13 定型技法(直線 lineタグ)
ここからは定型的な図形の書き方を見ていきましょう。
まずは直線です。
<line x1="10" y1="10" x2="100" y2="100" stroke="blue" stroke-width="2"/>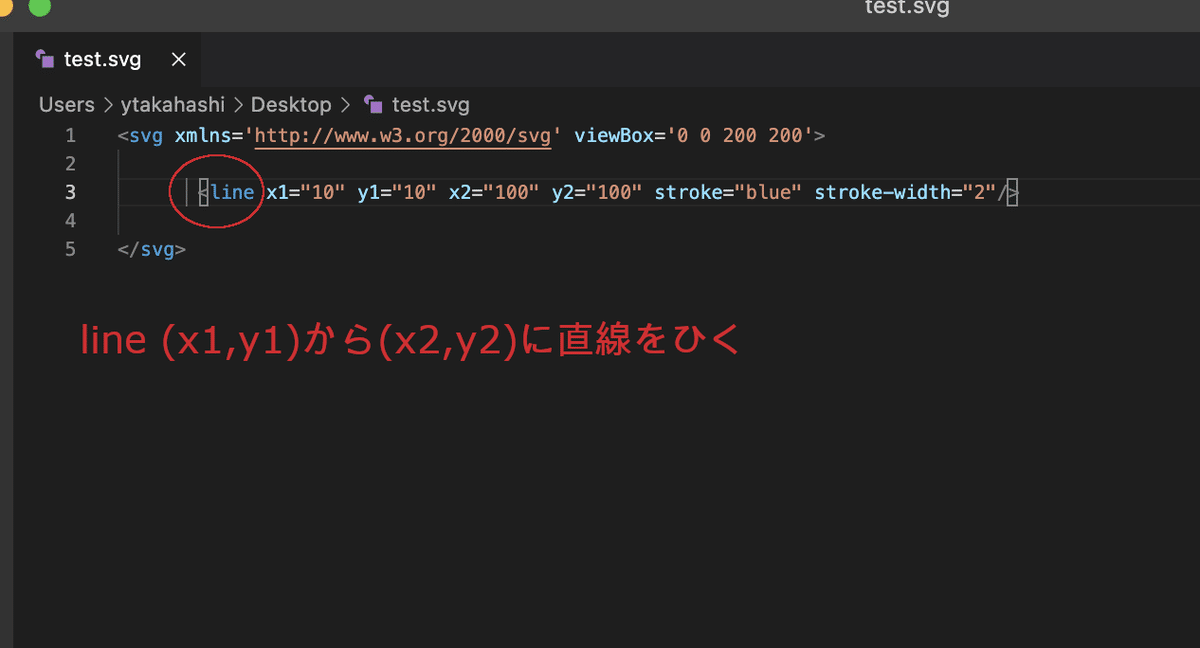
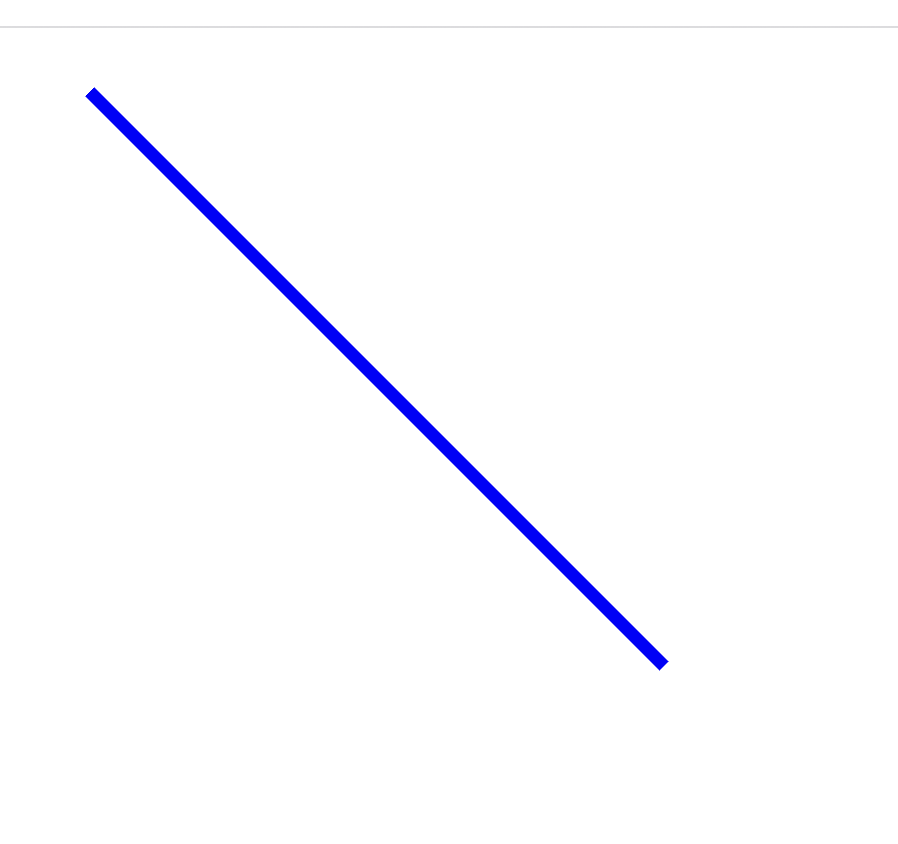
こんな感じでlineタグで囲むと直線を引くことができます。
こんな感じですね。
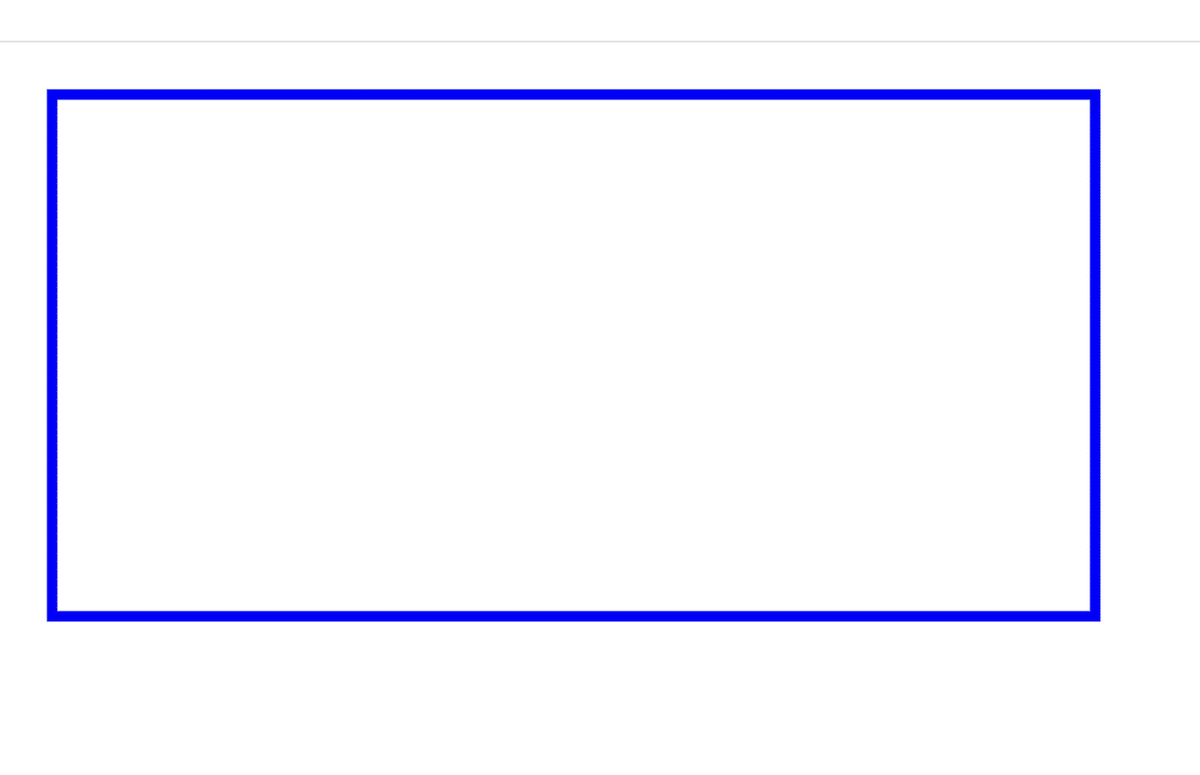
14 定型技法(四角形 rectタグ)
次は四角形です。
四角形は最初の点と幅、高さがわかれば描画できますね。
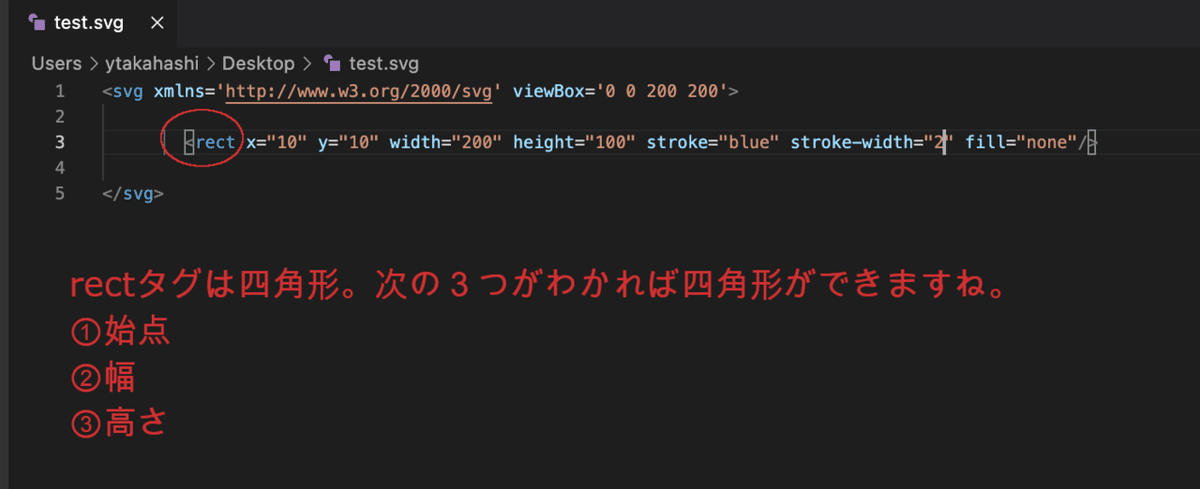
こんな感じになりました。
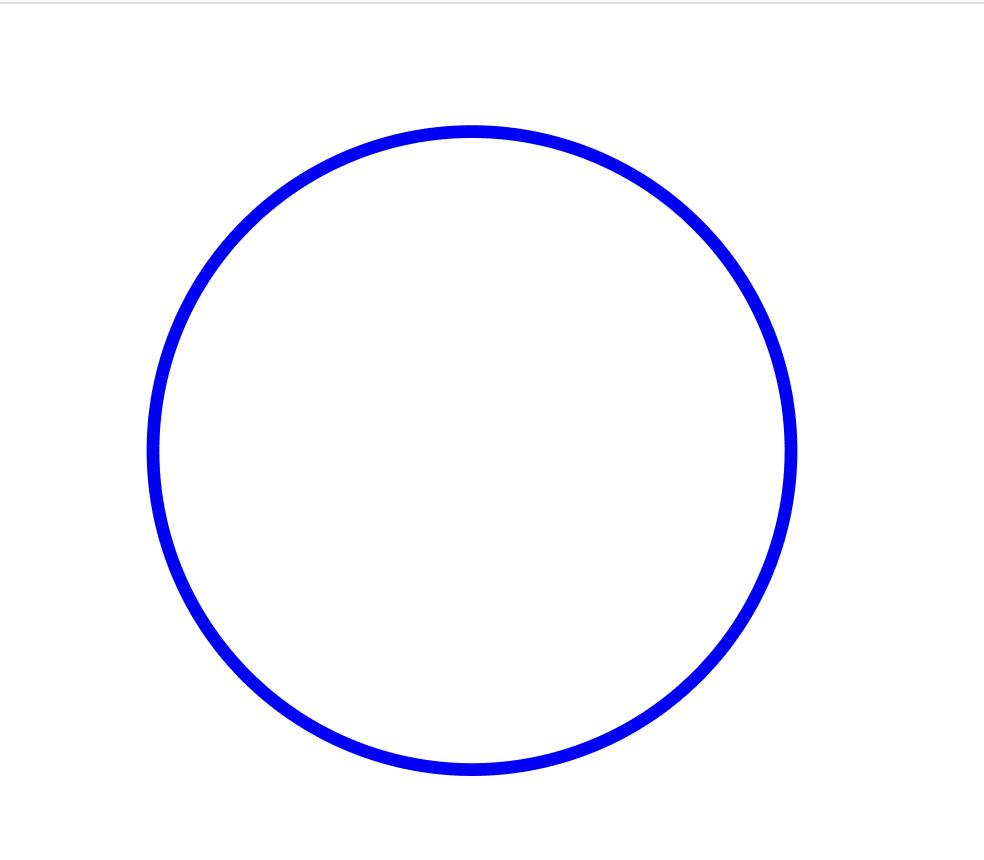
15 定型技法(円 circleタグ)
次は円です。
コンパスの要領で、中心と半径がわかれば描けますね。
<circle cx="100" cy="70" r="50" stroke="blue" stroke-width="2" fill="none"/>
こんな風になりました。
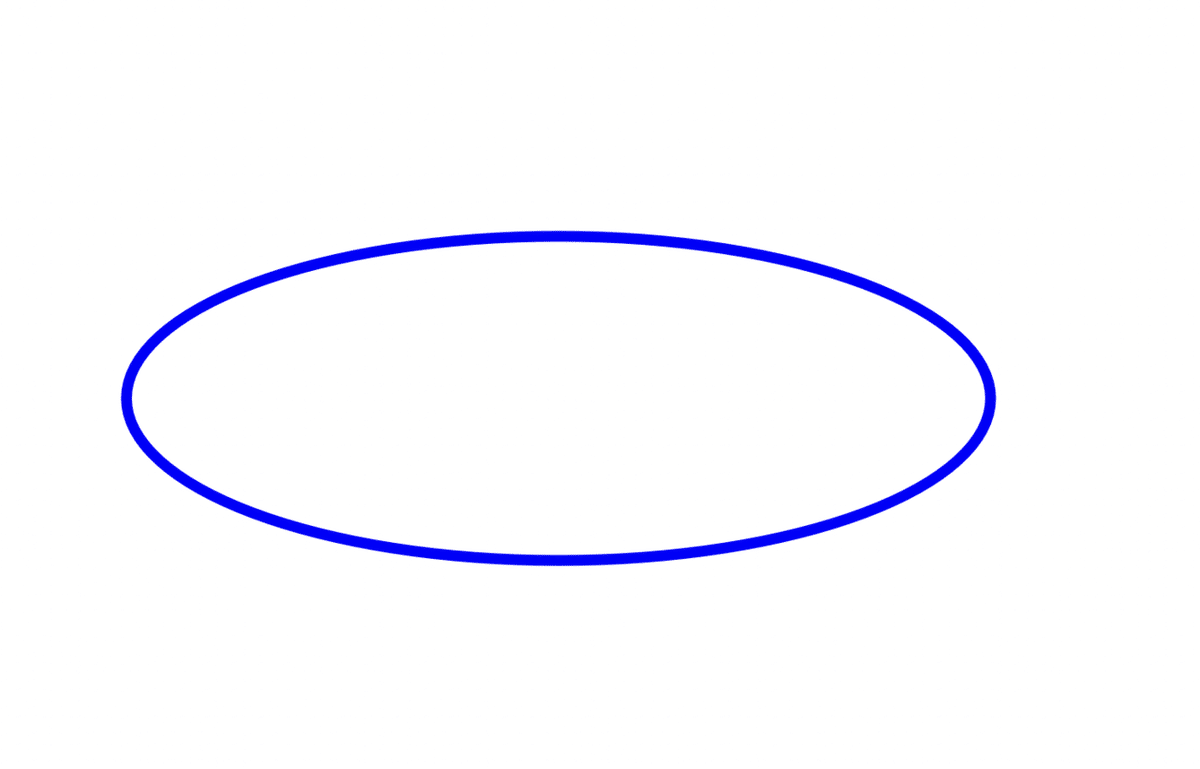
16 定型技法(楕円 ellipseタグ)
次は楕円です。
楕円は次の3つで決まるようです。
①中心
②X方向の半径
③Y方向の半径
<ellipse cx="100" cy="80" rx="80" ry="30" stroke="blue" stroke-width="2" fill="none"/>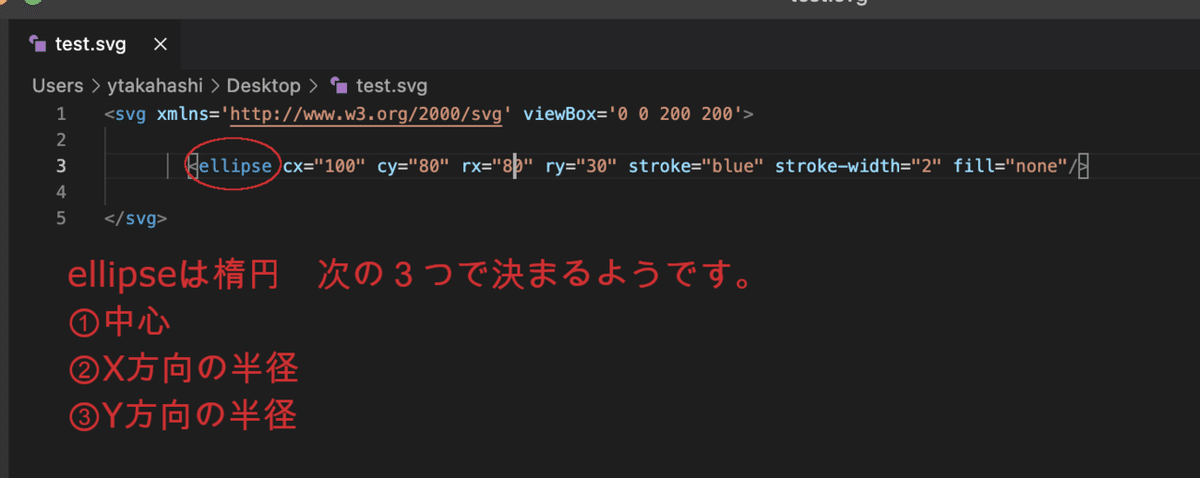
こんな感じになりました。
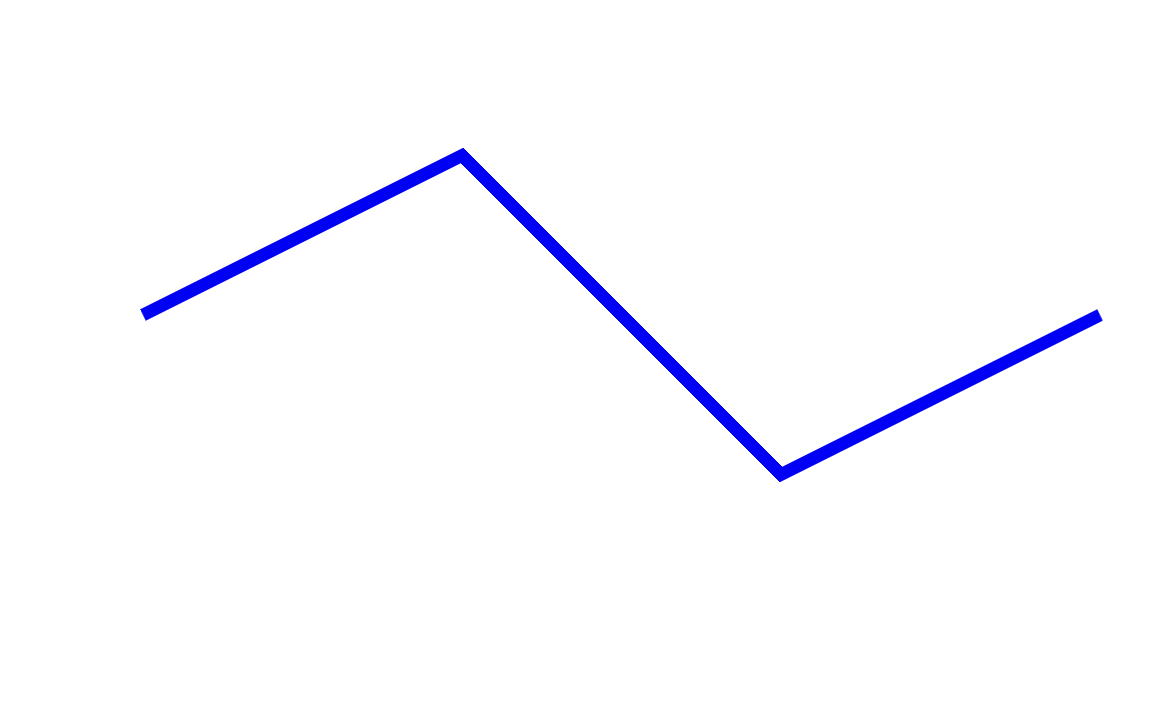
17 定型技法(折線 polylineタグ)
次は折線です。折れる箇所を指定しましょう。
<polyline points="50 50 100 25 150 75 200 65" stroke="blue" stroke-width="2" fill="none"/>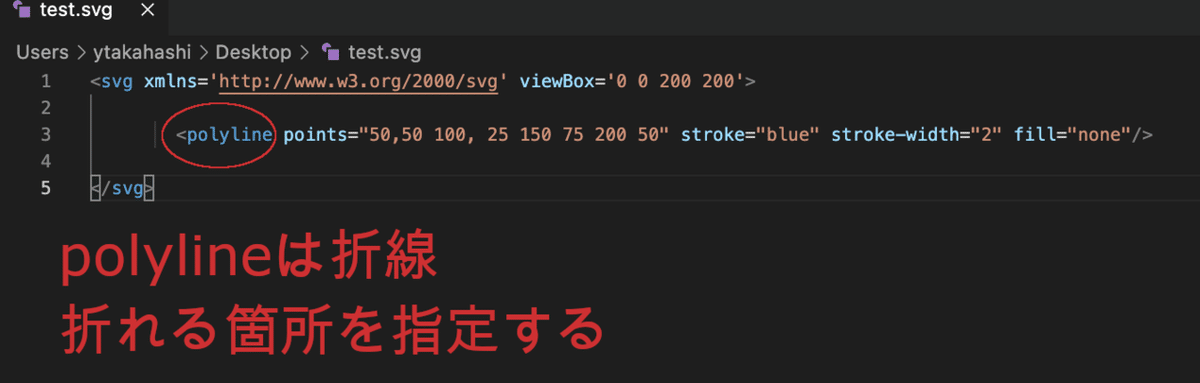
こんな風になりました。
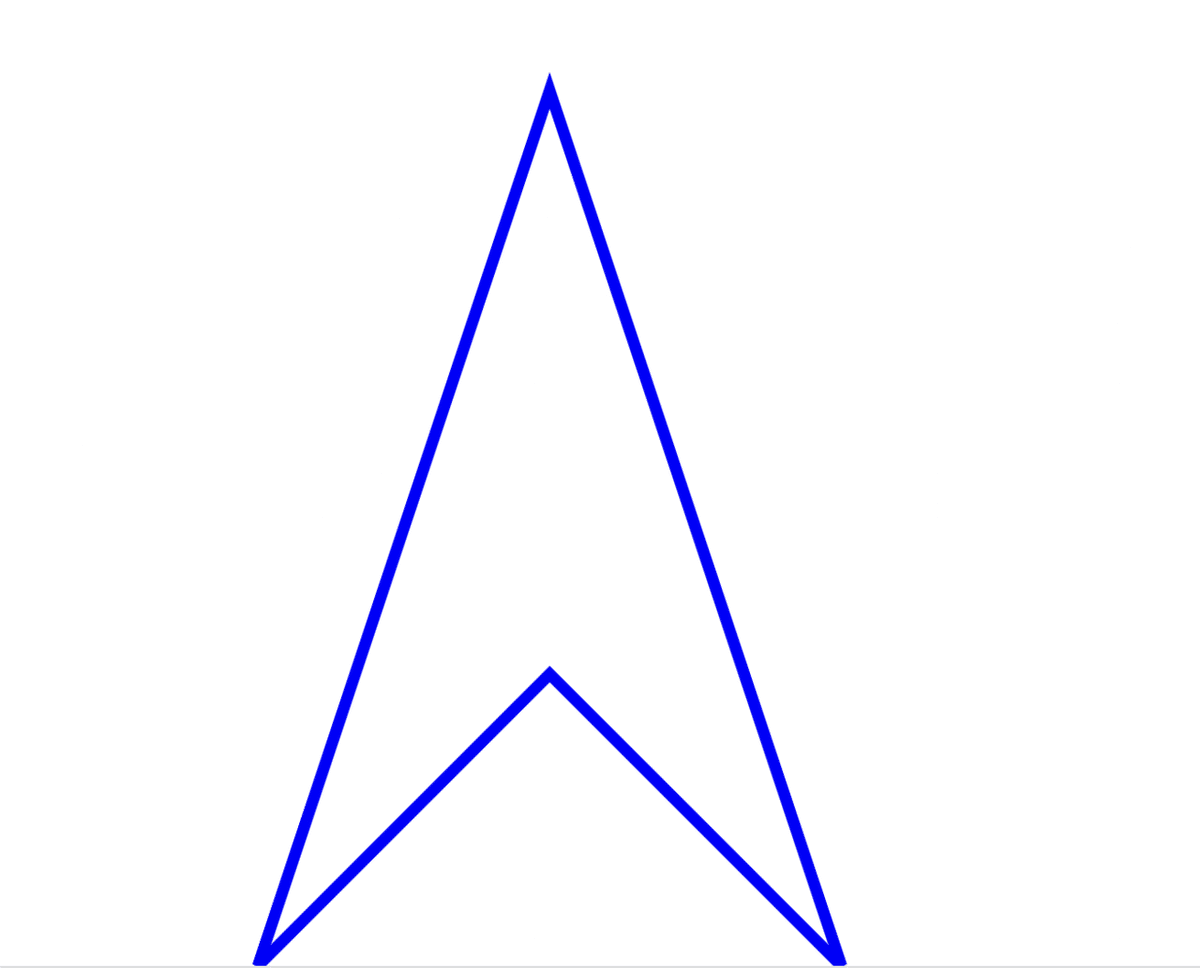
18 定型技法(多角形 polygonタグ)
次は多角形です。折れる箇所を指定しましょう。
<polygon points="50 50 100 200 50 150 0 200" stroke="blue" stroke-width="2" fill="none"/>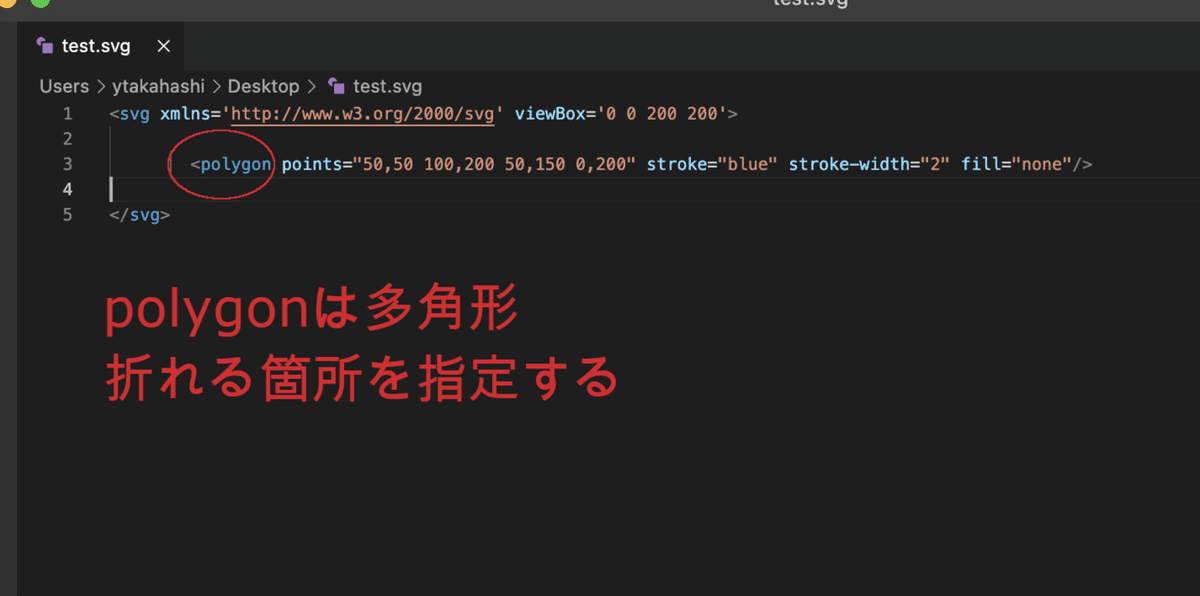
こんな感じになりました。
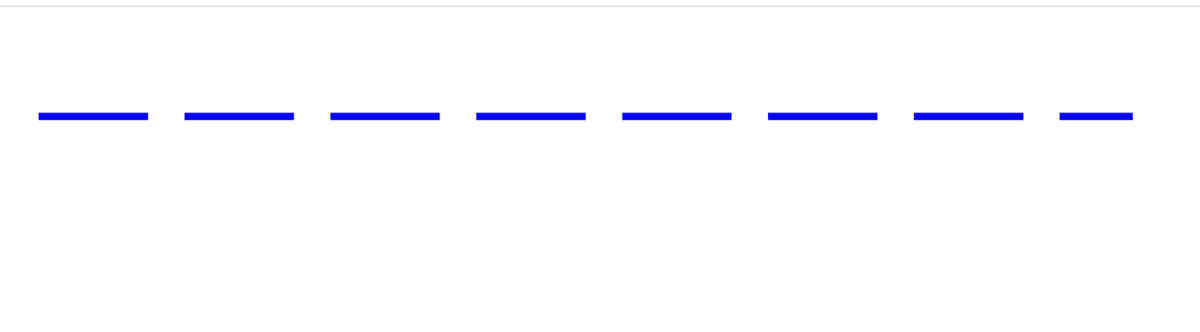
19 点線の描写(stroke-dasharray)
点線も描いてみましょう。
下のようにstroke-dasharrayを用いると描けます。
<polygon points="50 50 100 200 50 150 0 200" stroke="blue" stroke-width="2" fill="none" stroke-dasharray="10 5"/>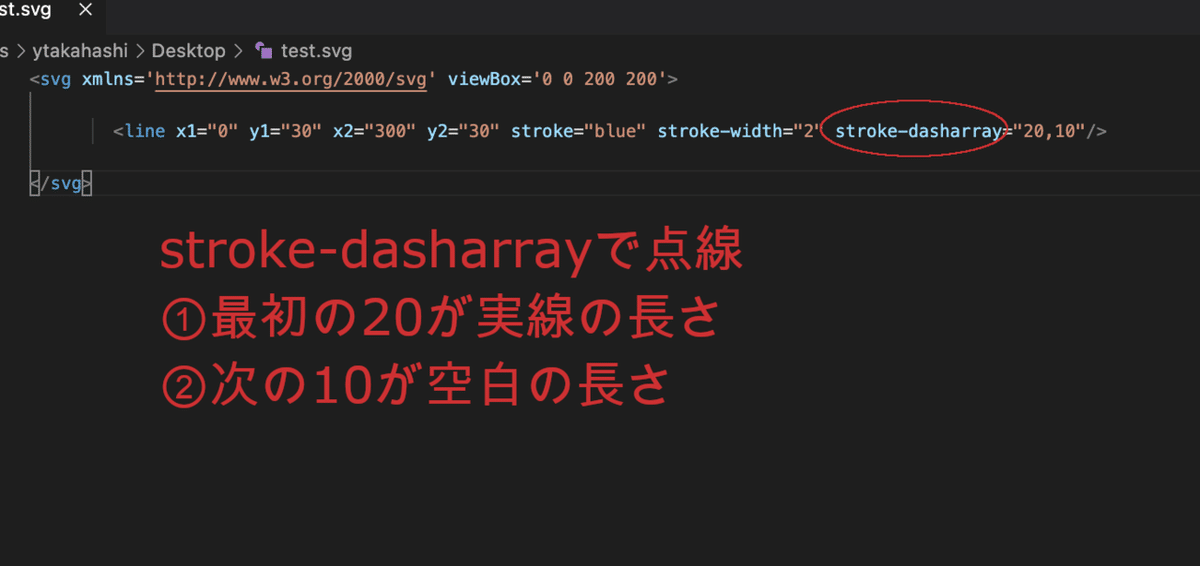
こんな風になりました。
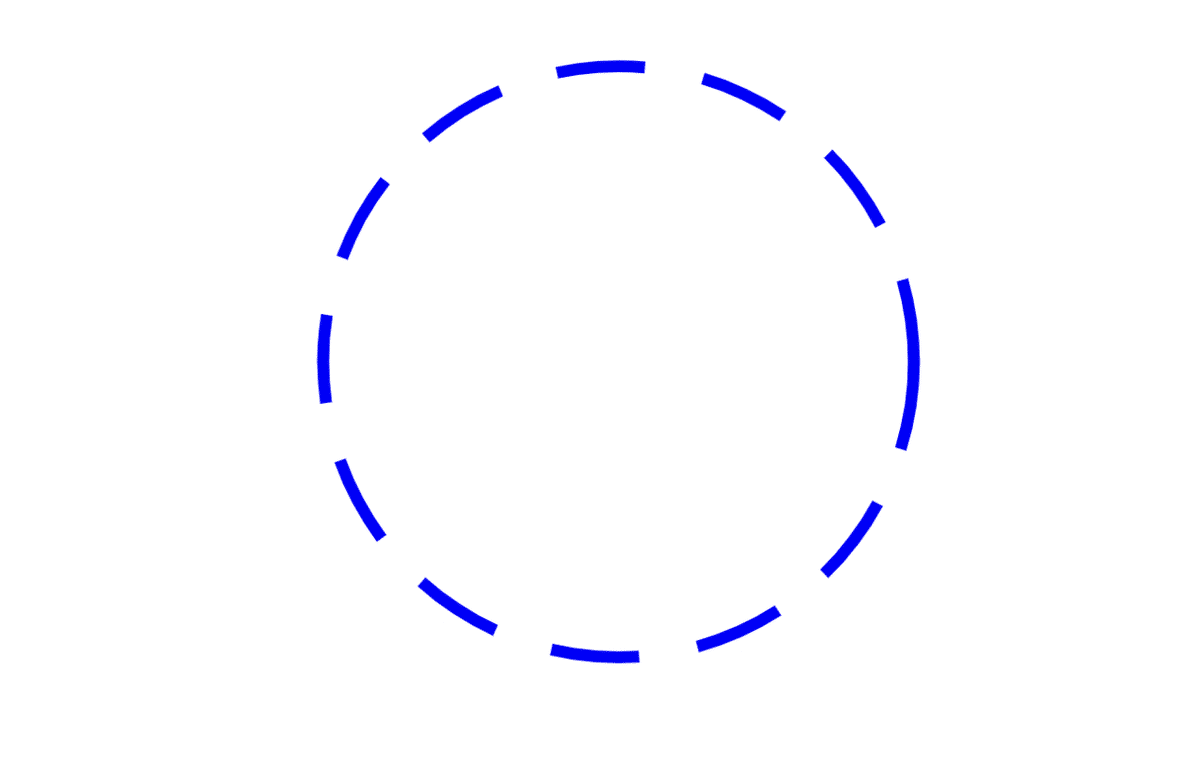
もちろん、下のように曲線などでも行けますね。
20 線の一部の色を変える(重ね合わせ)
svgでは描画箇所が同じであれば、下の行に描かれているものが上の行を上書きします。
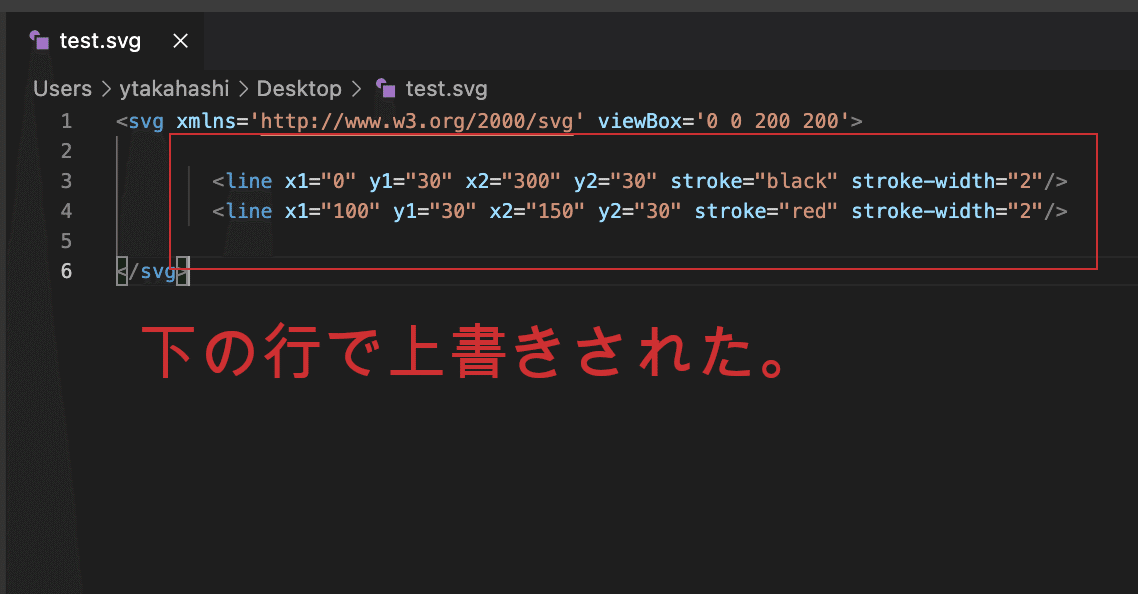
<polygon points="50 50 100 200 50 150 0 200" stroke="blue" stroke-width="2" fill="lightpink" stroke-dasharray="10 5"/>
<ellipse cx="100" cy="80" rx="80" ry="30" stroke="blue" stroke-width="2" fill="lightgreen"/>
上のように描いた場合、X座標が100~150の範囲で赤色が上書きされます。
こんな感じです。
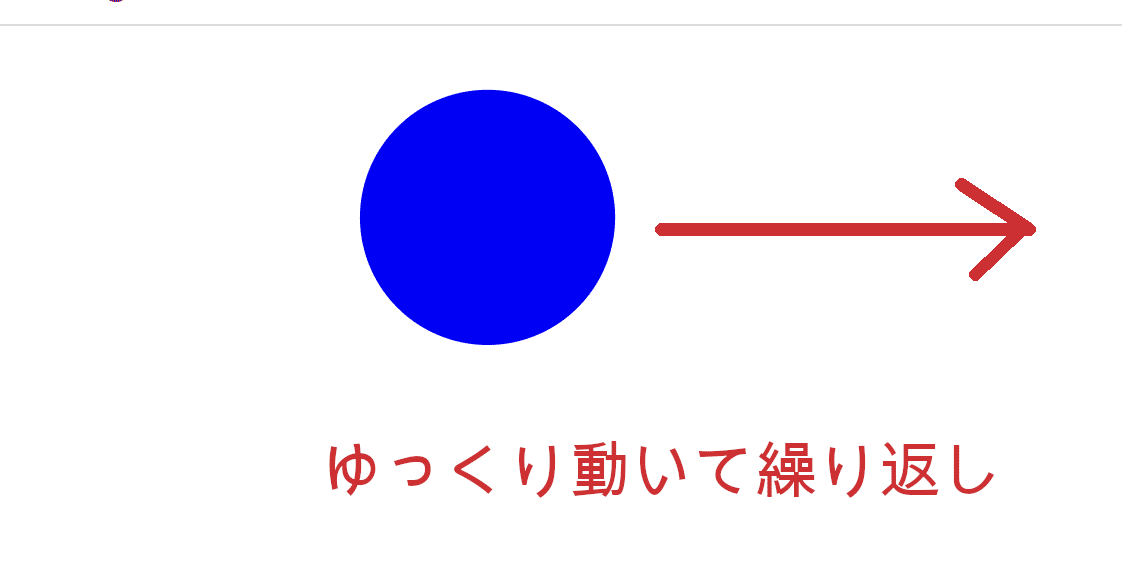
21 Animationの基礎を学ぼう。(animateタグ)
では、ここからは動きを加えていきましょう。
下のような「animate」タグで囲むことになります。
<circle cx = "30" cy="30" r="20" fill="blue">
 <animate attributeName="cx" dur="5s" from="30" to="270" repeatCount="indefinite"/>
</circle>
うまく動画が載せられず残念でしたが、下のように右まで進み、また左に戻って進むようなものができました。
22 animateタグの構成を確認しよう
では構成を確認しましょう。
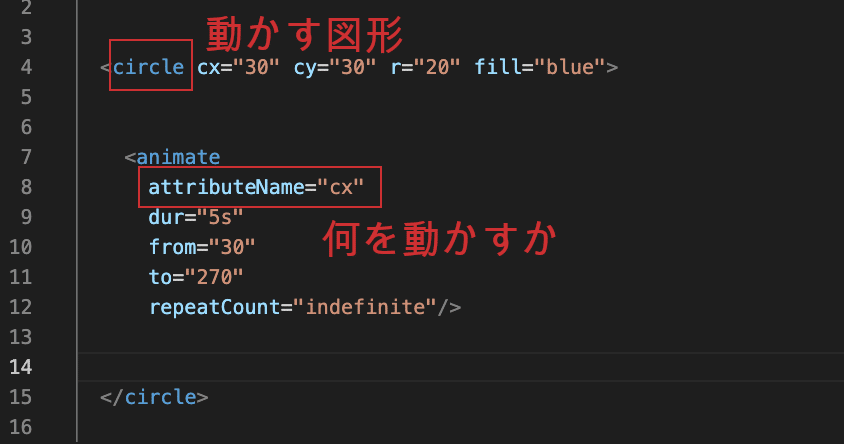
① attributeName
たぶんこれが一番大事です。これは「何を動かすのか」というものです。
今回は「cx」です。
「cx」は上の「circle」タグで円の中心(X軸)を表しています。
つまり、今回のアニメーションは円の中心(X軸)を右に動かすことによって、円自体を動かすアニメーションです。
② dur
これはそのままの意味で、「duration」(継続時間)です。今回は5秒かけてアニメーションを動かすという設定になっています。
③ from to
これは今回動かす円のX座標をどこからどこまで動かすのかという設定です。
今回はX=30からX=270まで動かすという指定をしています。
④ repeatCount
これは何回繰り返すかです。
今回は「indefinite」(無限)で設定していますが、回数を指定することで、何回かという設定も可能です。
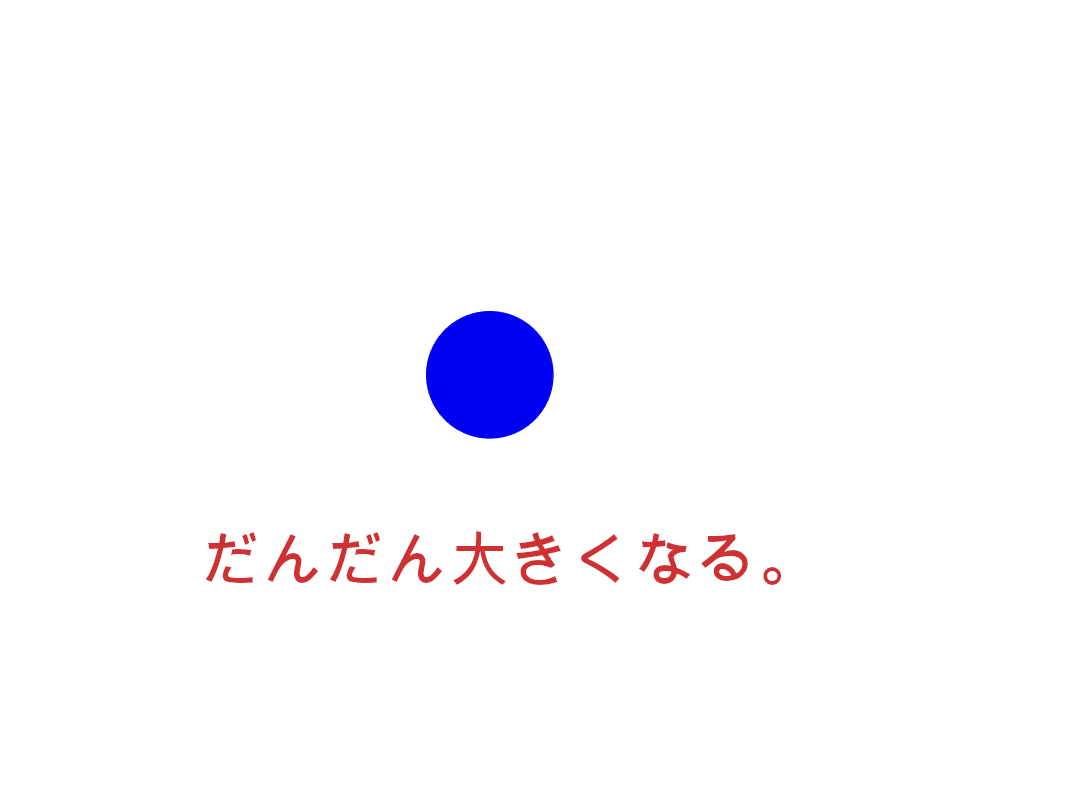
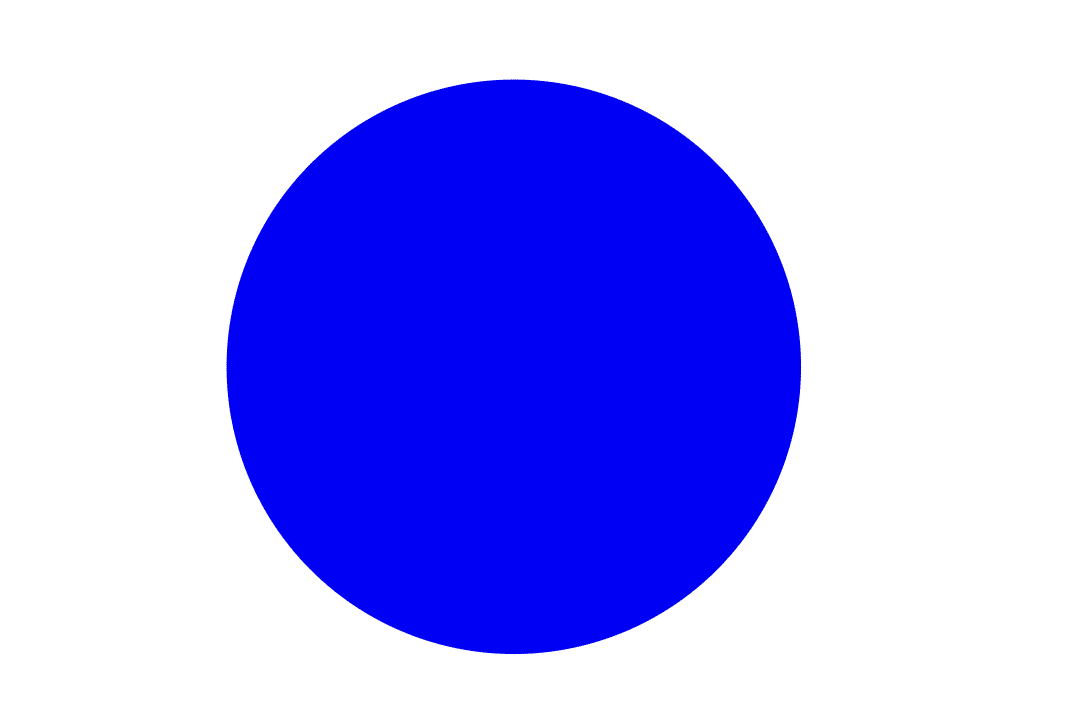
23 いろんなアニメーションを作ろう(大きくなる円)
では、いろんなアニメーションを作ってみましょう。
例えば、円が大きくなるようにするなら、半径を動かせばいいですね。
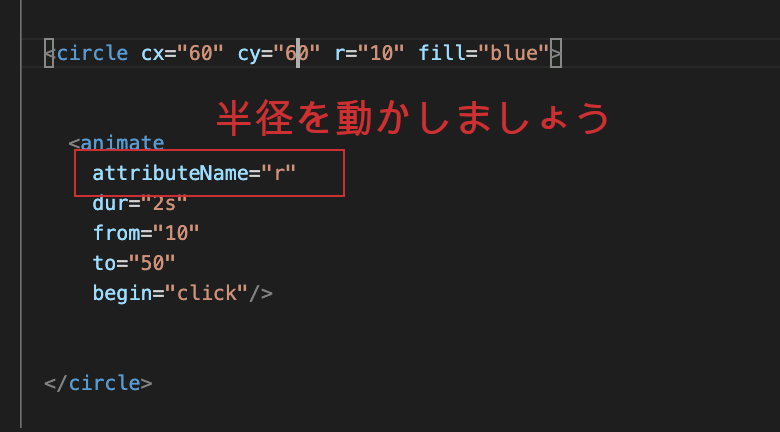
ちなみに
begin="click"
とすることで、クリックすることでアニメーションが動き出す仕様になります。
下のような感じです。
24 いろんなアニメーションを作ろう(色を変えよう)
色を変える場合も塗りつぶしである「fill」を属性に指定すればいいですね。
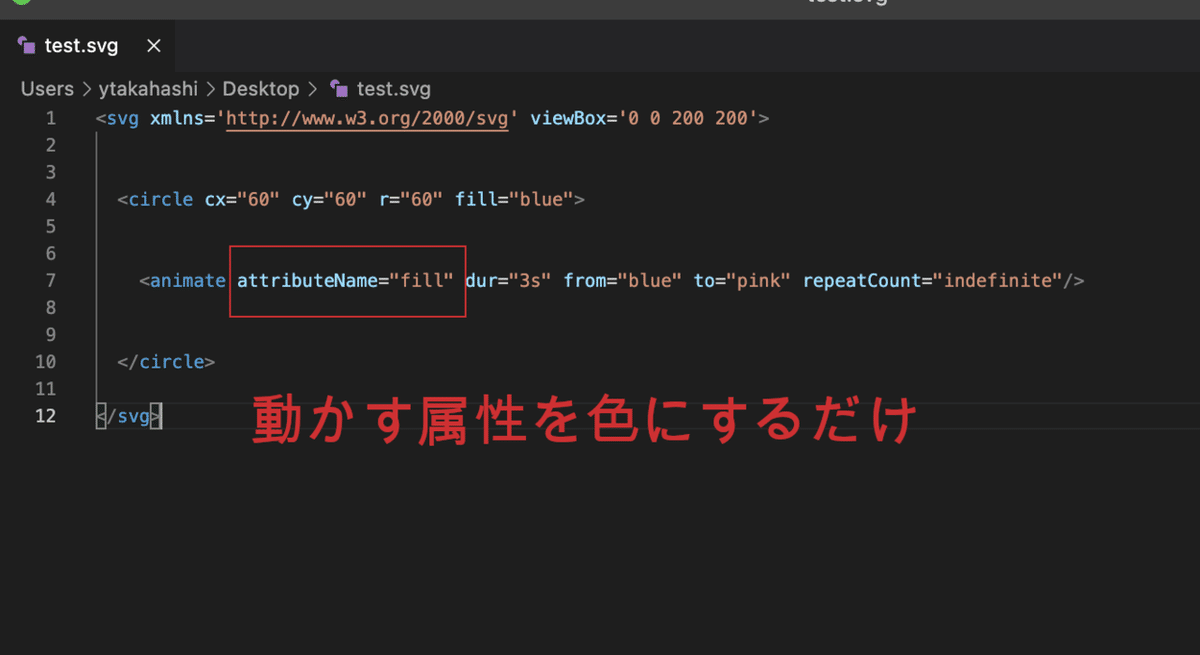
このように青からピンクに変わるものができました。

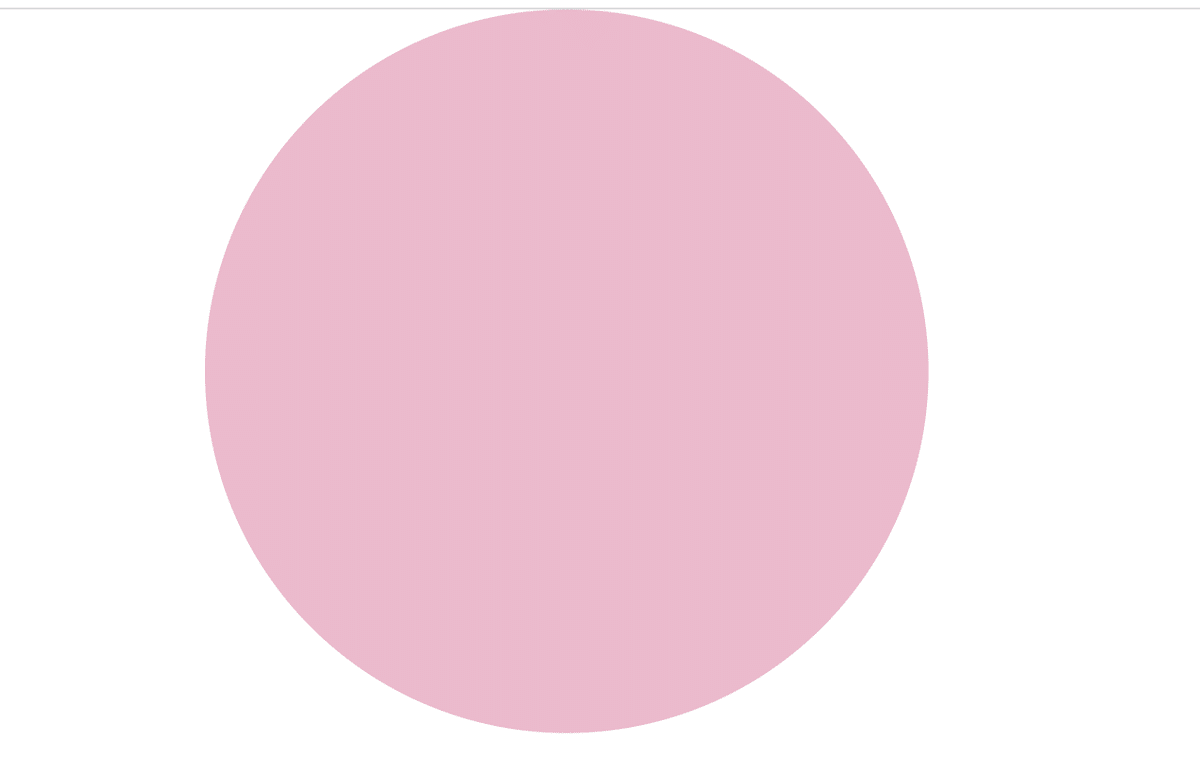
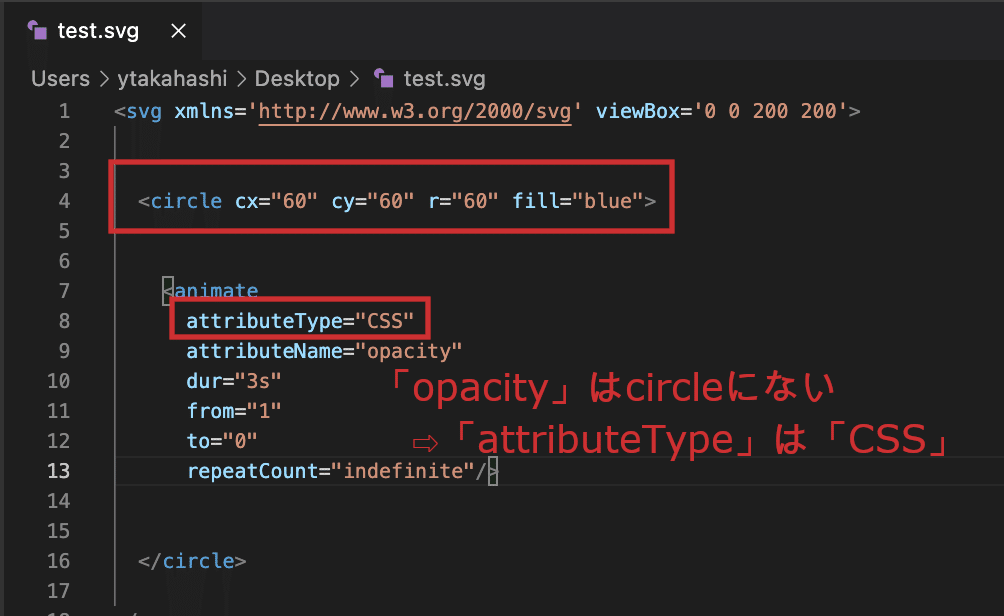
25 いろんなアニメーションを作ろう(透明度を変えよう)
透明にする場合はopacityを設定すれば良いですね。
<animate attributeType="CSS" attributeName="opacity" dur="3s" from="1" to="0" repeatCount="indefinite"/>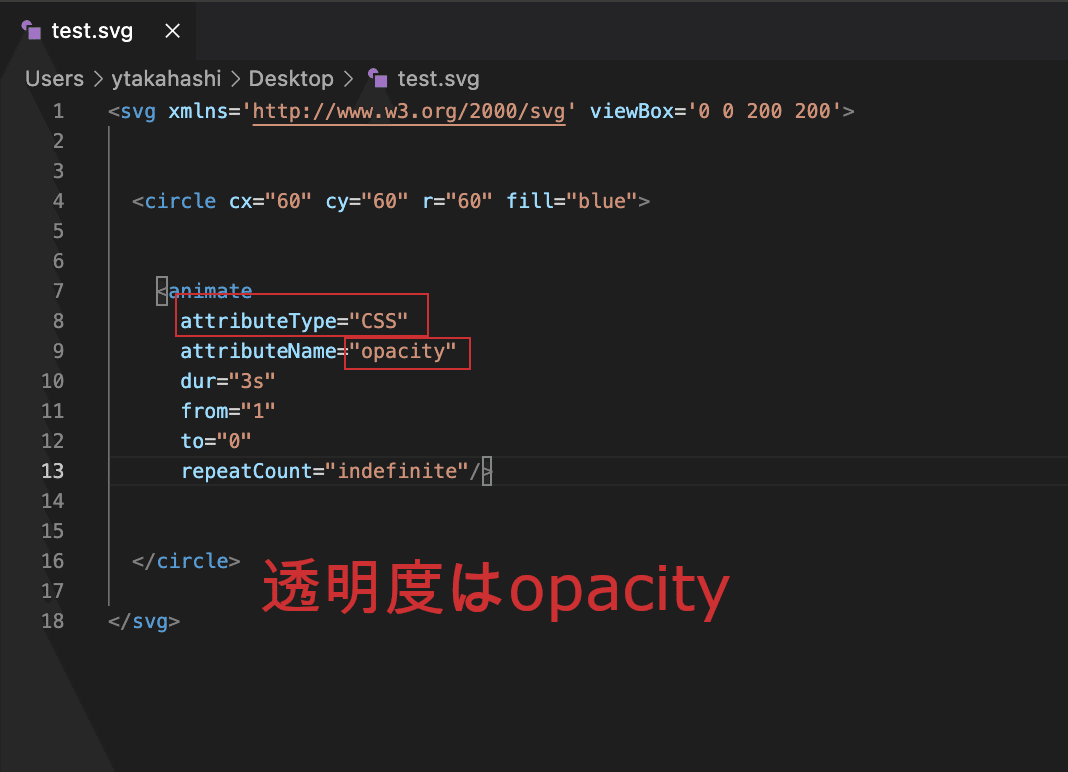
ちなみに今まで「attributeType」を設定していなかったのですが、こちらも設定をしたほうが良さそうでした。
こちらは図形要素自体の属性かCSSの属性かによって「XML」か「CSS」に設定します。
今回はコードの中にある属性ではありませんので、「CSS」の設定になりました。
番外編
<svg width="500" height="500" xmlns="http://www.w3.org/2000/svg">
<path d="M 25,100 A 75,75 0 1,1 175,100 A 75,75 0 1,1 25,100 z" stroke="black" fill="lightblue"/>
<circle fill="red" r="5">
<animateMotion path="M 25,100 A 75,75 0 1,1 175,100 A 75,75 0 1,1 25,100 z" begin="0s" dur="6s" calcMode="linear" repeatCount="indefinite"/>
</circle>
</svg>
今回は以上です。
これで色々なsvgを作ることができ、結果色々なフルオンチェーンNFTを作ることができると思います。
ぜひやってみてくださいね。
いいなと思ったら応援しよう!