
AIスーパーコンピュータ「継之助」爆誕!とりあえずRAID0で12TBのディスクをインストールする

ついにA100 80GBx8のマシンが稼働した。ここまで長かった。
まずGPUだけ先に届いて、次にNVLINKだけ届いて、さらに1.5ヶ月待ってやっとシャーシが届いて、その間にデータセンターとなる部屋を契約して、電気工事して、200V電源を用意して、机と椅子を組み立てて・・・朝から晩まで汗だくになりながら作業を行なった。
純正品はケチケチ仕様で発注したので1TBしかNVMeを入れてなかった。
VRAM640GBのマシンなので、HDDの方がVRAMとあまり変わらない容量になってしまう。
Nous-Capybara-34Bをダウンロードしようとしたら、SSDが一杯になって止まってしまった。これは勿体無い。
そこで我らがドスパラで2.5インチSSDと2.5インチハードディスクを買った。
まずは2.5インチハードディスク4TBx3が先に届いたのでRAID0構成で組んでみることにする。
まずはホットスワップ用のHDDケースをバラしてHDDを入れる簡単なお仕事開始
同じことを3回やる。

まずは一台だけ入れてみてホットスワップが実際に生きてるか確認する

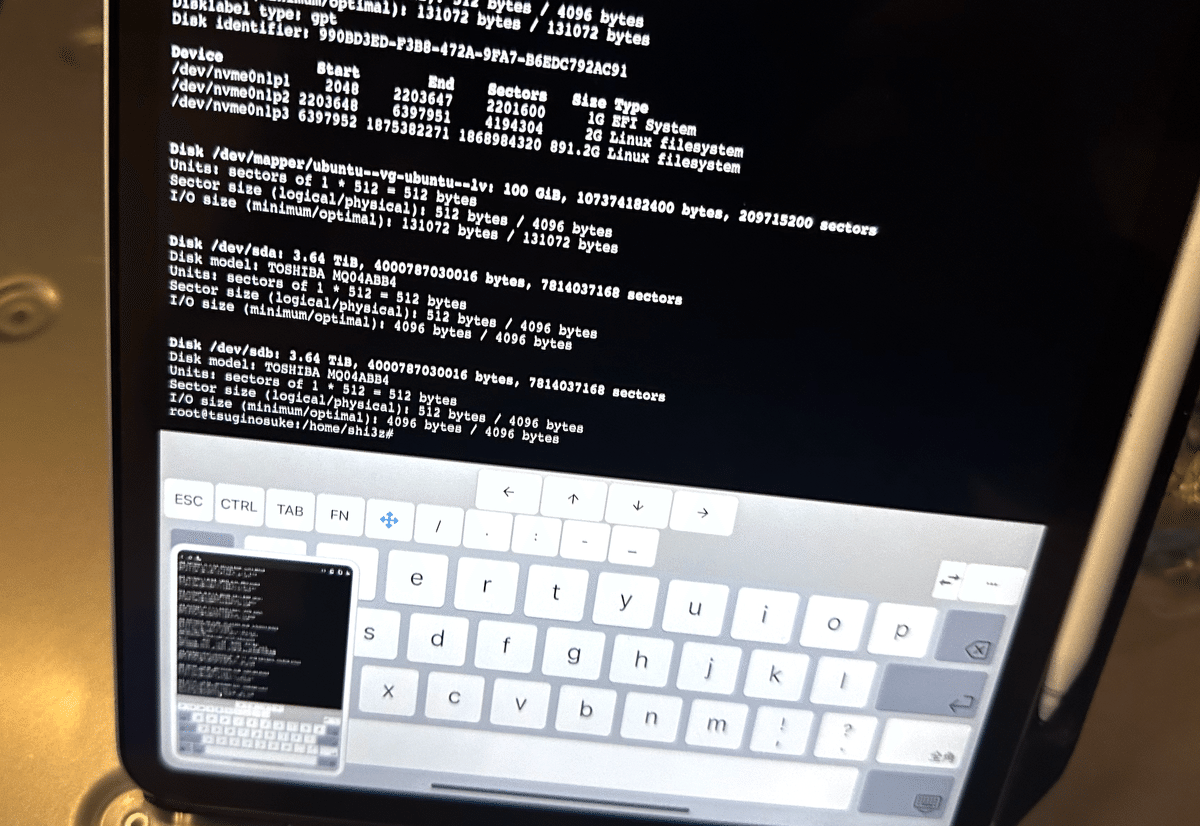
確認にはiPadのターミナルソフトを使った。場所とらなくて便利。
念の為MacBookProも持っていったけど取り出す必要がなかった。

よし、ちゃんと3.64TiBの東芝製ストレージが認識されている。
ホットスワップすごい。今まで障害の時しかそう思ったことなかったけど。
電源入れたまま機能拡張できるとか胸熱すぎる。
同じことを3回繰り返して4TBHDDを3つ、4TBSSDを一つインストールする。残りの4TBSSD二つは後日届く。
最近はChatGPTの知識がアップデートされたのでサーバーの設定についてもChatGPTに聞いた方が検索するよりも良かったりする。
まずfdiskで確認
# fdisk -l
Disk /dev/loop0: 63.45 MiB, 66531328 bytes, 129944 sectors
Units: sectors of 1 * 512 = 512 bytes
Sector size (logical/physical): 512 bytes / 512 bytes
I/O size (minimum/optimal): 512 bytes / 512 bytes


Disk /dev/loop1: 111.95 MiB, 117387264 bytes, 229272 sectors
Units: sectors of 1 * 512 = 512 bytes
Sector size (logical/physical): 512 bytes / 512 bytes
I/O size (minimum/optimal): 512 bytes / 512 bytes


Disk /dev/loop2: 53.26 MiB, 55844864 bytes, 109072 sectors
Units: sectors of 1 * 512 = 512 bytes
Sector size (logical/physical): 512 bytes / 512 bytes
I/O size (minimum/optimal): 512 bytes / 512 bytes


Disk /dev/loop3: 55.66 MiB, 58363904 bytes, 113992 sectors
Units: sectors of 1 * 512 = 512 bytes
Sector size (logical/physical): 512 bytes / 512 bytes
I/O size (minimum/optimal): 512 bytes / 512 bytes


Disk /dev/loop4: 6.86 MiB, 7188480 bytes, 14040 sectors
Units: sectors of 1 * 512 = 512 bytes
Sector size (logical/physical): 512 bytes / 512 bytes
I/O size (minimum/optimal): 512 bytes / 512 bytes


Disk /dev/loop5: 40.86 MiB, 42840064 bytes, 83672 sectors
Units: sectors of 1 * 512 = 512 bytes
Sector size (logical/physical): 512 bytes / 512 bytes
I/O size (minimum/optimal): 512 bytes / 512 bytes


Disk /dev/loop6: 63.46 MiB, 66547712 bytes, 129976 sectors
Units: sectors of 1 * 512 = 512 bytes
Sector size (logical/physical): 512 bytes / 512 bytes
I/O size (minimum/optimal): 512 bytes / 512 bytes


Disk /dev/nvme0n1: 894.25 GiB, 960197124096 bytes, 1875385008 sectors
Disk model: SAMSUNG MZ1L2960HCJR-00A07
Units: sectors of 1 * 512 = 512 bytes
Sector size (logical/physical): 512 bytes / 4096 bytes
I/O size (minimum/optimal): 131072 bytes / 131072 bytes
Disklabel type: gpt
Disk identifier: 990BD3ED-F3B8-472A-9FA7-B6EDC792AC91

Device           Start        End    Sectors   Size Type
/dev/nvme0n1p1    2048    2203647    2201600     1G EFI System
/dev/nvme0n1p2 2203648    6397951    4194304     2G Linux filesystem
/dev/nvme0n1p3 6397952 1875382271 1868984320 891.2G Linux filesystem


Disk /dev/mapper/ubuntu--vg-ubuntu--lv: 100 GiB, 107374182400 bytes, 209715200 sectors
Units: sectors of 1 * 512 = 512 bytes
Sector size (logical/physical): 512 bytes / 4096 bytes
I/O size (minimum/optimal): 131072 bytes / 131072 bytes


Disk /dev/sda: 3.64 TiB, 4000787030016 bytes, 7814037168 sectors
Disk model: TOSHIBA MQ04ABB4
Units: sectors of 1 * 512 = 512 bytes
Sector size (logical/physical): 512 bytes / 4096 bytes
I/O size (minimum/optimal): 4096 bytes / 4096 bytes


Disk /dev/sdb: 3.64 TiB, 4000787030016 bytes, 7814037168 sectors
Disk model: TOSHIBA MQ04ABB4
Units: sectors of 1 * 512 = 512 bytes
Sector size (logical/physical): 512 bytes / 4096 bytes
I/O size (minimum/optimal): 4096 bytes / 4096 bytes


Disk /dev/sdc: 3.64 TiB, 4000787030016 bytes, 7814037168 sectors
Disk model: TOSHIBA MQ04ABB4
Units: sectors of 1 * 512 = 512 bytes
Sector size (logical/physical): 512 bytes / 4096 bytes
I/O size (minimum/optimal): 4096 bytes / 4096 bytes


Disk /dev/sdd: 3.64 TiB, 4000787030016 bytes, 7814037168 sectors
Disk model: Samsung SSD 870
Units: sectors of 1 * 512 = 512 bytes
Sector size (logical/physical): 512 bytes / 512 bytes
I/O size (minimum/optimal): 512 bytes / 512 bytes
root@tsuginosuke:/home/shi3z# sudo apt install mdadm
Reading package lists... Done
Building dependency tree... Done
Reading state information... Done
mdadm is already the newest version (4.2-0ubuntu2).
mdadm set to manually installed.
0 upgraded, 0 newly installed, 0 to remove and 38 not upgraded.
root@tsuginosuke:/home/shi3z# sudo mdadm —create /dev/md0 —level=0 —raid-devices=3 -f /dev/sd[abc]
mdadm: An option must be given to set the mode before a second device
       (/dev/md0) is listed
root@tsuginosuke:/home/shi3z# ls /dev/md0
ls: cannot access '/dev/md0': No such file or directory
root@tsuginosuke:/home/shi3z# mdadm --create /dev/md0 --level=0 --raid-devices=3 /dev/sda /dev/sdb /dev/sdc
mdadm: Defaulting to version 1.2 metadata
mdadm: array /dev/md0 started.
root@tsuginosuke:/home/shi3z# mdadm -D /dev/md0
/dev/md0:
           Version : 1.2
     Creation Time : Mon Nov 27 05:03:24 2023
        Raid Level : raid0
        Array Size : 11720658432 (10.92 TiB 12.00 TB)
      Raid Devices : 3
     Total Devices : 3
       Persistence : Superblock is persistent

       Update Time : Mon Nov 27 05:03:24 2023
             State : clean
    Active Devices : 3
   Working Devices : 3
    Failed Devices : 0
     Spare Devices : 0

            Layout : -unknown-
        Chunk Size : 512K

Consistency Policy : none

              Name : tsuginosuke:0  (local to host tsuginosuke)
              UUID : ac49be56:65d332c7:9980e2b4:59487d77
            Events : 0

    Number   Major   Minor   RaidDevice State
       0       8        0        0      active sync   /dev/sda
       1       8       16        1      active sync   /dev/sdb
       2       8       32        2      active sync   /dev/sdc
今回はsdaからsdcの三つが東芝のハードディスクのようだ。
ここでサーバー屋さんは「あーあー、同じロットの同じメーカーのHDD並べちゃって耐障害性どうすんのよ、これだからシロートさんは」と思ったことだろう。今回は別にいいのだ。ハードディスクなど使い捨てである。
今回はRAID0構成でこの三つのハードディスクを一つにして使うことにする。
RAID0というのは、この三つのハードディスクを同時並行的に使うことでスループットを向上させるという、普通のサーバーなら壊れた時に死ぬので基本的にやらない構成だ。
しかしこれはスーパーコンピュータ。大事なデータなどないのである。
あるのは貪欲に求める学習データとモデルのみ。モデルなど、壊れたらまた学習すればいいのだ。
mdadmをインストールしてsdaからsdcを束ねてみる。
# sudo apt install mdadm
Reading package lists... Done
Building dependency tree... Done
Reading state information... Done
mdadm is already the newest version (4.2-0ubuntu2).
mdadm set to manually installed.
0 upgraded, 0 newly installed, 0 to remove and 38 not upgraded.
# mdadm --create /dev/md0 --level=0 --raid-devices=3 /dev/sda /dev/sdb /dev/sdc
mdadm: Defaulting to version 1.2 metadata
mdadm: array /dev/md0 started.
root@tsuginosuke:/home/shi3z# mdadm -D /dev/md0
/dev/md0:
           Version : 1.2
     Creation Time : Mon Nov 27 05:03:24 2023
        Raid Level : raid0
        Array Size : 11720658432 (10.92 TiB 12.00 TB)
      Raid Devices : 3
     Total Devices : 3
       Persistence : Superblock is persistent

       Update Time : Mon Nov 27 05:03:24 2023
             State : clean
    Active Devices : 3
   Working Devices : 3
    Failed Devices : 0
     Spare Devices : 0

            Layout : -unknown-
        Chunk Size : 512K

Consistency Policy : none

              Name : tsuginosuke:0  (local to host tsuginosuke)
              UUID : ac49be56:65d332c7:9980e2b4:59487d77
            Events : 0

    Number   Major   Minor   RaidDevice State
       0       8        0        0      active sync   /dev/sda
       1       8       16        1      active sync   /dev/sdb
       2       8       32        2      active sync   /dev/sdc
できた。あっさりである。
しかしこれをマウントしようとしたら怒られた。
# mkdir /mnt/hdd
# mount /dev/md0 /mnt/hdd
mount: /mnt/hdd: wrong fs type, bad option, bad superblock on /dev/md0, missing codepage or helper program, or other error.
「ChatGPTモーン、継之助に怒られちゃったよー」と泣きつくと「フォーマットしろ」とのこと。そりゃそうか。
フォーマットはext4でいいのかどうか悩んだが、まあ他のファイルシステムを調べるの面倒なのでとりあえずext4でフォーマットしてみる。SSDとかは違うフォーマットの方がいいとかありそう。
# mkfs.ext4 /dev/md0
mke2fs 1.46.5 (30-Dec-2021)
Creating filesystem with 2930164608 4k blocks and 366272512 inodes
Filesystem UUID: af1c8f32-2a1a-4b13-9379-126207434eef
Superblock backups stored on blocks:
	32768, 98304, 163840, 229376, 294912, 819200, 884736, 1605632, 2654208,
	4096000, 7962624, 11239424, 20480000, 23887872, 71663616, 78675968,
	102400000, 214990848, 512000000, 550731776, 644972544, 1934917632,
	2560000000

Allocating group tables: done
Writing inode tables: done
Creating journal (262144 blocks): done
Writing superblocks and filesystem accounting information: done
フォーマットが終わったら無事、マウントできた。やったぜ
# mount /dev/md0 /mnt/hdd
# ls /mnt/hdd
lost+found
んで、transformersとかのキャッシュ先をこのHDD上におきたいので.bashrcをこんな感じでいじった。
$ cat ~/.bashrc
export PYENV_ROOT="$HOME/.pyenv"
export PYTORCH_TRANSFORMERS_CACHE="/mnt/hdd/cache"
export PATH="$PYENV_ROOT/bin:$PATH"
eval "$(pyenv init -)"
cd /mnt/hdd
こうするとtransformersで読み込んだモデルは全てHDD上に保存されるという寸法だ。
まあ本当はSSDにした方がいいと思うんだけどそれはまた次回。
試しにNous-Capybara-34bをダウンロードリベンジだ!と思って簡単なコードを書いて実行する。
$ cat nous.py
from transformers import AutoTokenizer, AutoModelForCausalLM

tokenizer = AutoTokenizer.from_pretrained("NousResearch/Nous-Capybara-34B",trust_remote_code=True)
model = AutoModelForCausalLM.from_pretrained("NousResearch/Nous-Capybara-34B",trust_remote_code=True)
huggingfaceのサンプルの通りだとエラーが出る。
リモートコードを信用して実行するフラグをつなければならない。
なぜREPLでやらないのかというと、ダウンロードに時間がかかるからである。これは半日くらいは待たないといけない。なんせ34Bだ。データ量は640GBくらいあるのである。
nohupで実行する。
$ nohup python nous.py&これで一安心だ。
$ tail -f nohup.out
Downloading config.json: 100%|██████████| 687/687 [00:00<00:00, 2.90MB/s]
Downloading (…)model.bin.index.json: 100%|██████████| 44.8k/44.8k [00:00<00:00, 16.8MB/s]
Downloading shards:   0%|          | 0/7 [00:00<?, ?it/s]   Downloading (…)l-00001-of-00007.bin:  51%|█████▏    | 5.12G/9.98G [11:20<10:41, 7.57MB/s]
あとは気長に待つだけだ。
ここまで揃ったら日本最大規模のLLMを個人で作れるようになる。
そのためのデータセットも一ヶ月かけて用意したしな
わくわく