
[UIデザイナーが学ぶ]Three.jsのパーティクルのすこし応用の話
はじめに
この記事はthreejs journeyを利用しての学習メモです。
このthreejs journeyはthree.jsを学ぶのに非常に有用ですので、是非視聴してみてください。おすすめです!!
パーティクルの応用に挑戦
パーティクルを利用しての応用表現に挑戦したいと思います。
ベースの表示
まずはベースとなるパーティクル表示を行います。
座標-2〜2の範囲でランダムに10000個のパーティクルを配置します。
...中略

let geometry = null;
let material = null;
let points = null;

const parameters = {
  count: 10000,
  size: 0.02,
};

const createParticles = () => {
  if (points !== null) {
    geometry.dispose();
    material.dispose();
    scene.remove(points);
  }

  geometry = new THREE.BufferGeometry();
  const positions = new Float32Array(parameters.count * 3);

  for (let i = 0; i < parameters.count; i++) {
    const i3 = i * 3;
    positions[i3] = (Math.random() - 0.5) * 4;
    positions[i3 + 1] = (Math.random() - 0.5) * 4;
    positions[i3 + 2] = (Math.random() - 0.5) * 4;
  }

  geometry.setAttribute("position", new THREE.BufferAttribute(positions, 3));

  material = new THREE.PointsMaterial({
    size: parameters.size,
    sizeAttenuation: true,
    depthWrite: false,
    blending: THREE.AdditiveBlending,
  });

  points = new THREE.Points(geometry, material);

  scene.add(points);
};

createParticles()
表示はこんな感じ。
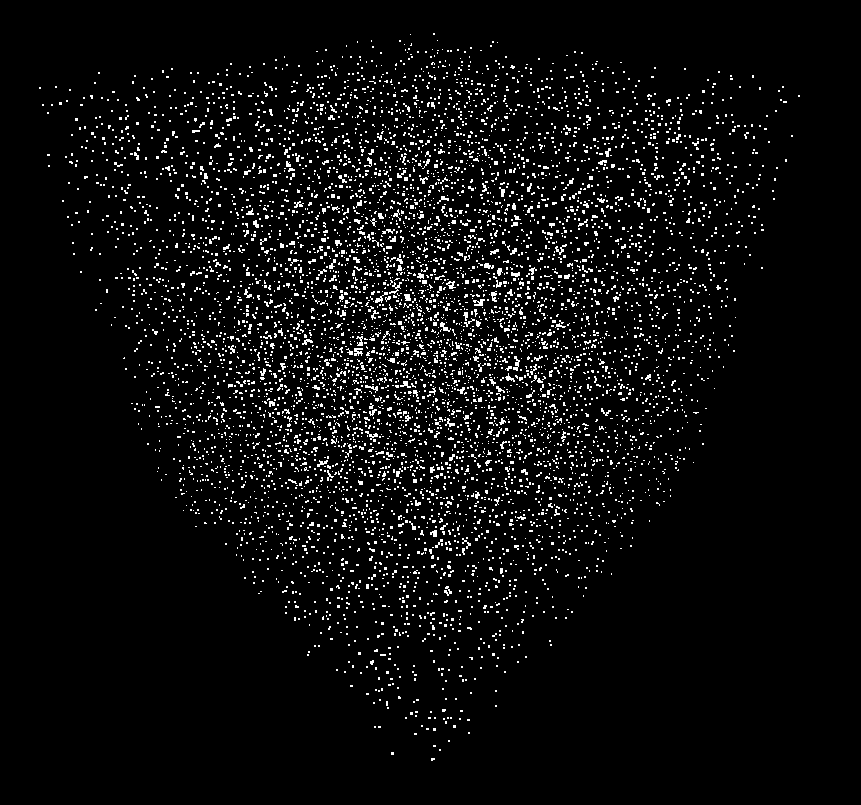
以下の箇所念の為メモリーリークしないように、メモリの開放と不要なオブジェクトを削除しています。
  if (points !== null) {
    geometry.dispose();
    material.dispose();
    scene.remove(points);
  }
パーティクルを直線に配置する
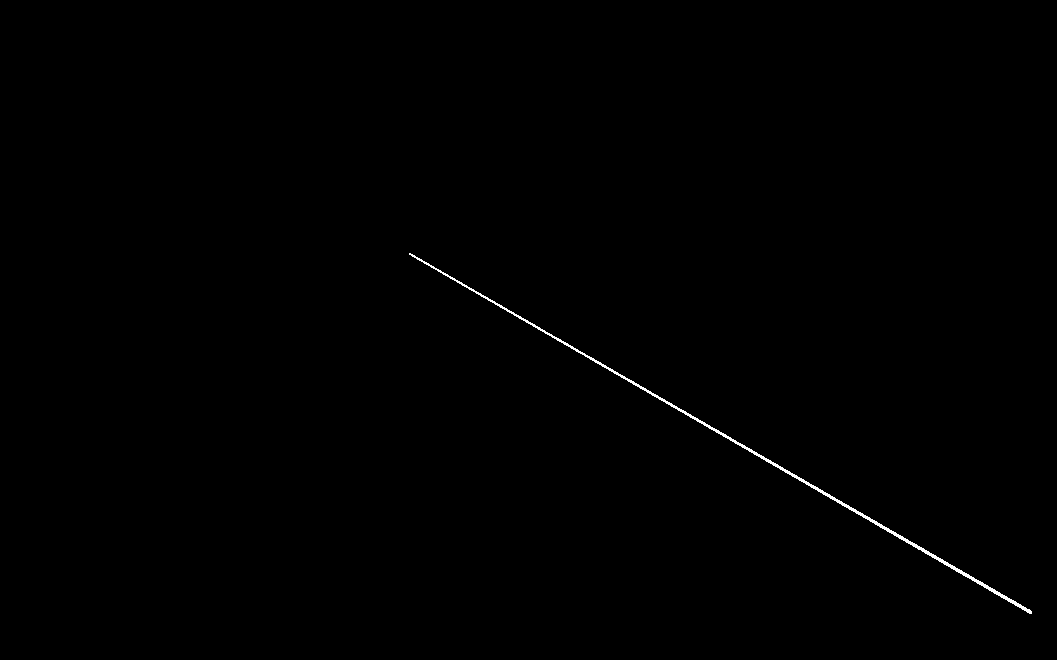
パーティクルを1直線に配置します。
直線の長さは5としてパラメーターに追加します。
x座標のみ値を設定することでパーティクルがx座標の0〜5の間に配置されます(当たり前ですが…)
const parameters = {
  count: 10000,
  size: 0.02,
  radius: 5, // 追加
};

 for (let i = 0; i < parameters.count; i++) {
    const radius = Math.random() * parameters.radius;

    const i3 = i * 3;
    positions[i3] = radius;
    positions[i3 + 1] = 0;
    positions[i3 + 2] = 0;
  }
複数の直線を描く
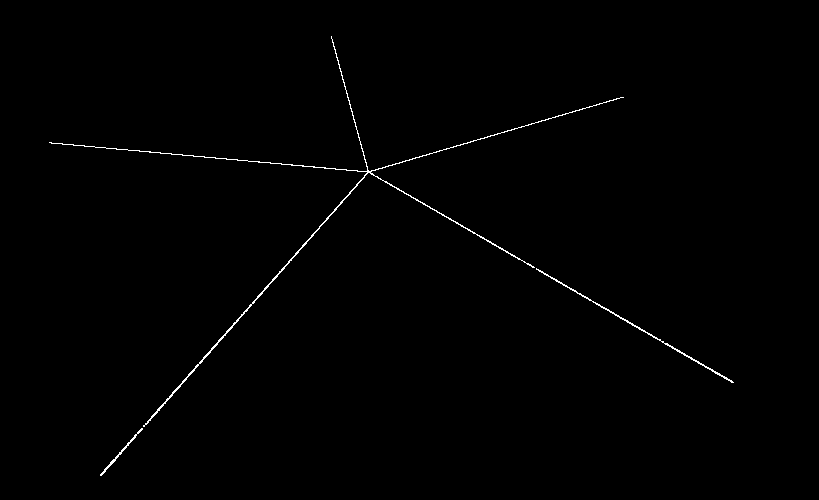
上記で描いた直線を複数追加してみます。
まずは、各線の角度を決めていき、その角度に従って線を描いていきます。
const parameters = {
  count: 10000,
  size: 0.02,
  radius: 5,
  branches: 5,
};

 中略...

  for (let i = 0; i < parameters.count * 3; i++) {
    const radius = Math.random() * parameters.radius;
    const branchAngle = (i % parameters.branches) / parameters.branches * Math.PI * 2

 中略...
以下でまずはbranchesの値に合わせて、0〜1の範囲で正規化を行います。
branchesが5の場合、「0, 0.2, 0.4, 0.6, 0.8」の取得できるので、これを利用して角度を設定します。
(i % parameters.branches) / parameters.branches今回は描画範囲を360度にするのでMath.PI*2を上記で取得した値にかけます。
(i % parameters.branches) / parameters.branches * Math.PI * 252°間隔で線が描画されました。
原点を軸に線をねじる
次に原点を軸に線をねじってみようと思います
radiusの値にspinの値を掛けることで、原点から遠ければ遠いほど値が大きくなります。
これを座標値に足すことでねじりを表現します。
...中略

const parameters = {
  count: 10000,
  size: 0.02,
  radius: 5,
  branches: 5,
  spin: 1, // 追加
};


const createParticles = () => {
  geometry = new THREE.BufferGeometry();
  const positions = new Float32Array(parameters.count * 3);

  for (let i = 0; i < parameters.count; i++) {
    const radius = Math.random() * parameters.radius;
    const spinAngle = radius * parameters.spin; // 追加

    const branchAngle =
      ((i % parameters.branches) / parameters.branches) * Math.PI * 2;
    const i3 = i * 3;
    positions[i3] = Math.cos(branchAngle + spinAngle) * radius;
    positions[i3 + 1] = 0;
    positions[i3 + 2] = Math.sin(branchAngle + spinAngle) * radius;
  }
...中略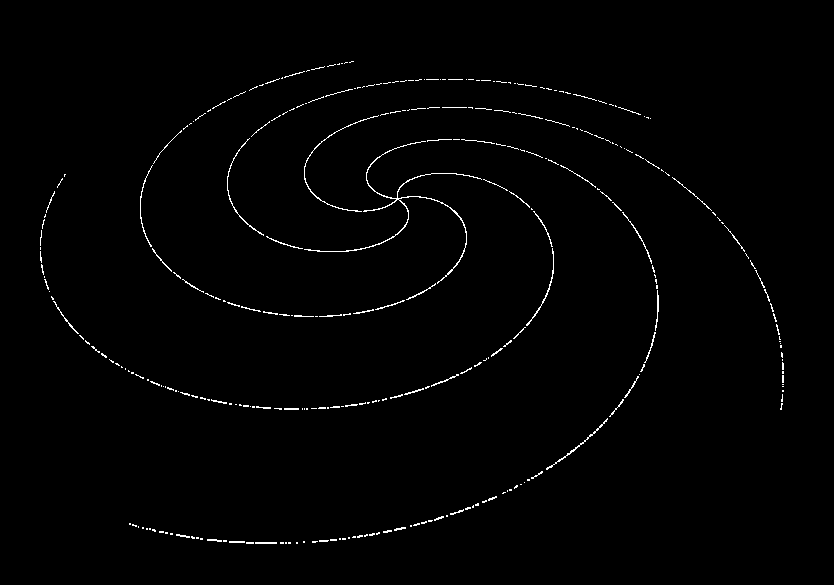
ランダムに配置
現在は規則的にパーティクルが並んでいるので、よりランダムには配置するようにします。
...中略

const parameters = {
  count: 10000,
  size: 0.02,
  radius: 5,
  branches: 5,
  spin: 1,
  randomness: 0.2,
};

const createParticles = () => {
  geometry = new THREE.BufferGeometry();
  const positions = new Float32Array(parameters.count * 3);

  for (let i = 0; i < parameters.count; i++) {
    const radius = Math.random() * parameters.radius;
    const spinAngle = radius * parameters.spin;

    const branchAngle =
      ((i % parameters.branches) / parameters.branches) * Math.PI * 2;
    const i3 = i * 3;

    const randomX = (Math.random() - 0.5) * parameters.randomness;
    const randomY = (Math.random() - 0.5) * parameters.randomness;
    const randomZ = (Math.random() - 0.5) * parameters.randomness;

    positions[i3] = Math.cos(branchAngle + spinAngle) * radius + randomX;
    positions[i3 + 1] = randomY;
    positions[i3 + 2] = Math.sin(branchAngle + spinAngle) * radius + randomZ;
  }
...中略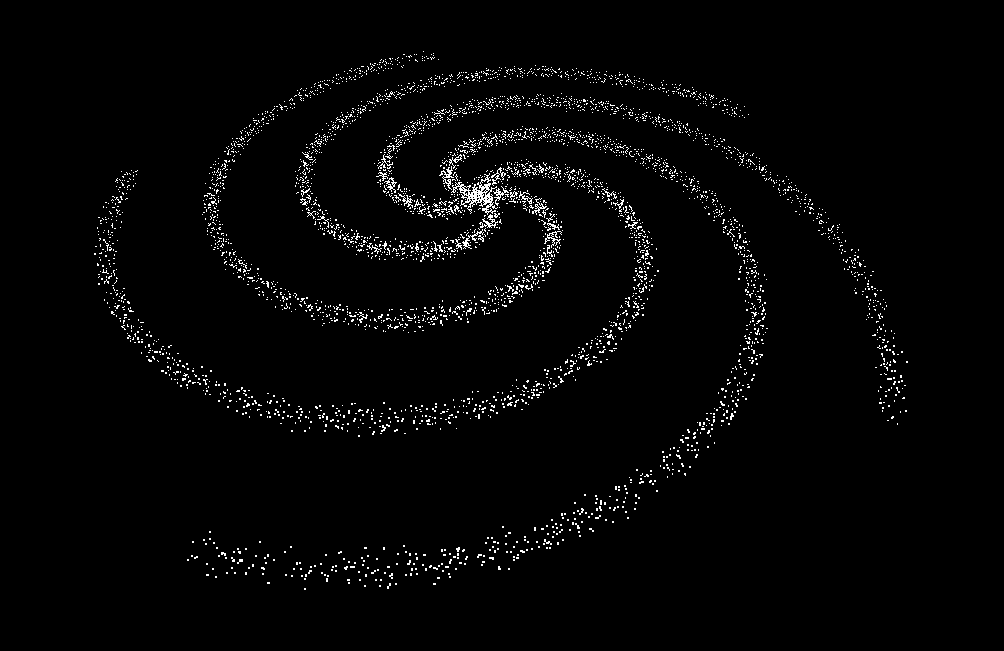
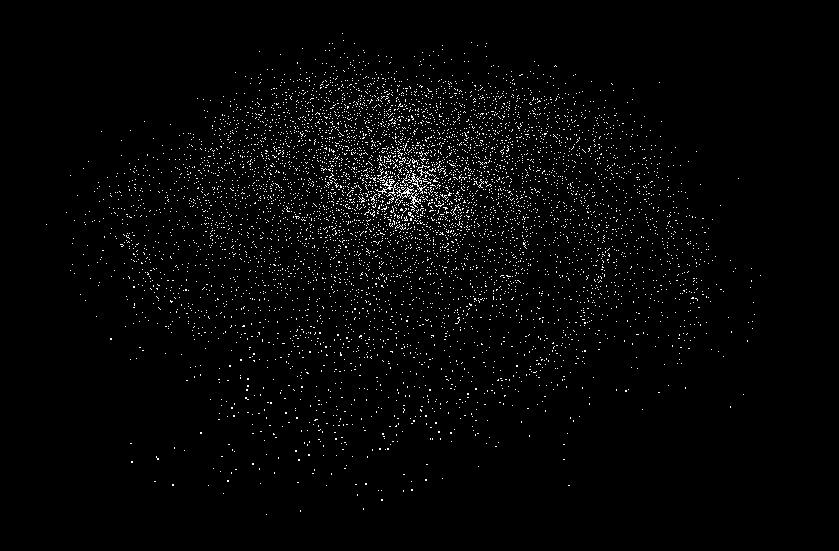
もっとランダムに配置
Math.pow()を利用することで、ランダム配置の分布を変更します。
    const randomX = Math.pow(Math.random(), parameters.randomnessPower);
    const randomY = Math.pow(Math.random(), parameters.randomnessPower);
    const randomZ = Math.pow(Math.random(), parameters.randomnessPower);
だだし、上記の方法だと値が必ず正の値になるので、負の値もはいるように、調整します。
   const randomX = Math.pow(Math.random(), parameters.randomnessPower) * (Math.random() < 0.5 ? 1 : -1);
   const randomY = Math.pow(Math.random(), parameters.randomnessPower) * (Math.random() < 0.5 ? 1 : -1);
   const randomZ = Math.pow(Math.random(), parameters.randomnessPower) * (Math.random() < 0.5 ? 1 : -1);
よりばらけるようになりました。
色をつける
最後に色をつけて終わりです。
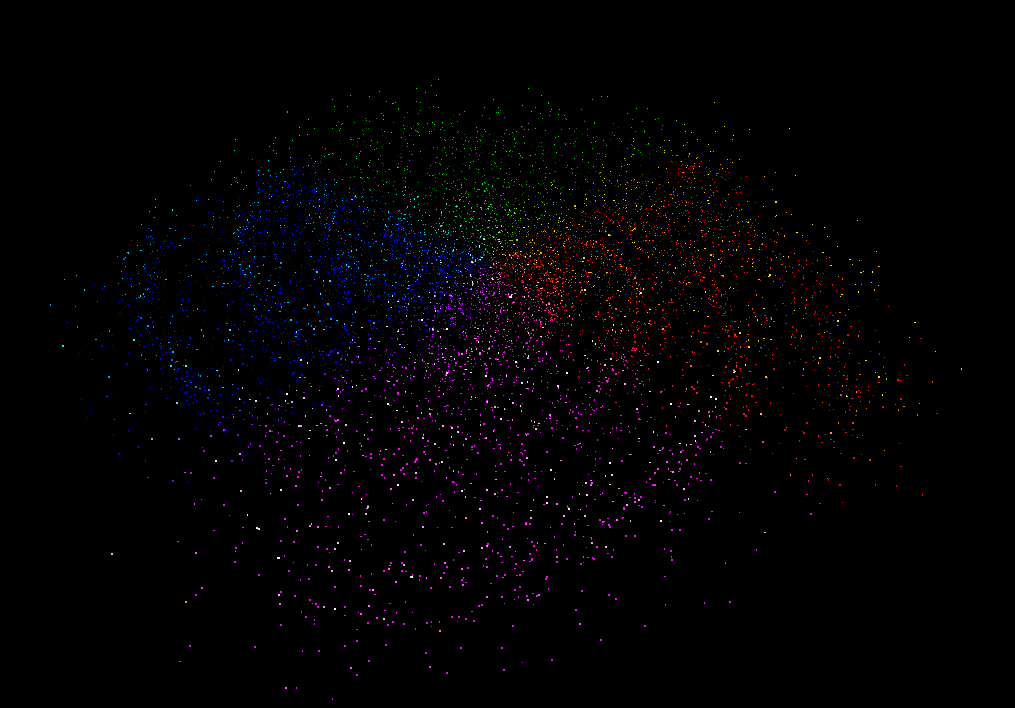
マテリアルに以下を追加することで、頂点カラーを設定することができるようになります。
vertexColors: true単純にpositonsと同じ値をいれていみる。
const createParticles = () => {
  geometry = new THREE.BufferGeometry();
  const positions = new Float32Array(parameters.count * 3);
  const colors = new Float32Array(parameters.count * 3);

  for (let i = 0; i < parameters.count; i++) {
    const radius = Math.random() * parameters.radius;
    const spinAngle = radius * parameters.spin;

    const branchAngle =
      ((i % parameters.branches) / parameters.branches) * Math.PI * 2;
    const i3 = i * 3;

    const randomX =
      Math.pow(Math.random(), parameters.randomnessPower) *
      (Math.random() < 0.5 ? 1 : -1);
    const randomY =
      Math.pow(Math.random(), parameters.randomnessPower) *
      (Math.random() < 0.5 ? 1 : -1);
    const randomZ =
      Math.pow(Math.random(), parameters.randomnessPower) *
      (Math.random() < 0.5 ? 1 : -1);

    positions[i3] = Math.cos(branchAngle + spinAngle) * radius + randomX;
    positions[i3 + 1] = randomY;
    positions[i3 + 2] = Math.sin(branchAngle + spinAngle) * radius + randomZ;

    colors[i3] = Math.cos(branchAngle + spinAngle) * radius + randomX;
    colors[i3 + 1] = randomY;
    colors[i3 + 2] = Math.sin(branchAngle + spinAngle) * radius + randomZ;
  }

  geometry.setAttribute("position", new THREE.BufferAttribute(positions, 3));
  geometry.setAttribute("color", new THREE.BufferAttribute(colors, 3));

  material = new THREE.PointsMaterial({
    size: parameters.size,
    sizeAttenuation: true,
    depthWrite: false,
    blending: THREE.AdditiveBlending,
    vertexColors: true,
  });

  points = new THREE.Points(geometry, material);

  scene.add(points);
};
こんな感じで、これはこれできれい。
原点から外にむかってグラデーションにしてみる
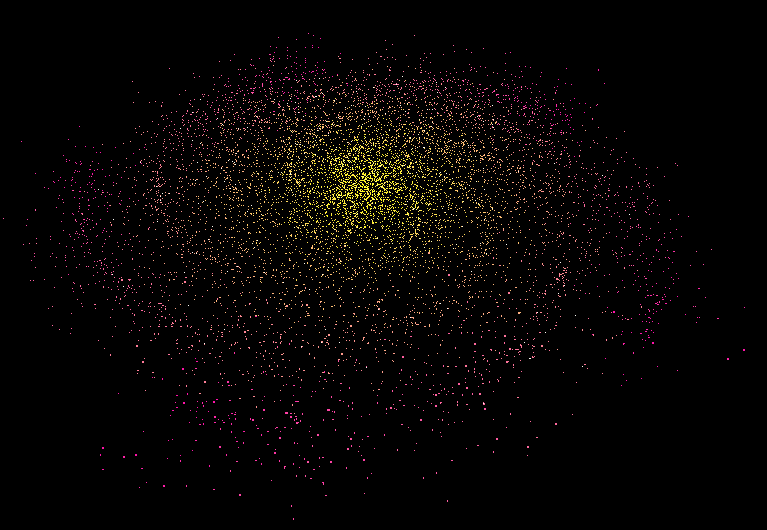
原点から外にいくにつれ色が変わっていくようにしてみます。
Three.jsのVector3クラスのメソッドlerp関数を利用してグラデーションを表現してみます。
◎lerp関数とは
lerp 関数は、線形補間 (linear interpolation) を行うための関数です。lerp は、2つの値の間を指定した割合で補間します。
const color1 = new THREE.Color(0xff0000); // 赤
const color2 = new THREE.Color(0x0000ff); // 青
const alpha = 0.5; // 補間の割合

const resultColor = color1.clone().lerp(color2, alpha);
console.log(resultColor); // 中間色 (紫)
今回のサンプルに適応してみると、
グラデーションさせたいので、原点からの距離によって色を徐々に変えていこうと思います。
その際に、色に利用する値は正規化する必要があるので0〜1にします。
const createParticles = () => {
  geometry = new THREE.BufferGeometry();
  const positions = new Float32Array(parameters.count * 3);
  const colors = new Float32Array(parameters.count * 3);
  const color1 = new THREE.Color(0xfffb00); // 黄色
  const color2 = new THREE.Color(0xff00aa); // ピンク

  for (let i = 0; i < parameters.count; i++) {
    const radius = Math.random() * parameters.radius;
    const spinAngle = radius * parameters.spin;

    const branchAngle =
      ((i % parameters.branches) / parameters.branches) * Math.PI * 2;
    const i3 = i * 3;

    const randomX =
      Math.pow(Math.random(), parameters.randomnessPower) *
      (Math.random() < 0.5 ? 1 : -1);
    const randomY =
      Math.pow(Math.random(), parameters.randomnessPower) *
      (Math.random() < 0.5 ? 1 : -1);
    const randomZ =
      Math.pow(Math.random(), parameters.randomnessPower) *
      (Math.random() < 0.5 ? 1 : -1);

    positions[i3] = Math.cos(branchAngle + spinAngle) * radius + randomX;
    positions[i3 + 1] = randomY;
    positions[i3 + 2] = Math.sin(branchAngle + spinAngle) * radius + randomZ;

    // 原点からの距離によって色を変える
    const alpha = radius / parameters.radius;
    const resultColor = color1.clone().lerp(color2, alpha);

    colors[i3] = resultColor.r;
    colors[i3 + 1] = resultColor.g;
    colors[i3 + 2] = resultColor.b;
  }
ちょっと見づらいですが、こんな感じ。
おまけ
アニメーションさせてみます。
... 中略
/**
 * Animate
 */
const clock = new THREE.Clock();

const tick = () => {
  const elapsedTime = clock.getElapsedTime();

  const positions = geometry.attributes.position.array;
  const angle = Math.PI * 0.001;
  const cosAngle = Math.cos(angle);
  const sinAngle = Math.sin(angle);

  for (let i = 0; i < positions.length; i += 3) {
    const x = positions[i];
    const z = positions[i + 2];

    // Y軸回転の回転行列を適用
    positions[i] = x * cosAngle - z * sinAngle; // 新しいX座標
    positions[i + 2] = x * sinAngle + z * cosAngle; // 新しいZ座標
  }

  geometry.attributes.position.needsUpdate = true; // 更新を通知

  // Update controls
  controls.update();

  // Render
  renderer.render(scene, camera);

  // Call tick again on the next frame
  window.requestAnimationFrame(tick);
};

tick();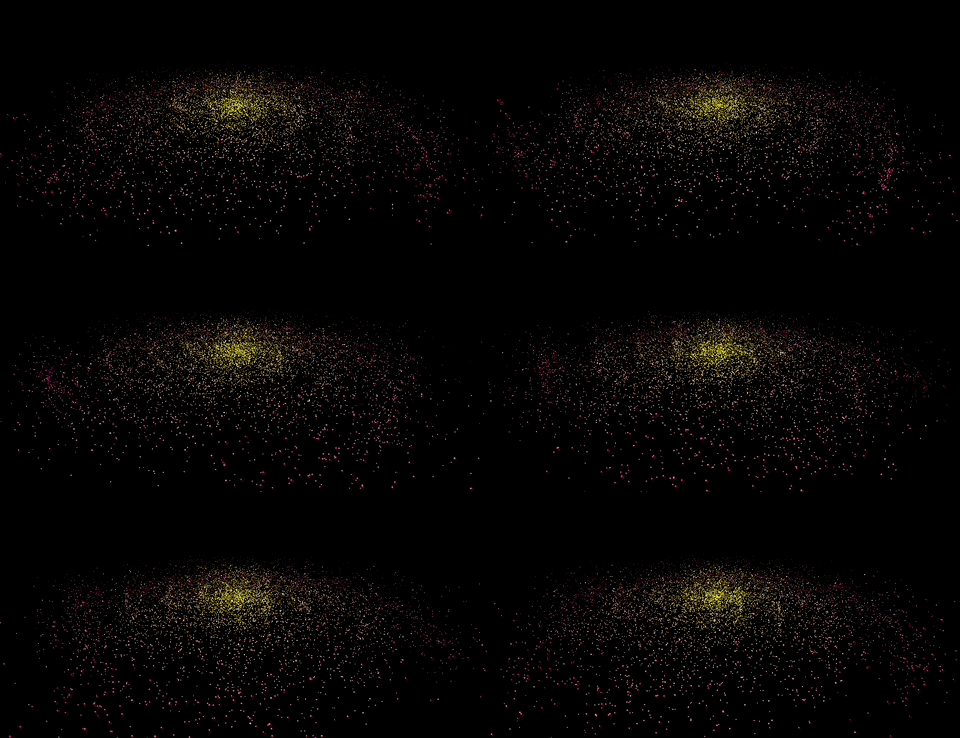
おすすめサイト
こちらを見ていただくともっと理解が深まると思います。
