React Native の expo-localization の使い方

「React Native」の「expo-localization」の使い方をまとめました。
前回
1. expo-localization
「expo-localization」は、React Nativeアプリで端末のロケール情報を取得するためのライブラリです。
2. React Nativeアプリの多言語対応
React Nativeアプリの多言語対応の手順は、次のとおりです。
2-1. React Nativeプロジェクトの作成
(1) React Nativeプロジェクトの作成。
npx react-native init my_app --version 0.75.3
cd my_app
(2) パッケージのインストール。
「i18next」は多言語対応のパッケージです。
npx install-expo-modules
npm install expo-localization
npm install i18next react-i18next
npm install --save-dev @types/react-i18next
2-2. iOSのセットアップ
(1) podのインストール。
cd ios
pod install
cd ..
(2) Xcodeで署名し、iPhoneにインストールできることを確認。
2-3. React Nativeアプリの多言語対応
(1) 言語リソースの準備。
言語リソースのフォルダ構成は、次のとおりです。
・プロジェクトフォルダ
・App.tsx
・localization フォルダ
・i18n.ts
・ja フォルダ
・index.ts
・en フォルダ
・index.ts
・localization/i18n.ts
import i18n from "i18next";
import { initReactI18next } from "react-i18next";
import * as Localization from "expo-localization";
import en from "./en/index";
import ja from "./ja/index";
i18n.use(initReactI18next).init({
resources: {
en: { translation: en },
ja: { translation: ja },
},
lng: Localization.getLocales()[0]?.languageTag, // 端末の言語設定を適用
fallbackLng: "en", // 言語が見つからない場合は英語にフォールバック
interpolation: {
escapeValue: false,
},
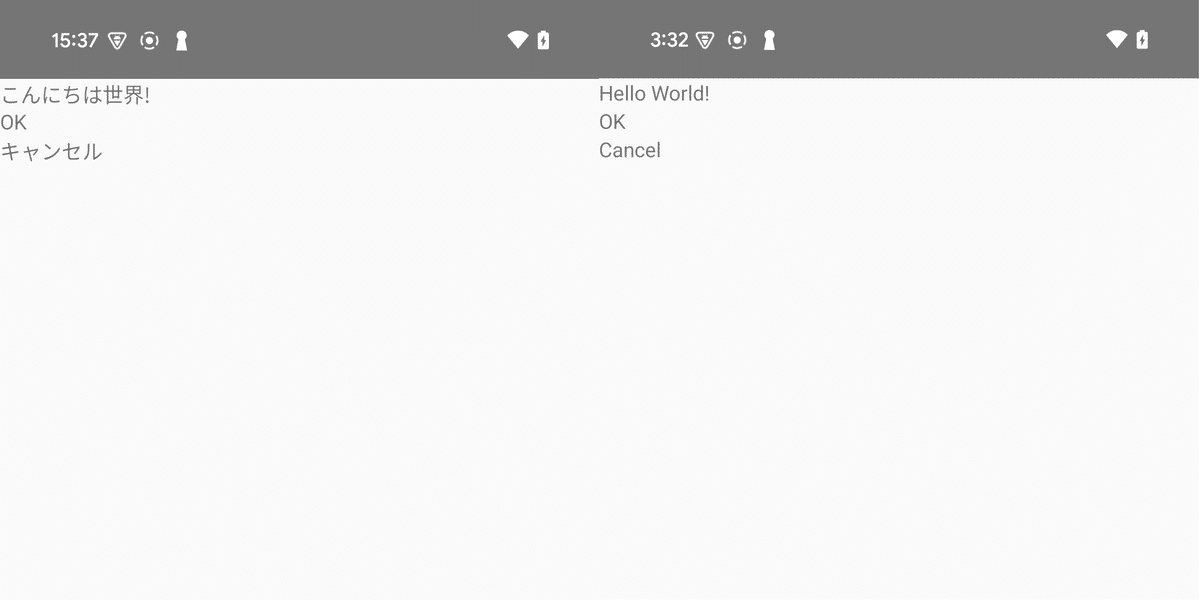
});・localization/ja/index.ts
const ja = {
    helloworld: "こんにちは世界",
    button: {
        ok: "OK",
        cancel: "キャンセル",
    }
};

export default ja;
・localization/en/index.ts
const en = {
    helloworld: "Hello World!",
    button: {
        ok: "OK",
        cancel: "Cancel",
    }
}


export default en;
(2) コードの編集。
・App.tsx
import React from "react";
import { Text, View } from "react-native";
import { useTranslation } from "react-i18next";
import "./localization/i18n";

const App: React.FC = () => {
  const { t } = useTranslation();

  return (
    <View>
      <Text>{t("helloworld")}</Text>
      <Text>{t("button.ok")}</Text>
      <Text>{t("button.cancel")}</Text>
    </View>
  );
};

export default App;
(3) コードの実行。
npm start