Google Colab で T2I-Adapter-SDXL を試す

「Google Colab」で「T2I-Adapter-SDXL」を試したので、まとめました。
1. T2I-Adapter-SDXL
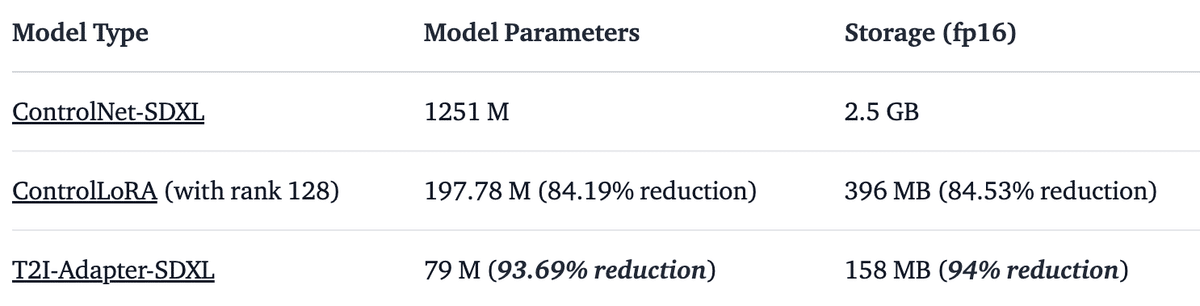
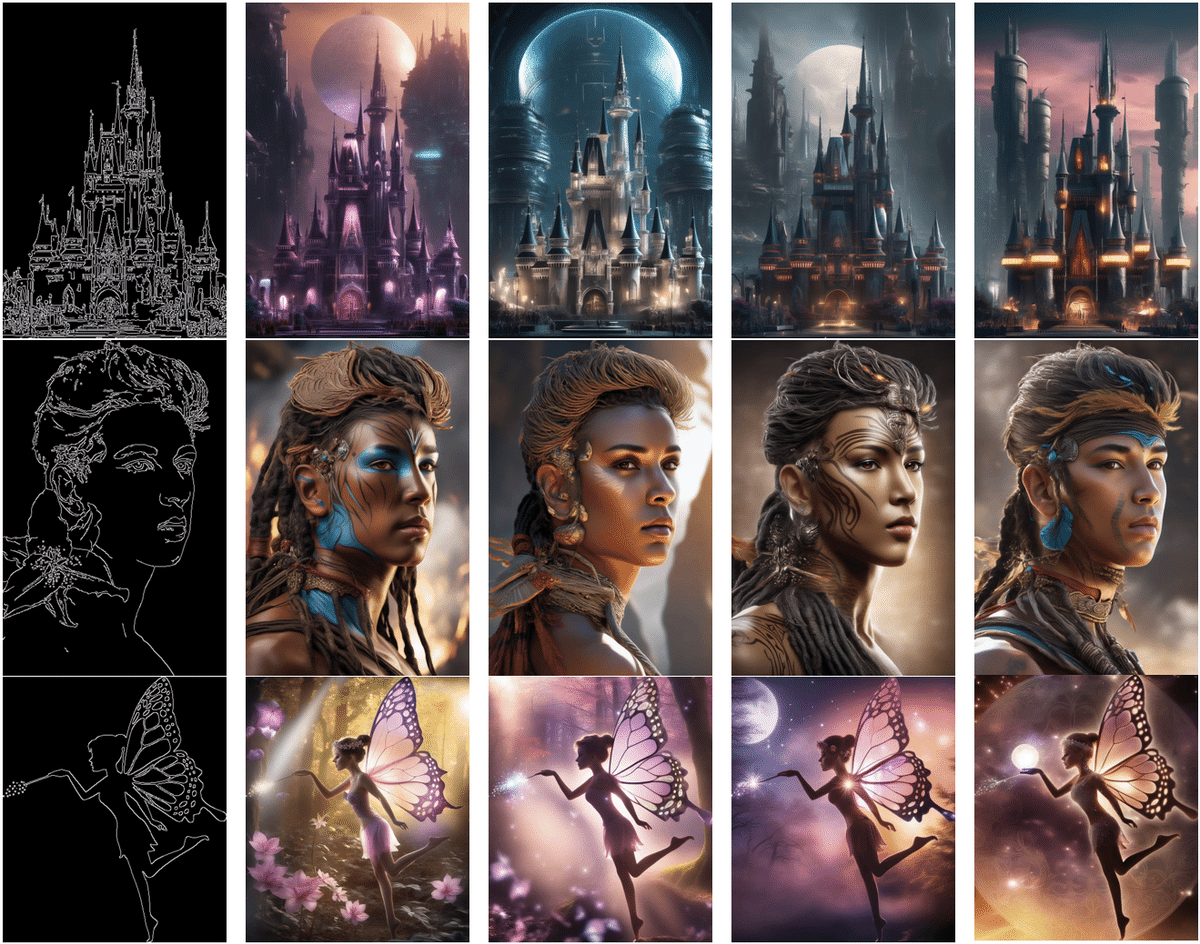
「T2I-Adapter-SDLX」は、「SDXL」でテキストから画像を生成する時に追加条件 (sketch、canny、lineart、depth、openpose) を加えて生成結果を制御するニューラルネットワークです。「ControlNet」と比べて、実行コストが低いのが特徴です。
2. Colabでの実行
Colabでの実行手順は、次のとおりです。
(1) パッケージのインストール。
# パッケージのインストール
!pip install -U git+https://github.com/huggingface/diffusers.git
!pip install -U controlnet_aux==0.0.7 # コンディショニングモデルと検出器用
!pip install transformers accelerate
(2) T2I-Adapterの準備。
import torch
from diffusers import T2IAdapter

# T2I-Adapterの準備
adapter = T2IAdapter.from_pretrained(
    "TencentARC/t2i-adapter-lineart-sdxl-1.0",  # Lineart
    torch_dtype=torch.float16,
    varient="fp16"
).to("cuda")
(3) SDXLAdapterパイプラインの準備。
from diffusers import (
    AutoencoderKL,
    EulerAncestralDiscreteScheduler,
    StableDiffusionXLAdapterPipeline,
)

# SDXLAdapterパイプラインの準備
euler_a = EulerAncestralDiscreteScheduler.from_pretrained(
    "stabilityai/stable-diffusion-xl-base-1.0",
    subfolder="scheduler"
)
vae = AutoencoderKL.from_pretrained(
    "madebyollin/sdxl-vae-fp16-fix",
    torch_dtype=torch.float16
)
pipe = StableDiffusionXLAdapterPipeline.from_pretrained(
    "stabilityai/stable-diffusion-xl-base-1.0",
    vae=vae,
    adapter=adapter,
    scheduler=euler_a,
    torch_dtype=torch.float16,
    variant="fp16",
).to("cuda")
(4) LineartDetectorの準備。
from controlnet_aux.lineart import LineartDetector
# LineartDetectorの準備
line_detector = LineartDetector.from_pretrained(
"lllyasviel/Annotators"
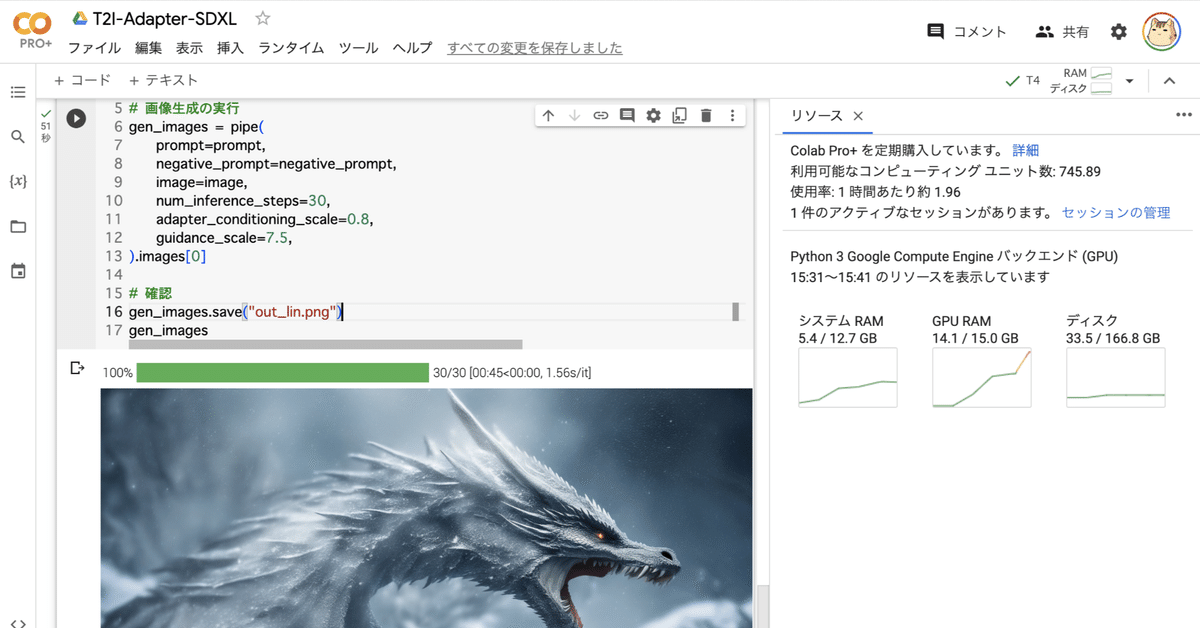
).to("cuda")(5) 入力画像の準備。
from diffusers.utils import load_image

# 入力画像の準備
url = "https://huggingface.co/Adapter/t2iadapter/resolve/main/figs_SDXLV1.0/org_lin.jpg"
image = load_image(url)

# 確認
image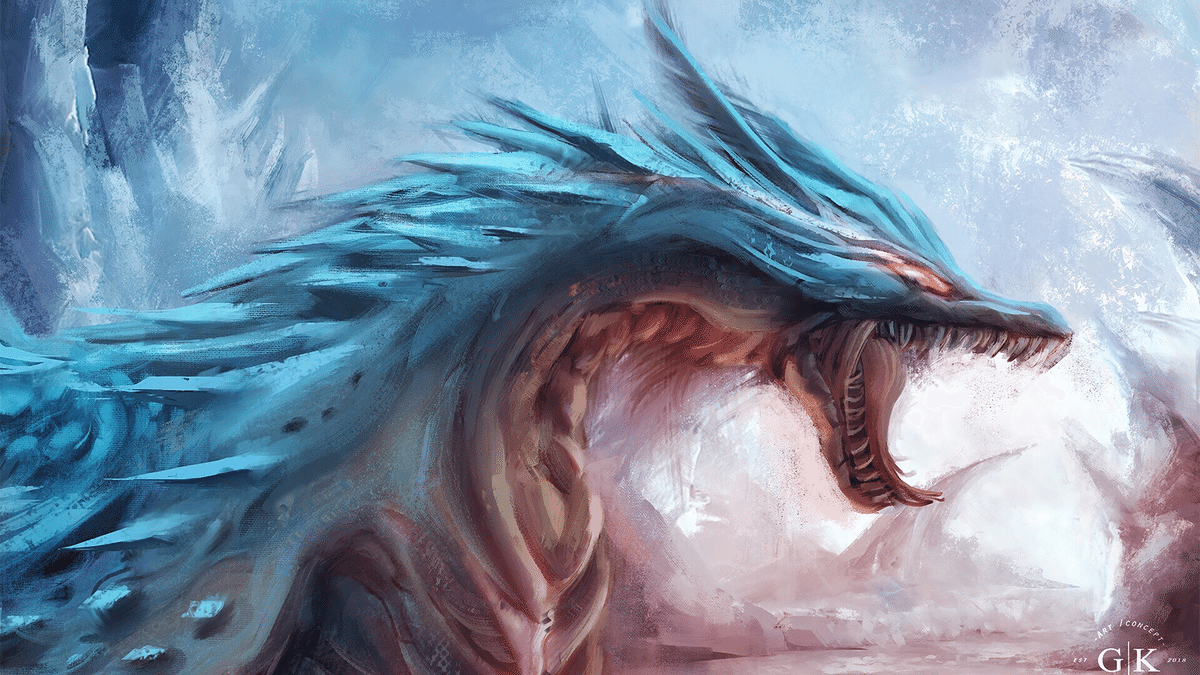
(6) 入力画像から線画を検出。
# 線画の検出
image = line_detector(image, detect_resolution=384, image_resolution=1024)

# 確認
image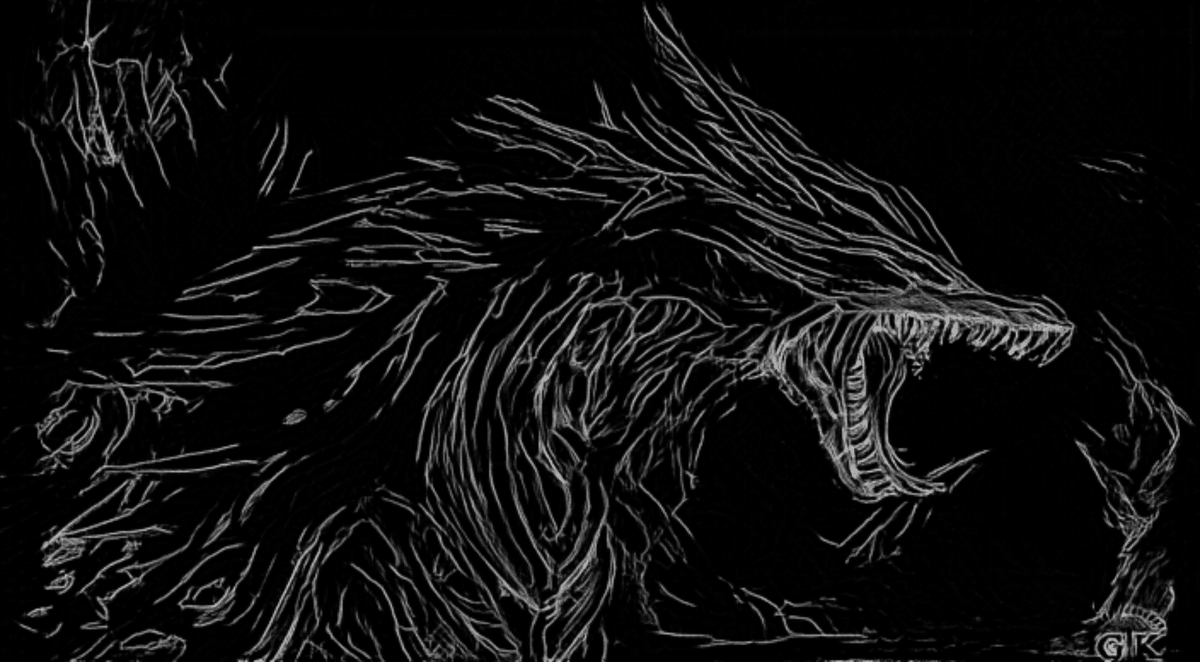
(7) テキストからの画像生成。
# プロンプトの準備
prompt = "Ice dragon roar, 4k photo"
negative_prompt = "anime, cartoon, graphic, text, painting, crayon, graphite, abstract, glitch, deformed, mutated, ugly, disfigured"

# 画像生成の実行
gen_images = pipe(
    prompt=prompt,
    negative_prompt=negative_prompt,
    image=image,
    num_inference_steps=30,
    adapter_conditioning_scale=0.8,
    guidance_scale=7.5,
).images[0]

# 確認
gen_images.save("out_lin.png")
gen_images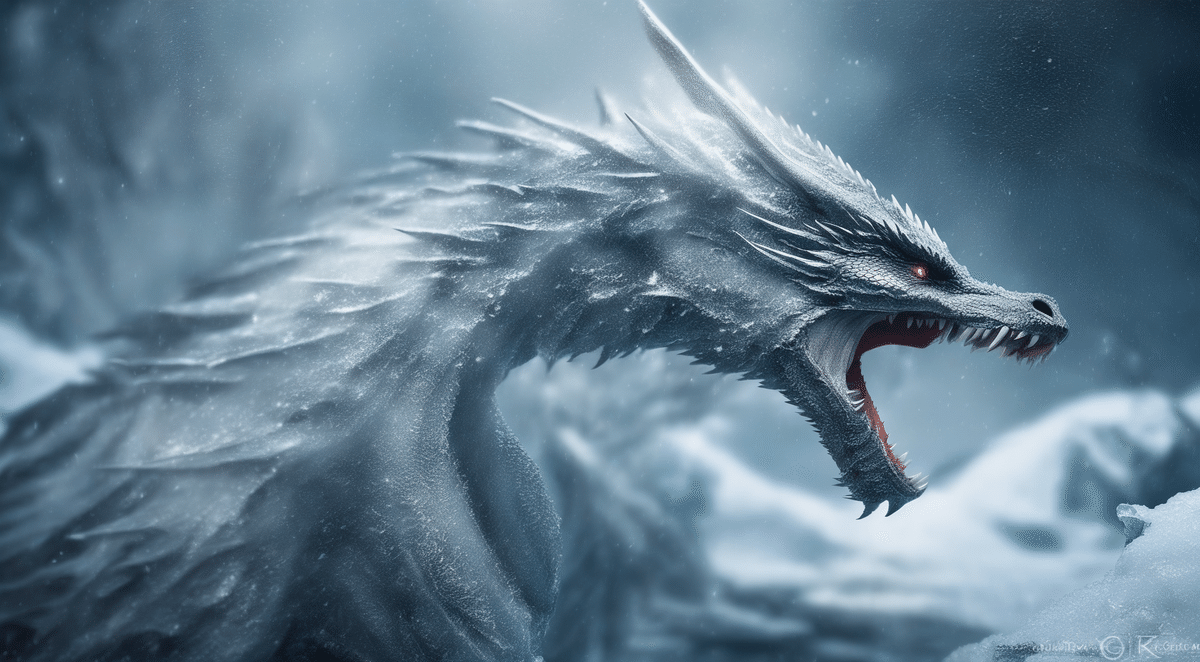
プロンプトの日本語訳は、次のとおりです。
prompt = "アイスドラゴン 咆哮 4K 写真"
negative_prompt = "アニメ, 漫画, グラフィック, テキスト, ペインティング, クレヨン, 黒鉛, 抽象, グリッチ, 変形した, 変異した, 醜い"
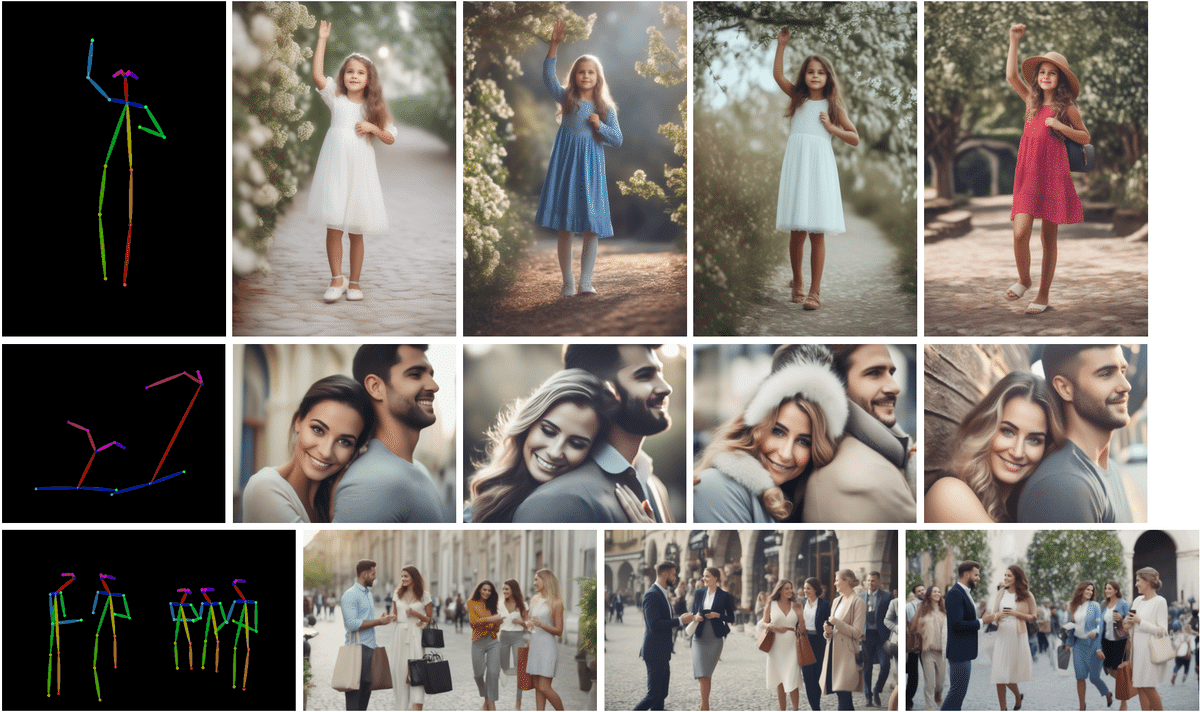
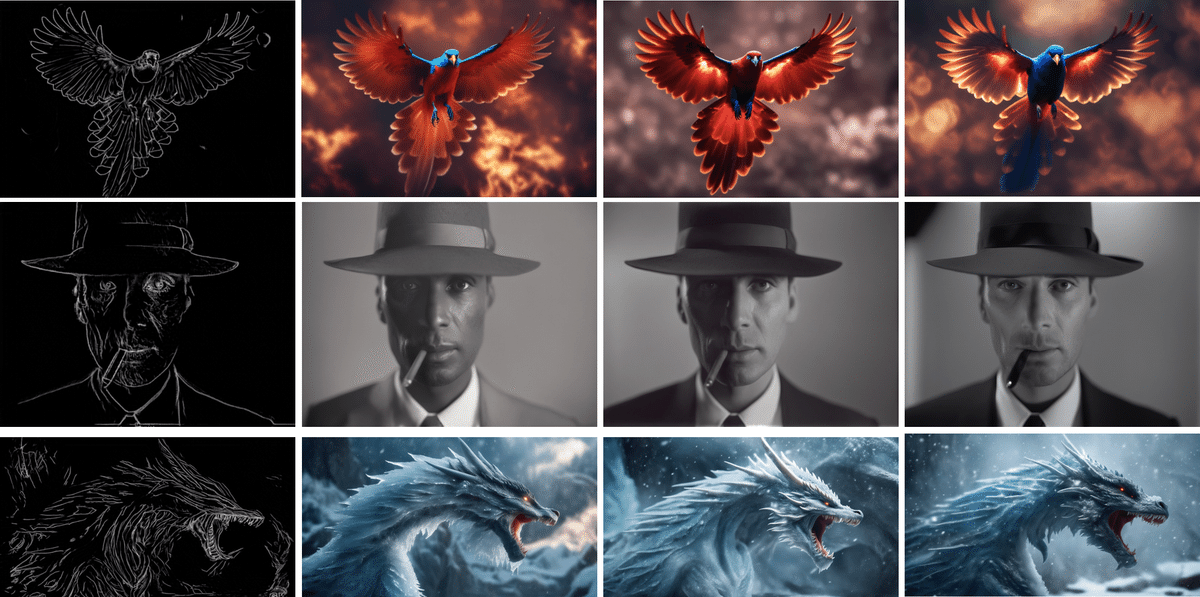
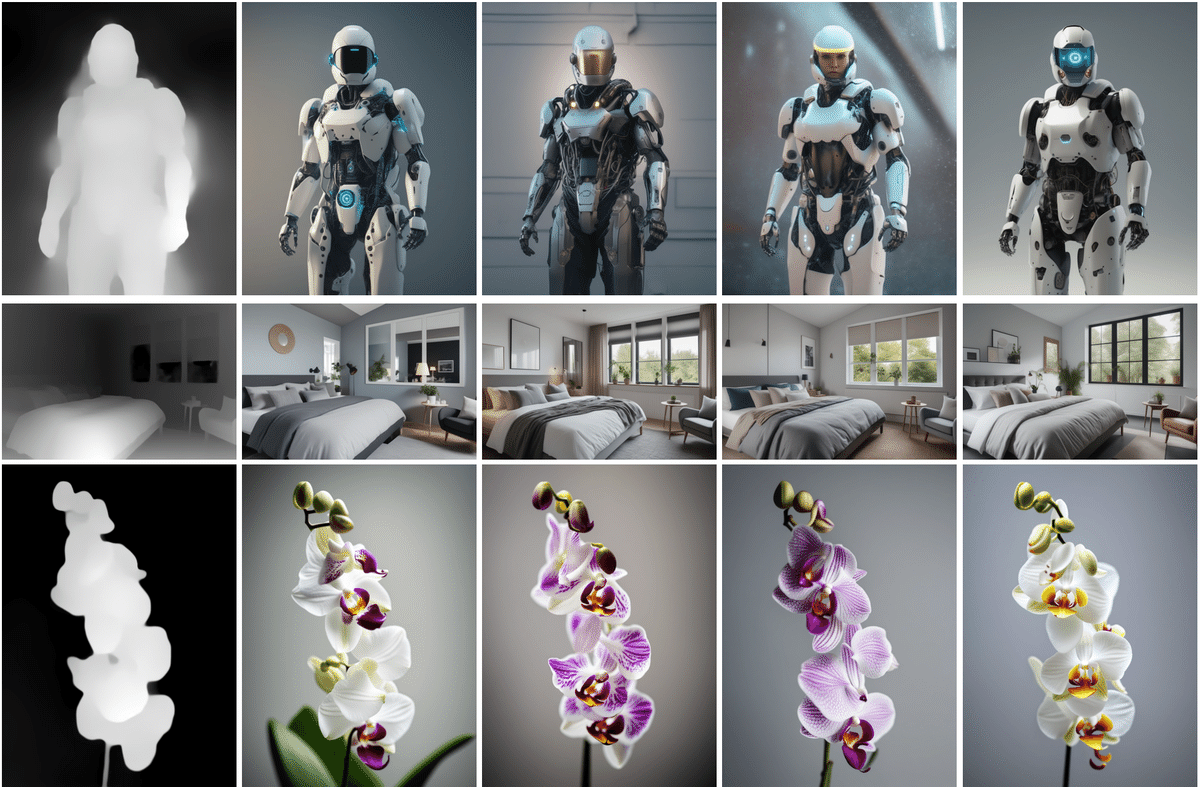
3. 生成結果
各コンディショニングの「生成結果」と「チェックポイント」は、次のとおりです。
4-1. Lineart
4-2.Sketch
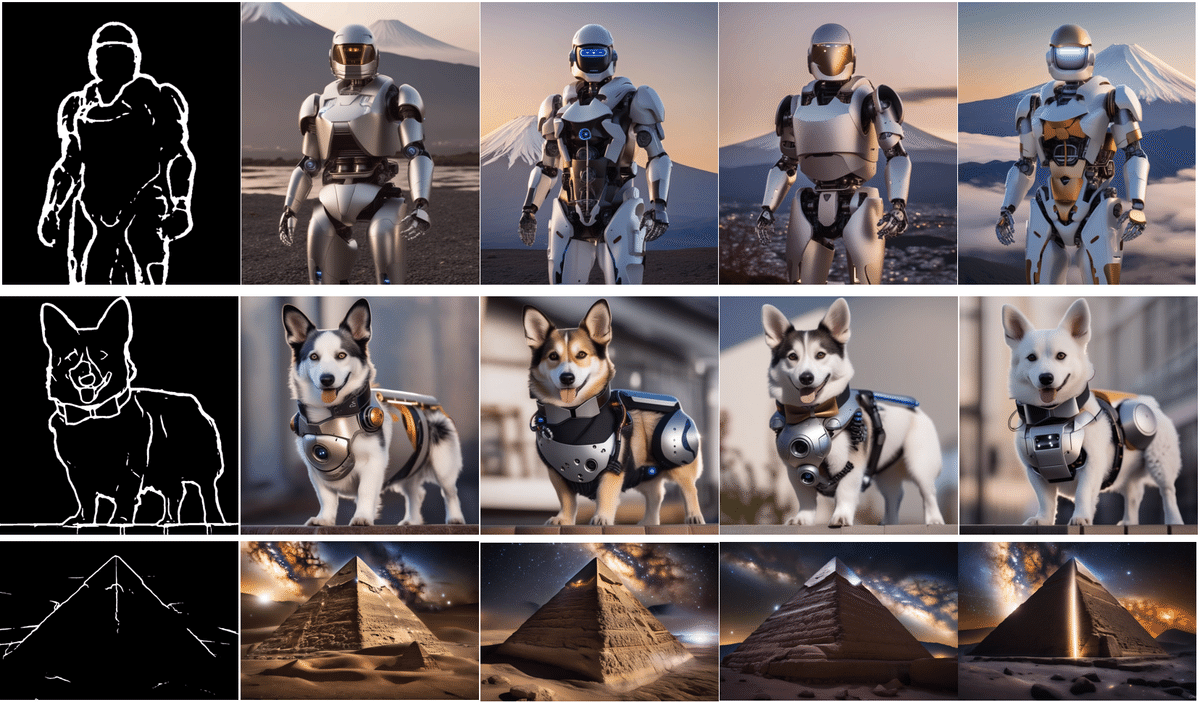
4-3. Canny
4-4. Depth
・TencentARC/t2i-adapter-depth-midas-sdxl-1.0
・TencentARC/t2i-adapter-depth-zoe-sdxl-1.0
4-5. OpenPose