diffusers で ControNet の inpaint を試す
「diffusers」で「ControNet」の「inpaint」を試したので、まとめました。
・diffusers v0.24.0
1. ControlNet の inpaint
「inpaint」は、画像の一部をマスクして、任意の領域のみ新しい画像を生成させることができる機能です。
2. Colabでの実行
「ControlNet」で「inpaint」を行う手順は、次のとおりです。
(1) パッケージのインストール。
# パッケージのインストール
!pip install diffusers accelerate omegaconf
(2) モデルのダウンロード。
今回は、「IrisMix-v3」を使います。
# モデルのダウンロード
!wget https://huggingface.co/natsusakiyomi/IrisMix/resolve/main/IrisMix-v3.safetensors
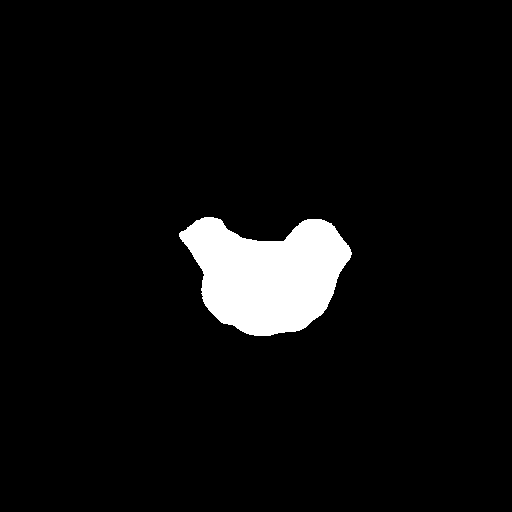
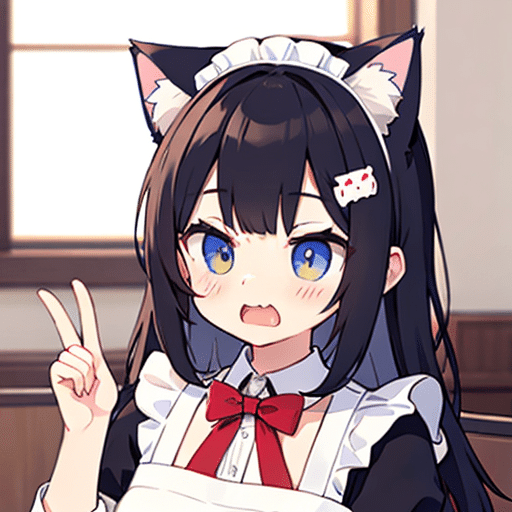
(3) 左端のフォルダアイコンでファイル一覧を表示し、初期画像とマスク画像をアップロード。
表情のみ変更するためのマスク画像になります。
・init_image.png

・mask_image.png

(4) 初期画像とマスク画像の読み込み
ControlNetで利用するコントロール画像も準備します。
from diffusers.utils import load_image
import numpy as np
import torch

# 初期画像の準備
init_image = load_image("init_image.png")
init_image = init_image.resize((512, 512))

# マスク画像の準備
mask_image = load_image("mask_image.png")
mask_image = mask_image.resize((512, 512))

# コントロール画像の準備
def make_inpaint_condition(image, image_mask):
    image = np.array(image.convert("RGB")).astype(np.float32) / 255.0
    image_mask = np.array(image_mask.convert("L")).astype(np.float32) / 255.0

    assert image.shape[0:1] == image_mask.shape[0:1], "image and image_mask must have the same image size"
    image[image_mask > 0.5] = -1.0  # set as masked pixel
    image = np.expand_dims(image, 0).transpose(0, 3, 1, 2)
    image = torch.from_numpy(image)
    return image
control_image = make_inpaint_condition(init_image, mask_image)
(5) ControlNetモデルとパイプラインの準備。
from diffusers import ControlNetModel, DDIMScheduler, StableDiffusionControlNetInpaintPipeline

# ControlNetモデルの準備
controlnet = ControlNetModel.from_pretrained(
    "lllyasviel/control_v11p_sd15_inpaint",
    torch_dtype=torch.float16
)

# パイプラインの準備
pipe = StableDiffusionControlNetInpaintPipeline.from_single_file(
    "IrisMix-v3.safetensors",
    controlnet=controlnet,
    torch_dtype=torch.float16
)
pipe.scheduler = DDIMScheduler.from_config(pipe.scheduler.config)
pipe.enable_model_cpu_offload()

# EasyNegativeV2の準備
pipe.load_textual_inversion("embed/negative",weight_name="EasyNegativeV2.safetensors",token="EasyNegative")

# NSFWの無効化
pipe.safety_checker = lambda images, **kwargs: (images, [False] * len(images))
(6) 画像生成。
prompt = "angry, cute cat ear maid"
negative_prompt = "EasyNegativeV2, bad face"

# 画像生成
image = pipe(
    prompt,
    negative_prompt=negative_prompt,
    num_inference_steps=20,
    generator=generator,
    image=init_image,
    mask_image=mask_image,
    control_image=control_image,
).images[0]

# 確認
image
3. 他のプロンプトによる画像生成
3-1. 笑顔
prompt = "happy, cute cat ear maid"
3-2. 悲しい顔
prompt = "sad, crying, despair, cute cat ear maid"
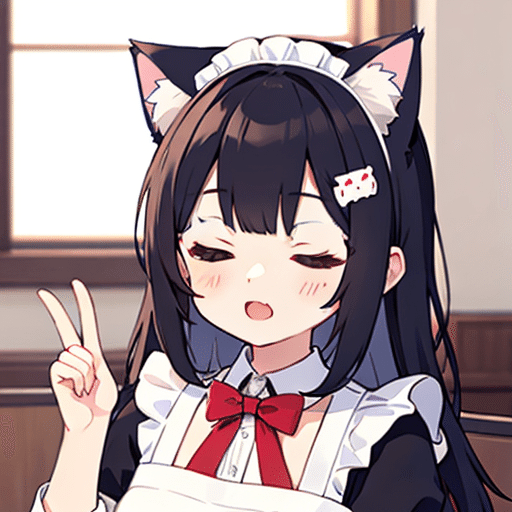
prompt = "close eyes, blink, cat ear maid"3-3. 目を閉じた顔

