React Native の ネイティブモジュール の使い方
前回
1. ネイティブモジュールの呼び出し
1-1. React Nativeプロジェクトの作成
(1) React Nativeプロジェクトの作成。
npx react-native init my_app
cd my_app
1-2. Androidのネイティブモジュールの実装
(1) AndroidStudioでReact Nativeプロジェクトのandroidフォルダを開く。
(2) ネイティブモジュールの実装。
・DeviceNameModule.kt
package com.my_app

import com.facebook.react.bridge.Promise
import com.facebook.react.bridge.ReactApplicationContext
import com.facebook.react.bridge.ReactContextBaseJavaModule
import com.facebook.react.bridge.ReactMethod

// デバイス名モジュール
class DeviceNameModule(reactContext: ReactApplicationContext) : ReactContextBaseJavaModule(reactContext) {

    // 名前の取得
    override fun getName(): String {
        return "DeviceNameModule"
    }

    // デバイス名の取得
    @ReactMethod
    fun getDeviceName(promise: Promise) {
        try {
            val deviceName = android.os.Build.MODEL
            promise.resolve(deviceName)
        } catch (e: Exception) {
            promise.reject("Error", e)
        }
    }
}
(3) ネイティブモジュールをアプリ側に公開。
・DeviceNameModulePackage.kt
package com.my_app

import com.facebook.react.ReactPackage
import com.facebook.react.bridge.ReactApplicationContext
import com.facebook.react.bridge.NativeModule
import com.facebook.react.uimanager.ViewManager

// パッケージ
class DeviceNameModulePackage : ReactPackage {

    // ネイティブモジュールの生成
    override fun createNativeModules(reactContext: ReactApplicationContext): List<NativeModule> {
        return listOf(DeviceNameModule(reactContext))
    }

    // ビューマネージャの生成
    override fun createViewManagers(reactContext: ReactApplicationContext): List<ViewManager<*, *>> {
        return emptyList()
    }
}
・MainApplication.ktの一部
  override val reactNativeHost: ReactNativeHost =
      object : DefaultReactNativeHost(this) {
        override fun getPackages(): List<ReactPackage> =
            PackageList(this).packages.apply {
              // 自動リンクできないパッケージは、ここで手動で追加できる
              // example: add(MyReactNativePackage())

              add(DeviceNameModulePackage()) // ★ここに追加
            }
1-3. iOSのネイティブモジュールの実装
(1) podのインストール。
cd ios
pod install
cd ..
(2) Xcodeで「ios」内のworkspaceを開き、署名し、iPhoneにインストールできることを確認。
(3) ネイティブモジュールの実装。
Swiftでネイティブモジュールを実装します。
・DeviceNameModule.swift
import Foundation
import React

// デバイス名モジュール
@objc(DeviceNameModule)
class DeviceNameModule: NSObject, RCTBridgeModule {

    // 名前の取得
    static func moduleName() -> String! {
        return "DeviceNameModule"
    }

    // モジュールをメインスレッドで初期化する必要があるか
    static func requiresMainQueueSetup() -> Bool {
        return true
    }

    // デバイス名の取得
    @objc(getDeviceName:rejecter:)
    func getDeviceName(resolver: @escaping RCTPromiseResolveBlock, rejecter: @escaping RCTPromiseRejectBlock) {
        let deviceName = UIDevice.current.name
        if !deviceName.isEmpty {
            resolver(deviceName)
        } else {
            rejecter("Error", "Device name could not be retrieved", nil)
        }
    }
}
(4) ブリッジヘッダーの設定。
Swiftコードの初回追加時に、ブリッジヘッダー追加ダイアログが開くので、「Create Bridgin Header」ボタンを押します。
・<プロジェクト名>-Bridging-Header.h
#import <React/RCTBridgeModule.h>(5) ネイティブモジュールをアプリ側に公開。
・DeviceNameModule.m
#import <React/RCTBridgeModule.h>

@interface RCT_EXTERN_MODULE(DeviceNameModule, NSObject)

RCT_EXTERN_METHOD(getDeviceName:(RCTPromiseResolveBlock)resolve rejecter:(RCTPromiseRejectBlock)reject)

@end
1-4. ネイティブモジュールの呼び出し
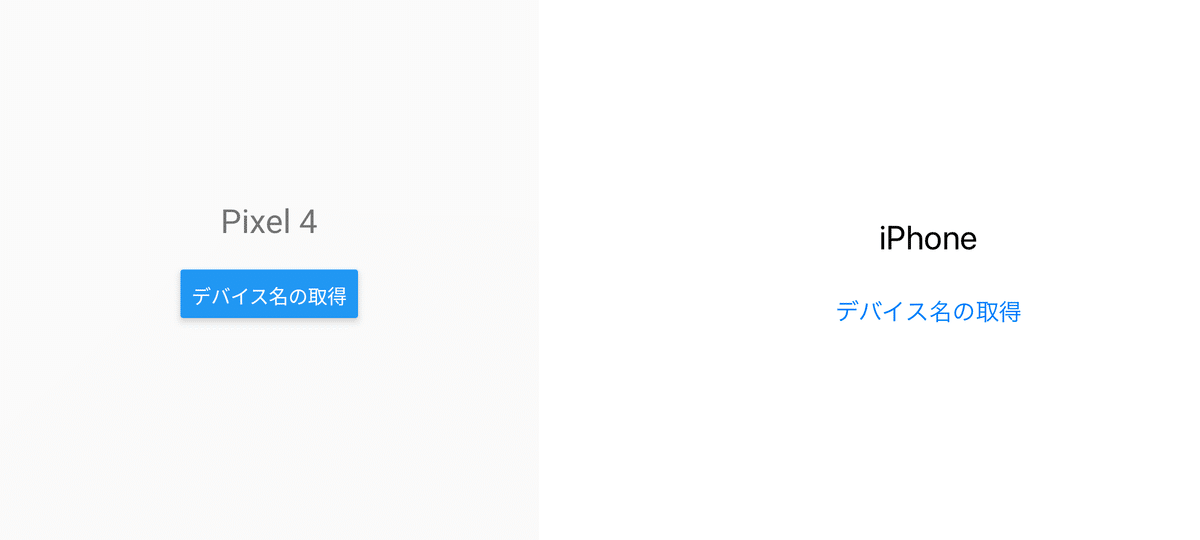
(1) 「App.tsx」の編集。
・App.tsx
import React, { useState } from 'react';
import { Button, Text, SafeAreaView } from 'react-native';

// ネイティブモジュールの準備
import { NativeModules } from 'react-native';
const { DeviceNameModule } = NativeModules;

// アプリ
const App: React.FC = () => {
  const [message, setMessage] = useState('');

  // ボタンクリック時に呼ばれる
  const onClick = async () => {
    // デバイス名の取得
    const deviceName = await DeviceNameModule.getDeviceName()
    setMessage(deviceName);
  };

  return (
    <SafeAreaView style={{ flex: 1, justifyContent: 'center', alignItems: 'center' }}>
      <Text style={{ fontSize: 24, marginBottom: 20 }}>{message}</Text>
      <Button
        onPress={onClick}
        title="デバイス名の取得"
      />
      </SafeAreaView>
  );
};

export default App;
(2) 実行。
npm start
2. ネイティブモジュールからのイベント通知
2-1. Androidのネイティブモジュールの実装
(1) AndroidStudioでReact Nativeプロジェクトのandroidフォルダを開く。
(2) ネイティブモジュールの実装。
・ClockModule.kt
package com.my_app

import com.facebook.react.bridge.*
import com.facebook.react.modules.core.DeviceEventManagerModule
import java.util.*
import kotlin.concurrent.fixedRateTimer

// ネイティブモジュール
class ClockModule(reactContext: ReactApplicationContext) : ReactContextBaseJavaModule(reactContext) {
    private val reactContext: ReactApplicationContext = reactContext
    private var timer: Timer? = null

    // 名前の取得
    override fun getName(): String {
        return "ClockModule"
    }

    // イベントの送信
    private fun sendEvent(eventName: String, params: WritableMap?) {
        reactContext
            .getJSModule(DeviceEventManagerModule.RCTDeviceEventEmitter::class.java)
            .emit(eventName, params)
    }

    // Tickingの開始
    @ReactMethod
    fun startTicking() {
        timer?.cancel()
        timer = fixedRateTimer("tickTimer", false, 0L, 1000L) {
            val params = Arguments.createMap()
            params.putString("message", "" + Date())
            sendEvent("TickEvent", params) // イベント名を修正
        }
    }

    // Tickingの停止
    @ReactMethod
    fun stopTicking() {
        timer?.cancel()
        timer = null
    }

    // リスナーの追加
    @ReactMethod
    fun addListener(eventName: String) {
    }

    // リスナーの削除
    @ReactMethod
    fun removeListeners(count: Int) {
    }
}
(3) ネイティブモジュールをアプリ側に公開。
・ClockModulePackage.kt
package com.my_app

import com.facebook.react.ReactPackage
import com.facebook.react.bridge.ReactApplicationContext
import com.facebook.react.uimanager.ViewManager
import com.facebook.react.bridge.NativeModule

// パッケージ
class ClockModulePackage : ReactPackage {

    // ネイティブモジュールの生成
    override fun createNativeModules(reactContext: ReactApplicationContext): List<NativeModule> {
        return listOf(ClockModule(reactContext))
    }

    // ビューマネージャの生成
    override fun createViewManagers(reactContext: ReactApplicationContext): List<ViewManager<*, *>> {
        return emptyList()
    }
}
・MainApplication.ktの一部
  override val reactNativeHost: ReactNativeHost =
      object : DefaultReactNativeHost(this) {
        override fun getPackages(): List<ReactPackage> =
            PackageList(this).packages.apply {
              // 自動リンクできないパッケージは、ここで手動で追加できる
              // example: add(MyReactNativePackage())

              add(MyEventEmitterPackage()) // ★ここに追加
            }
2-2. iOSのネイティブモジュールの実装
(1) podのインストール。
cd ios
pod install
cd ..
(2) Xcodeで「ios」内のworkspaceを開き、署名し、iPhoneにインストールできることを確認。
(3) ネイティブモジュールの実装。
・MyEventEmitter.swift
import Foundation
import React

// ネイティブモジュール
@objc(ClockModule)
class ClockModule: RCTEventEmitter {
  private var timer: Timer?

  // サーポートイベントの取得
  override func supportedEvents() -> [String]! {
    return ["TickEvent"]
  }

  // Tickingの開始
  @objc
  func startTicking() {
    stopTicking()
    DispatchQueue.main.async {
      self.timer = Timer.scheduledTimer(timeInterval: 1.0, target: self, selector: #selector(self.sendTickEvent), userInfo: nil, repeats: true)
      RunLoop.current.add(self.timer!, forMode: .common)
    }
  }

  // Tickingの停止
  @objc
  func stopTicking() {
    timer?.invalidate()
    timer = nil
  }

  // イベントの送信
  @objc
  private func sendTickEvent() {
    let params: [String: Any] = ["message": "\(Date())"]
    sendEvent(withName: "TickEvent", body: params)
  }

  // メインキューの利用
  override static func requiresMainQueueSetup() -> Bool {
    return true
  }
}
(4) ブリッジヘッダーの設定。
Swiftコードの初回追加時に、ブリッジヘッダー追加ダイアログが開くので、「Create Bridgin Header」ボタンを押します。
・<プロジェクト名>-Bridging-Header.h
#import <React/RCTBridgeModule.h>(5) ネイティブモジュールをアプリ側に公開。
・ClockModule.m
#import <React/RCTBridgeModule.h>
#import <React/RCTEventEmitter.h>

@interface RCT_EXTERN_MODULE(ClockModule, RCTEventEmitter)

RCT_EXTERN_METHOD(startTicking)
RCT_EXTERN_METHOD(stopTicking)

@end
2-3. ネイティブモジュールからのイベント通知
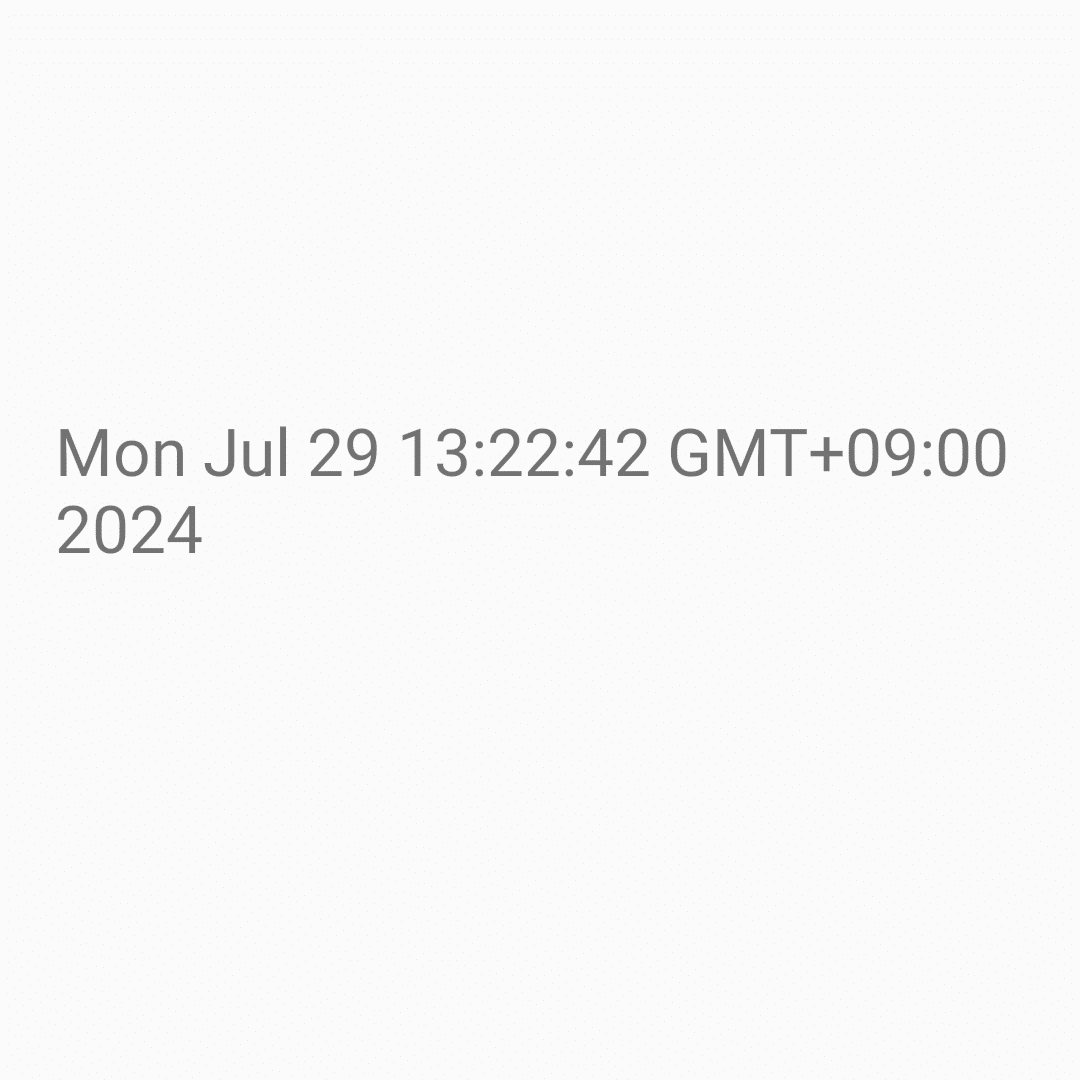
(1) 「App.tsx」の編集。
・App.tsx
import React, { useState, useEffect } from 'react';
import { Text, SafeAreaView, NativeEventEmitter, NativeModules } from 'react-native';

// ネイティブモジュールの準備
const { ClockModule } = NativeModules;
const eventEmitter = new NativeEventEmitter(ClockModule);

// アプリ
const App: React.FC = () => {
  const [message, setMessage] = useState('None');

  // 初期化
  useEffect(() => {
    // イベントリスナーの追加
    const subscription = eventEmitter.addListener('TickEvent', (event) => {
      setMessage(event.message);
    });

    // Tickingの開始
    ClockModule.startTicking();

    // 後処理
    return () => {
      // イベントリスナーの削除
      subscription.remove();

      // Tickingの停止
      ClockModule.stopTicking();
    };
  }, []);

  // UI
  return (
    <SafeAreaView style={{ flex: 1, justifyContent: 'center', alignItems: 'center' }}>
      <Text style={{ fontSize: 24, marginBottom: 20 }}>{message}</Text>
    </SafeAreaView>
  );
};

export default App;
(2) 実行。
npm start
3. カスタムビューの利用
3-1. Androidのカスタムビューの実装
(1) AndroidStudioでReact Nativeプロジェクトのandroidフォルダを開く。
(2) カスタムビューの実装。
「MainApplication.kt」が存在するフォルダに次のコードを追加します。
・MyCustomView.kt
package com.my_app
import android.content.Context
import android.widget.FrameLayout
import android.widget.TextView
import android.view.Gravity

// カスタムビュー
class MyCustomView(context: Context) : FrameLayout(context) {
    private val textView: TextView

    init {
        textView = TextView(context).apply {
            text = "MyCustomView"
            gravity = Gravity.CENTER
        }
        addView(textView)
    }

    // テキストの指定
    fun setText(newText: String) {
        textView.text = newText
    }
}
(3) カスタムビューマネージャの実装。
・MyCustomViewManager.kt
package com.my_app
import com.facebook.react.uimanager.SimpleViewManager
import com.facebook.react.uimanager.ThemedReactContext
import com.facebook.react.uimanager.annotations.ReactProp

// カスタムビューマネージャ
class MyCustomViewManager : SimpleViewManager<MyCustomView>() {

    // 名前の取得
    override fun getName(): String {
        return "MyCustomView"
    }

    // ビューインスタンスの取得
    override fun createViewInstance(reactContext: ThemedReactContext): MyCustomView {
        return MyCustomView(reactContext)
    }

    // テキストの指定
    @ReactProp(name = "text")
    fun setText(view: MyCustomView, text: String) {
        view.setText(text)
    }
}
(4) カスタムビューをアプリ側に公開。
・MyCustomViewPackage.kt
package com.my_app
import com.facebook.react.ReactPackage
import com.facebook.react.bridge.NativeModule
import com.facebook.react.bridge.ReactApplicationContext
import com.facebook.react.uimanager.ViewManager

// パッケージ
class MyCustomViewPackage : ReactPackage {

    // ネイティブモジュールの生成
    override fun createNativeModules(reactContext: ReactApplicationContext): List<NativeModule> {
        return emptyList()
    }

    // ビューマネージャの生成
    override fun createViewManagers(reactContext: ReactApplicationContext): List<ViewManager<*, *>> {
        return listOf(MyCustomViewManager())
    }
}
・MainApplication.ktの一部
  override val reactNativeHost: ReactNativeHost =
      object : DefaultReactNativeHost(this) {
        override fun getPackages(): List<ReactPackage> =
            PackageList(this).packages.apply {
              // 自動リンクできないパッケージは、ここで手動で追加できる
              // example: add(MyReactNativePackage())

              add(MyCustomViewPackage()) // ★ここに追加
            }
3-2. iOSのカスタムビューの実装
(1) podのインストール。
cd ios
pod install
cd ..
(2) Xcodeで「ios」内のworkspaceを開き、署名し、iPhoneにインストールできることを確認。
(3) カスタムビューの実装。
・MyCustomView.swift
import UIKit

// カスタムビュー
class MyCustomView: UIView {
  private let label: UILabel

  // 初期化
  override init(frame: CGRect) {
    label = UILabel(frame: .zero)
    super.init(frame: frame)
    setupView()
  }

  // 初期化
  required init?(coder: NSCoder) {
    label = UILabel(frame: .zero)
    super.init(coder: coder)
    setupView()
  }

  // ビューのセットアップ
  private func setupView() {
    // ラベル
    label.text = "MyCustomView"
    label.textAlignment = .center
    label.translatesAutoresizingMaskIntoConstraints = false
    self.addSubview(label)

    // 制約
    NSLayoutConstraint.activate([
      label.centerXAnchor.constraint(equalTo: self.centerXAnchor),
      label.centerYAnchor.constraint(equalTo: self.centerYAnchor)
    ])
  }

  // テキストの指定
  @objc var text: String = "MyCustomView" {
      didSet {
          label.text = text
      }
  }
}
(4) ブリッジヘッダーの設定。
Swiftコードの初回追加時に、ブリッジヘッダー追加ダイアログが開くので、「Create Bridgin Header」ボタンを押します。
・<プロジェクト名>-Bridging-Header.h
#import "React/RCTViewManager.h"(5) カスタムビューマネージャの実装。
・MyCustomViewManager.swift
import UIKit
import React

// カスタムビューマネージャ
@objc(MyCustomViewManager)
class MyCustomViewManager: RCTViewManager {

  // 名前の取得
  override static func moduleName() -> String! {
    return "MyCustomView"
  }

  // ビューインスタンスの取得
  override func view() -> UIView! {
    return MyCustomView()
  }

  // テキストの指定
  @objc func setText(_ node: NSNumber, text: String) {
      DispatchQueue.main.async {
          let component = self.bridge.uiManager.view(forReactTag: node) as! MyCustomView
          component.text = text
      }
  }
}
(6) カスタムビューをアプリ側に公開。
・MyCustomViewManager.m
#import <React/RCTViewManager.h>

@interface RCT_EXTERN_MODULE(MyCustomViewManager, RCTViewManager)

RCT_EXPORT_VIEW_PROPERTY(text, NSString)

@end
3-3. カスタムビューの利用
(1) 「App.tsx」の編集。
・App.tsx
import React from 'react';
import { requireNativeComponent, ViewStyle, View } from 'react-native';

// カスタムビューの準備
interface MyCustomViewProps {
  style?: ViewStyle;
  text?: String;
}
const MyCustomView = requireNativeComponent<MyCustomViewProps>('MyCustomView');

// アプリのメインコンポーネント
const App = () => {
  return (
    <View style={{ flex: 1 }}>
      <MyCustomView style={{ width: '100%', height: '100%' }} text="New Text" />
    </View>
  );
};

export default App;
(2) 実行。
npm start
【おまけ】 デバッグ
Android側のデバッグ出力は、通常のAndroid開発と同様、Log.d()で出力してlogcatで確認します。
androud.util.Log.d("debug", "A>>>");adb logcat -s debug