ROS2 Jazzy 入門 (2) - ロボット操作

「SDF」で作ったシンプルな差動二輪ロボットを「Gazebo Harmonic」で表示して「teleop_twist_keyboard」で操作します。
・Ubuntu 24.04
・ROS2 Jazzy
・Gazebo Harmonic
前回
1. ROS2 Jazzy と Gazebo Harmonic の準備
「Ubuntu 24.04」に「ROS2 Jazzy」と「Gazebo Harmonic」をインストールします。
2. teleop_twist_keyboard の準備
「teleop_twist_keyboard」は、ROS2でロボットの移動をキーボード操作するためのツールです。主に、ロボットの基本的な動作をテストする場面で使用します。キーボード入力に応じて、ロボットの速度命令を geometry_msgs/Twist 形式で発行します。他のノードが購読できるトピック (通常は/cmd_vel) にデータを送信します。
(1) パッケージのインストール。
$ sudo apt update
$ sudo apt install ros-jazzy-teleop-twist-keyboard
(2) ターミナルを開いて「teleop_twist_keyboard」を実行。
キーボード入力を受け取り、geometry_msgs/Twist メッセージをpublishする「teleop_twist_keyboard」ノードを起動します。
$ ros2 run teleop_twist_keyboard teleop_twist_keyboardThis node takes keypresses from the keyboard and publishes them
as Twist/TwistStamped messages. It works best with a US keyboard layout.
---------------------------
Moving around:
u i o
j k l
m , .
For Holonomic mode (strafing), hold down the shift key:
---------------------------
U I O
J K L
M < >
t : up (+z)
b : down (-z)
anything else : stop
q/z : increase/decrease max speeds by 10%
w/x : increase/decrease only linear speed by 10%
e/c : increase/decrease only angular speed by 10%このノードはキーボードからキー入力を受け取り、それを Twist/TwistStamped メッセージとして発行します。US キーボードレイアウトで最適に機能します。
---------------------------
移動:
u i o
j k l
m , .
Holonomicモード (横移動) の場合は、Shift キーを押したままにします:
---------------------------
U I O
J K L
M < >
t: 上 (+z)
b: 下 (-z)
その他: 停止
q/z: 最大速度を 10% 増加/減少
w/x: 直線速度のみを 10% 増加/減少
e/c: 角速度のみを 10% 増加/減少
(3) 別のターミナルを開いて「ros2 topic echo」を実行。
/cmd_velトピックにpublishされたメッセージをリアルタイム出力します。
$ ros2 topic echo /cmd_vellinear:
x: 0.5
y: 0.0
z: 0.0
angular:
x: 0.0
y: 0.0
z: 0.0
---
:
geometry_msgs/Twist のデータ型は次のとおりです。
・geometry_msgs/Twist
・geometry_msgs/Vector3 linear : 直線速度 (m/s)
・geometry_msgs/Vector3 angular : 角速度 (rad/s)
・geometry_msgs/Vector3
・float64 x
・float64 y
・float64 z
3. ros_gz の準備
「ros_gz」は、ROS2とGazeboを橋渡しするためのインターフェースを提供するパッケージです。
(1) パッケージのインストール。
$ sudo apt update
$ sudo apt install ros-jazzy-ros-gz
4. SDF の準備
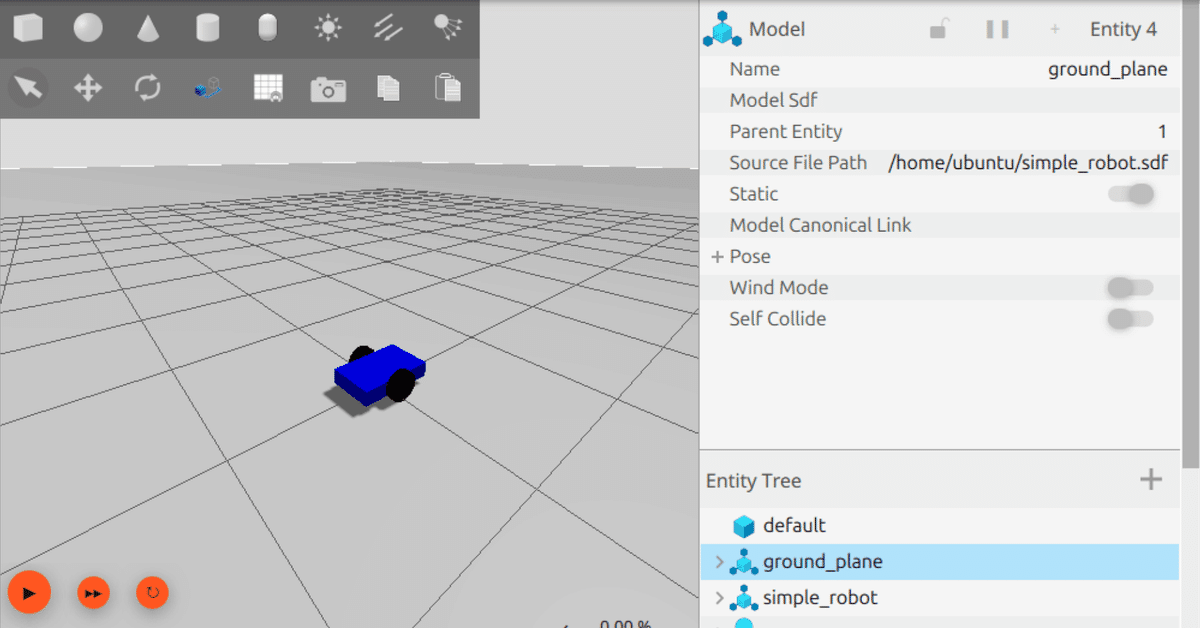
「SDF」 (Simulation Description Format) は、「Gazebo」で使用されるXMLベースのフォーマットです。ロボットやシミュレーション環境全体の詳細な設定を記述します。
(1) SDFの作成。
シンプルな差動二輪ロボットのSDFファイルを作成します。
・simple_robot.sdf
<?xml version="1.0" ?>
<!-- シンプルな差動二輪ロボットのSDFファイル -->
<sdf version="1.8">
    <world name="simple_world">
        <!-- 物理シミュレーションの設定 -->
        <physics name="1ms" type="ignored">
            <max_step_size>0.001</max_step_size>    <!-- シミュレーションの時間刻み -->
            <real_time_factor>1.0</real_time_factor>    <!-- リアルタイム係数 -->
        </physics>

        <!-- 必要なプラグインの読み込み -->
        <plugin filename="gz-sim-physics-system" name="gz::sim::systems::Physics"/>
        <plugin filename="gz-sim-scene-broadcaster-system" name="gz::sim::systems::SceneBroadcaster"/>
        <plugin filename="gz-sim-user-commands-system" name="gz::sim::systems::UserCommands"/>

        <!-- 太陽光源の設定 -->
        <light type="directional" name="sun">
            <cast_shadows>true</cast_shadows>
            <pose>0 0 10 0 0 0</pose>    <!-- 光源の位置 -->
            <diffuse>0.8 0.8 0.8 1</diffuse>    <!-- 拡散光 -->
            <specular>0.2 0.2 0.2 1</specular>    <!-- 鏡面光 -->
            <attenuation>
                <range>1000</range>
                <constant>0.9</constant>
                <linear>0.01</linear>
                <quadratic>0.001</quadratic>
            </attenuation>
            <direction>-0.5 0.1 -0.9</direction>    <!-- 光の方向 -->
        </light>

        <!-- 地面モデルの設定 -->
        <model name="ground_plane">
            <static>true</static>
            <link name="link">
                <collision name="collision">
                    <geometry>
                        <plane>
                            <normal>0 0 1</normal>
                        </plane>
                    </geometry>
                </collision>
                <visual name="visual">
                    <geometry>
                        <plane>
                            <normal>0 0 1</normal>
                            <size>100 100</size>    <!-- 地面の大きさ -->
                        </plane>
                    </geometry>
                    <material>
                        <ambient>0.8 0.8 0.8 1</ambient>
                        <diffuse>0.8 0.8 0.8 1</diffuse>
                        <specular>0.8 0.8 0.8 1</specular>
                    </material>
                </visual>
            </link>
        </model>

        <!-- ロボット本体の設定 -->
        <model name="simple_robot">
            <pose>0 0 0.1 0 0 0</pose>    <!-- ロボットの初期位置 -->

            <!-- ベースリンク(本体) -->
            <link name="base_link">
                <inertial>
                    <mass>1.0</mass>    <!-- 本体の質量 -->
                    <inertia>    <!-- 慣性モーメント -->
                        <ixx>0.0835</ixx>
                        <ixy>0</ixy>
                        <ixz>0</ixz>
                        <iyy>0.1209</iyy>
                        <iyz>0</iyz>
                        <izz>0.1209</izz>
                    </inertia>
                </inertial>
                <visual name="visual">
                    <geometry>
                        <box>
                            <size>0.5 0.3 0.1</size>    <!-- 本体のサイズ -->
                        </box>
                    </geometry>
                    <material>
                        <ambient>0 0 1 1</ambient>    <!-- 青色 -->
                        <diffuse>0 0 1 1</diffuse>
                        <specular>0 0 1 1</specular>
                    </material>
                </visual>
                <collision name="collision">
                    <geometry>
                        <box>
                            <size>0.5 0.3 0.1</size>
                        </box>
                    </geometry>
                </collision>
            </link>

            <!-- 左車輪 -->
            <link name="left_wheel">
                <pose relative_to="base_link">0 0.175 0 -1.5708 0 0</pose>    <!-- 左車輪の位置 -->
                <inertial>
                    <mass>0.5</mass>    <!-- 車輪の質量 -->
                    <inertia>
                        <ixx>0.00125</ixx>
                        <ixy>0</ixy>
                        <ixz>0</ixz>
                        <iyy>0.00125</iyy>
                        <iyz>0</iyz>
                        <izz>0.002</izz>
                    </inertia>
                </inertial>
                <visual name="visual">
                    <geometry>
                        <cylinder>
                            <radius>0.1</radius>    <!-- 車輪の半径 -->
                            <length>0.05</length>    <!-- 車輪の幅 -->
                        </cylinder>
                    </geometry>
                    <material>
                        <ambient>0 0 0 1</ambient>    <!-- 黒色 -->
                        <diffuse>0 0 0 1</diffuse>
                        <specular>0 0 0 1</specular>
                    </material>
                </visual>
                <collision name="collision">
                    <geometry>
                        <cylinder>
                            <radius>0.1</radius>
                            <length>0.05</length>
                        </cylinder>
                    </geometry>
                </collision>
            </link>

            <!-- 右車輪(左車輪と同様の設定) -->
            <link name="right_wheel">
                <pose relative_to="base_link">0 -0.175 0 -1.5708 0 0</pose>    <!-- 右車輪の位置 -->
                <inertial>
                    <mass>0.5</mass>
                    <inertia>
                        <ixx>0.00125</ixx>
                        <ixy>0</ixy>
                        <ixz>0</ixz>
                        <iyy>0.00125</iyy>
                        <iyz>0</iyz>
                        <izz>0.002</izz>
                    </inertia>
                </inertial>
                <visual name="visual">
                    <geometry>
                        <cylinder>
                            <radius>0.1</radius>
                            <length>0.05</length>
                        </cylinder>
                    </geometry>
                    <material>
                        <ambient>0 0 0 1</ambient>
                        <diffuse>0 0 0 1</diffuse>
                        <specular>0 0 0 1</specular>
                    </material>
                </visual>
                <collision name="collision">
                    <geometry>
                        <cylinder>
                            <radius>0.1</radius>
                            <length>0.05</length>
                        </cylinder>
                    </geometry>
                </collision>
            </link>

            <!-- キャスター(補助輪) -->
            <link name="caster">
                <pose relative_to="base_link">-0.2 0 -0.05 0 0 0</pose>    <!-- キャスターの位置 -->
                <inertial>
                    <mass>0.1</mass>    <!-- キャスターの質量 -->
                    <inertia>
                        <ixx>0.0001</ixx>
                        <ixy>0</ixy>
                        <ixz>0</ixz>
                        <iyy>0.0001</iyy>
                        <iyz>0</iyz>
                        <izz>0.0001</izz>
                    </inertia>
                </inertial>
                <collision name="collision">
                    <geometry>
                        <sphere>
                            <radius>0.05</radius>    <!-- キャスターの半径 -->
                        </sphere>
                    </geometry>
                </collision>
                <visual name="visual">
                    <geometry>
                        <sphere>
                            <radius>0.05</radius>
                        </sphere>
                    </geometry>
                    <material>
                        <ambient>0.8 0.8 0.8 1</ambient>    <!-- グレー色 -->
                        <diffuse>0.8 0.8 0.8 1</diffuse>
                        <specular>0.8 0.8 0.8 1</specular>
                    </material>
                </visual>
            </link>

            <!-- 左車輪のジョイント -->
            <joint name="left_wheel_joint" type="revolute">
                <parent>base_link</parent>
                <child>left_wheel</child>
                <axis>
                    <xyz>0 0 1</xyz>    <!-- 回転軸 -->
                    <limit>
                        <lower>-1.79769e+308</lower>    <!-- 回転制限なし -->
                        <upper>1.79769e+308</upper>
                    </limit>
                </axis>
            </joint>

            <!-- 右車輪のジョイント -->
            <joint name="right_wheel_joint" type="revolute">
                <parent>base_link</parent>
                <child>right_wheel</child>
                <axis>
                    <xyz>0 0 1</xyz>
                    <limit>
                        <lower>-1.79769e+308</lower>
                        <upper>1.79769e+308</upper>
                    </limit>
                </axis>
            </joint>

            <!-- キャスターのジョイント(固定) -->
            <joint name="caster_joint" type="fixed">
                <parent>base_link</parent>
                <child>caster</child>
            </joint>

            <!-- 差動駆動システムのプラグイン -->
            <plugin filename="gz-sim-diff-drive-system" name="gz::sim::systems::DiffDrive">
                <topic>cmd_vel</topic>    <!-- 速度指令のトピック名 -->
                <left_joint>left_wheel_joint</left_joint>    <!-- 左車輪のジョイント名 -->
                <right_joint>right_wheel_joint</right_joint>    <!-- 右車輪のジョイント名 -->
                <wheel_separation>0.35</wheel_separation>    <!-- 車輪間距離 -->
                <wheel_radius>0.1</wheel_radius>    <!-- 車輪半径 -->
                <odom_publish_frequency>50</odom_publish_frequency>    <!-- Odometry公開の頻度 -->
            </plugin>
        </model>
    </world>
</sdf>
次の4つのプラグインが使われています。
・gz::sim::systems::Physics : 物理シミュレーション
・gz::sim::systems::SceneBroadcaster : 外部にシーン情報を送信
・gz::sim::systems::UserCommands : 外部から命令を受信
・gz::sim::systems::DiffDrive : 差動駆動ロボットのシミュレーション
「gz::sim::systems::DiffDrive」の主なパラメータは次のとおりです。
<plugin filename="gz-sim-diff-drive-system" name="gz::sim::systems::DiffDrive">
  <!-- 速度命令を受信するトピック -->
  <cmd_vel_topic>/cmd_vel</cmd_vel_topic>  <!-- 速度命令を受信するトピック (通常は/cmd_vel)

  <!-- 車輪の接続ジョイント -->
  <left_joint>left_wheel_joint</left_joint>  <!-- 左車輪に対応するジョイント名 -->
  <right_joint>right_wheel_joint</right_joint>  <!-- 右車輪に対応するジョイント名 -->

  <!-- 車輪の物理的特性 -->
  <wheel_separation>0.5</wheel_separation>  <!-- 左右の車輪の間隔 (メートル) -->
  <wheel_radius>0.15</wheel_radius>  <!-- 車輪の半径 (メートル) -->

  <!-- 最大速度と加速度 -->
  <max_linear_velocity>2.0</max_linear_velocity>  <!-- 最大線形速度 (m/s) -->
  <max_angular_velocity>1.0</max_angular_velocity>  <!-- 最大角速度 (rad/s) -->
  <max_linear_acceleration>1.0</max_linear_acceleration>  <!-- 最大線形加速度 (m/s^2) -->
  <max_angular_acceleration>0.5</max_angular_acceleration>  <!-- 最大角加速度 (rad/s^2) -->

  <!-- Odometryの設定 -->
  <odom_publish_frequency>1</odom_publish_frequency>  <!-- Odometry公開の頻度 -->
  <odom_topic>odom</odom_topic>  <!-- Odometryトピック名 -->
  <frame_id>odom</frame_id>  <!-- OdometryフレームID -->
  <child_frame_id>base_link</child_frame_id>  <!-- ロボットのベースフレームID -->
</plugin>
プラグインがどのエンティティ(モデル、リンク、センサー、世界など)に影響を与えるかは、そのプラグインがSDF内のどこに記述されるかによって決まります。
・<world>
世界全体に影響を与えるプラグイン
(例: 物理エンジン、環境管理など)
・<model>
特定のモデルに影響を与えるプラグイン
(例: 移動制御、センサーモデルなど)
・<sensor>
特定のセンサーに影響を与えるプラグイン
(例: カメラ画像処理)
5. Gazeboの実行
(1) ターミナルを開いて「Gazebo」を起動。
$ gz sim simple_robot.sdf(2) 別のターミナルを開いて「/cmd_vel」をROS2にブリッジ。
$ ros2 run ros_gz_bridge parameter_bridge /cmd_vel@geometry_msgs/msg/Twist@gz.msgs.Twist(3) 別のターミナルを開いて「teleop_twist_keyboard」を起動。
$ ros2 run teleop_twist_keyboard teleop_twist_keyboard(4) 「Gazebo」左下の▶をクリック。
物理シミュレーションが開始します。
(5) 「teleop_twist_keyboard」のターミナルをフォーカスして、「i」をクリック。
ロボットが前進します。

6. launchファイル
6-1. launchファイル
「launchファイル」は、ROS2のロボットシステムを構成する複数のノードやリソースをまとめて起動・設定・制御するためのスクリプトです。Pythonで記述するため、柔軟でプログラマブルな設定が可能です。
6-2. launchファイル の作成
次の3つの命令をまとめた「launchファイル」を作成します。
$ gz sim simple_robot.sdf$ ros2 run ros_gz_bridge parameter_bridge /cmd_vel@geometry_msgs/msg/Twist@gz.msgs.Twist$ ros2 run teleop_twist_keyboard teleop_twist_keyboard(1) 「launchファイル」の作成。
最初の2つの命令はlog出力、「teleop_twist_keyboard」はキー入力が必要なため「xterm」で画面出力しています。
・run_simple_robot.py
from launch import LaunchDescription
from launch.actions import ExecuteProcess

def generate_launch_description():
    return LaunchDescription([
        # Gazeboの起動
        ExecuteProcess(
            cmd=['gz', 'sim', 'simple_robot.sdf'],
            output='log',
            log_cmd=True
        ),

        # ブリッジの起動
        ExecuteProcess(
            cmd=[
                'ros2', 'run', 'ros_gz_bridge', 'parameter_bridge',
                '/cmd_vel@geometry_msgs/msg/Twist@gz.msgs.Twist'
            ],
            output='log',
            log_cmd=True
        ),

        # teleop_twist_keyboardの起動
        ExecuteProcess(
            cmd=['ros2', 'run', 'teleop_twist_keyboard', 'teleop_twist_keyboard'],
            output='screen',
            prefix='xterm -e'
        ),
    ])
(2) 「xterm」がない場合はインストール。
sudo apt install xterm6-3. launchファイル の実行
(1) 絶対パスで起動。
「Gazebo」の▶で物理シミュレーションを開始し、xtermで「i」で前進するか試してみてください。
$ ros2 launch ~/run_simple_robot.py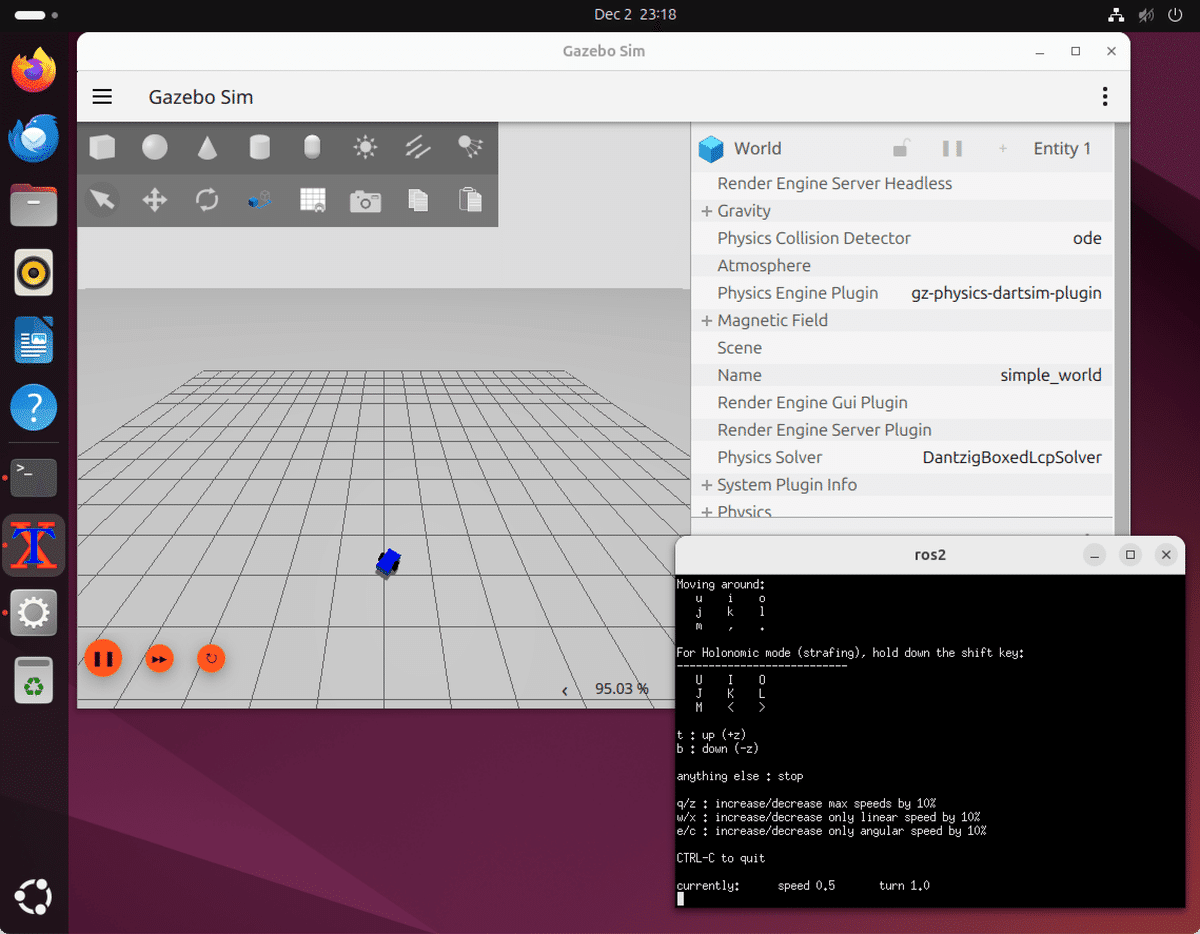
【おまけ】 ブリッジ前のトピック確認
(1) トピック一覧の確認。
$ gz topic -l/clock
/cmd_vel
/gazebo/resource_paths
/gui/camera/pose
/gui/currently_tracked
/gui/track
/model/simple_robot/odometry
/model/simple_robot/tf
/stats
/world/simple_world/clock
/world/simple_world/dynamic_pose/info
/world/simple_world/pose/info
/world/simple_world/scene/deletion
/world/simple_world/scene/info
/world/simple_world/state
/world/simple_world/stats
/model/simple_robot/enable
/world/simple_world/light_config
/world/simple_world/material_color(2) データ型の確認。
$ gz topic -i -t /cmd_velPublishers [Address, Message Type]:
tcp://192.168.64.6:39751, gz.msgs.Twist
Subscribers [Address, Message Type]:
tcp://192.168.64.6:33995, gz.msgs.Twist
tcp://192.168.64.6:39751, gz.msgs.Twist
(3) リアルタイムデータを確認。
$ gz topic -e -t /cmd_vellinear {
x: 0.5
}
angular {
z: 1
}
linear {
}
angular {
}