
【じっくりSw1ftUI 4】導入編4〜コードテンプレートを作ろう②ContentViewを編集する準備をしよう

で作った新規プロジェクトの起動まで終わったので、
ContentView
を自分がやりたい感じに編集してく準備をする〜〜〜〜!
そもそもContentViewとはなんぞや👀?
って人もいると思うので〜〜〜
なんかに詳しくは書いてるんだけど、読んでも最初はイメージも湧かないかも知れないので、一番平たく言っちゃうと、要は
ContentView
👉アプリを起動したときに、一番最初に表示される画面(ビュー)
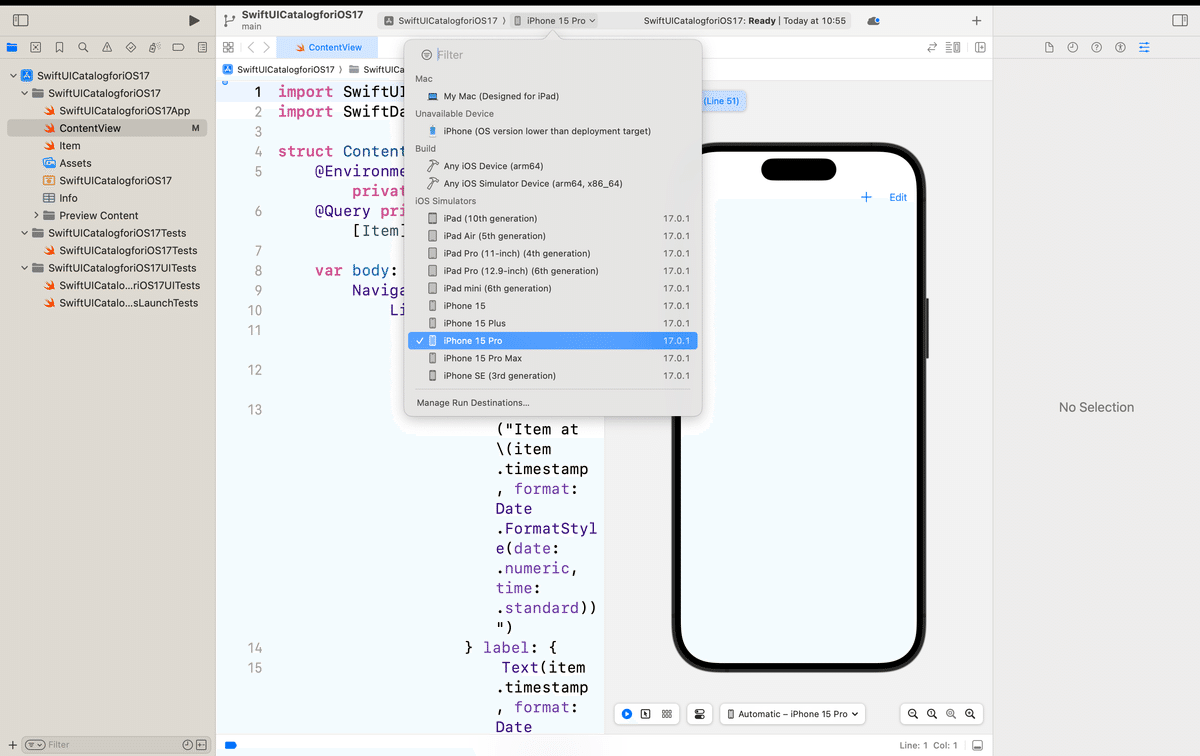
ってこと。実際に、前回、新規追加したアプリを、シミュレーターで起動すると


と、解説はこの辺で、今回はここのコンテンツビューを他の画面に変更したいので〜〜〜
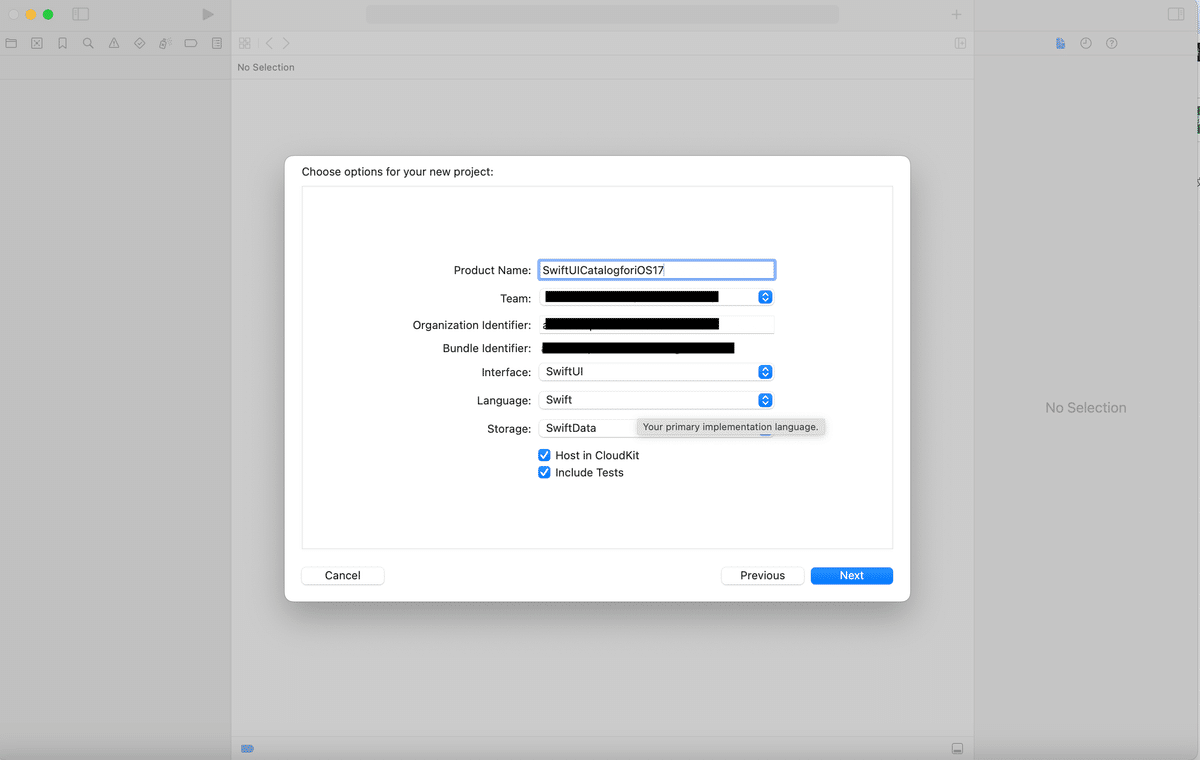
操作
元々あるコードを他のファイルに退避する用にファイルを追加

画面右上のファイル>New>Fileの順にクリックすると、
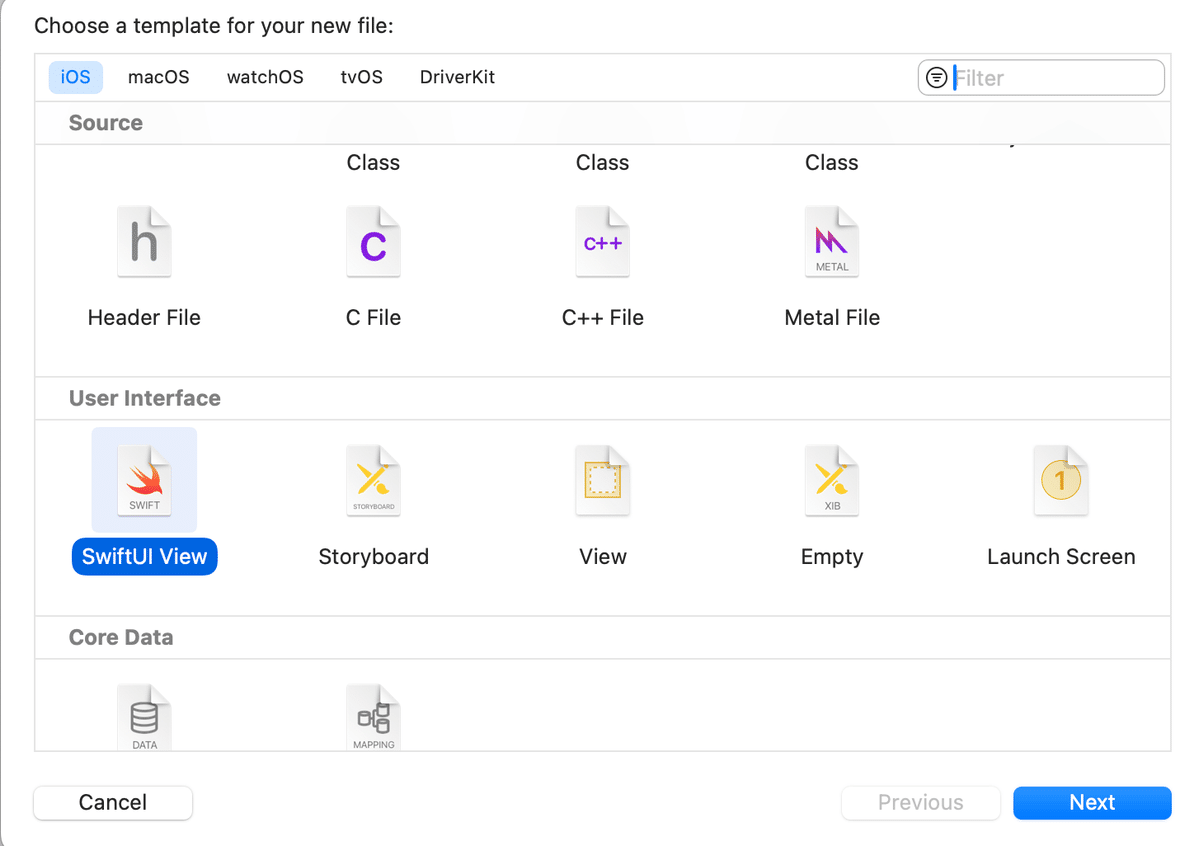


Createをクリック

次に、コードの中身を入れ替えてく
ContentViewのコード(書き換え前)
import SwiftUI
import SwiftData
struct ContentView: View {
@Environment(\.modelContext) private var modelContext
@Query private var items: [Item]
var body: some View {
NavigationSplitView {
List {
ForEach(items) { item in
NavigationLink {
Text("Item at \(item.timestamp, format: Date.FormatStyle(date: .numeric, time: .standard))")
} label: {
Text(item.timestamp, format: Date.FormatStyle(date: .numeric, time: .standard))
}
}
.onDelete(perform: deleteItems)
}
.toolbar {
ToolbarItem(placement: .navigationBarTrailing) {
EditButton()
}
ToolbarItem {
Button(action: addItem) {
Label("Add Item", systemImage: "plus")
}
}
}
} detail: {
Text("Select an item")
}
}
private func addItem() {
withAnimation {
let newItem = Item(timestamp: Date())
modelContext.insert(newItem)
}
}
private func deleteItems(offsets: IndexSet) {
withAnimation {
for index in offsets {
modelContext.delete(items[index])
}
}
}
}
#Preview {
ContentView()
.modelContainer(for: Item.self, inMemory: true)
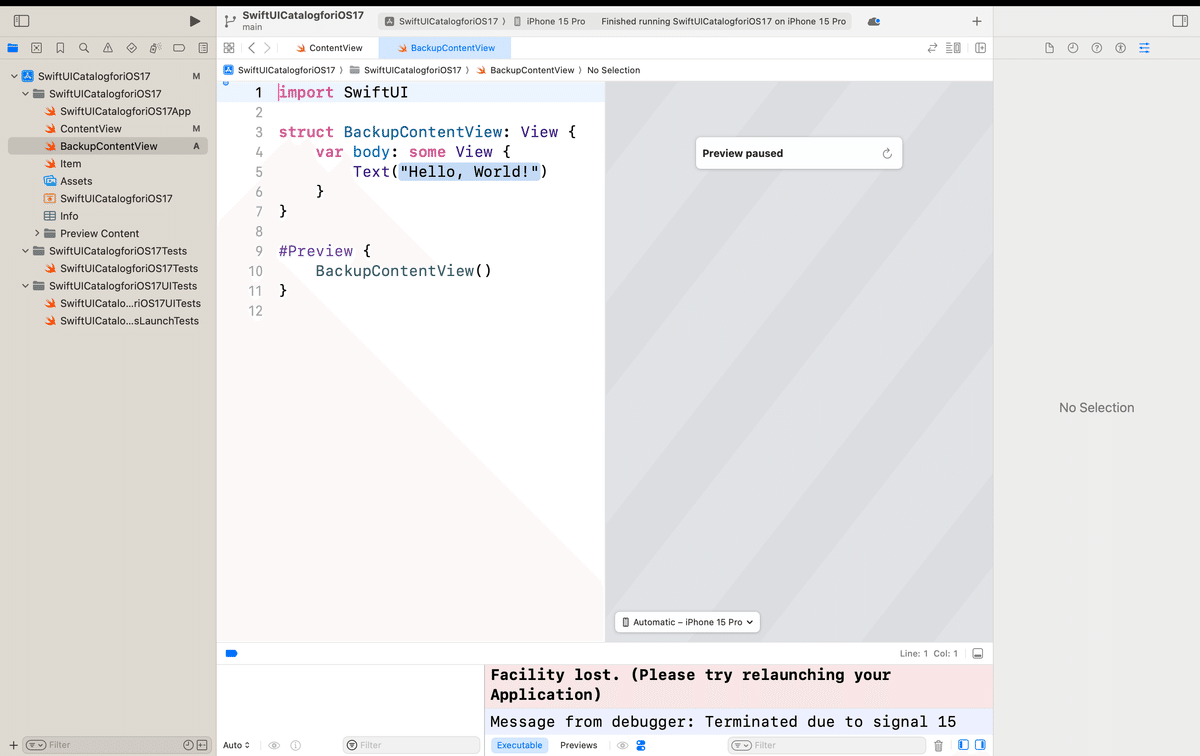
}BackupContentViewのコード(書き換え前)
import SwiftUI

struct BackupContentView: View {
    var body: some View {
        Text("Hello, World!")
    }
}

#Preview {
    BackupContentView()
}
見てもらうとわかる通り、
追加したファイルの初期コードは、
SwiftDataのフレームワークが入っていない分、
めちゃくちゃシンプル👀
コイツを入れ替えて、最初のコードと入れ替えるんだけど、
入れ替え過程まで示すと、
スクショが結構、えらい事になる
のと、
コードベースで開発できる環境
👉コピペして貼り替えれば大丈夫
だから、下のコードに張り替えてみてね〜〜〜
ContentViewのコード(書き換え後)
import SwiftUI

struct ContentView: View {
    var body: some View {
        Text("Hello, World!")
    }
}

#Preview {
    ContentView()
}
BackupContentViewのコード(書き換え後)
import SwiftUI
import SwiftData

struct BackupContentView: View {
    @Environment(\.modelContext) private var modelContext
    @Query private var items: [Item]

    var body: some View {
        NavigationSplitView {
            List {
                ForEach(items) { item in
                    NavigationLink {
                        Text("Item at \(item.timestamp, format: Date.FormatStyle(date: .numeric, time: .standard))")
                    } label: {
                        Text(item.timestamp, format: Date.FormatStyle(date: .numeric, time: .standard))
                    }
                }
                .onDelete(perform: deleteItems)
            }
            .toolbar {
                ToolbarItem(placement: .navigationBarTrailing) {
                    EditButton()
                }
                ToolbarItem {
                    Button(action: addItem) {
                        Label("Add Item", systemImage: "plus")
                    }
                }
            }
        } detail: {
            Text("Select an item")
        }
    }

    private func addItem() {
        withAnimation {
            let newItem = Item(timestamp: Date())
            modelContext.insert(newItem)
        }
    }

    private func deleteItems(offsets: IndexSet) {
        withAnimation {
            for index in offsets {
                modelContext.delete(items[index])
            }
        }
    }
}

#Preview {
    BackupContentView()
              .modelContainer(for: Item.self, inMemory: true)
}
てな感じで整理できた🕺プレビューでも
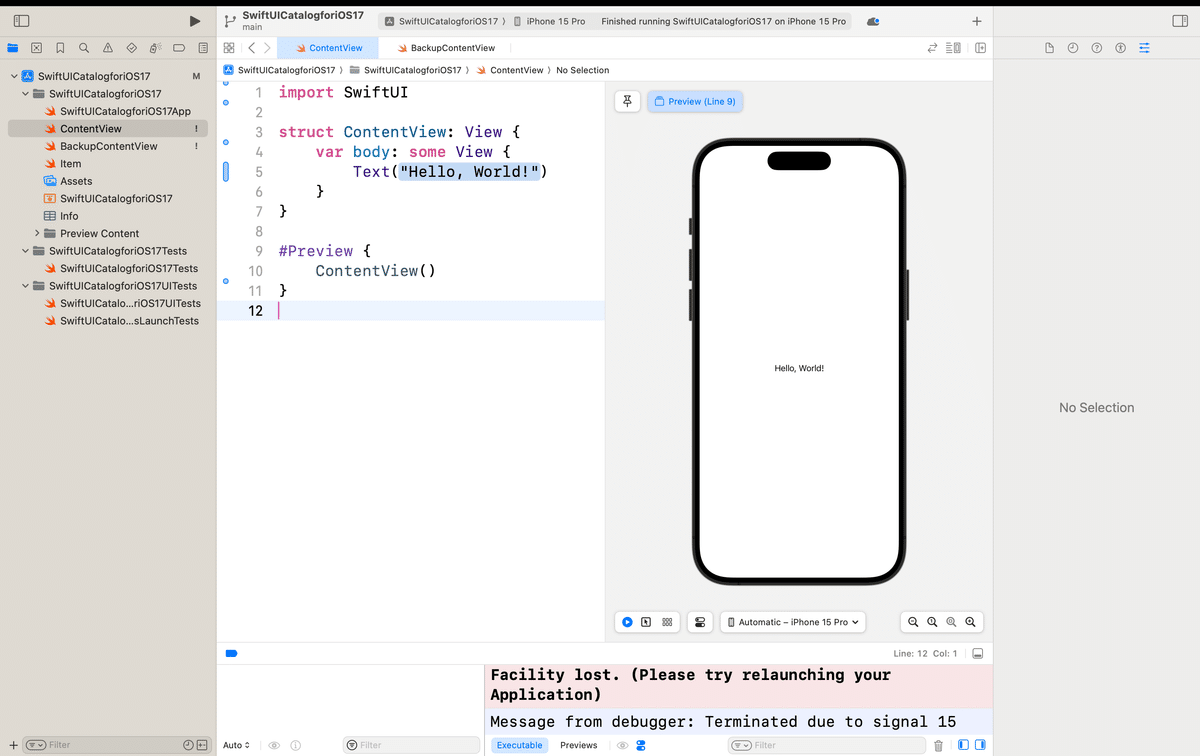

てな感じで、
SwiftUIはコードベースでUIを構築しながらアプリを作ってく
👉シンプルでモダンなフレームワーク
なので、
の【気ままにUIKit】シリーズでやってた
💃UIKitに比べて、
ビュー入れ替えやデザイン変更なんかがめちゃくちゃ簡単🕺
なので、ずっとUIKitでは今後開発しないって言ってた次第💦
と、ここでだったら最初から、Swift Dataとかのチェックを外してやればよかったじゃないか
って人も居そうなんだけど、
後からCoreDataやCloudKit、Testなんかをしたいときに、
追加するのが面倒
なのと、
ビューの入れ替えが簡単な実例を示したかった
ので、今回はやったまでの次第👀
まあ、
やり方は自由なので、あくまでも参考にしてみてね〜〜〜
👉コードベースの開発環境に、答え=正解なんざない🕺
まとめ
ここでは、コードの内容を全て理解してなくても、
正しいコードさえ打てていれば、コードの張り替えだけでもアプリは動く
って感覚を身につけてもらえれば十分🕺
👉自分で本格的に色々、作り始めたら、コードなんて嫌でも理解できるようになるし、
なんかでも書いてるとおり、
泳げるようになりたいなら、
陸で泳ぎの練習をするよりも、いきなり水に飛び込め
って感じかな🧐
と、今回もここまでで結構、記事としては長くなったのと、ちょうどキリもいいので、続きはまた次回💦
Apple公式サイト
さてと、次回は
💃今回張り替えたコンテントビューを加工してく〜〜〜🕺
オイラ自身が、
なんかの記事を本が出るまで待っていて、SwiftUIはすっかり忘れていて、難しいことなんてできないし、やる気もなく、
ただの学び直しでやってるだけ
だから、
そんなに身構えなくて大丈夫だからね〜〜〜〜
さてと、連続で3記事も上げて、
すでにお疲れちゃんモード
なので、一旦、
西日本新聞とか犬の散歩して、
気が向いたらまた書こう!