
【じっくりSw1ftUI34】実践編4〜第19章 基本的な SwiftUI プロジェクトの構造〜ここで新規プロジェクトの構成を復習しとこう
さてと、前回
をやって階層構造で
App-Scene-View
って階層に触れたので〜〜〜今回は、
新規プロジェクトを作った時にデフォルトで追加されるファイルを復習しとこう🕺
オイラの学び直しなんていらない本の内容だけ読めたらいいって人は、
に、まんまあるみたいなのでそちらでテケトーにやってね。
さてと
じっくり第19章を読んでく
概要では、
SwiftUI開発を始める際に知っておくと複雑なアプリを作ろうとする時に役立つ知識に触れる
この章では、SwiftUIプロジェクトの構造要素を簡潔に概観してく🕺
みたいなことを書いてんね👀
まず、XocdeでSwiftUIの新規プロジェクトを作ろう
導入編でもやったけど、今回は、新規プロジェクトをもう1回作るので、
Xcodeのアイコンをクリック
Xcodeの入り口画面が開いたら、Create New Project…をクリック
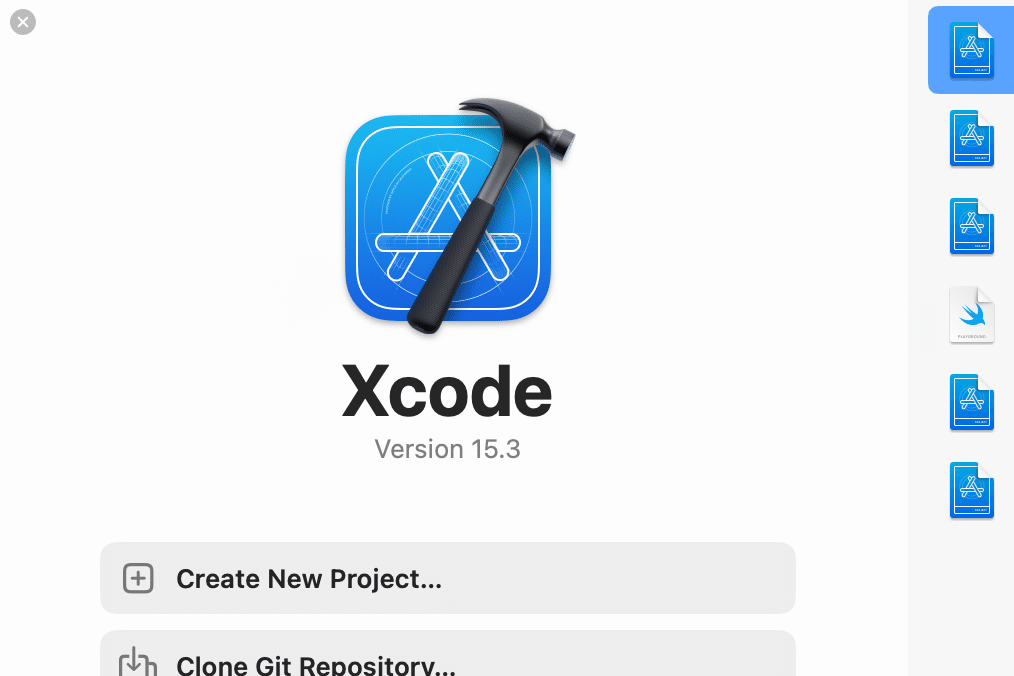
(新しいバージョンになると変わる可能性もあるので、位置ではなく、名称で覚えとこう)
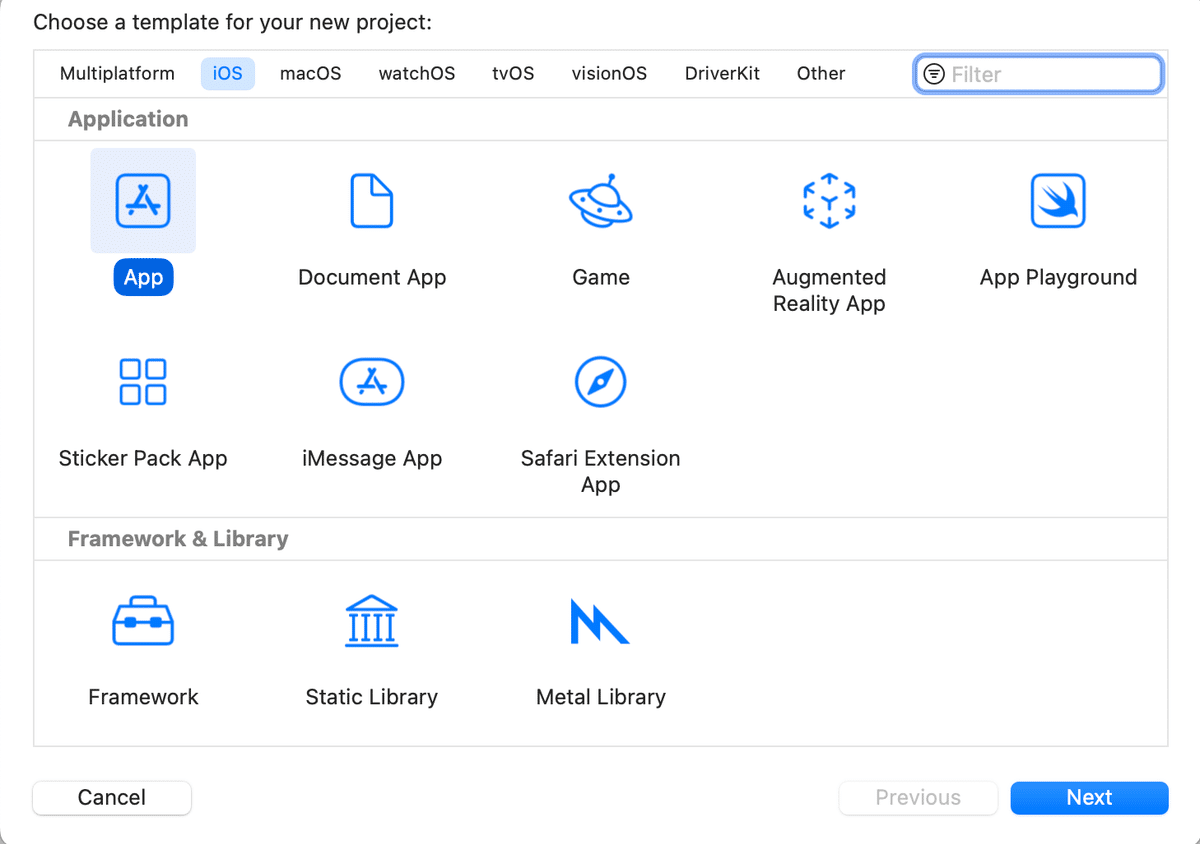
ここでは何もせずに、Nextをクリック
Product Nameにテケトーな名前を入力

こんな感じ
本の解説どおりに進みたいので、下図の箇所は何も変更せずに
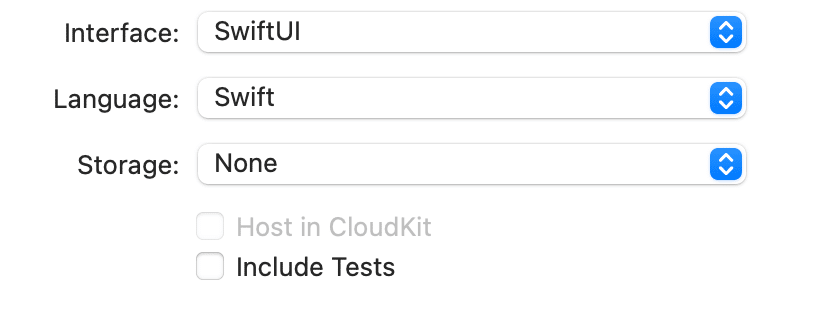
右下のNextをクリック

プロジェクトファイルの格納場所を選ぶ画面が出てくるので、テケトーな場所を選んで、右下のCreateをクリック
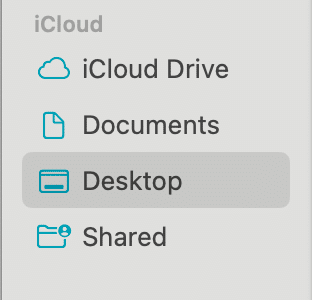
そうすると、
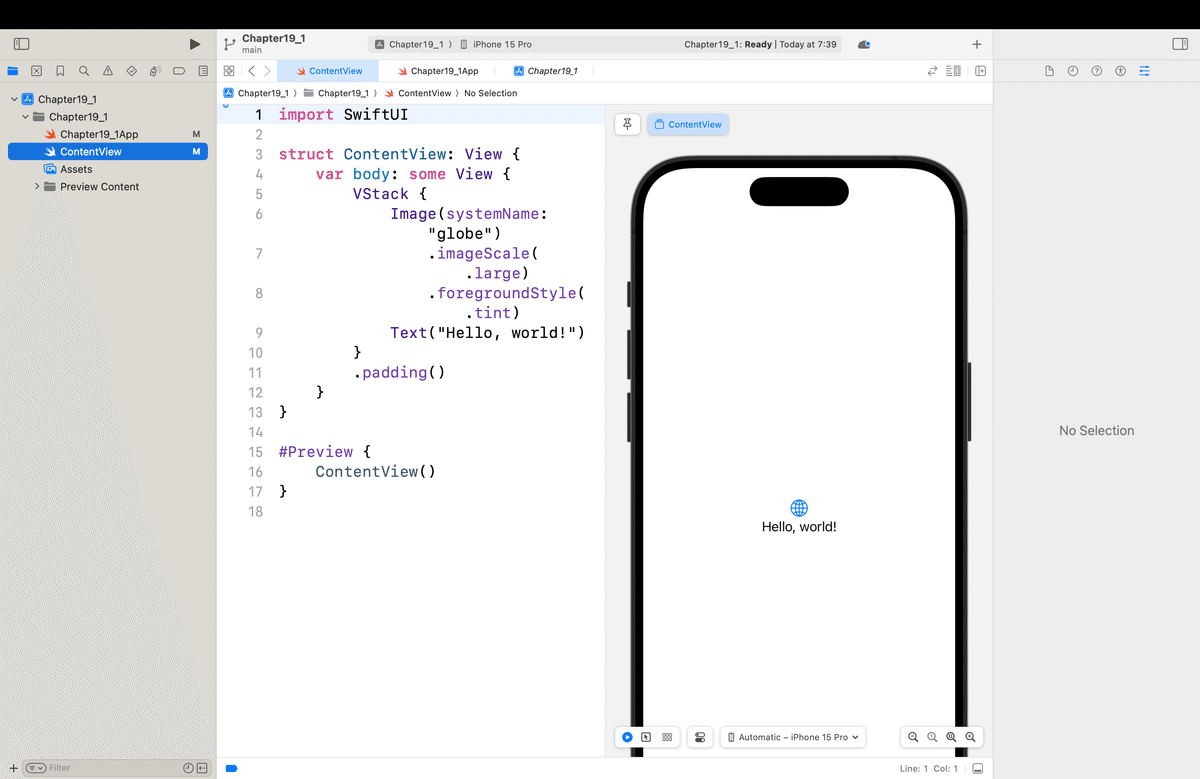
ここからひとつひとつ左側のナビゲーターのところにあるファイルを見てく!
ファイル名の最後にAppが付いてるファイル=DemoProjectApp。Swfitファイル
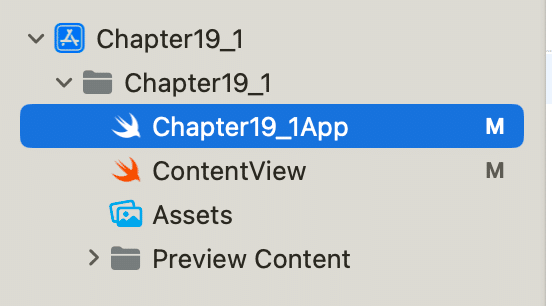
クリックすると、コードエディターが表示されるので
import SwiftUI

@main
struct Chapter19_1App: App {
    var body: some Scene {
        WindowGroup {
            ContentView()
        }
    }
}
てな感じのコードが初期値で入ってる。見てもらうと分かるけど
でやった構造体の中に、
でやったうちの
Scene:Viewの上位層が、Appって最上位のファイルの中に組み込まれてる
のがわかる👀🌱
Scene構造体の中に、WindowGroupってのがあって、その中に、ContentViewってView要素がある
👉ここでViewを管理してるんだなってことがイメージできればOK
次に、ContentViewを見てく
ContentViewをクリック
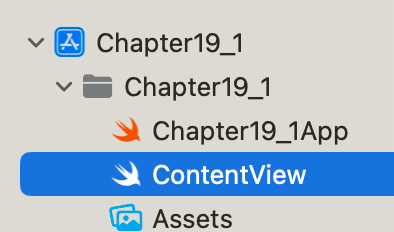
すると、
import SwiftUI

struct ContentView: View {
    var body: some View {
        VStack {
            Image(systemName: "globe")
                .imageScale(.large)
                .foregroundStyle(.tint)
            Text("Hello, world!")
        }
        .padding()
    }
}

#Preview {
    ContentView()
}
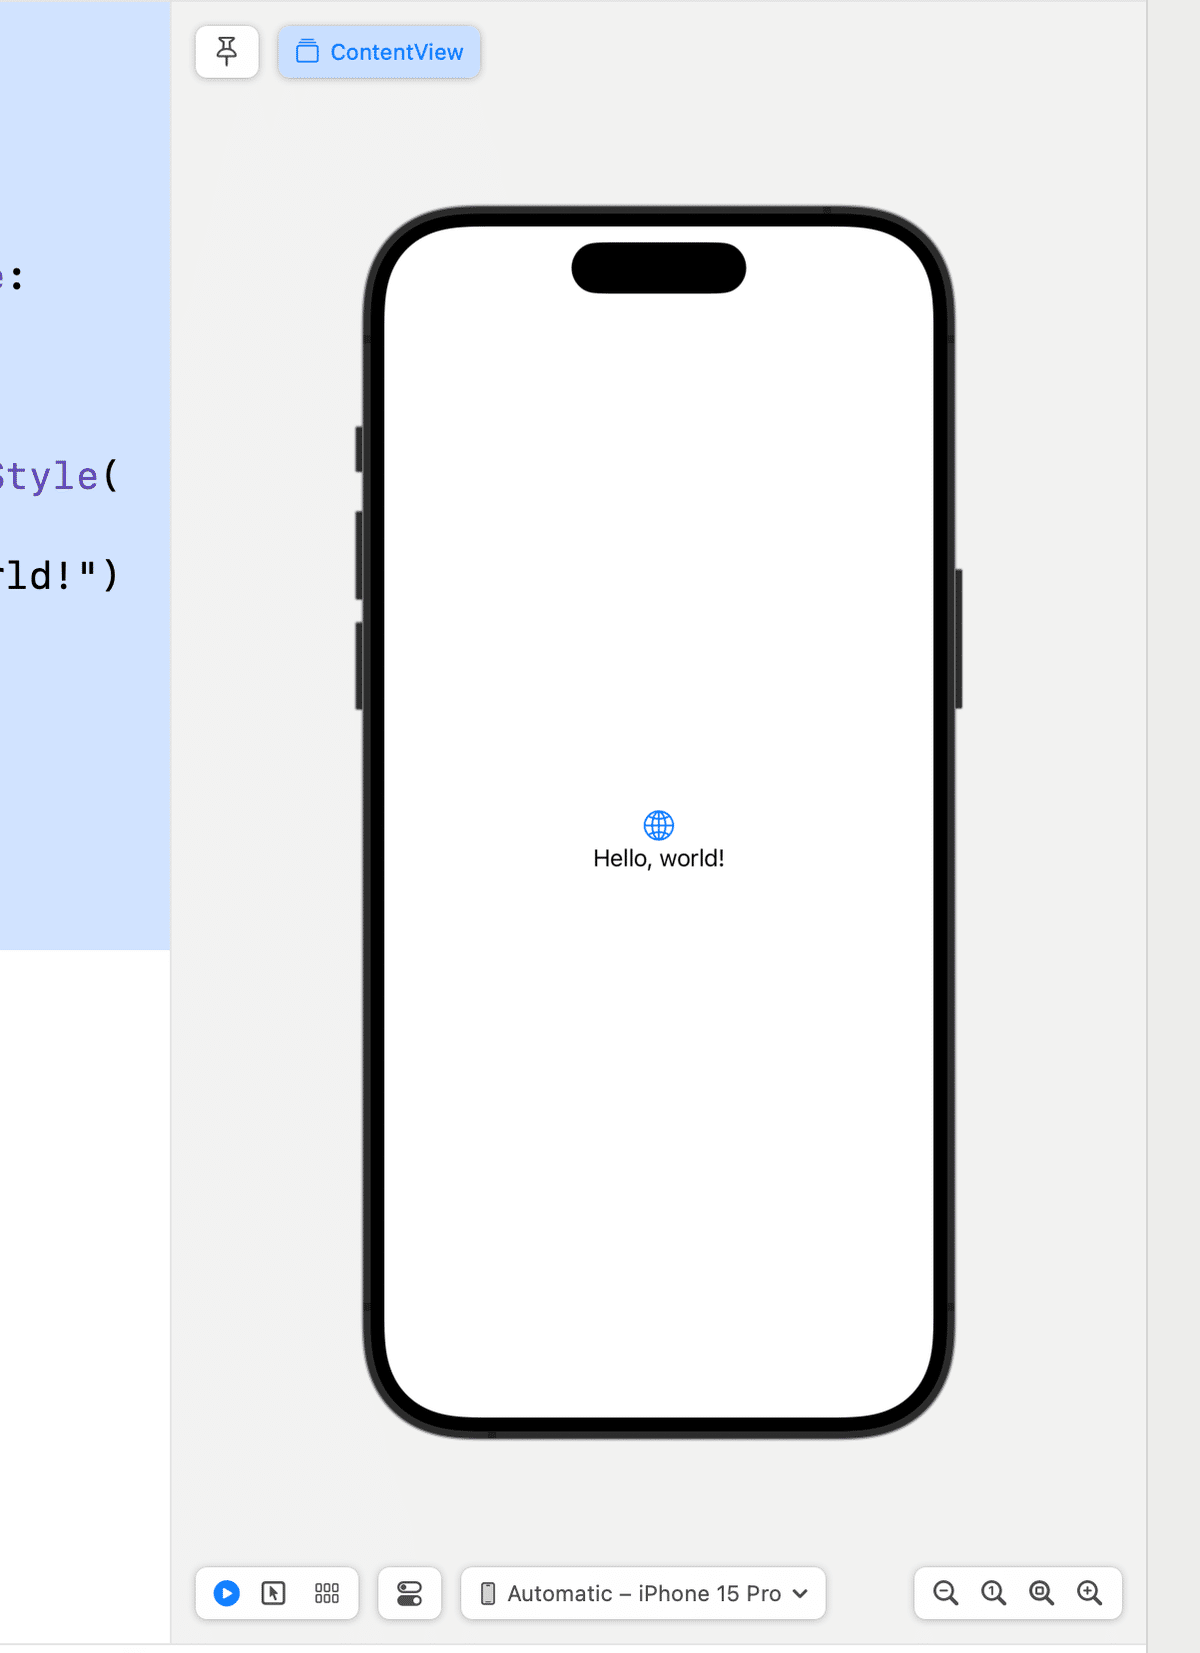
てな感じのコードが初期値ですでに書かれてる。右側のプレビューエリアを見ると、
お次は、Assets.File
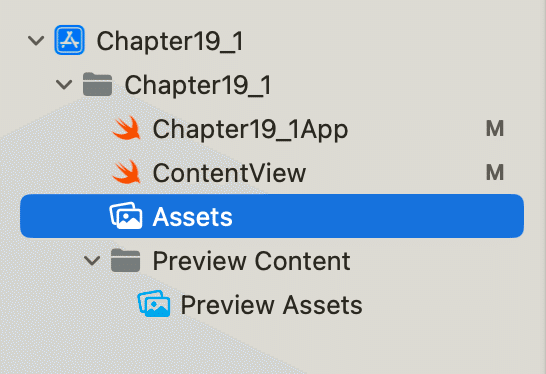
クリックすると
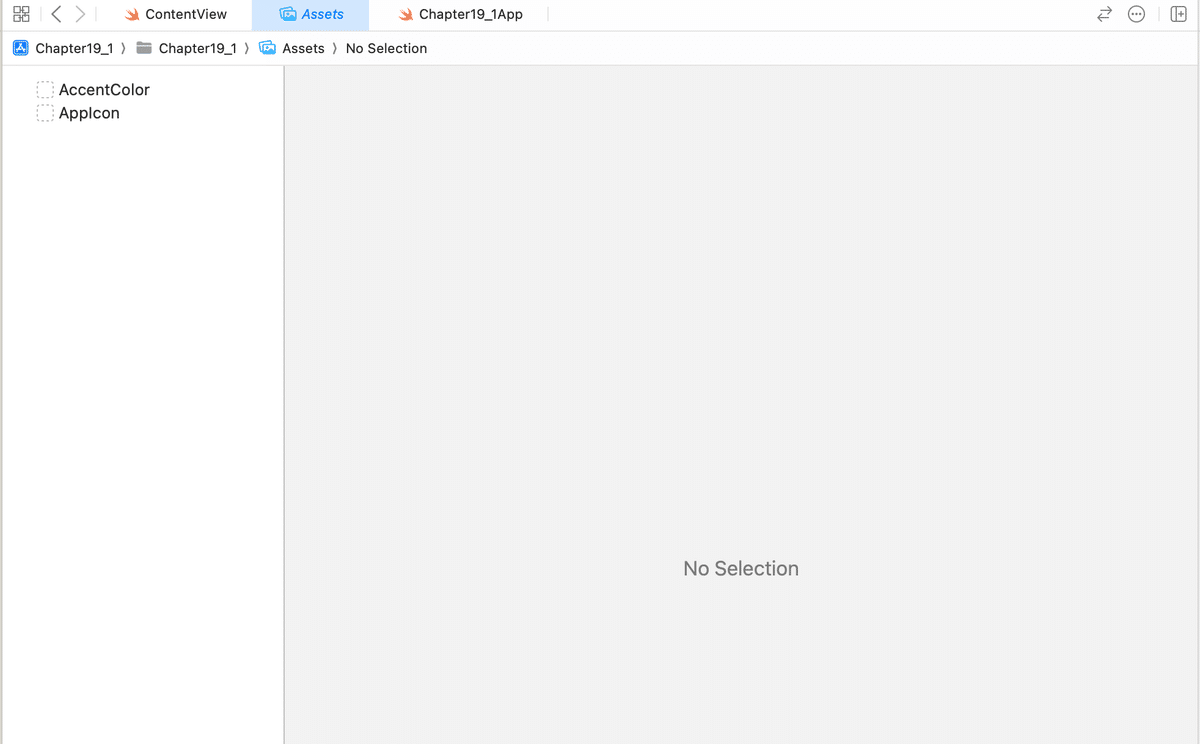
なんだけど、ここは
アプリに組み込みたい画像やアイコン、色なんかを格納する領域
てな感じで、今後使っていくから、今はそのイメージで十分🕺
ちょっと試しに、さっきのプレビュー画面の画像を組み込んでみると、、、
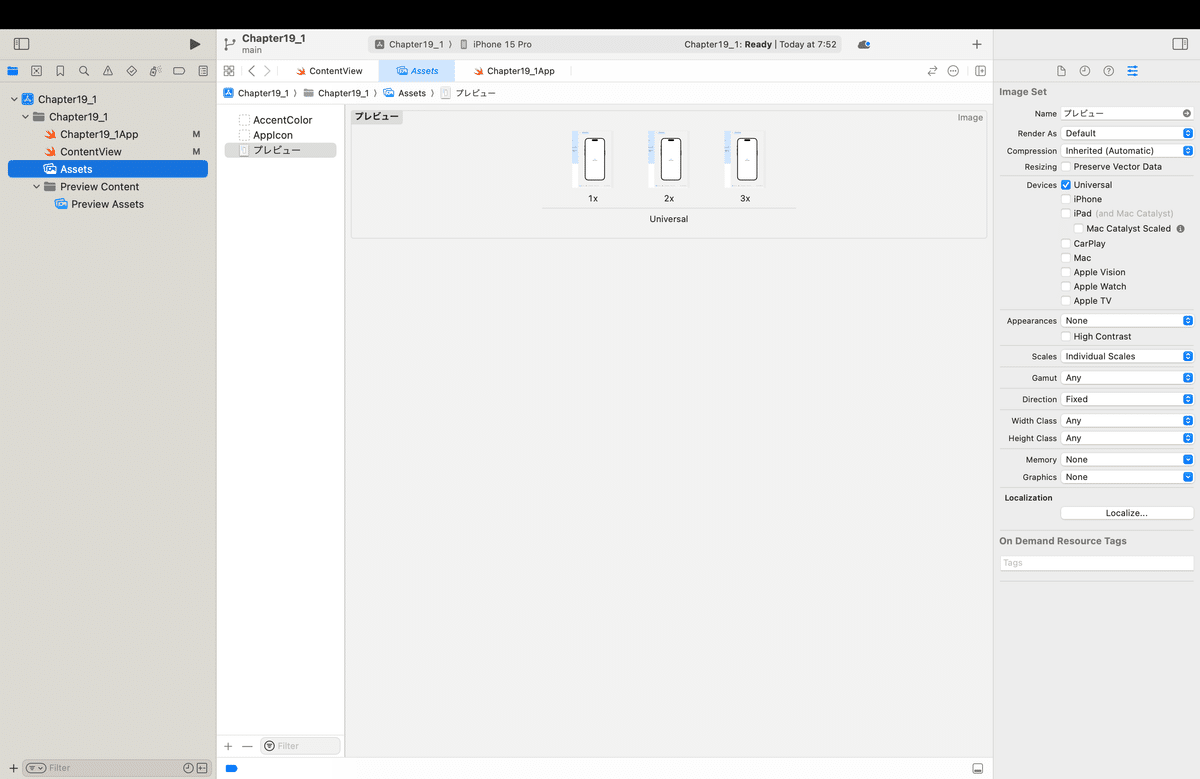
import SwiftUI

struct ContentView: View {
    var body: some View {
        VStack {
            Image("プレビュー")//ここだけ変更
                .imageScale(.large)
                .foregroundStyle(.tint)
            Text("Hello, world!")
        }
        .padding()
    }
}

#Preview {
    ContentView()
}
てな感じでコードを書き換えると、、、
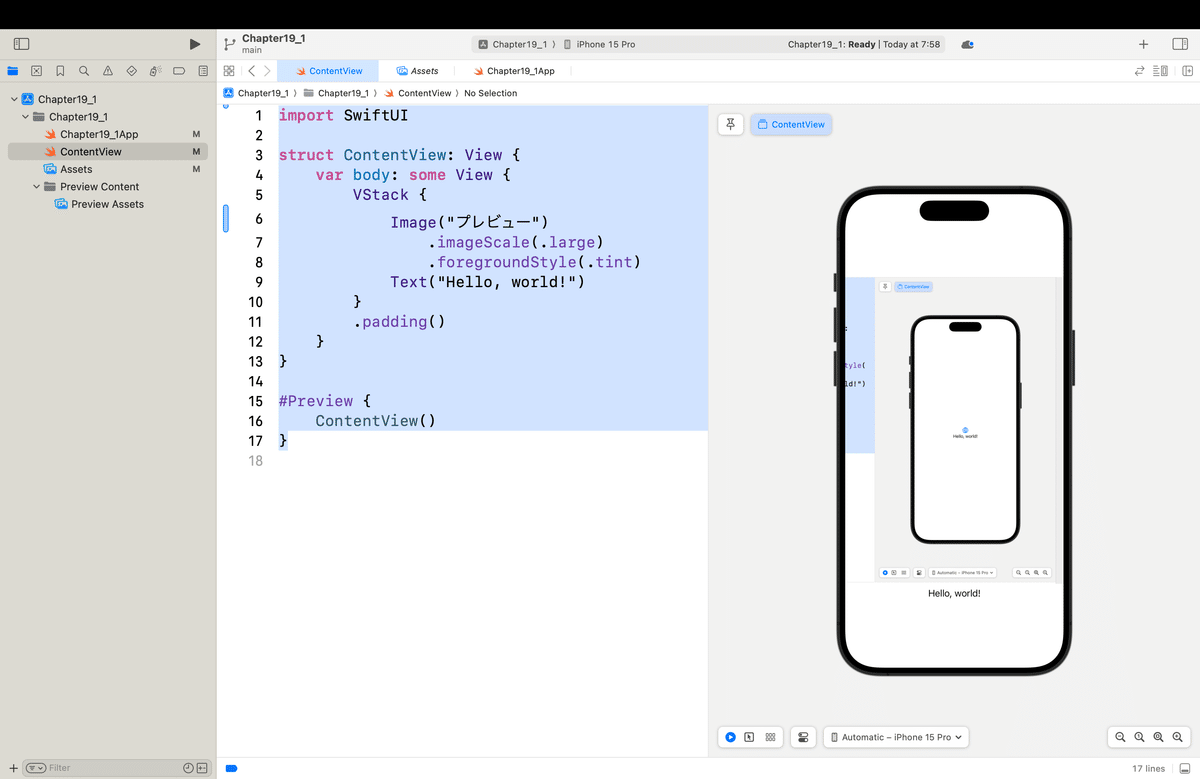
こんな感じで、
アプリに使いたい=表示させたい画像はAssetsに格納するんだ!
ってイメージでOK
*ま、SFSymbolsがあるので、
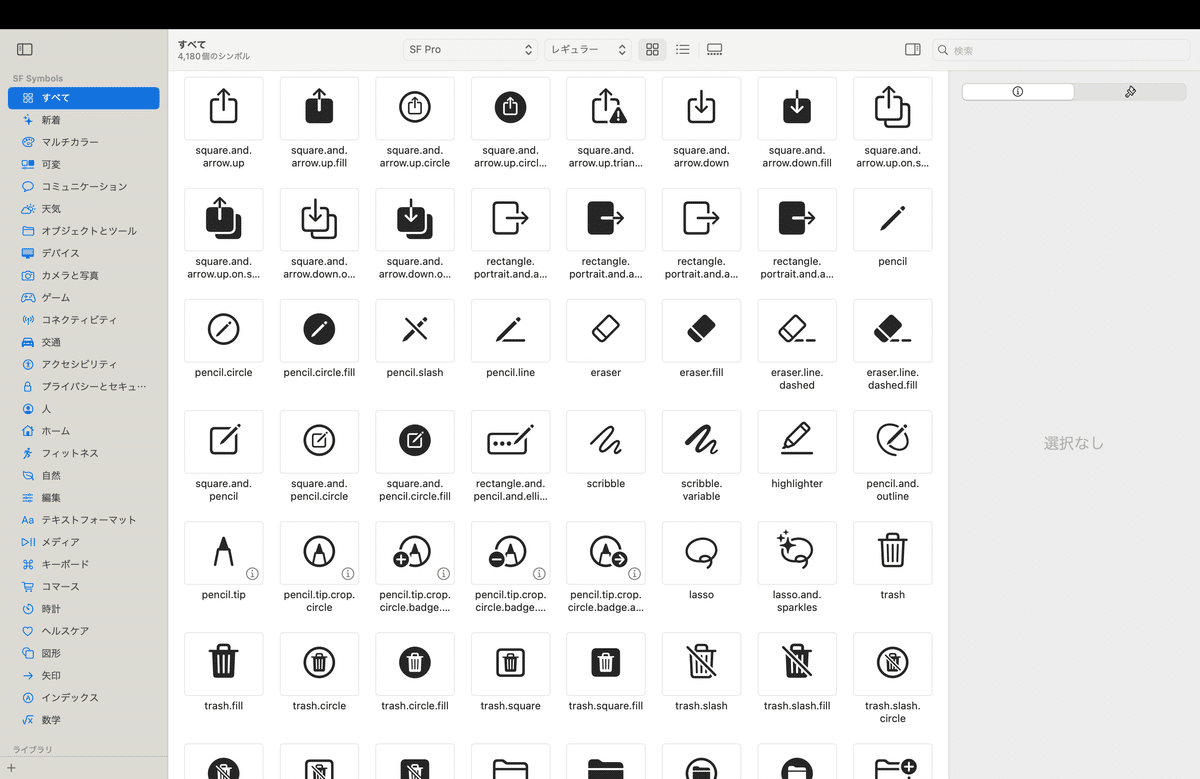
実はアイコンとか画像でsystemで代用できるものがある場合は、あんまり必要以上には画像は格納しない方がいいんだけどね🧐あんまりAssetsに画像を盛り込みすぎても
画像の管理が大変になる
プロジェクトファイルもその分重くなる
機種に合わせて1x,2x,3xを用意しないといけなくなる
であんまりいいことないんだよね〜〜〜🤔
PreviewAssetsフォルダー
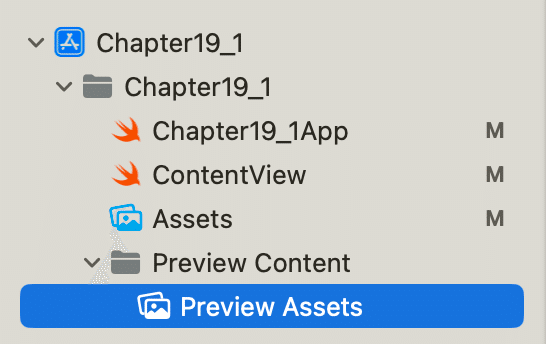
ここは、AppStoreに公開申請をするまでに必要なプレビューなんかを管理するところらしい👀
今まで色々なアプリを作って動かしてきてるけど、
正直ここを意識したことはないし、
触ったことってあったっけ?
🧐てくらい記憶に残ってない🤣
本文の内容としては以上🕺
まとめ
各ファイルを階層構造を意識して、どこに何が入っているか
を知れば今回はOK
役割を知ればいいだけで
全部、理解しようとしても理解できるものではないし、
木を見て森を見ずにならないようにね〜〜〜
さてとここからは恒例のよもやま話なんだけど
前回の最後で、
ちょっとここも、実は結構、気をつけたほうがいいことがあったりするので、しっかりじっくりこれまでの経験をしっかり盛り込みながら解説してく予定💦
って書いたんだけど、大体、SwiftUI系の本はどの本を読んでも
この記事の冒頭
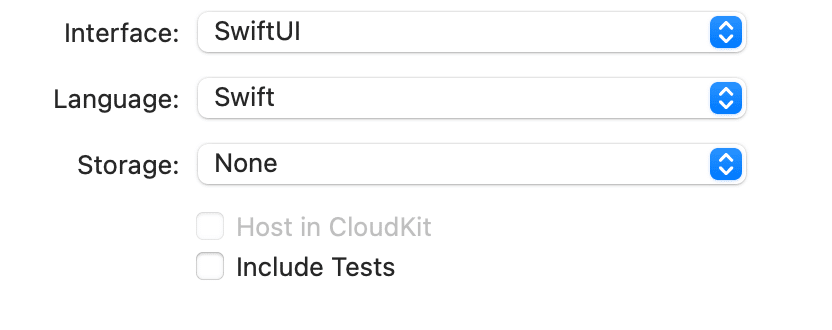
初めてやる人に、プレーンでプロジェクトを作らせるモノが多いんだけど、これだと後々、
CoreDataみたいなデータベース
ICloudみたいなクラウドサービス
XCTestを利用したテスト
なんかがデフォルトで入っていないから、後で必要になった時に、
結構、最初のうちは慣れていないから追加するのが面倒だったりするんだよね🧐
なので、オイラは、(もう一個、新規のプロジェクトを作るけど)

して作る〜〜〜!すると、
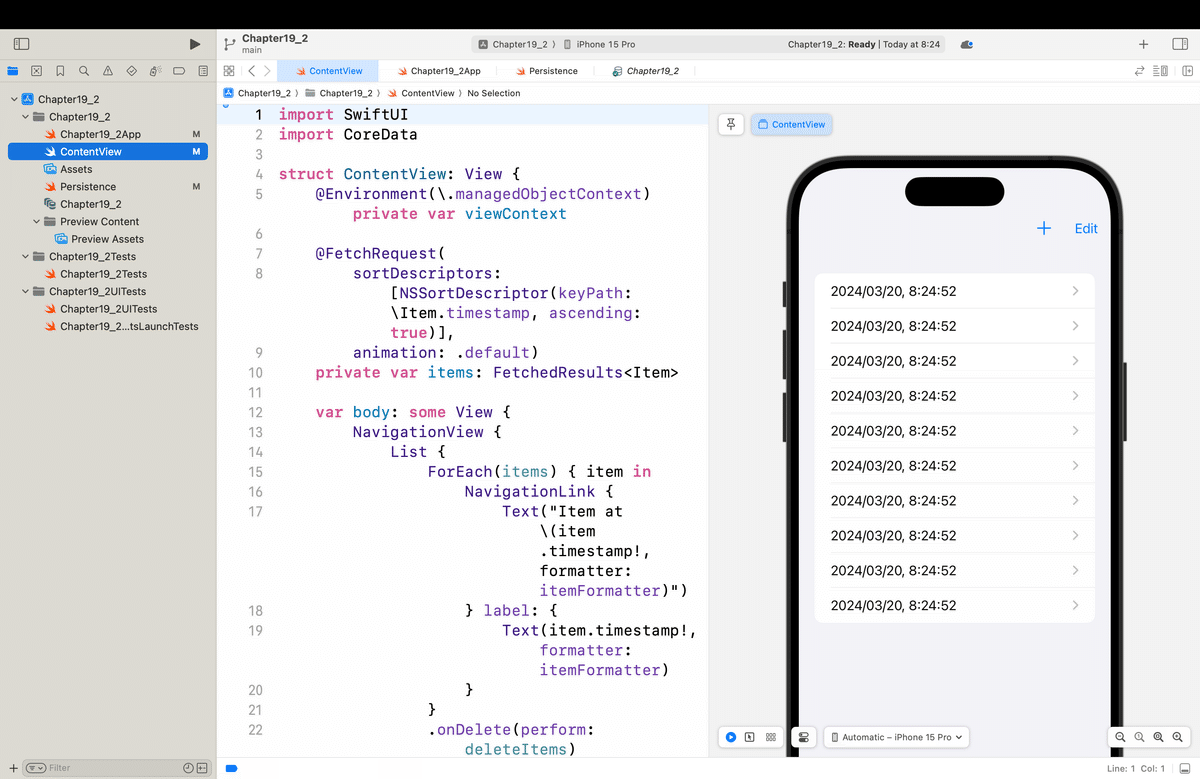
フルフルで初期から用意されてる。(最近は業務でRPAばっかりやってるから、うっすらしか覚えてないんだけど)、後からDatabaseを使いたいってなった時、
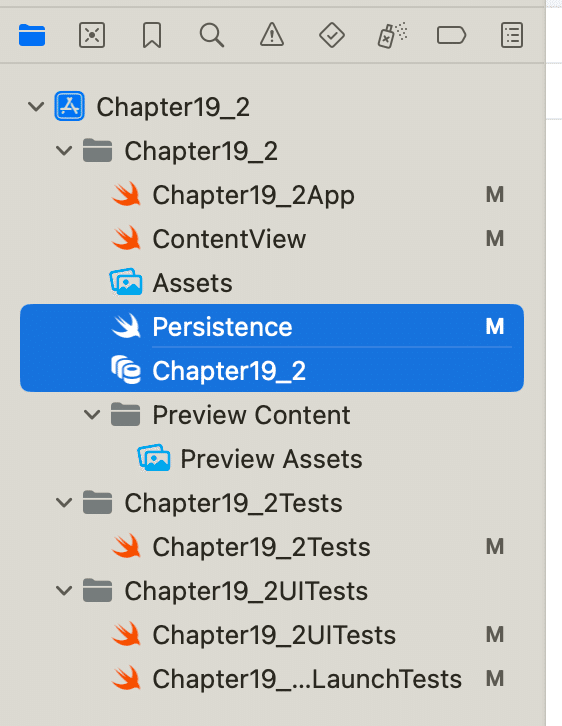
自分で組み込むことはできるんだけど、正常に動かせるように設定をするのが結構、大変だった気がする!
さらに、一昨年くらいだったかSwiftDataって新しいものも出た(だからこの学び直しをやってる面も大きい)ので、
もう一個ど新規でプロジェクトを作って〜〜〜
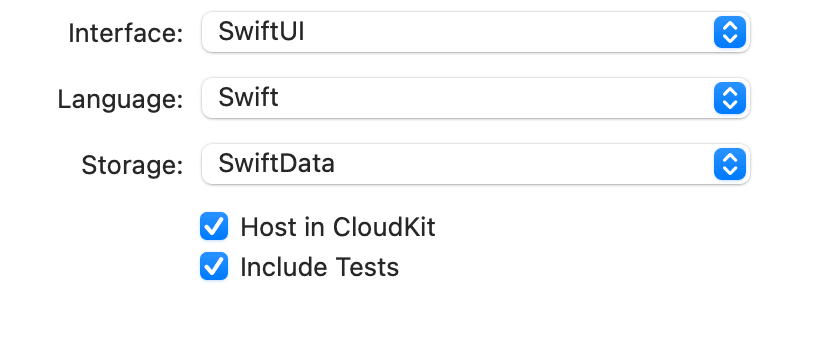
すると、
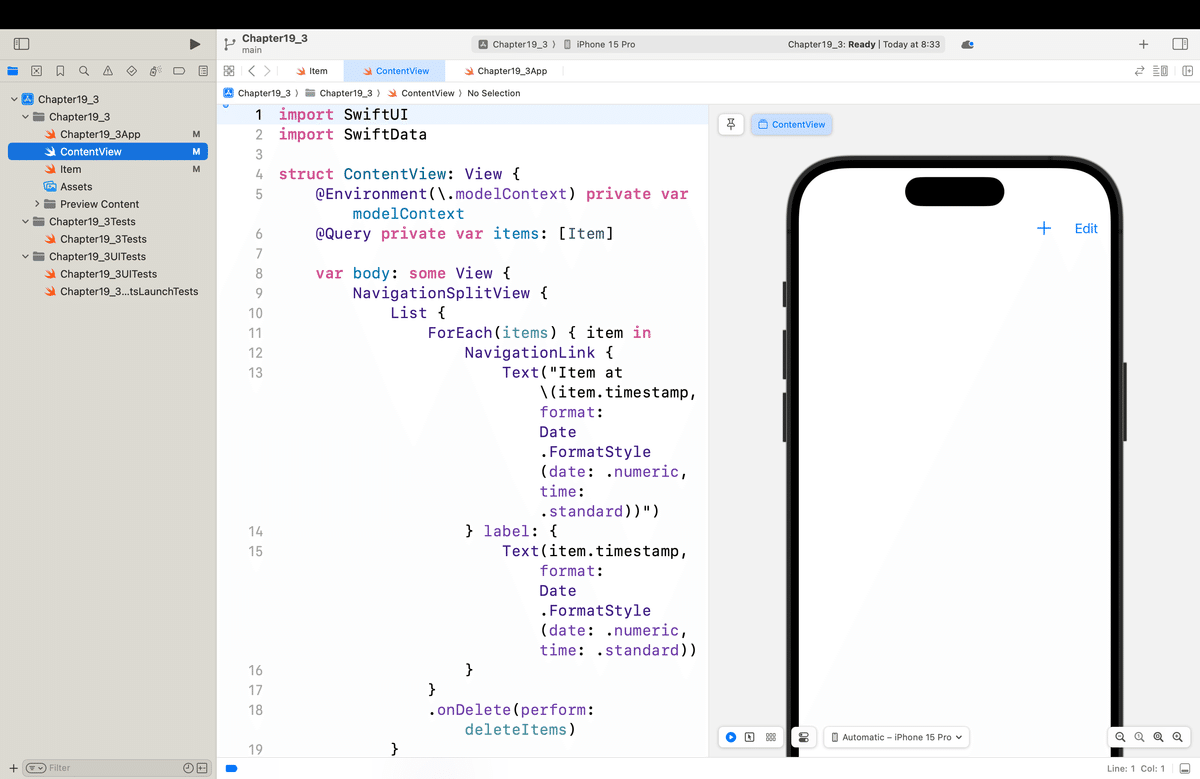
で、皆さんここまで読んで
DemoProject.entitlements
をオイラはあえて飛ばしてるんだけど、
資格ファイルは、アプリ内の特定の iOS 機能のサポートを有効にするために使用されます。たとえば、アプリが iCloud ストレージやデバイスのマイクにアクセスする必要がある場合、または Siri 経由で音声制御を統合する予定がある場合は、このファイル内でこれらの資格を有効にする必要があります。
って解説だけで、これだけ読んでも初めてな人は、
実際に、iCloudストレージなんかを使う時にやってみないと理解できない
だろうし、
👉却って、理解した気になっても混乱するだけ
だと判断したから。今、通勤途中につぶやいてる
で、
って先日、つぶやいてんだけど
日本は、積み上げ方式を尊ぶ文化
👉目先を理解してから先に進もうとする
んだけど、
木=各機能とか概念
を実際に触れて動かしもしてないのに、理解したなんてことはありえない
👉システムは全て繋がってる=森だから
まさに、
木を見て森を見ず
=こんな薄い解説だけを見て1回で理解した気になっても、実際に動かしながら肌感覚で身につけないと本当の意味で理解したことにはならない
からね。まあ、CloudKit自体はやればそんなに難しいことではないし、非常に便利だしなんだけど、それはこのまま記事が進んでいけば、
第50章あたり
でどうせやるからね👀そもそも
CloudKitやCoreDataなんて使ったアプリ作らない限りは、
一生、関係ない話だし💦
だから、導入編で最初のころに書いたと思うけど、
自分が何のために学ぶのか=自分の作りたいアプリは何か
を意識することが大事🕺
って言ってたんだよね〜〜〜!
マルチプラットフォーム=様々なフレームワークや機能が用意されていて、やろうと思えば何でもできる
👉全てを覚えようとするのは効率が悪いし、全てを覚えたところで、そもそも何が作りたいのかがないと、収拾がつかないアプリになってしまう
コンセプトの完全性
だからね👀ここも、最近つぶやいた
に繋がってくるんだけど、、、。
デザインドキュメントを最初に作らないからコンセプトが決まらず
コンセプトすらないから、60%以上のほぼ使われない機能を全て盛り込もうとし、
やみくもに試行錯誤ばかりを繰り返し、むやみやたらにやろうとするから、各機能とかコードの結合が強くなり、
作業と時間のコストばかりがかかる
デザインの素養も最低限すら身についていないから公開も覚束ない
公開できても使いにくいアプリにしかなっていない
予算と時間だけかけて結果、誰にも使われない
なんて誰得?って話でしょ👀💦
ここは、
GoogleとYahooのポータル(入り口)画面の違い
を比較するとよく分かると思う。。。
<Googleはなぜ、ポータルサイトとブラウザで世界の覇者になり得たか>
さてと、よもやま話はこの辺にして、
今回のコード(見たい人もいるだろうから一応載せとく〜〜〜)
◾️Chapter19_1(None)
import SwiftUI

@main
struct Chapter19_1App: App {
    var body: some Scene {
        WindowGroup {
            ContentView()
        }
    }
}
import SwiftUI
struct ContentView: View {
var body: some View {
VStack {
Image("プレビュー")
.imageScale(.large)
.foregroundStyle(.tint)
Text("Hello, world!")
}
.padding()
}
}
#Preview {
ContentView()
}◾️Chapter19_2(CoreData&XCTest)
import SwiftUI
@main
struct Chapter19_2App: App {
let persistenceController = PersistenceController.shared
var body: some Scene {
WindowGroup {
ContentView()
.environment(\.managedObjectContext, persistenceController.container.viewContext)
}
}
}import SwiftUI
import CoreData
struct ContentView: View {
@Environment(\.managedObjectContext) private var viewContext
@FetchRequest(
sortDescriptors: [NSSortDescriptor(keyPath: \Item.timestamp, ascending: true)],
animation: .default)
private var items: FetchedResults<Item>
var body: some View {
NavigationView {
List {
ForEach(items) { item in
NavigationLink {
Text("Item at \(item.timestamp!, formatter: itemFormatter)")
} label: {
Text(item.timestamp!, formatter: itemFormatter)
}
}
.onDelete(perform: deleteItems)
}
.toolbar {
ToolbarItem(placement: .navigationBarTrailing) {
EditButton()
}
ToolbarItem {
Button(action: addItem) {
Label("Add Item", systemImage: "plus")
}
}
}
Text("Select an item")
}
}
private func addItem() {
withAnimation {
let newItem = Item(context: viewContext)
newItem.timestamp = Date()
do {
try viewContext.save()
} catch {
// Replace this implementation with code to handle the error appropriately.
// fatalError() causes the application to generate a crash log and terminate. You should not use this function in a shipping application, although it may be useful during development.
let nsError = error as NSError
fatalError("Unresolved error \(nsError), \(nsError.userInfo)")
}
}
}
private func deleteItems(offsets: IndexSet) {
withAnimation {
offsets.map { items[$0] }.forEach(viewContext.delete)
do {
try viewContext.save()
} catch {
// Replace this implementation with code to handle the error appropriately.
// fatalError() causes the application to generate a crash log and terminate. You should not use this function in a shipping application, although it may be useful during development.
let nsError = error as NSError
fatalError("Unresolved error \(nsError), \(nsError.userInfo)")
}
}
}
}
private let itemFormatter: DateFormatter = {
let formatter = DateFormatter()
formatter.dateStyle = .short
formatter.timeStyle = .medium
return formatter
}()
#Preview {
ContentView().environment(\.managedObjectContext, PersistenceController.preview.container.viewContext)
}import CoreData
struct PersistenceController {
static let shared = PersistenceController()
static var preview: PersistenceController = {
let result = PersistenceController(inMemory: true)
let viewContext = result.container.viewContext
for _ in 0..<10 {
let newItem = Item(context: viewContext)
newItem.timestamp = Date()
}
do {
try viewContext.save()
} catch {
// Replace this implementation with code to handle the error appropriately.
// fatalError() causes the application to generate a crash log and terminate. You should not use this function in a shipping application, although it may be useful during development.
let nsError = error as NSError
fatalError("Unresolved error \(nsError), \(nsError.userInfo)")
}
return result
}()
let container: NSPersistentContainer
init(inMemory: Bool = false) {
container = NSPersistentContainer(name: "Chapter19_2")
if inMemory {
container.persistentStoreDescriptions.first!.url = URL(fileURLWithPath: "/dev/null")
}
container.loadPersistentStores(completionHandler: { (storeDescription, error) in
if let error = error as NSError? {
// Replace this implementation with code to handle the error appropriately.
// fatalError() causes the application to generate a crash log and terminate. You should not use this function in a shipping application, although it may be useful during development.
/*
Typical reasons for an error here include:
* The parent directory does not exist, cannot be created, or disallows writing.
* The persistent store is not accessible, due to permissions or data protection when the device is locked.
* The device is out of space.
* The store could not be migrated to the current model version.
Check the error message to determine what the actual problem was.
*/
fatalError("Unresolved error \(error), \(error.userInfo)")
}
})
container.viewContext.automaticallyMergesChangesFromParent = true
}
}import XCTest
@testable import Chapter19_2
final class Chapter19_2Tests: XCTestCase {
override func setUpWithError() throws {
// Put setup code here. This method is called before the invocation of each test method in the class.
}
override func tearDownWithError() throws {
// Put teardown code here. This method is called after the invocation of each test method in the class.
}
func testExample() throws {
// This is an example of a functional test case.
// Use XCTAssert and related functions to verify your tests produce the correct results.
// Any test you write for XCTest can be annotated as throws and async.
// Mark your test throws to produce an unexpected failure when your test encounters an uncaught error.
// Mark your test async to allow awaiting for asynchronous code to complete. Check the results with assertions afterwards.
}
func testPerformanceExample() throws {
// This is an example of a performance test case.
self.measure {
// Put the code you want to measure the time of here.
}
}
}import XCTest
final class Chapter19_2UITests: XCTestCase {
override func setUpWithError() throws {
// Put setup code here. This method is called before the invocation of each test method in the class.
// In UI tests it is usually best to stop immediately when a failure occurs.
continueAfterFailure = false
// In UI tests it’s important to set the initial state - such as interface orientation - required for your tests before they run. The setUp method is a good place to do this.
}
override func tearDownWithError() throws {
// Put teardown code here. This method is called after the invocation of each test method in the class.
}
func testExample() throws {
// UI tests must launch the application that they test.
let app = XCUIApplication()
app.launch()
// Use XCTAssert and related functions to verify your tests produce the correct results.
}
func testLaunchPerformance() throws {
if #available(macOS 10.15, iOS 13.0, tvOS 13.0, watchOS 7.0, *) {
// This measures how long it takes to launch your application.
measure(metrics: [XCTApplicationLaunchMetric()]) {
XCUIApplication().launch()
}
}
}
}import XCTest
final class Chapter19_2UITestsLaunchTests: XCTestCase {
override class var runsForEachTargetApplicationUIConfiguration: Bool {
true
}
override func setUpWithError() throws {
continueAfterFailure = false
}
func testLaunch() throws {
let app = XCUIApplication()
app.launch()
// Insert steps here to perform after app launch but before taking a screenshot,
// such as logging into a test account or navigating somewhere in the app
let attachment = XCTAttachment(screenshot: app.screenshot())
attachment.name = "Launch Screen"
attachment.lifetime = .keepAlways
add(attachment)
}
}◾️Chapter19_3(SwiftData&XCTest)
import SwiftUI
import SwiftData
@main
struct Chapter19_3App: App {
var sharedModelContainer: ModelContainer = {
let schema = Schema([
Item.self,
])
let modelConfiguration = ModelConfiguration(schema: schema, isStoredInMemoryOnly: false)
do {
return try ModelContainer(for: schema, configurations: [modelConfiguration])
} catch {
fatalError("Could not create ModelContainer: \(error)")
}
}()
var body: some Scene {
WindowGroup {
ContentView()
}
.modelContainer(sharedModelContainer)
}
}import SwiftUI
import SwiftData
struct ContentView: View {
@Environment(\.modelContext) private var modelContext
@Query private var items: [Item]
var body: some View {
NavigationSplitView {
List {
ForEach(items) { item in
NavigationLink {
Text("Item at \(item.timestamp, format: Date.FormatStyle(date: .numeric, time: .standard))")
} label: {
Text(item.timestamp, format: Date.FormatStyle(date: .numeric, time: .standard))
}
}
.onDelete(perform: deleteItems)
}
.toolbar {
ToolbarItem(placement: .navigationBarTrailing) {
EditButton()
}
ToolbarItem {
Button(action: addItem) {
Label("Add Item", systemImage: "plus")
}
}
}
} detail: {
Text("Select an item")
}
}
private func addItem() {
withAnimation {
let newItem = Item(timestamp: Date())
modelContext.insert(newItem)
}
}
private func deleteItems(offsets: IndexSet) {
withAnimation {
for index in offsets {
modelContext.delete(items[index])
}
}
}
}
#Preview {
ContentView()
.modelContainer(for: Item.self, inMemory: true)
}import Foundation
import SwiftData
@Model
final class Item {
var timestamp: Date
init(timestamp: Date) {
self.timestamp = timestamp
}
}import XCTest
@testable import Chapter19_3
final class Chapter19_3Tests: XCTestCase {
override func setUpWithError() throws {
// Put setup code here. This method is called before the invocation of each test method in the class.
}
override func tearDownWithError() throws {
// Put teardown code here. This method is called after the invocation of each test method in the class.
}
func testExample() throws {
// This is an example of a functional test case.
// Use XCTAssert and related functions to verify your tests produce the correct results.
// Any test you write for XCTest can be annotated as throws and async.
// Mark your test throws to produce an unexpected failure when your test encounters an uncaught error.
// Mark your test async to allow awaiting for asynchronous code to complete. Check the results with assertions afterwards.
}
func testPerformanceExample() throws {
// This is an example of a performance test case.
self.measure {
// Put the code you want to measure the time of here.
}
}
}import XCTest
final class Chapter19_3UITests: XCTestCase {
override func setUpWithError() throws {
// Put setup code here. This method is called before the invocation of each test method in the class.
// In UI tests it is usually best to stop immediately when a failure occurs.
continueAfterFailure = false
// In UI tests it’s important to set the initial state - such as interface orientation - required for your tests before they run. The setUp method is a good place to do this.
}
override func tearDownWithError() throws {
// Put teardown code here. This method is called after the invocation of each test method in the class.
}
func testExample() throws {
// UI tests must launch the application that they test.
let app = XCUIApplication()
app.launch()
// Use XCTAssert and related functions to verify your tests produce the correct results.
}
func testLaunchPerformance() throws {
if #available(macOS 10.15, iOS 13.0, tvOS 13.0, watchOS 7.0, *) {
// This measures how long it takes to launch your application.
measure(metrics: [XCTApplicationLaunchMetric()]) {
XCUIApplication().launch()
}
}
}
}import XCTest
final class Chapter19_3UITestsLaunchTests: XCTestCase {
override class var runsForEachTargetApplicationUIConfiguration: Bool {
true
}
override func setUpWithError() throws {
continueAfterFailure = false
}
func testLaunch() throws {
let app = XCUIApplication()
app.launch()
// Insert steps here to perform after app launch but before taking a screenshot,
// such as logging into a test account or navigating somewhere in the app
let attachment = XCTAttachment(screenshot: app.screenshot())
attachment.name = "Launch Screen"
attachment.lifetime = .keepAlways
add(attachment)
}
}ここに書いてるコードの意味なんて次回以降でどんどんやっていくから、ここで無理に理解しようとか覚えようとせずに、
デフォルトで書かれるコードでもこんなに違いがあるんだ!
ってイメージしてもらえればそれで十分🕺
(コメントアウトしてる行を自分で減らすとさらに面白いかもね👀
いつもの記事公開後のコードにはコメント無しバージョンで載せよう)
さてと、次回は(次回から)
いよいよ、SwiftUIフレームワークを使った開発をひとつひとつやってく
実践編の本番
まずは、ここまでの記事で散々出てきた
モディファイアを使ったカスタムビューの作り方
に入ってく〜〜〜🕺
*ちなみに実際にiBooksで購入してこの本を読んでる人なら分かると思うけど、今回の範囲は、
たった2ページ
だからね🌱一度、
なんかでiOS16までを何回か回してやり慣れてる人からしたら、
そんだけここは重要で、盛り込む内容が実は多い
ってだけの話😆ま、次回からホントに、
モディファイアなんかを使って各ビューを作って行ったりな単独な機能とかのお話にフォーカスされてくから、
本のプロットに忠実にやればいいかな🧐って感じ
だけどね👀💦
ま、多分、そーはならないかな 藁🤣
記事公開後、
いつもどおり
でやったやり方で〜〜〜
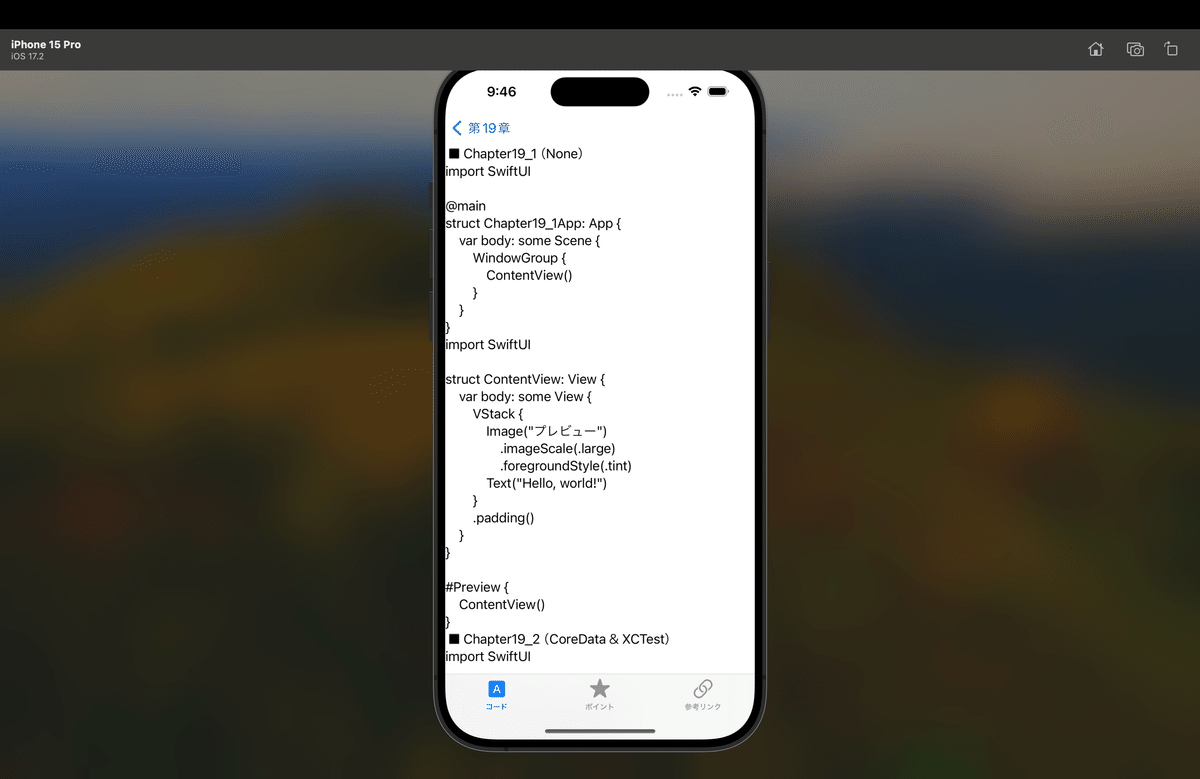
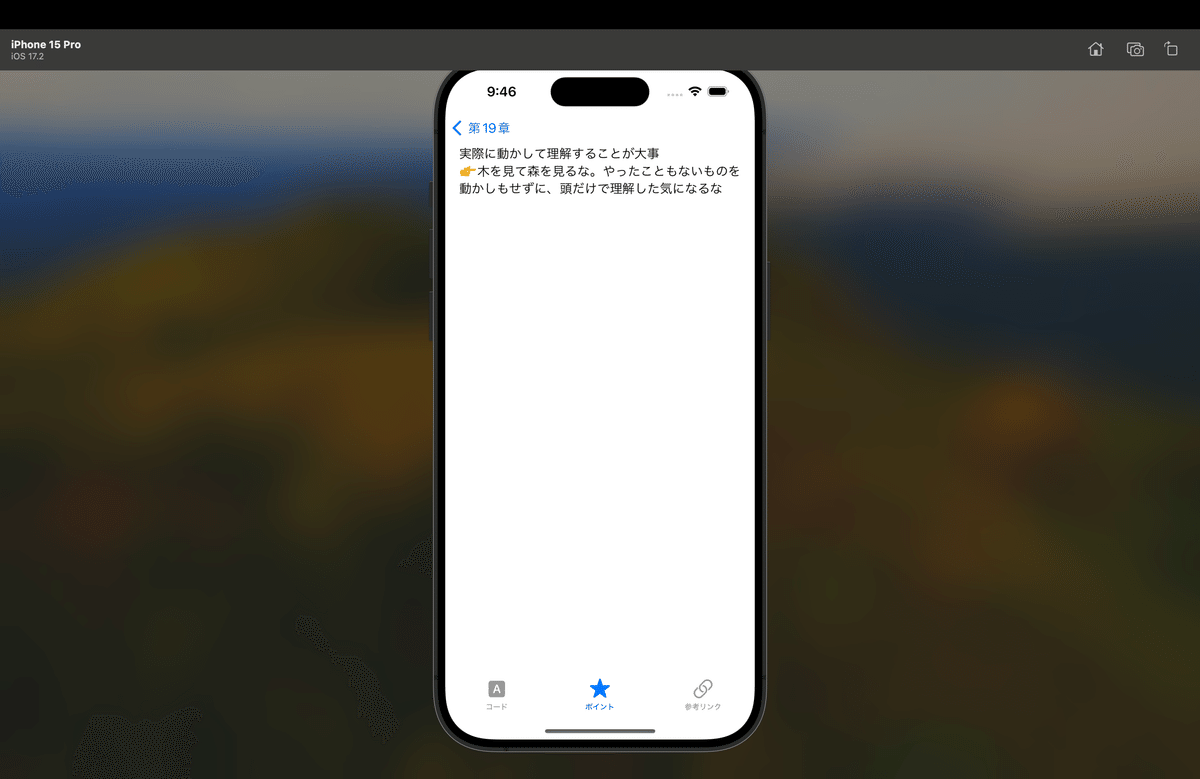
てな感じで、ハイ!完了🕺
サンプルコード
◾️EssentialsMenu.swift
//フレームワーク
import SwiftUI
import WebKit
//ビュー管理構造体
struct ListiOSApp17DevelopmentEssentials: Identifiable {
var id: Int
var title: String
var view: ViewEnumiOSApp17DevelopmentEssentials
}
//遷移先の画面を格納する列挙型
enum ViewEnumiOSApp17DevelopmentEssentials {
case Ch1
//じっくり13で追加
case Ch2
//じっくり14で追加
case Ch3
//じっくり15で追加
case Ch4
//じっくり16で追加
case Ch5
//じっくり17で追加
case Ch6
//じっくり18で追加
case Ch7
//じっくり19で追加
case Ch8
//じっくり20、21で追加
case Ch9
//じっくり22、23で追加
case Ch10
//じっくり24で追加
case Ch11
//じっくり25で追加
case Ch12
//じっくり26で追加
case Ch13
//じっくり27,28で追加
case Ch14
//じっくり29で追加
case Ch15
//じっくり31で追加
case Ch16
//じっくり32で追加
case Ch17
//じっくり33で追加
case Ch18
//じっくり34で追加
case Ch19
}
//各項目に表示する文字列
let dataiOSApp17DevelopmentEssentials: [ListiOSApp17DevelopmentEssentials] = [
ListiOSApp17DevelopmentEssentials(id: 1, title: essentialsChapter1Title, view: .Ch1),
//じっくり13で追加
ListiOSApp17DevelopmentEssentials(id: 2, title: essentialsChapter2Title, view: .Ch2),
//じっくり13で追加
ListiOSApp17DevelopmentEssentials(id: 3, title: essentialsChapter3Title, view: .Ch3),
//じっくり15で追加
ListiOSApp17DevelopmentEssentials(id: 4, title: essentialsChapter4Title, view: .Ch4),
//じっくり16で追加
ListiOSApp17DevelopmentEssentials(id: 5, title: essentialsChapter5Title, view: .Ch5),
//じっくり17で追加
ListiOSApp17DevelopmentEssentials(id: 6, title: essentialsChapter6Title, view: .Ch6),
//じっくり18で追加
ListiOSApp17DevelopmentEssentials(id: 7, title: essentialsChapter7Title, view: .Ch7),
//じっくり19で追加
ListiOSApp17DevelopmentEssentials(id: 8, title: essentialsChapter8Title, view: .Ch8),
//じっくり20、21で追加
ListiOSApp17DevelopmentEssentials(id: 9, title: essentialsChapter9Title, view: .Ch9),
//じっくり22、23で追加
ListiOSApp17DevelopmentEssentials(id: 10, title: essentialsChapter10Title, view: .Ch10),
//じっくり24で追加
ListiOSApp17DevelopmentEssentials(id: 11, title: essentialsChapter11Title, view: .Ch11),
//じっくり25で追加
ListiOSApp17DevelopmentEssentials(id: 12, title: essentialsChapter12Title, view: .Ch12),
//じっくり26で追加
ListiOSApp17DevelopmentEssentials(id: 13, title: essentialsChapter13Title, view: .Ch13),
//じっくり27,28で追加
ListiOSApp17DevelopmentEssentials(id: 14, title: essentialsChapter14Title, view: .Ch14),
//じっくり29で追加
ListiOSApp17DevelopmentEssentials(id: 15, title: essentialsChapter15Title, view: .Ch15),
//じっくり31で追加
ListiOSApp17DevelopmentEssentials(id: 16, title: essentialsChapter16Title, view: .Ch16),
//じっくり32で追加
ListiOSApp17DevelopmentEssentials(id: 17, title: essentialsChapter17Title, view: .Ch17),
//じっくり33で追加
ListiOSApp17DevelopmentEssentials(id: 18, title: essentialsChapter18Title, view: .Ch18),
//じっくり34で追加
ListiOSApp17DevelopmentEssentials(id: 19, title: essentialsChapter19Title, view: .Ch19),
]
struct iOSApp17DevelopmentEssentials: View {
var body: some View {
VStack {
Divider()
List (dataiOSApp17DevelopmentEssentials) { data in
self.containedViewiOSApp17DevelopmentEssentials(dataiOSApp17DevelopmentEssentials: data)
}
.edgesIgnoringSafeArea([.bottom])
}
.navigationTitle("iOS開発の章目次")
.navigationBarTitleDisplayMode(.inline)
}
//タップ後に遷移先へ遷移させる関数
func containedViewiOSApp17DevelopmentEssentials(dataiOSApp17DevelopmentEssentials: ListiOSApp17DevelopmentEssentials) -> AnyView {
switch dataiOSApp17DevelopmentEssentials.view {
case .Ch1:
return AnyView(NavigationLink (destination: iOSApp17DevelopmentEssentialsCh1()) {
Text(dataiOSApp17DevelopmentEssentials.title)
})
//じっくり13で追加
case .Ch2:
return AnyView(NavigationLink (destination: iOSApp17DevelopmentEssentialsCh2()) {
Text(dataiOSApp17DevelopmentEssentials.title)
})
//じっくり13で追加
case .Ch3:
return AnyView(NavigationLink (destination: iOSApp17DevelopmentEssentialsCh3()) {
Text(dataiOSApp17DevelopmentEssentials.title)
})
//じっくり15で追加
case .Ch4:
return AnyView(NavigationLink (destination: iOSApp17DevelopmentEssentialsCh4()) {
Text(dataiOSApp17DevelopmentEssentials.title)
})
//じっくり16で追加
case .Ch5:
return AnyView(NavigationLink (destination: iOSApp17DevelopmentEssentialsCh5()) {
Text(dataiOSApp17DevelopmentEssentials.title)
})
//じっくり17で追加
case .Ch6:
return AnyView(NavigationLink (destination: iOSApp17DevelopmentEssentialsCh6()) {
Text(dataiOSApp17DevelopmentEssentials.title)
})
//じっくり18で追加
case .Ch7:
return AnyView(NavigationLink (destination: iOSApp17DevelopmentEssentialsCh7()) {
Text(dataiOSApp17DevelopmentEssentials.title)
})
//じっくり19で追加
case .Ch8:
return AnyView(NavigationLink (destination: iOSApp17DevelopmentEssentialsCh8()) {
Text(dataiOSApp17DevelopmentEssentials.title)
})
//じっくり20、21で追加
case .Ch9:
return AnyView(NavigationLink (destination: iOSApp17DevelopmentEssentialsCh9()) {
Text(dataiOSApp17DevelopmentEssentials.title)
})
//じっくり22、23で追加
case .Ch10:
return AnyView(NavigationLink (destination: iOSApp17DevelopmentEssentialsCh10()) {
Text(dataiOSApp17DevelopmentEssentials.title)
})
//じっくり24で追加
case .Ch11:
return AnyView(NavigationLink (destination: iOSApp17DevelopmentEssentialsCh11()) {
Text(dataiOSApp17DevelopmentEssentials.title)
})
//じっくり25で追加
case .Ch12:
return AnyView(NavigationLink (destination: iOSApp17DevelopmentEssentialsCh12()) {
Text(dataiOSApp17DevelopmentEssentials.title)
})
//じっくり26で追加
case .Ch13:
return AnyView(NavigationLink (destination: iOSApp17DevelopmentEssentialsCh13()) {
Text(dataiOSApp17DevelopmentEssentials.title)
})
//じっくり27,28で追加
case .Ch14:
return AnyView(NavigationLink (destination: iOSApp17DevelopmentEssentialsCh14()) {
Text(dataiOSApp17DevelopmentEssentials.title)
})
//じっくり29で追加
case .Ch15:
return AnyView(NavigationLink (destination: iOSApp17DevelopmentEssentialsCh15()) {
Text(dataiOSApp17DevelopmentEssentials.title)
})
//じっくり31で追加
case .Ch16:
return AnyView(NavigationLink (destination: iOSApp17DevelopmentEssentialsCh16()) {
Text(dataiOSApp17DevelopmentEssentials.title)
})
//じっくり32で追加
case .Ch17:
return AnyView(NavigationLink (destination: iOSApp17DevelopmentEssentialsCh17()) {
Text(dataiOSApp17DevelopmentEssentials.title)
})
//じっくり33で追加
case .Ch18:
return AnyView(NavigationLink (destination: iOSApp17DevelopmentEssentialsCh18()) {
Text(dataiOSApp17DevelopmentEssentials.title)
})
//じっくり34で追加
case .Ch19:
return AnyView(NavigationLink (destination: iOSApp17DevelopmentEssentialsCh19()) {
Text(dataiOSApp17DevelopmentEssentials.title)
})
}
}
}
#Preview {
iOSApp17DevelopmentEssentials()
}◾️Essentials19.swift
import SwiftUI
import WebKit
//iOSApp17DevelopmentEssentialsCh19.swift
//ビュー管理構造体
struct ListiOSApp17DevelopmentEssentialsCh19: Identifiable {
var id: Int
var title: String
var view: ViewEnumiOSApp17DevelopmentEssentialsCh19
}
//遷移先の画面を格納する列挙型
enum ViewEnumiOSApp17DevelopmentEssentialsCh19 {
case Sec1
}
//各項目に表示するリスト項目
let dataiOSApp17DevelopmentEssentialsCh19: [ListiOSApp17DevelopmentEssentialsCh19] = [
ListiOSApp17DevelopmentEssentialsCh19(id: 1, title: essentialsChapter19SubTitle, view: .Sec1)
]
struct iOSApp17DevelopmentEssentialsCh19: View {
var body: some View {
VStack {
Divider()
List (dataiOSApp17DevelopmentEssentialsCh19) { data in
self.containedViewiOSApp17DevelopmentEssentialsCh19(dataiOSApp17DevelopmentEssentialsCh19: data)
}
.edgesIgnoringSafeArea([.bottom])
}
.navigationTitle(essentialsChapter19NavigationTitle)
.navigationBarTitleDisplayMode(.inline)
}
//タップ後に遷移先へ遷移させる関数
func containedViewiOSApp17DevelopmentEssentialsCh19(dataiOSApp17DevelopmentEssentialsCh19: ListiOSApp17DevelopmentEssentialsCh19) -> AnyView {
switch dataiOSApp17DevelopmentEssentialsCh19.view {
case .Sec1:
return AnyView(NavigationLink (destination: Essentials19()) {
Text(dataiOSApp17DevelopmentEssentialsCh19.title)
})
}
}
}
#Preview {
iOSApp17DevelopmentEssentialsCh19()
}
//Essentials19.swift
struct Essentials19: View {
var body: some View {
VStack{
TabView {
Essentials19Code()
.tabItem {
Image(systemName: codeImageTab)
Text(codeTextTab)
}
Essentials19Points()
.tabItem {
Image(systemName: pointImageTab)
Text(pointTextTab)
}
Essentials19WEB()
.tabItem {
Image(systemName: webImageTab)
Text(webTextTab)
}
}
}
}
}
#Preview {
Essentials19()
}
struct Essentials19Code: View {
var body: some View {
ScrollView{
Text(codeEssentials19)
}
}
}
#Preview {
Essentials19Code()
}
struct Essentials19Points: View {
var body: some View {
ScrollView{
Text(pointEssentials19)
}
}
}
#Preview {
Essentials19Points()
}
struct Essentials19WebView: UIViewRepresentable {
let searchURL: URL
func makeUIView(context: Context) -> WKWebView {
let view = WKWebView()
let request = URLRequest(url: searchURL)
view.load(request)
return view
}
func updateUIView(_ uiView: WKWebView, context: Context) {
}
}
struct Essentials19WEB: View {
private var url:URL = URL(string: urlEssentials19)!
var body: some View {
Essentials19WebView(searchURL: url)
}
}
#Preview {
Essentials19WEB()
}
//タイトル
let essentialsChapter19NavigationTitle = "第19章"
let essentialsChapter19Title = "第19章 基本的なSwiftUIプロジェクトの構造"
let essentialsChapter19SubTitle = "第1節 基本的なSwiftUIプロジェクトの構造"
//コード
let codeEssentials19 = """
◾️Chapter19_1(None)
import SwiftUI
@main
struct Chapter19_1App: App {
var body: some Scene {
WindowGroup {
ContentView()
}
}
}
import SwiftUI

struct ContentView: View {
    var body: some View {
        VStack {
            Image("プレビュー")
                .imageScale(.large)
                .foregroundStyle(.tint)
            Text("Hello, world!")
        }
        .padding()
    }
}

#Preview {
    ContentView()
}
◾️Chapter19_2(CoreData&XCTest)
import SwiftUI
@main
struct Chapter19_2App: App {
let persistenceController = PersistenceController.shared
var body: some Scene {
WindowGroup {
ContentView()
.environment(\\.managedObjectContext, persistenceController.container.viewContext)
}
}
}
import SwiftUI
import CoreData
struct ContentView: View {
@Environment(\\.managedObjectContext) private var viewContext
@FetchRequest(
sortDescriptors: [NSSortDescriptor(keyPath: \\Item.timestamp, ascending: true)],
animation: .default)
private var items: FetchedResults<Item>
var body: some View {
NavigationView {
List {
ForEach(items) { item in
NavigationLink {
Text("Item at \\(item.timestamp!, formatter: itemFormatter)")
} label: {
Text(item.timestamp!, formatter: itemFormatter)
}
}
.onDelete(perform: deleteItems)
}
.toolbar {
ToolbarItem(placement: .navigationBarTrailing) {
EditButton()
}
ToolbarItem {
Button(action: addItem) {
Label("Add Item", systemImage: "plus")
}
}
}
Text("Select an item")
}
}
private func addItem() {
withAnimation {
let newItem = Item(context: viewContext)
newItem.timestamp = Date()
do {
try viewContext.save()
} catch {
let nsError = error as NSError
fatalError("Unresolved error \\(nsError), \\(nsError.userInfo)")
}
}
}
private func deleteItems(offsets: IndexSet) {
withAnimation {
offsets.map { items[$0] }.forEach(viewContext.delete)
do {
try viewContext.save()
} catch {
let nsError = error as NSError
fatalError("Unresolved error \\(nsError), \\(nsError.userInfo)")
}
}
}
}
private let itemFormatter: DateFormatter = {
let formatter = DateFormatter()
formatter.dateStyle = .short
formatter.timeStyle = .medium
return formatter
}()
#Preview {
ContentView().environment(\\.managedObjectContext, PersistenceController.preview.container.viewContext)
}
import CoreData
struct PersistenceController {
static let shared = PersistenceController()
static var preview: PersistenceController = {
let result = PersistenceController(inMemory: true)
let viewContext = result.container.viewContext
for _ in 0..<10 {
let newItem = Item(context: viewContext)
newItem.timestamp = Date()
}
do {
try viewContext.save()
} catch {
let nsError = error as NSError
fatalError("Unresolved error \\(nsError), \\(nsError.userInfo)")
}
return result
}()
let container: NSPersistentContainer
init(inMemory: Bool = false) {
container = NSPersistentContainer(name: "Chapter19_2")
if inMemory {
container.persistentStoreDescriptions.first!.url = URL(fileURLWithPath: "/dev/null")
}
container.loadPersistentStores(completionHandler: { (storeDescription, error) in
if let error = error as NSError? {
fatalError("Unresolved error \\(error), \\(error.userInfo)")
}
})
container.viewContext.automaticallyMergesChangesFromParent = true
}
}
import XCTest
@testable import Chapter19_2
final class Chapter19_2Tests: XCTestCase {
override func setUpWithError() throws {
}
override func tearDownWithError() throws {
}
func testExample() throws {
}
func testPerformanceExample() throws {
self.measure {
}
}
}
import XCTest
final class Chapter19_2UITests: XCTestCase {
override func setUpWithError() throws {
continueAfterFailure = false
}
override func tearDownWithError() throws {
}
func testExample() throws {
let app = XCUIApplication()
app.launch()
}
func testLaunchPerformance() throws {
if #available(macOS 10.15, iOS 13.0, tvOS 13.0, watchOS 7.0, *) {
measure(metrics: [XCTApplicationLaunchMetric()]) {
XCUIApplication().launch()
}
}
}
}
import XCTest
final class Chapter19_2UITestsLaunchTests: XCTestCase {
override class var runsForEachTargetApplicationUIConfiguration: Bool {
true
}
override func setUpWithError() throws {
continueAfterFailure = false
}
func testLaunch() throws {
let app = XCUIApplication()
app.launch()
let attachment = XCTAttachment(screenshot: app.screenshot())
attachment.name = "Launch Screen"
attachment.lifetime = .keepAlways
add(attachment)
}
}
◾️Chapter19_3(SwiftData&XCTest)
import SwiftUI
import SwiftData
@main
struct Chapter19_3App: App {
var sharedModelContainer: ModelContainer = {
let schema = Schema([
Item.self,
])
let modelConfiguration = ModelConfiguration(schema: schema, isStoredInMemoryOnly: false)
do {
return try ModelContainer(for: schema, configurations: [modelConfiguration])
} catch {
fatalError("Could not create ModelContainer: \\(error)")
}
}()
var body: some Scene {
WindowGroup {
ContentView()
}
.modelContainer(sharedModelContainer)
}
}
import SwiftUI
import SwiftData
struct ContentView: View {
@Environment(\\.modelContext) private var modelContext
@Query private var items: [Item]
var body: some View {
NavigationSplitView {
List {
ForEach(items) { item in
NavigationLink {
Text("Item at \\(item.timestamp, format: Date.FormatStyle(date: .numeric, time: .standard))")
} label: {
Text(item.timestamp, format: Date.FormatStyle(date: .numeric, time: .standard))
}
}
.onDelete(perform: deleteItems)
}
.toolbar {
ToolbarItem(placement: .navigationBarTrailing) {
EditButton()
}
ToolbarItem {
Button(action: addItem) {
Label("Add Item", systemImage: "plus")
}
}
}
} detail: {
Text("Select an item")
}
}
private func addItem() {
withAnimation {
let newItem = Item(timestamp: Date())
modelContext.insert(newItem)
}
}
private func deleteItems(offsets: IndexSet) {
withAnimation {
for index in offsets {
modelContext.delete(items[index])
}
}
}
}
#Preview {
ContentView()
.modelContainer(for: Item.self, inMemory: true)
}
import Foundation
import SwiftData

@Model
final class Item {
    var timestamp: Date

    init(timestamp: Date) {
        self.timestamp = timestamp
    }
}
import XCTest
@testable import Chapter19_3
final class Chapter19_3Tests: XCTestCase {
override func setUpWithError() throws {
}
override func tearDownWithError() throws {
}
func testExample() throws {
}
func testPerformanceExample() throws {
self.measure {
}
}
}
import XCTest
final class Chapter19_3UITests: XCTestCase {
override func setUpWithError() throws {
continueAfterFailure = false
}
override func tearDownWithError() throws {
}
func testExample() throws {
let app = XCUIApplication()
app.launch()
}
func testLaunchPerformance() throws {
if #available(macOS 10.15, iOS 13.0, tvOS 13.0, watchOS 7.0, *) {
measure(metrics: [XCTApplicationLaunchMetric()]) {
XCUIApplication().launch()
}
}
}
}
import XCTest
final class Chapter19_3UITestsLaunchTests: XCTestCase {
override class var runsForEachTargetApplicationUIConfiguration: Bool {
true
}
override func setUpWithError() throws {
continueAfterFailure = false
}
func testLaunch() throws {
let app = XCUIApplication()
app.launch()
let attachment = XCTAttachment(screenshot: app.screenshot())
attachment.name = "Launch Screen"
attachment.lifetime = .keepAlways
add(attachment)
}
}
"""
//ポイント
let pointEssentials19 = """
実際に動かして理解することが大事
👉木を見て森を見るな。やったこともないものを動かしもせずに、頭だけで理解した気になるな
"""
//URL
let urlEssentials19 = "https://note.com/m_kakudo/n/n511711d6696d"ハイ!完了🕺
ま、あとは自分で改修して遊んでみてね〜〜〜〜🕺
さてと、新聞とノーマンを読んで、
14時からスマホの機種変に行こっ!!!!
シミュレーターがあれば十分なんで、
「iOS17対応の実機特に必要ないかな」
って感じだったんだけど、
iPhone15にするから結局、実機が手に入ってしまう🕺
また、8年くらい使うんだろうな🧐
