
#5 検索機能の実装 AppGyverでアプリ開発

前回の記事#4では、GoogleスプレッドシートとAppGyverを繋げる方法について紹介しました。
また、番外編として、Googleドライブにある画像をAppGyver上で表示させる方法についても、紹介しております。
今回は、『検索機能の実装』ということで、検索欄の作成〜検索結果をアプリ上で表示させる方法について説明します。
検索アプリの肝となる機能なので、ぜひご覧頂けると幸いです!
1. 検索欄と検索ボタンの作成
まず、UIの作成を行っていきます。
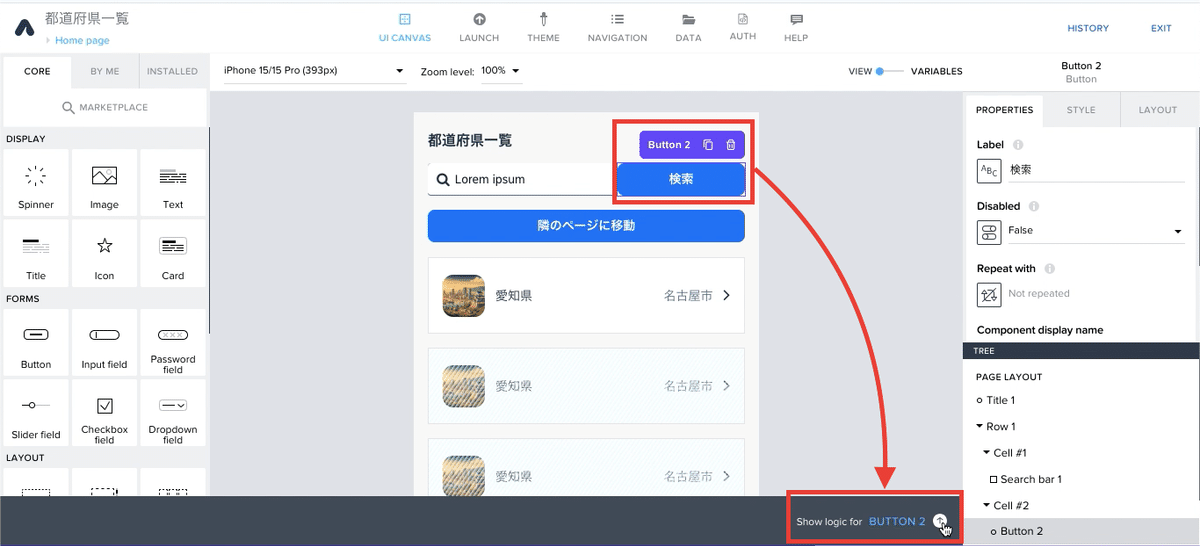
左のコンポーネント欄から、検索欄とボタンのコンポーネントを配置します。
しかし、上下に並んでしまうため、セルというコンポーネントを使用し、検索欄と検索ボタンが横並びになるように配置していきます。
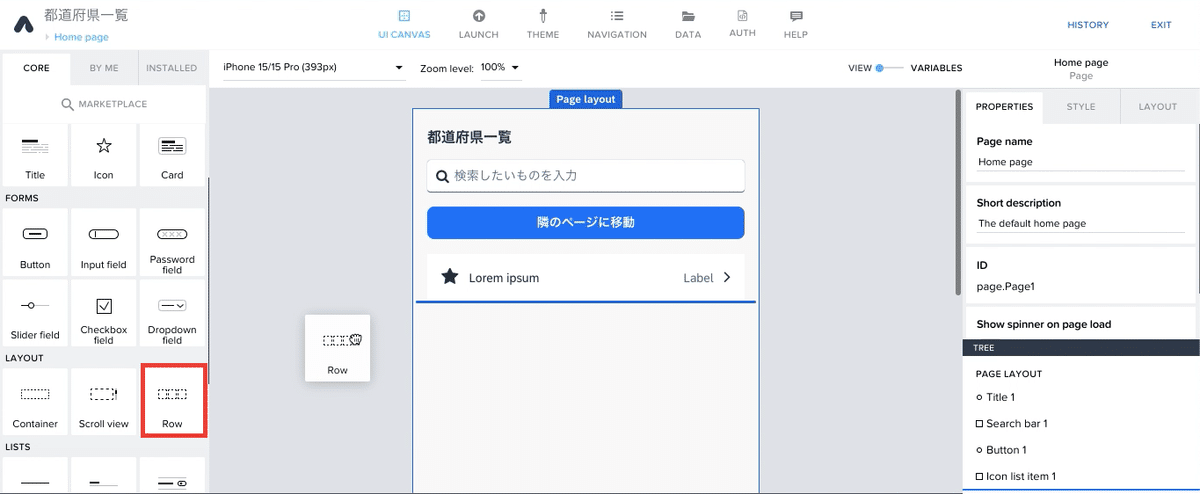


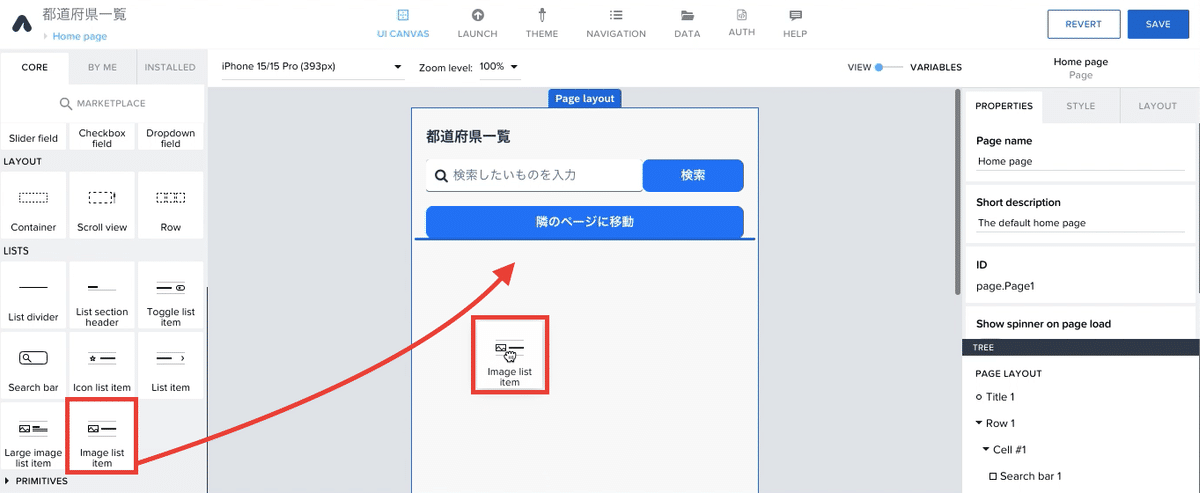
2. 画像付きラベルの作成
次に、画像付きラベルのコンポーネントを配置します。
ひとまず、UIの作成は以上とし、検索スキームの作成に移ります。
3. 検索機能の実装
1. VARIABLE画面でロジックの作成
UIの画面から、ロジックの画面に移ります。
※ここから少し複雑な内容になりますので、わかりにくい部分があればコメント等で教えて頂けるとありがたいです!
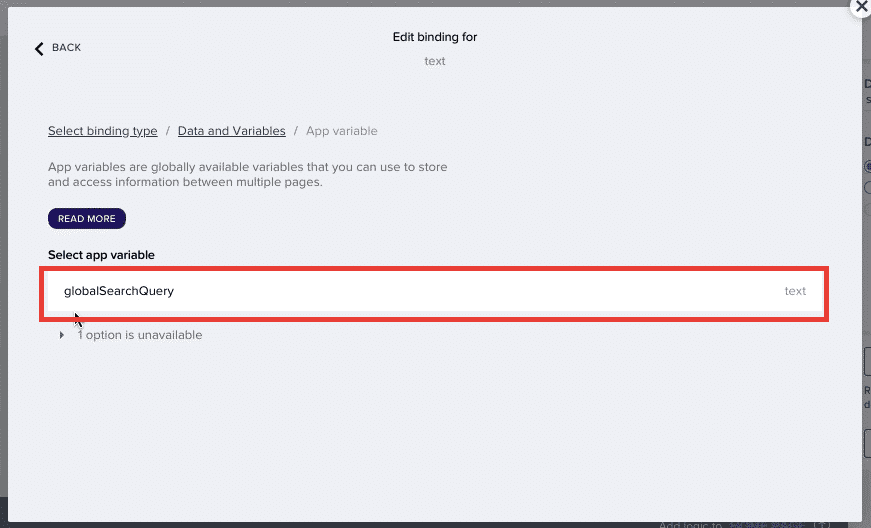
1.「VIEW画面」から「VARIABLES画面」に移動
2.「App variables」を選択
3.「ADD APP VARIABLE」を押す
4.「Variable name」に「globalSearchQuery」と入力
5.「Variable value type」は「text」にする

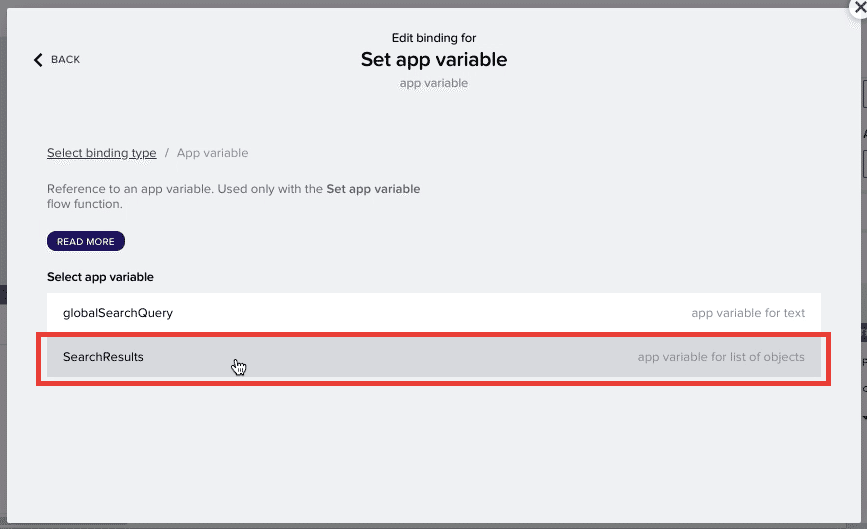
同じように「SearchResults」も作成します。
※「Variable value type」は「List」にする
→その後、「List item type」を「Object」にする
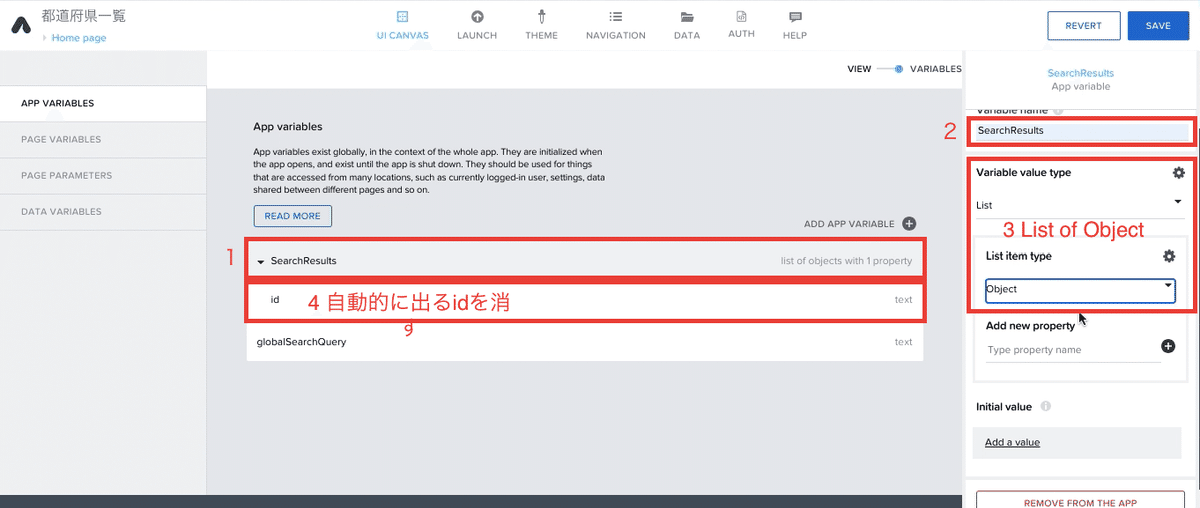
自動的に生成される「id」のオブジェクトを削除する。

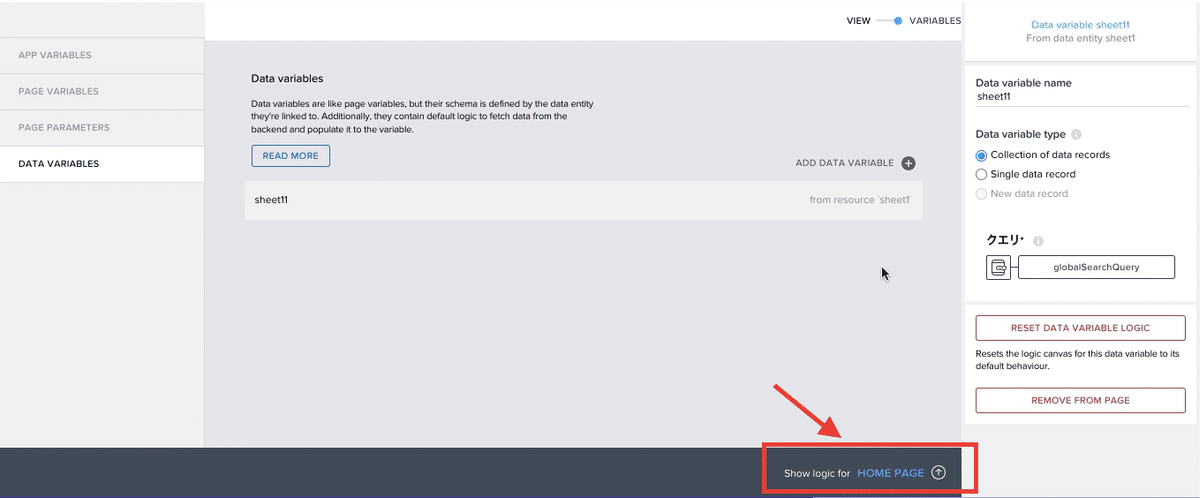
次に「Data variables」に移ります。
「ADD DATA VARIABLE」を押し、「Sheet11(作成したデータの名称)」を選択

クエリの部分を先程作成した、「globalSearchQuery」にします。


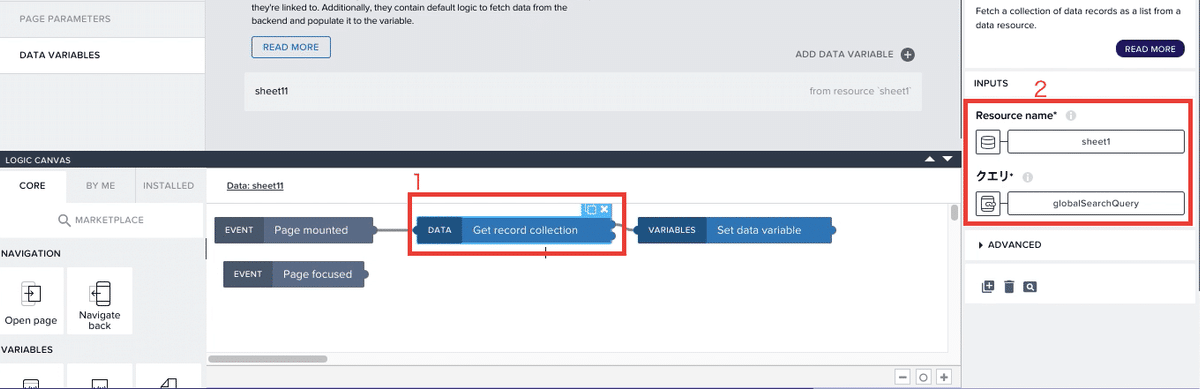
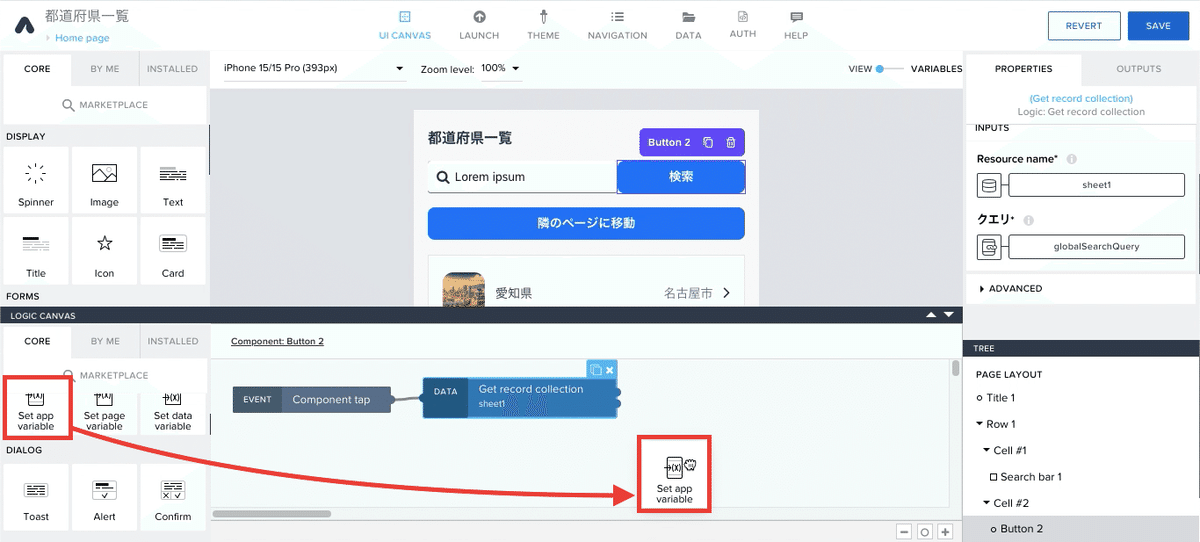
その後、右下のロジック画面を開く
「Get record collection」をクリックし、以下であることを確認
Resource name:Sheet1
クエリ:globalSearchQuery
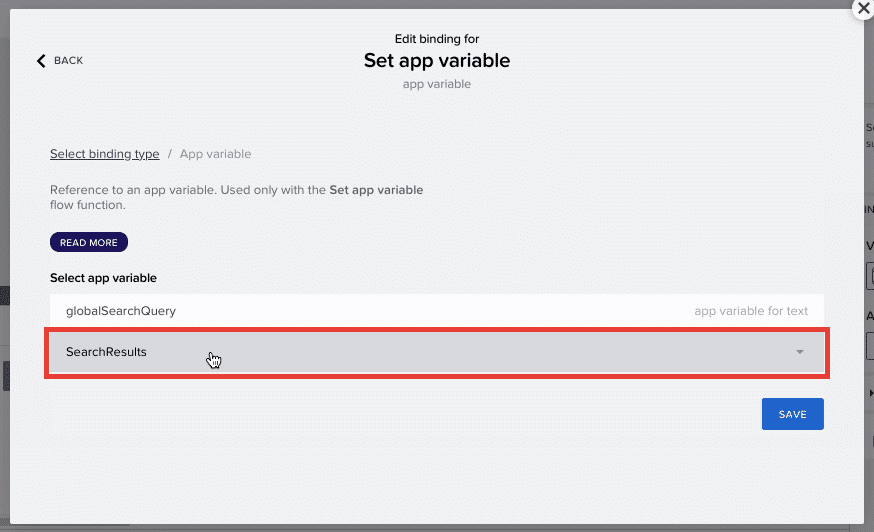
「Set data variable」を「Set app variable」に置き換える


「Get record collection」と「Set app variable」を繋げる

「Assigned value」を「outputs["Get record collection"].records」にする


「Variable name」を「SearchResults」にする


以上で、VARIABLE画面でのロジックの作成は終了です。
2. 検索欄の入力を「globalSearchQuery」に連携
VIEW画面に戻り、「Search bar」を選択します。
「Value」を「globalSearchQuery」にする


3. 表示機能の作成
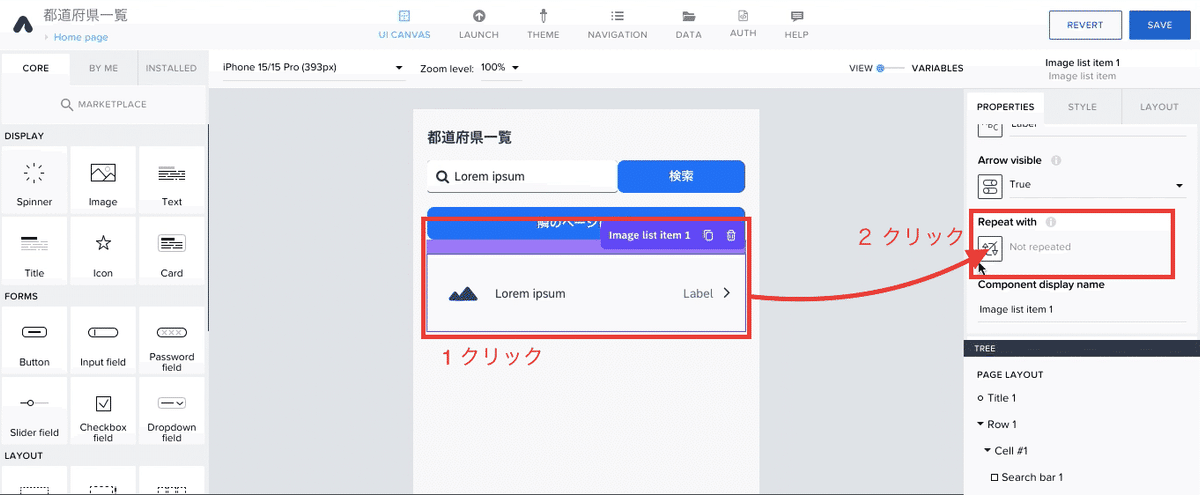
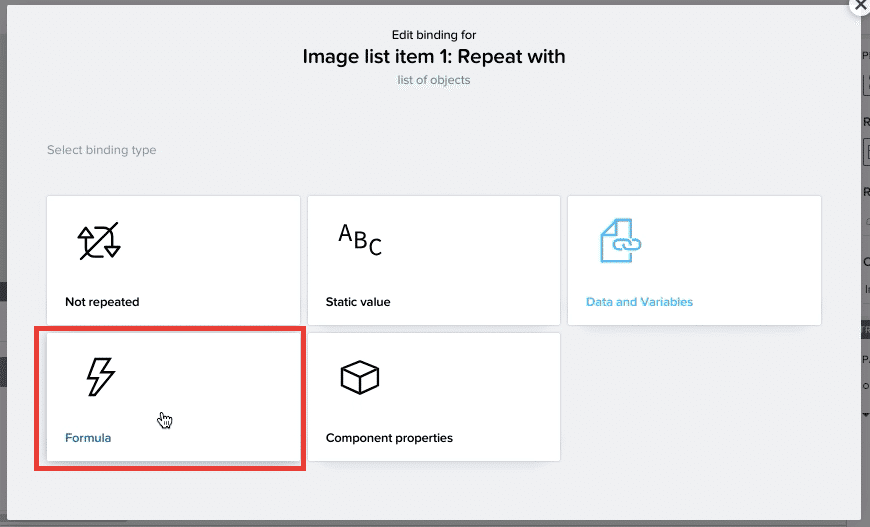
データの「Image list item」をクリック
「Repeat with」をクリックし、「Sheet1」に接続


「Image source」を「AI画像」に接続

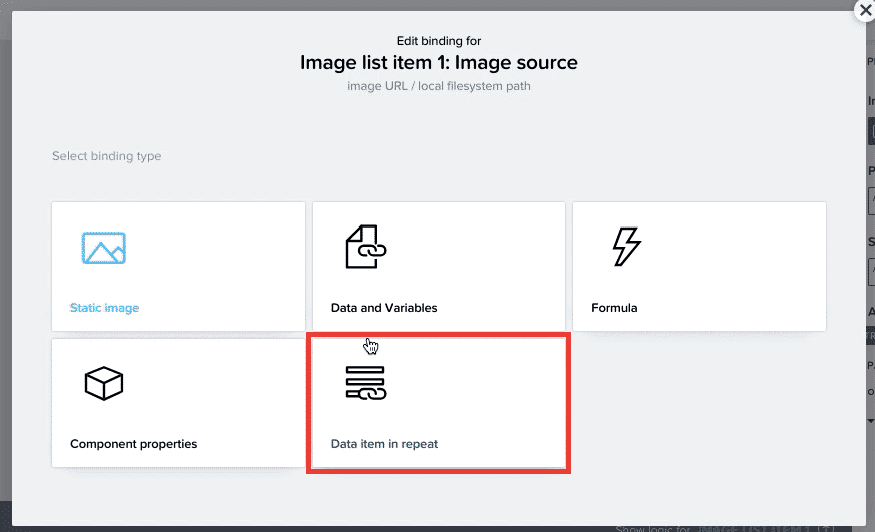

「Primary label」を「都道府県」に接続
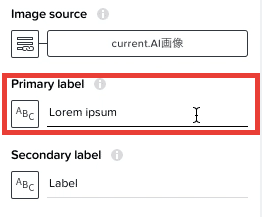

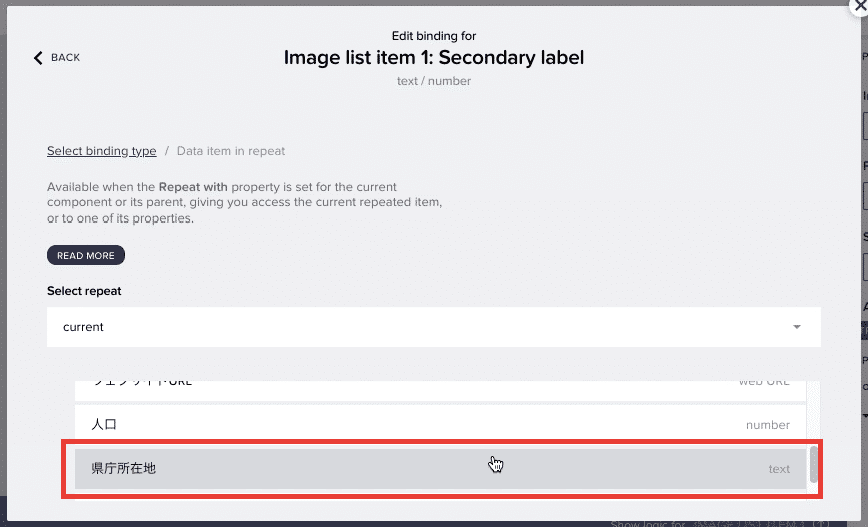
「Secondary label」を「県庁所在地」に接続

→完成!!

上記のように連携したGoogleスプレッドシートの内容が表示されたら、表示機能の完成です。
4. 検索機能の作成
次に検索ボタンをクリックした際に、検索結果が呼び出されるようにロジックを作成します。
検索ボタンをクリック→右下のロジック画面を表示
「Get record collection」をドラッグ&ドロップ

「Component tap」と「Get record collection」を繋げ、クエリを「globalSearchQuery」にする


次に「Set app variable」をドラッグ&ドロップ
「Get record collection」と「Set app variable」を繋げ、
「Variable name」を「SearchResults」にする

「Assigned value」を「outputs["Get record collection"].records」にする


完成画面が以下↓

検索機能の作成は以上です。
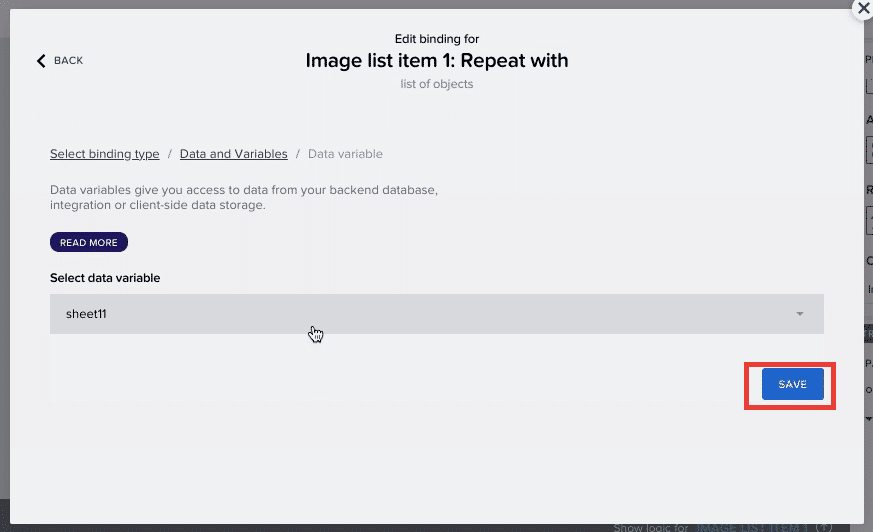
5. 検索結果を表示するようにリピート機能を修正
「3. 表示機能の作成」で「Repeat with」を「Sheet1」に接続しているかと思います。
ここの部分を検索結果である「SearchResults」が表示されるように修正します↓


以下で、完成です!
4. 動きの確認
最後に実際の動きを確認していきます。
WEB上でアプリの動きを確認します。
※作成画面の上にある「LAUNCH」→「Preview your app」→「Preview on web」から作成中の画面が表示できます。
検索欄になんでもいいので好きな県を入れてみます(県名の一部でも可能です)
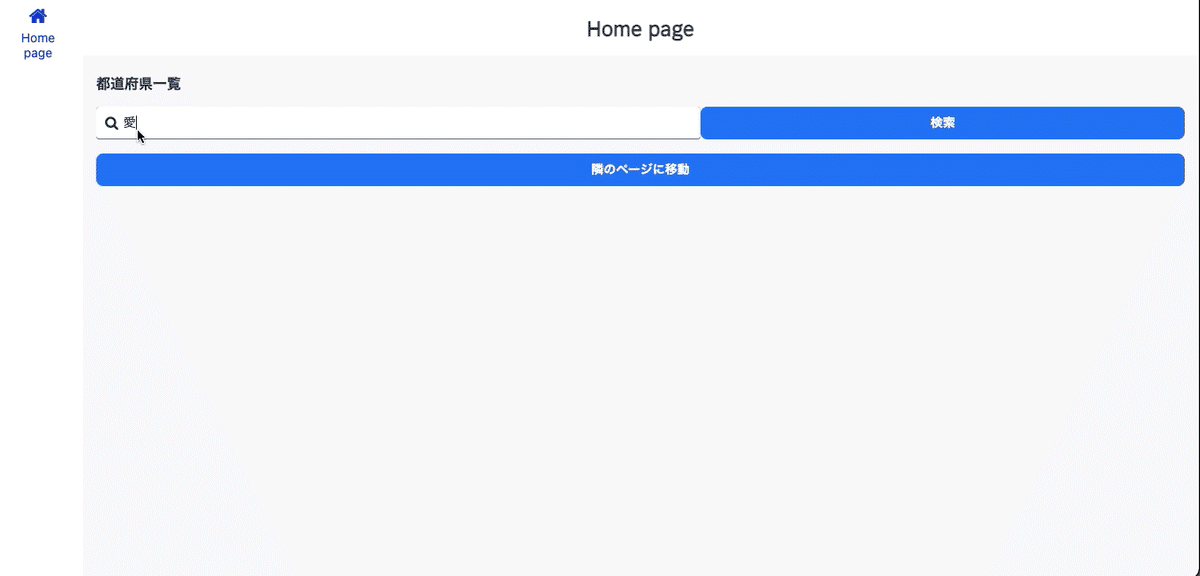
検索ボタンを押すと、

愛知県、愛媛県のデータが表示されました!
ちなみに、「県」と入力すると、都道府県のうち、県が全て表示されます。

これで、検索機能の実装は以上となります。
5. 最後に、次回は「スピナーの作成」
いかがだったでしょうか?
今回の記事では検索機能を実装しました。
一方、私が初めてこの検索機能を作成した時に、
「フリーズしているのか、検索中なのか分からない」
ということがありました。
そこで、次回の記事では、以下の2点について紹介したいと思います。
・検索中のマーク(スピナー:通信やローディング時にくるくる回るアニメーション)の作成
・都道府県の詳細画面(都道府県のHPリンクに飛ばす)の作成
ぜひ、最後までご覧になって下さい。