階層マージ記事第三弾!Super Mergerの新機能を学ぼう!新Calcutation Modeを解説!(階層マージ上級編#1)

はじめに
階層マージ記事第三弾ということで、ついに上級編になります。
今回は、Super Mergerの新しいCalcutation Modeについて、お伝えできればと思います。
Super MergerのGithub上にも情報が少ない為、pyコードを読み解いて、自分なりに噛み砕いた内容なので、間違いがあったら指摘願います。
前回、基礎編と中級編の記事はこちら。
前準備
今回使用するマージレシピとプロンプト、モデルを定義します。
この場を借りて、各モデル製作者様に御礼申し上げます。
Model
Model A : LastpieceCore_A0692
[Concept : イラスト調]
Model B : VoidnoiseCore_F0636
[Concept : リアリズム調]
Model C : blue_pencil-v8(ぶるぺん 様 [@blue_pen5805])
[Concept : イラスト調]
Merge Weight
0.5,0.5,0.5,0.5,0.5,0.5,0.5,0.5,0.5,0.5,0.5,0.5,0.5,0.5,0.5,0.5,0.5,0.5,0.5,0.5,0.5,0.5,0.5,0.5,0.5,0.5Prompt
best quality,absurdres,highres,ultra detailed,detailed background,(1girl,solo:1.5),bobcut,brown hair,[proud],suit,close view,
BREAK
daytime in the city
Negative Prompt
EasyNegativeV2,[:(negative_hand-neg:1.5):19],(worst quality:1.5),(low quality:1.5),(normal quality:1.5),(monochrome),(grayscale),(watermark),(white letters),signature,username,text,error,(nsfw)Settings
Steps: 35
Sampler: DPM++ 2M Karras
CFG scale: 11
Size: 512x768
Denoising strength: 0.55
Clip skip: 2
Hires upscale: 2
Hires steps: 15
Hires upscaler: Latent (nearest)
Seed


Calcutation Mode
今回、Super Merger(commit : 03135016)までのアップデートで様々なCalcutation Modeが追加されました。
追加されたのは以下になります。
trainDifference(差分学習)
smoothAdd MT(平滑化フィルタ加算 マルチスレッド処理)
tensor2(第二dimension テンソル法)
smoothAdd MTとtensor2は、既存のsmooth Addとtensor2と何が違うのか、解説していきます。
trainDifference
[ 使用可能なモード ] Add Difference
このモードは、Add Differenceの特性を利用した、算出方法になります。
前回の記事でも紹介しましたが、Add DifferenceはModel BからModelCの差分に対して、alpha weight
を乗算します。
$$
A+(B-C)\cdot alpha
$$
つまりは、Model BとModel Cとの差分結果に対してalpha weightを乗算して、その結果をModel Aへ加算することで、全体をマージするわけではなく、新しい要素をModel Aへ追加することができるマージモードです。
この時、加算された要素は、各コンポーネントに対して、新しい要素としてマージされます。
対して、trainDifferenceは、マージモードの動作的には同様ですが、Model Aへの加算方法が異なります。
差分要素をそのままModel Aへ加算するのではなく、疑似的に差分を学習させるようにマージします。厳密には違いますが、一番例えやすいのがLoRA+Modelのマージのイメージに近いです。
その為、そのままモデルマージするよりも、画風が大きく変化することなく、局所的な変化を加えることが出来るようになります。
Add Difference自体、3モデル使用しますが、今回で言うと、以下のような使い方をすることで、画風の変化を極力抑えた形で、モデルの特性を強化することができるようになります。
Model A : LastpieceCore_A0692
[Concept : イラスト調]
Model B : LastpieceCore_A0692
[Concept : イラスト調]
Model C : blue_pencil-v8(ぶるぺん 様 [@blue_pen5805])
[Concept : イラスト調]
Add Differenceの特性を使い、
特性を強化したいモデル → Model A、Model B
学習させたい要素を有しているモデル → Model C
とすることで、これらは同一特性(Model A=Model B)を有しており、現行のモデル差分をModel Cから疑似的に、追加学習の様なマージが可能になります。
では、やっていきましょう。
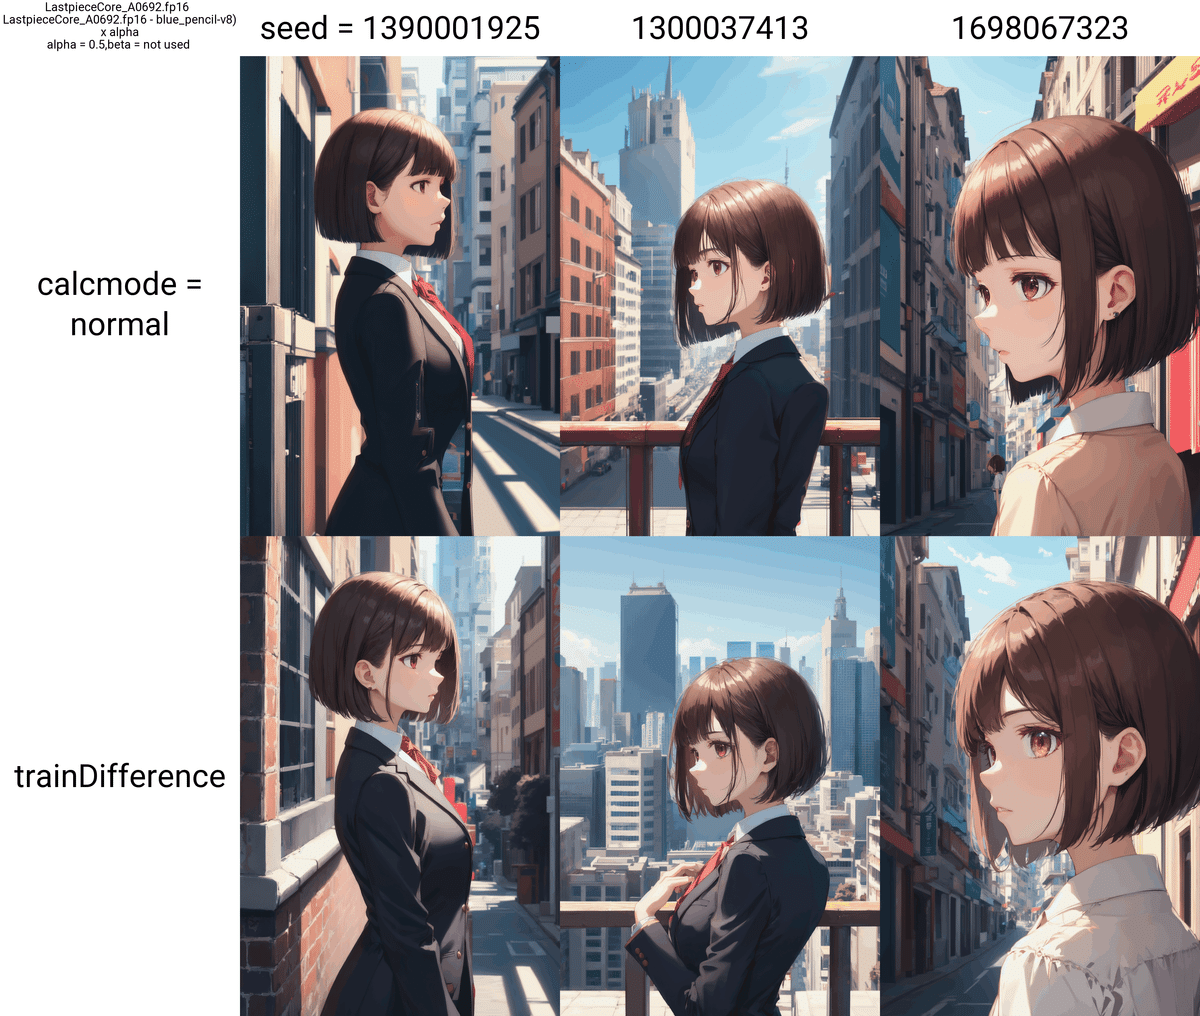
見て頂ければ分かると思いますが、Add Difference+normalは画風が変化しているのに対し、Add Difference+trainDifferenceは、大幅な画風の変化がありません。
このように、画風に変化を加えることなく、差分要素のみを学習的にマージさせることが可能となります。
この算出方法はもちろん万能ではなく、大きな欠点が存在します。
それは、過学習を引き起こす可能性が高い点です。
その為、trainDifferenceは大幅な画風変化を引き起こさず、モデルへ取り入れたい時に利用するようにしましょう。
smoothAdd MT
[ 使用可能なモード ] Add Difference
このモードは、既存のsmoothAddと性質は同じですが、CPUによるマルチスレッド処理が可能になりました。
従来のsmoothAddは、pixel毎に平滑化しつつマージを行うため、1マージするのに非常に膨大な時間を要していました。
それを緩和するべく、マルチスレッド処理を可能にしています。
以下が、Super Merger [merger.py] 内のsmoothAdd MT定義になります。
if calcmode == "smoothAdd MT":
      # setting threads to higher than 8 doesn't significantly affect the time for merging
      threads = cpu_count()
      tasks_per_thread = 8

      theta_0, theta_1, stopped = multithread_smoothadd(key_and_alpha, theta_0, theta_1, threads, tasks_per_thread, hear)
      if stopped:
return "STOPPED", *non4tasks_per_threadが8となっているので、8スレッド分のマルチスレッド処理が行われるよう、コードが記述されています。
割当スレッド数を書き換えて高速化を図れると思いきや、コメントで「# setting threads to higher than 8 doesn't significantly affect the time for merging」と書いているので、「tasks_per_thread」を8スレッドより大きい値に書き換えても、あまりマージ速度に影響はないようです。
では、どのぐらい改善されているか、試してみましょう。
ちなみに、前回のsmoothAddでは、3seed分のX/YPlot出力に「約30分」掛かっていました。
マージ実行中は当たり前ですが、CPU使用率が100%で張り付きます。
Loading weights [VoidnoiseCore_VoidnoiseCore_F0636.fp16] from file
Loading weights [SD1.5_blue_pencil-v8] from file
100%|██████████████████████████████████████████████████████████████████████████████| 1133/1133 [00:26<00:00, 42.39it/s]
Loading weights [LastpieceCore_LastpieceCore_A0692.fp16] from cache
Stage 1/2: 100%|███████████████████████████████████████████████████████████████| 1143/1143 [00:00<00:00, 163564.98it/s]
max threads = 12, total threads = 142, tasks per thread = 8
smoothAdd MT: 100%|████████████████████████████████████████████████████████████████| 1130/1130 [01:18<00:00, 14.47it/s]
Stage 2/2: 100%|██████████████████████████████████████████████████████████████| 1133/1133 [00:00<00:00, 1136333.44it/s]
Applying attention optimization: sdp... done.
Loading VAE weights specified in settings: cached lastpiece.vae.brightness.safetensors
100%|██████████████████████████████████████████████████████████████████████████████████| 35/35 [00:06<00:00, 5.71it/s]
100%|██████████████████████████████████████████████████████████████████████████████████| 15/15 [00:05<00:00, 2.98it/s]
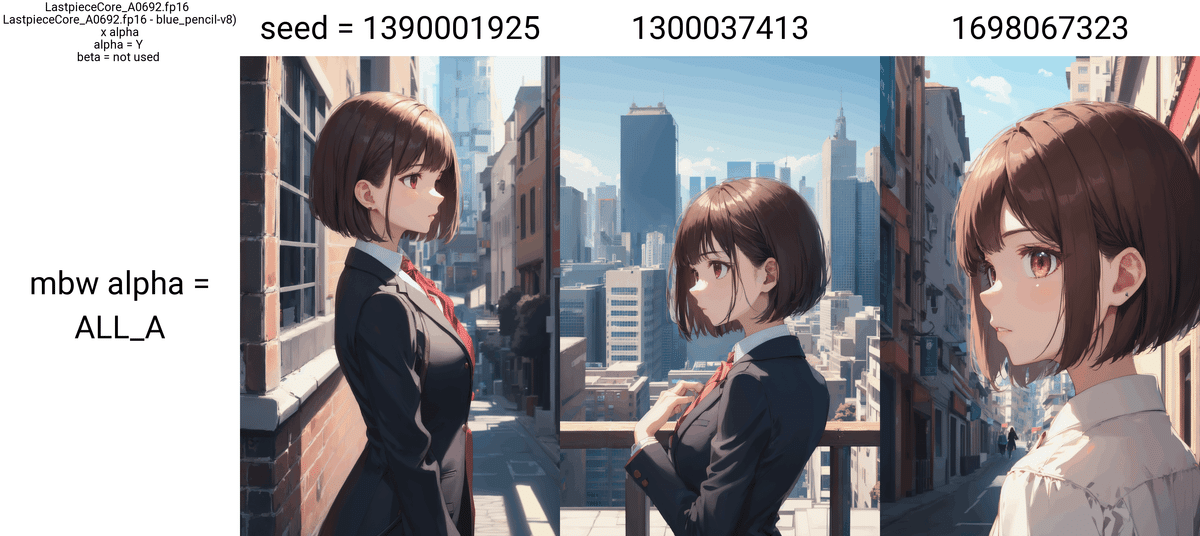
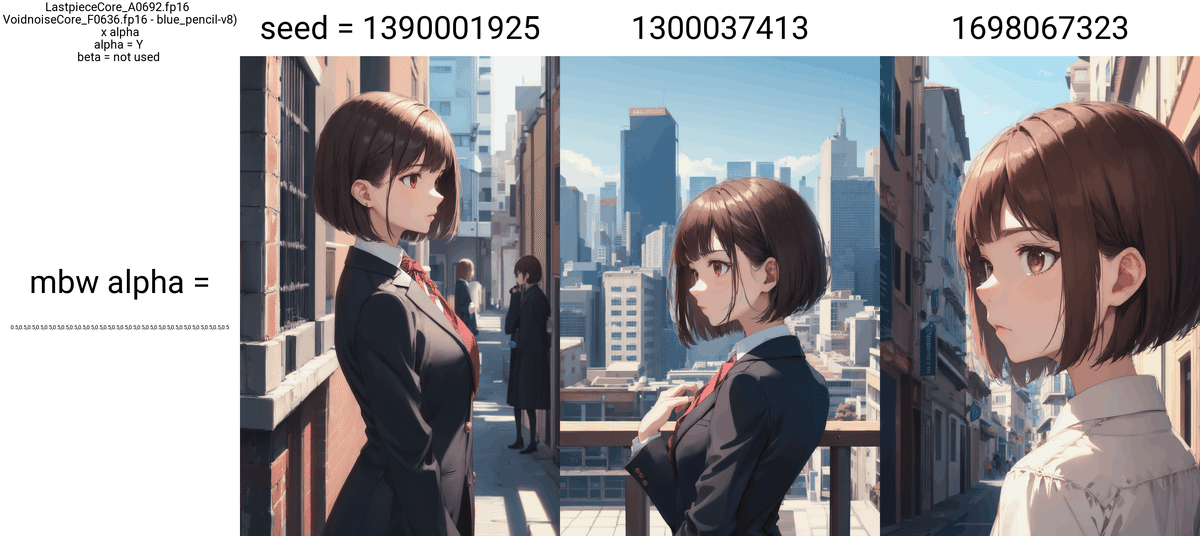
XY plot: X: seed, 1300037413, Y: mbw alpha , 0.5,0.5,0.5,0.5,0.5,0.5,0.5,0.5,0.5,0.5,0.5,0.5,0.5,0.5,0.5,0.5,0.5,0.5,0.5,0.5,0.5,0.5,0.5,0.5,0.5,0.5, Z: none, (2/3)
100%|██████████████████████████████████████████████████████████████████████████████████| 35/35 [00:05<00:00, 6.41it/s]
100%|██████████████████████████████████████████████████████████████████████████████████| 15/15 [00:05<00:00, 2.80it/s]
XY plot: X: seed, 1698067323, Y: mbw alpha , 0.5,0.5,0.5,0.5,0.5,0.5,0.5,0.5,0.5,0.5,0.5,0.5,0.5,0.5,0.5,0.5,0.5,0.5,0.5,0.5,0.5,0.5,0.5,0.5,0.5,0.5, Z: none, (3/3)
100%|██████████████████████████████████████████████████████████████████████████████████| 35/35 [00:05<00:00, 6.99it/s]
100%|██████████████████████████████████████████████████████████████████████████████████| 15/15 [00:05<00:00, 2.94it/s]
Total progress: 750it [21:58, 2.99it/s]
CLI上の処理時間では、「約2分」程度でマージ+X/Y Plotが完了しています。
非常に高速になっていますね!
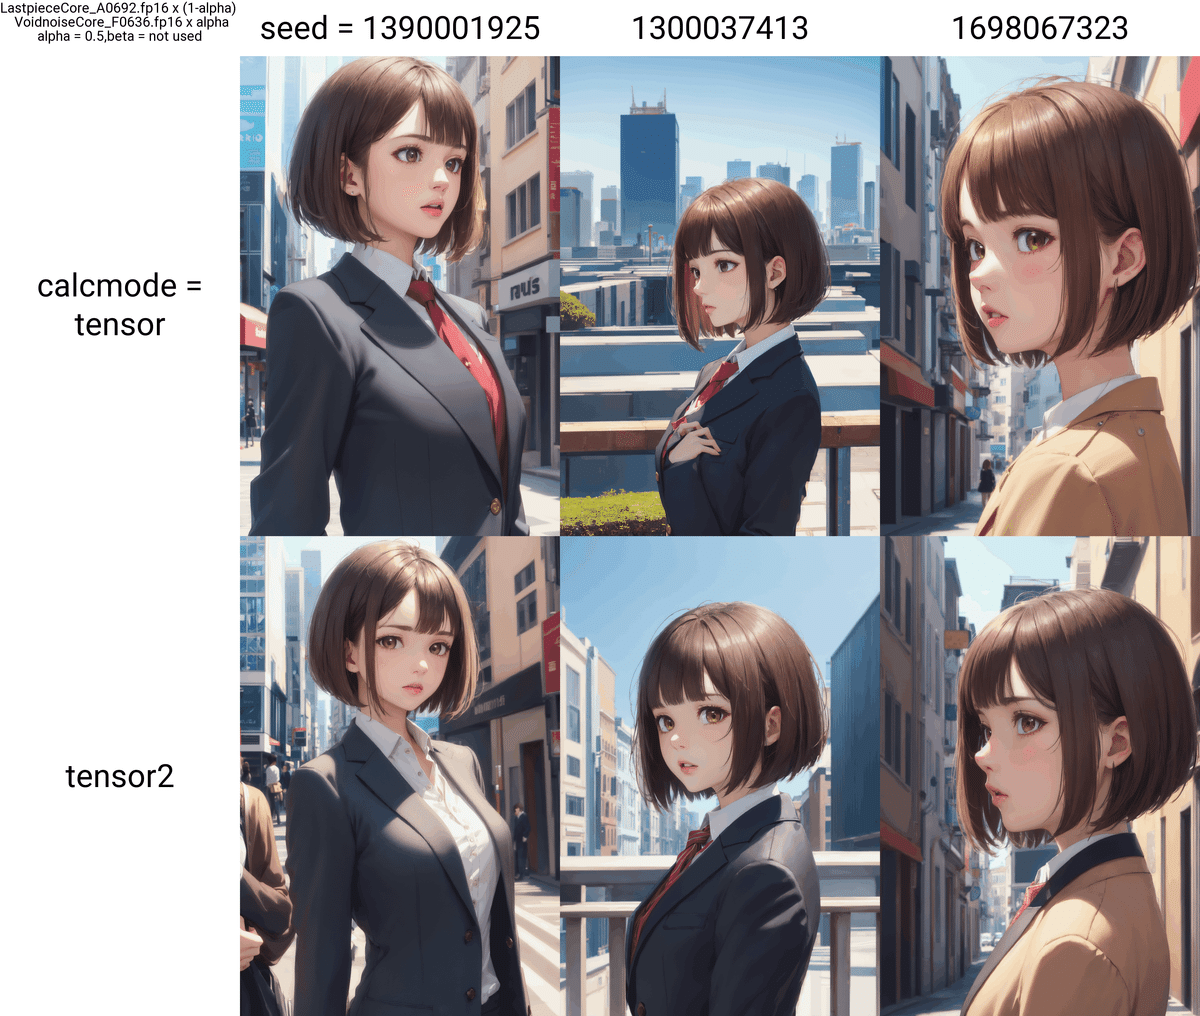
tensor2
[ 使用可能なモード ] Weight sum
以下は、tensorモードのマージ方式を図解したものになります。
これは前回でも紹介しましたね。

https://github.com/hako-mikan/sd-webui-supermerger/blob/main/calcmode_en.md#tensor
tensorモードの詳細ついては、扱いや処理が複雑な為、tensorモードのみの記事を別でお伝えする事とします。
このモードは、処理自体はtensorモードとほぼ同様です。
その為、上図のようにテンソル全体ではなく、ブロックに割り込ませるようにマージします。
対して、tensor2モードは、tensorモード自体を多次元的にtensorマージするように行います。
もう意味が分かりませんね!
tensorマージ、tensor2マージのpyコードの一部を見てみましょう。
[ tensorマージ ]
           elif calcmode == "tensor":
                dim = theta_0[key].dim()
                if dim == 0 : continue
                if current_alpha+current_beta <= 1 :
                    talphas = int(theta_0[key].shape[0]*(current_beta))
                    talphae = int(theta_0[key].shape[0]*(current_alpha+current_beta))
                    if dim == 1:
                        theta_0[key][talphas:talphae] = theta_1[key][talphas:talphae].clone()

                    elif dim == 2:
                        theta_0[key][talphas:talphae,:] = theta_1[key][talphas:talphae,:].clone()

                    elif dim == 3:
                        theta_0[key][talphas:talphae,:,:] = theta_1[key][talphas:talphae,:,:].clone()

                    elif dim == 4:
                        theta_0[key][talphas:talphae,:,:,:] = theta_1[key][talphas:talphae,:,:,:].clone()

                else:
                    talphas = int(theta_0[key].shape[0]*(current_alpha+current_beta-1))
                    talphae = int(theta_0[key].shape[0]*(current_beta))
                    theta_t = theta_1[key].clone()
                    if dim == 1:
                        theta_t[talphas:talphae] = theta_0[key][talphas:talphae].clone()

                    elif dim == 2:
                        theta_t[talphas:talphae,:] = theta_0[key][talphas:talphae,:].clone()

                    elif dim == 3:
                        theta_t[talphas:talphae,:,:] = theta_0[key][talphas:talphae,:,:].clone()

                    elif dim == 4:
                        theta_t[talphas:talphae,:,:,:] = theta_0[key][talphas:talphae,:,:,:].clone()
                    theta_0[key] = theta_t
[ tensor2マージ ]
            elif calcmode == "tensor2":
                dim = theta_0[key].dim()
                if dim == 0 : continue
                if current_alpha+current_beta <= 1 :
                    talphas = int(theta_0[key].shape[0]*(current_beta))
                    talphae = int(theta_0[key].shape[0]*(current_alpha+current_beta))
                    if dim > 1:
                        if theta_0[key].shape[1] > 100:
                            talphas = int(theta_0[key].shape[1]*(current_beta))
                            talphae = int(theta_0[key].shape[1]*(current_alpha+current_beta))
                    if dim == 1:
                        theta_0[key][talphas:talphae] = theta_1[key][talphas:talphae].clone()

                    elif dim == 2:
                        theta_0[key][:,talphas:talphae] = theta_1[key][:,talphas:talphae].clone()

                    elif dim == 3:
                        theta_0[key][:,talphas:talphae,:] = theta_1[key][:,talphas:talphae,:].clone()

                    elif dim == 4:
                        theta_0[key][:,talphas:talphae,:,:] = theta_1[key][:,talphas:talphae,:,:].clone()

                else:
                    talphas = int(theta_0[key].shape[0]*(current_alpha+current_beta-1))
                    talphae = int(theta_0[key].shape[0]*(current_beta))
                    theta_t = theta_1[key].clone()
                    if dim > 1:
                        if theta_0[key].shape[1] > 100:
                            talphas = int(theta_0[key].shape[1]*(current_alpha+current_beta-1))
                            talphae = int(theta_0[key].shape[1]*(current_beta))
                    if dim == 1:
                        theta_t[talphas:talphae] = theta_0[key][talphas:talphae].clone()

                    elif dim == 2:
                        theta_t[:,talphas:talphae] = theta_0[key][:,talphas:talphae].clone()

                    elif dim == 3:
                        theta_t[:,talphas:talphae,:] = theta_0[key][:,talphas:talphae,:].clone()

                    elif dim == 4:
                        theta_t[:,talphas:talphae,:,:] = theta_0[key][:,talphas:talphae,:,:].clone()
theta_0[key] = theta_ttensorマージでは、第一dimensionに対して処理をしています。対して、tensor2マージでは、通常の分岐はtensorマージと同一ですが、テンソルのdimensionが1よりも大きい場合のみ、theta_0[key].shape[1]に対して、処理を行うようになっています。対して、tensor2マージでは、第二dimensionに対して処理を行うようになっています。
※2023.07.11 追記
ひだりさんよりご指摘を頂きました。
tensor2マージは第二dimensionを参照するだけのようです。
テンソルの構成は[dim1,dim2,dim3,dim4]となっていますが、このdim2を参照しtensorマージの処理を行う仕組みになっているようです。
if dim == 1:
   theta_0[key][talphas:talphae] = theta_1[key][talphas:talphae].clone()
elif dim == 2:
   theta_0[key][:,talphas:talphae] = theta_1[key][:,talphas:talphae].clone()
elif dim == 3:
   theta_0[key][:,talphas:talphae,:] = theta_1[key][:,talphas:talphae,:].clone()
elif dim == 4:
   theta_0[key][:,talphas:talphae,:,:] = theta_1[key][:,talphas:talphae,:,:].clone()
確かに、talphas,talphaeの参照が第二dimensionになっていますね。
tensor2のとても詳しい解説は、ひだりさんのnoteを参照してみてください!
tensor2の仕組みを、一瞬で完全に理解しました。
他の方法と比較しても…複雑ですよね?
マージのイメージが付きにくい、という点でもtensorマージ自体、途轍もなく高難度なマージになります。
今回の記事では、tensorマージについて、なんとなくのイメージをして頂ければ大丈夫です。
最後に、tensorマージとtensor2マージのX/Y Plotを見てみましょう。
おわりに
今回は階層マージ上級編#1、新しいCalcutation Modeについてをお伝えしました!
途轍もなく難度が上がってきてるし、私自身も完全把握しているわけではないので、説明が拙くて内容が分かりづらかったら申し訳ありません…。
今回の階層マージ記事の上級編では、tensorマージとElemental Mergeを説明する予定でしたが、Super Merger自体のアップデートが入り、色んな機能が追加された為、急遽予定を変更して、新しいCalcutation Modeをご紹介することにしました。
まだまだSuper Mergerにはいろんな新機能があるので、tensorとElemental Mergeについては先になりそうですね…
では、また次回をお楽しみに!
いいなと思ったら応援しよう!