
書類フォーマット - ⑦ セクション⑵

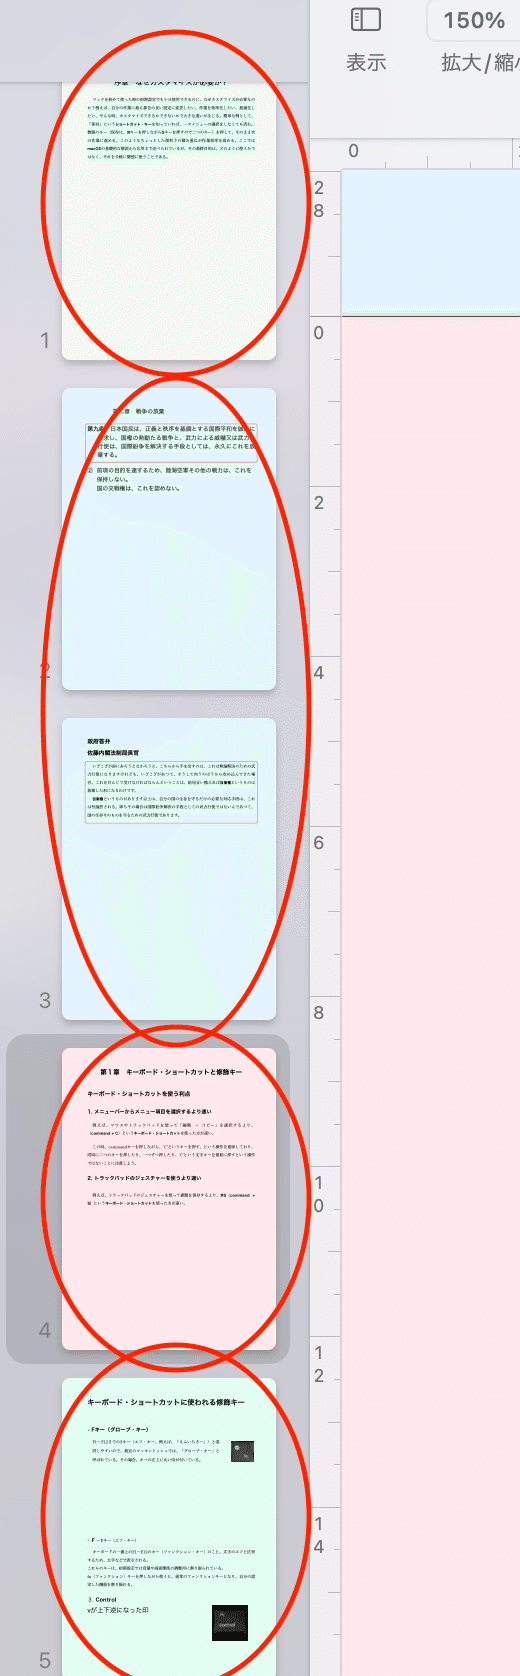
セクション別に色分けできる。
こうしておけば、どのページがどのセクションに属しているのか、一目で分かるようになり、便利である。
方法は、背景色がセクションごとに設定されることを利用する。
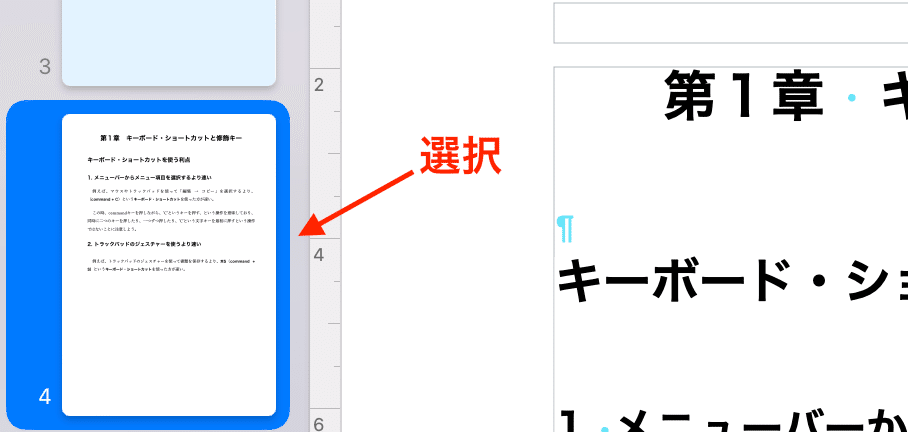
左サイドバーに表示されるサムネイルから必要なページを選択
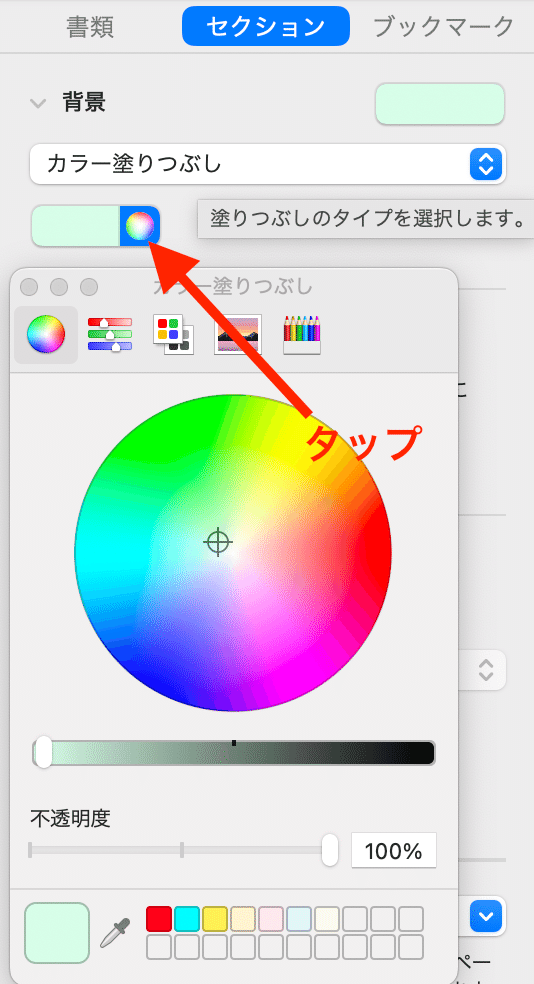
2.ツールバーの「書類」アイコンをタップして、「セクション」パネルのタブをタップし、背景色を選択。薄い色はカラーパネルから作成する
3.セクションのテキストをすべて選択する
【注意】他のセクションの文書は選択しない

4.ツールバーの「フォーマット」アイコンをタップし、「スタイル」パネルのタブをタップし、ベンツのようなマークをタップして、ポップアップメニューを表示する
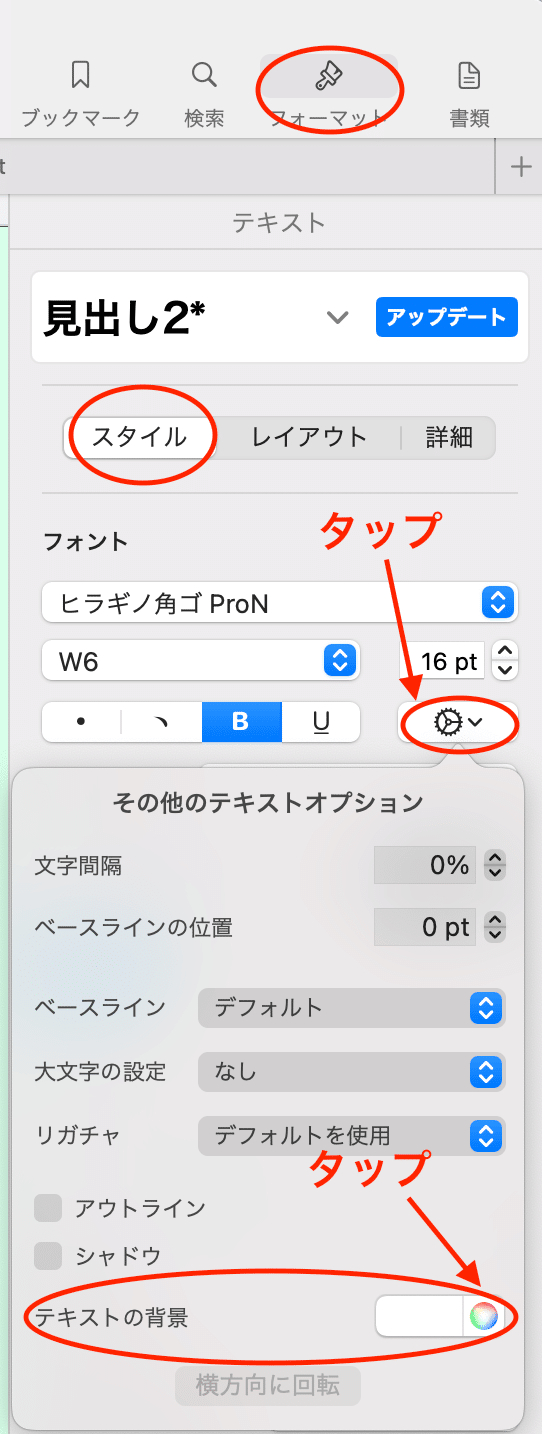
5.「テキストの背景」という項目のカラーパネルをタップして、セクションで選んだ色彩と同じ色を選択
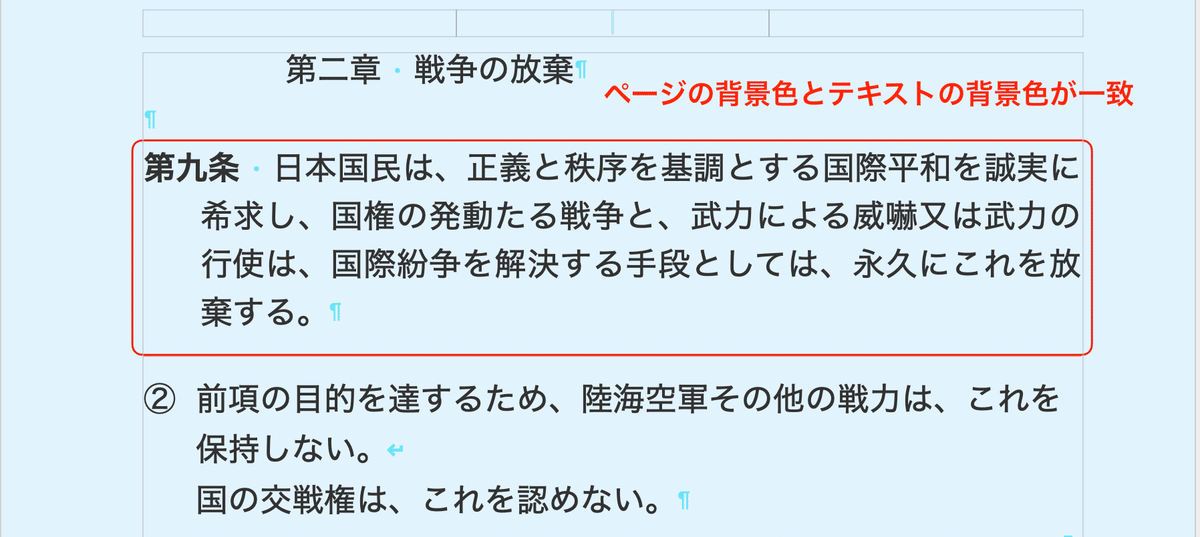
6.これを各セクションごとに繰り返せば、色分けができる
背景色は、最後に削除すれば、跡が残らない