
Pythonライブラリ(exe化):Pyinstaller

1.概要
Pythonスクリプトをexe化するライブラリであるPyinstallerを紹介します。
[Terminal]
pip install pyinstaller
2.exe化/Pyinstallerの特徴
Pyinstallerでは「Python本体」、「必要なライブラリ」、「Pythonプログラム」をひとまとめにしたexeファイルを作成してくれます。よって下記の特徴があります。
【exe化のメリット/Pyinstallerの特徴】
●Pyinstallerでexe化すると環境構築していないPCでも作成したプログラムを使用することが可能です。よって部門内で共有もできます。
●exeファイルをダブルクリックするだけでプログラムを実行できます。
【デメリット】
●ファイルサイズが恐ろしく大きくなります(数百MB)
●OS依存があるためWindowsとMacでのファイルやり取りはできません。
3.exe化するサンプルスクリプト
個人的には頻度が多い処理やGUIツールと合わせて使うと便利だと思うのでサンプルとしてtkinterを使用しました。
|サンプルコード⦅note_pyinstaller.py⦆は①ファイルパス取得、②取得パスの表示、③終了ボタンをつけただけのシンプルなつくりにしました。
[note_pyinstaller.py]
import os
import tkinter as tk
import tkinter.ttk as ttk
import tkinter.filedialog as tkfd

base = tk.Tk()
base.title("ファイルパス取得")

class App:
    def __init__(self):
        self.path = None

    def findfile(self):
        self.path = tkfd.askopenfile() # ファイルパス取得
        print(f'{os.path.basename(self.path.name)}を選択しました。')
        return self.path

    @property
    def getpath(self):
        if self.path != None:
            return self.path.name

app = App()
tk.Button(base, text="ファイルを選択", width=30, command=app.findfile).pack()
tk.Button(base, text='パスを表示', width=30, command=lambda :print(app.getpath)).pack()
tk.Button(base, text="終了", width=30, command=lambda :base.destroy()).pack()

base.mainloop()
4.Pyinstallerでのexe化
4-1.Pyinstallerのコード
exe化は下記で実行可能であり必要であればオプションも追加します。
[Pyinstallerのexe化]
pyinstaller pyファイル #オプション無し
pyinstaller pyファイル --onefile --noconsole #オプションあり
【Pyinstallerのオプション】
●--onefile:配布ファイルを1つでまとめる
●--noconsole:|コンソール⦅ターミナル⦆画面を表示しない
4-2.exe化の実演
今回のケースでは下記で実行しました。
[terminal]
pyinstaller note_pyinstaller.py --onefile --noconsole
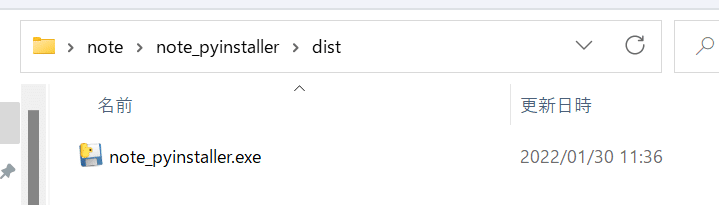
4-3.出力の確認
完了すると「dist」フォルダ内にexeファイルができております。このexeファイルをダブルクリックするだけで(環境構築していないPCでも)スクリプトの実行ができました。

あとがき
tkinterでファイルパス取得するの相当手こずった・・・・・・あと最後のは--noconsoleオプションないほうが見やすかったな・・・