【PS】泡の作り方

こんにちは。ゲームUIデザイナーのはなさくのです。
今回は、Photoshopの1レイヤースタイルで泡を作る方法についてご紹介します!
(有料版は、ページ最下部からPhotoshopデータをダウンロードすることができます)
01|泡をランダムに散りばめるブラシの作り方
まずは、Photoshopで泡ブラシを作ります。
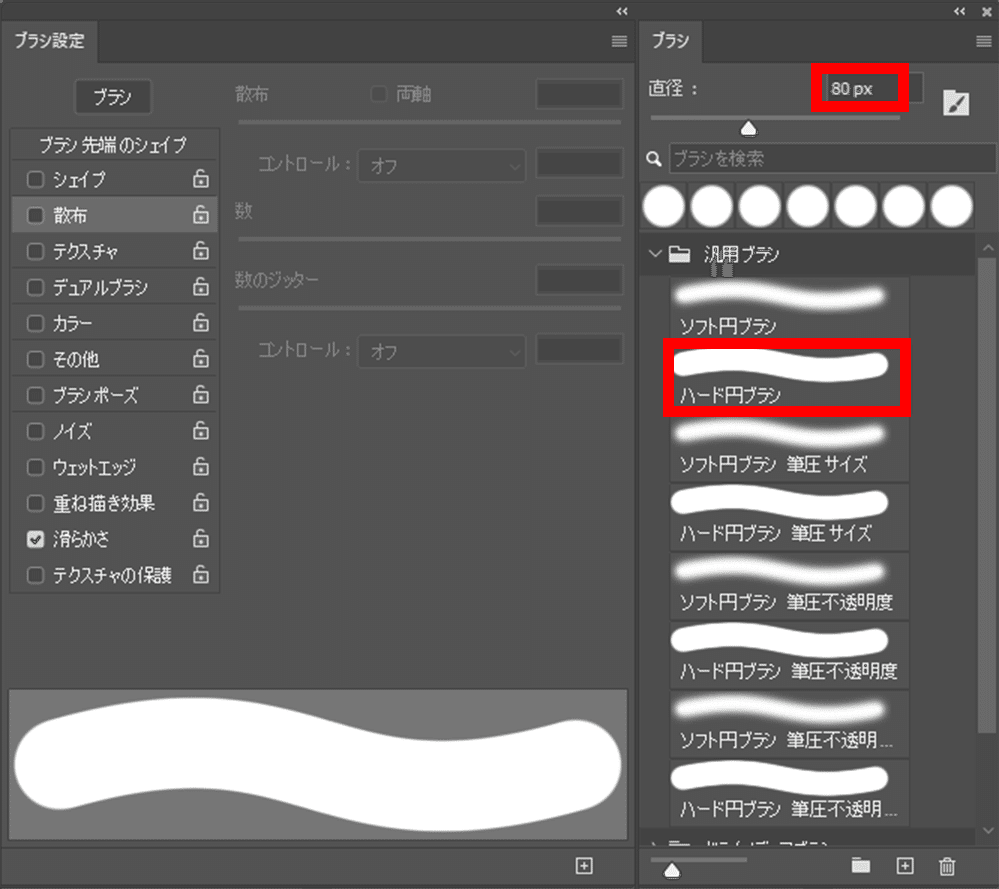
標準で入っているソフト円ブラシを選択します(上記赤枠)。
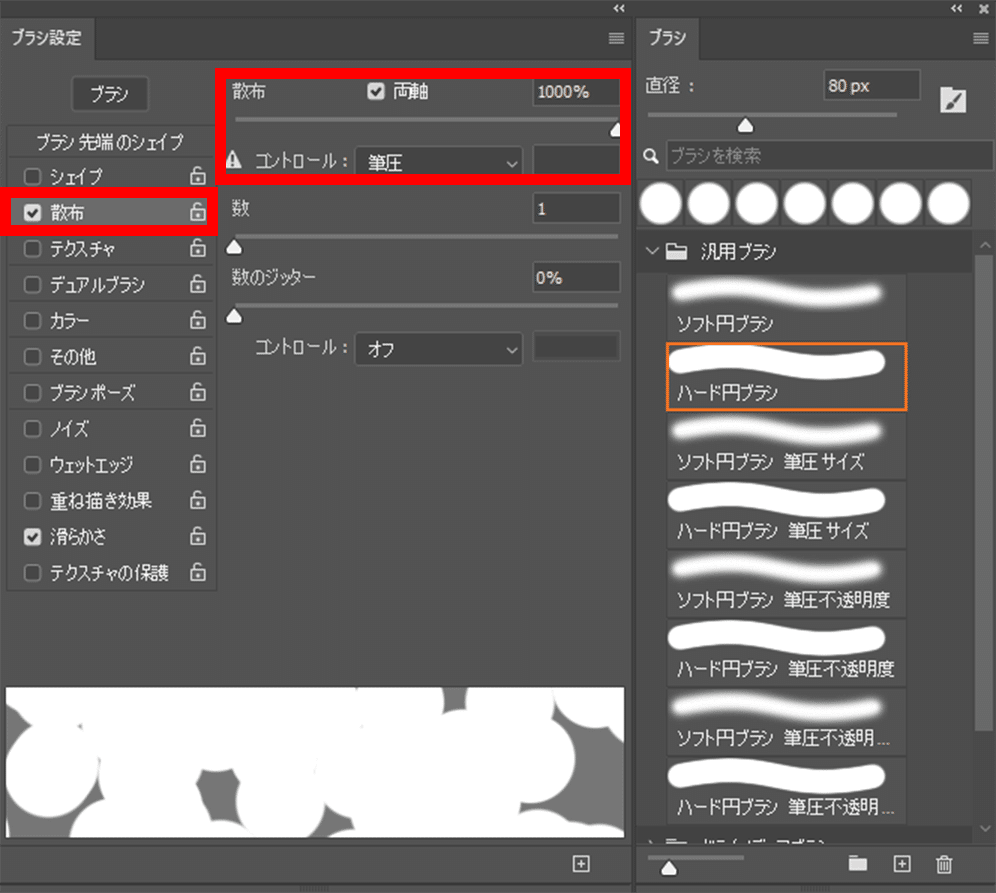
次にブラシ設定の「散布」にチェックを入れて、上記赤枠部分の設定をします。
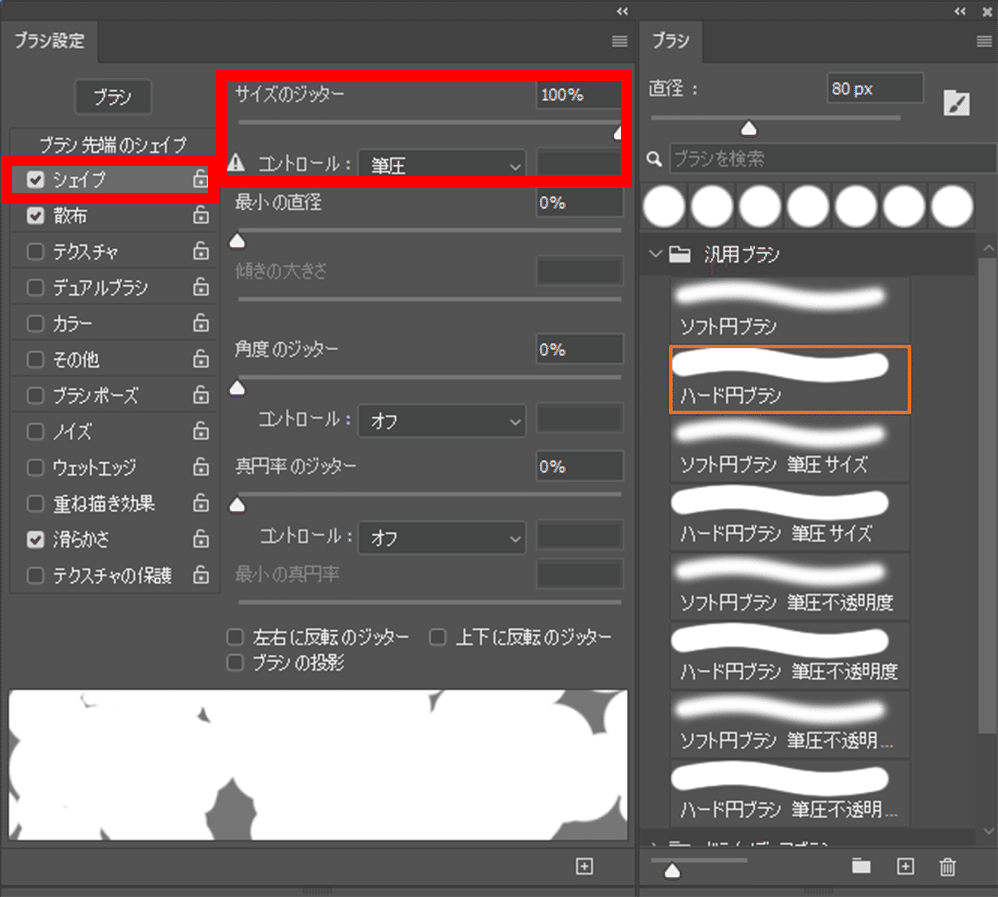
次にブラシ設定の「シェイプ」にチェックを入れて、上記赤枠部分の設定をします。
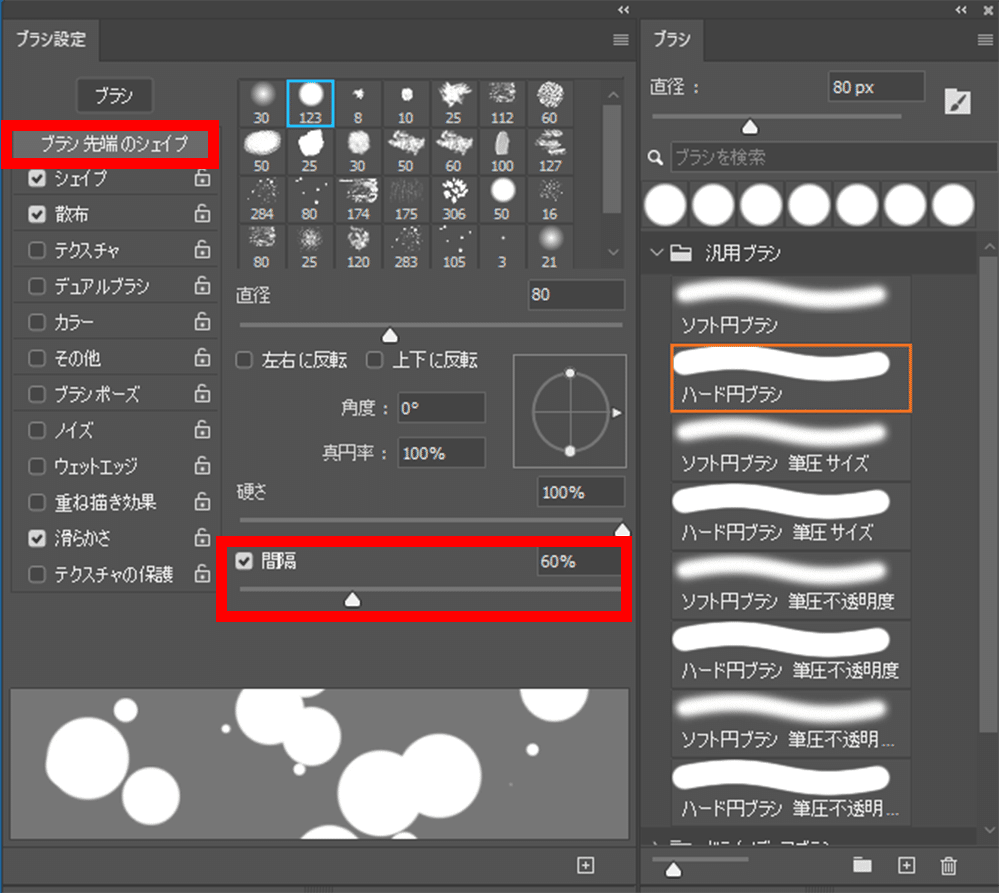
最後にブラシ設定の「ブラシ先端のシェイプ」を選択して、上記赤枠部分の設定をします。
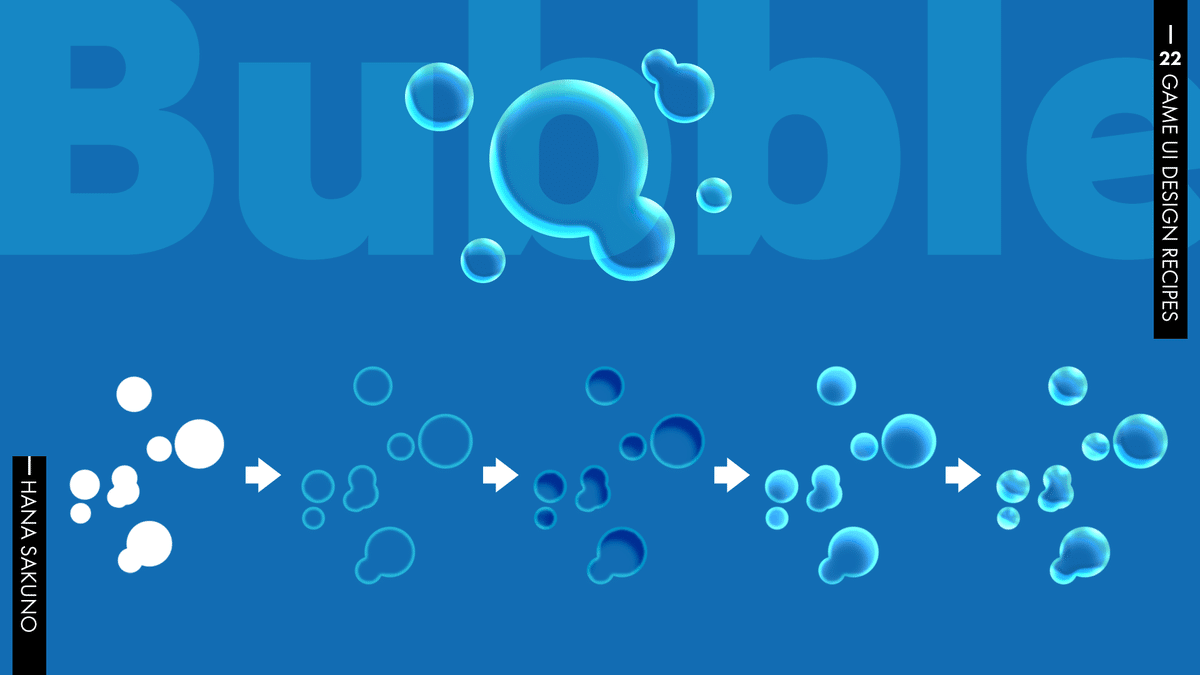
上記で設定したブラシを使って描くと、下記のような泡模様ができます。

02|泡っぽいレイヤースタイルの作り方
ここから先は
535字
/
4画像
/
1ファイル
¥ 800
この記事が気に入ったらチップで応援してみませんか?