一人GitでGit hubに慣れる「初めてのpush&pull request」

Gitでのチーム開発プロジェクトに投下され、チームで開発経験をせずにプログラムしている人向けにこのnoteを書いてます。
※Git hubアカウントを作っている前提で進めていきます。
※C#の環境構築を終えている前提です。あ、C#じゃなくてもかまいません。(C#がサンプルプログラムで置いてあるだけで)
環境
・windows10
・Git hub
・vs code
言語:C#(なんでもOK)
で作成していますので、予めご了承ください。
Git練習用のリポジトリをWeb上に作る
以下から新規作成でリポジトリを作りURLを取得してください。
https://github.com/new
※本noteはhttps通信で行っていきます。
vscodeを開き、ターミナルに接続、practiceフォルダを作ります。
C# はvscodeの拡張機能からダウンロード、コンソールでdot net practiceでアプリケーションを作成します。
cd c:\

mkdir practice

cd c:\practiceリポジトリとは、ファイルやディレクトリの状態を記録する場所です。 保存された状態は、内容の変更履歴として格納されています。 変更履歴を管理したいディレクトリをリポジトリの管理下に置くことで、そのディレクトリ内のファイルやディレクトリの変更履歴を記録することができます。
Gitコマンドをたたく
イニシャライズ(初期化)します。
Gitに必要な構成フォルダが用意されます。
git init下記が表示されたらOK。
Initialized empty Git repository in C:/practice/.git/
practiceフォルダを見ると、.gitのフォルダがあります。Windowsは隠しファイルになっています。
C#のHelloWorldをコンソールに表示するアプリをコミットしてみましょう。
```C#

// See https://aka.ms/new-console-template for more information
Console.WriteLine("Hello, World!");
Gitにステージングエリアに追加するコマンド ( .) ←ドットの前は半角空白です。(「 .」は変更ファイルすべてを選択する意味です。個別に行う場合はファイルを一つずつ選択します)
git add .git add は、作業ディレクトリ内の変更をステージングエリアに追加するコマンドです。 このコマンドは、個々のファイルのアップデート内容を次回コミット対象とするよう、Git に指示します。 ただし、実際には git add コマンドだけではリポジトリに何も影響しません。
コミットします。
git commitとは一言で言うと「追加・変更したファイルをGitに登録するためのコマンド」です。 通常のファイル操作では変更した内容を上書き保存すれば、ファイルの内容が変更されますが、Gitのリポジトリに変更内容を登録(保存)するためには、git commitを使用する必要があります。
git commit -m "first commit"-m以降はgit hubで変更した際のコメントの入力をします。
27ファイルがアップロードされる準備が整いました。
[master (root-commit) 5ca61ea] first commit
27 files changed, 260 insertions(+)
create mode 100644 Program.cs
create mode 100644 bin/Debug/net6.0/practice.deps.json
create mode 100644 bin/Debug/net6.0/practice.dll
create mode 100644 bin/Debug/net6.0/practice.exe
create mode 100644 bin/Debug/net6.0/practice.pdb
create mode 100644 bin/Debug/net6.0/practice.runtimeconfig.json
create mode 100644 obj/Debug/net6.0/.NETCoreApp,Version=v6.0.AssemblyAttributes.cs
create mode 100644 obj/Debug/net6.0/apphost.exe
create mode 100644 obj/Debug/net6.0/practice.AssemblyInfo.cs
create mode 100644 obj/Debug/net6.0/practice.AssemblyInfoInputs.cache
create mode 100644 obj/Debug/net6.0/practice.GeneratedMSBuildEditorConfig.editorconfig
create mode 100644 obj/Debug/net6.0/practice.GlobalUsings.g.cs
create mode 100644 obj/Debug/net6.0/practice.assets.cache
create mode 100644 obj/Debug/net6.0/practice.csproj.AssemblyReference.cache
create mode 100644 obj/Debug/net6.0/practice.csproj.CoreCompileInputs.cache
create mode 100644 obj/Debug/net6.0/practice.csproj.FileListAbsolute.txt
create mode 100644 obj/Debug/net6.0/practice.dll
create mode 100644 obj/Debug/net6.0/practice.genruntimeconfig.cache
create mode 100644 obj/Debug/net6.0/practice.pdb
create mode 100644 obj/Debug/net6.0/ref/practice.dll
create mode 100644 obj/Debug/net6.0/refint/practice.dll
create mode 100644 obj/practice.csproj.nuget.dgspec.json
create mode 100644 obj/practice.csproj.nuget.g.props
create mode 100644 obj/practice.csproj.nuget.g.targets
create mode 100644 obj/project.assets.json
create mode 100644 obj/project.nuget.cache
create mode 100644 practice.csproj
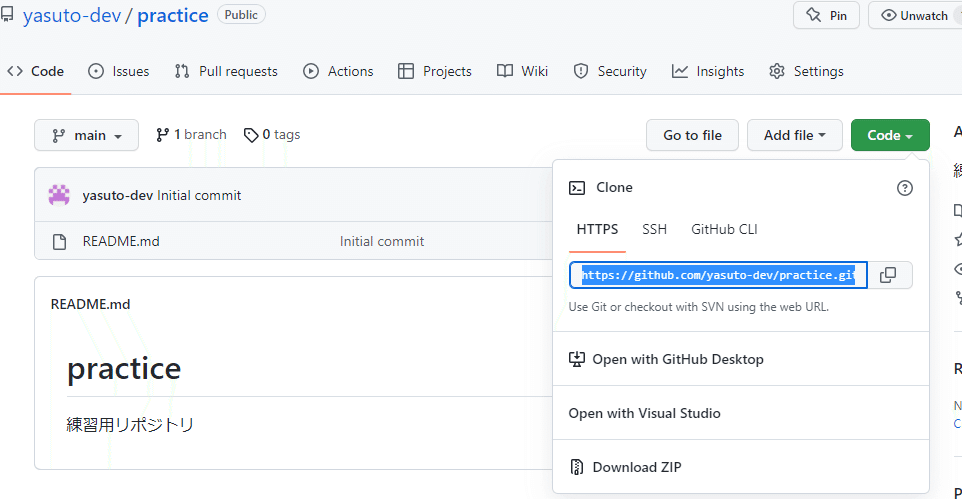
git remoteでhttpsで始まるURLを紐づけます。 (下記には該当URLをつけてください)
git remote add origin https://github.com/user/repo.gitgit pushコマンドします。
git push origin main※git push -u origin mainまたは
git push set--upstream origin main
とすると、以降このブランチが上流に設定され、git push のコマンドのみでアップロードできるようになります。
Enumerating objects: 35, done.
Counting objects: 100% (35/35), done.
Delta compression using up to 8 threads
Compressing objects: 100% (27/27), done.
Writing objects: 100% (34/34), 83.79 KiB | 986.00 KiB/s, done.
Total 34 (delta 3), reused 0 (delta 0), pack-reused 0
remote: Resolving deltas: 100% (3/3), done.
To https://github.com/yasuto-dev/practice.git
3e82163..6d66172  main -> main
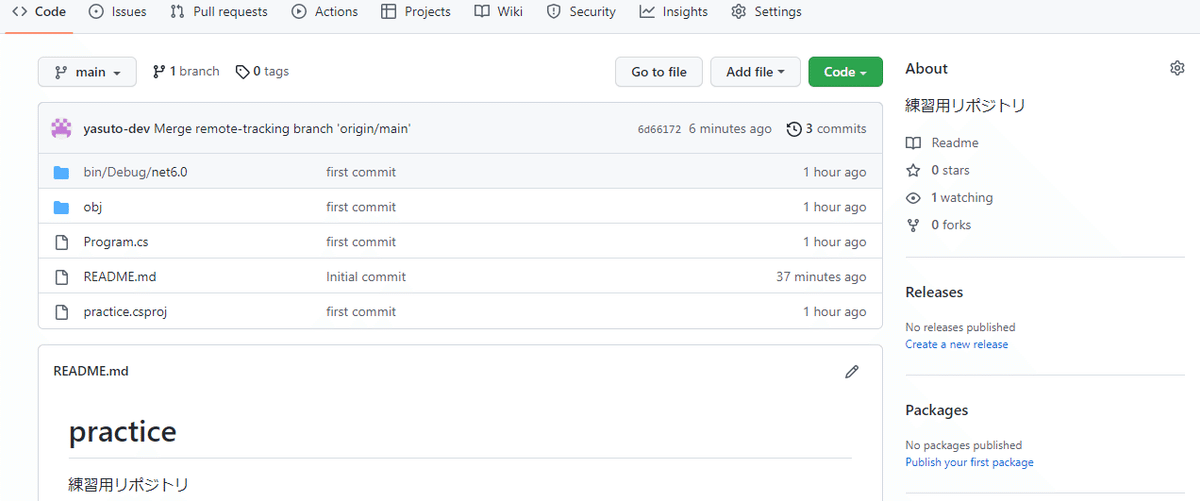
Web上で更新がされていればOKです。
※read.meの作成には注意!
ちなみにリポジトリ作成時に「read.me」 ファイルをつけていると、始めにreadmeが作られているので、ローカル(自分のPCとGit hub上の)更新との差分が発生し、アップできませんと警告が出ます。
error: failed to push some refs to 'https://github.com/yasuto-dev/practice.git'
hint: Updates were rejected because the remote contains work that you do
hint: not have locally. This is usually caused by another repository pushing
hint: to the same ref. You may want to first integrate the remote changes
hint: (e.g., 'git pull ...') before pushing again.
hint: See the 'Note about fast-forwards' in 'git push --help' for details.
この場合、git mergeで非更新を許すコマンドをします。
git merge --allow-unrelated-histories origin/main下記になればOKです。read.meファイルが作られています。
Merge made by the 'ort' strategy.
README.md | 2 ++
1 file changed, 2 insertions(+)
create mode 100644 README.md
再度、git pushコマンドします。
git push origin main
Web上で更新がされていればOKです。
masterブランチで設定した人向け
main/masterを選ぶときにmasterブランチを設定するとそのまま引き継ぎ、エラーでpushできません。その時はgit branchを確認し
git branch*masterとなっていました。
masterとmainの関係については割愛しますが、mainブランチに変更する方法は下記です。
git branch -m master main変更したブランチ名(main)でpushする
git push origin mainローカルPCでの変更をしてプッシュをする
コンソールの文字を変更し、ローカルPCでの変更、保存します。
```C#
Console.WriteLine("Good morning, World!");
変更したファイル名はProgram.csなので
git add Program.cs状態の確認をします
git status
On branch main
Changes to be committed:
(use "git restore --staged <file>..." to unstage)
modified:   Program.cs
modifiedは修正されたという意味になります。なのでOK
コミットの文字を入力
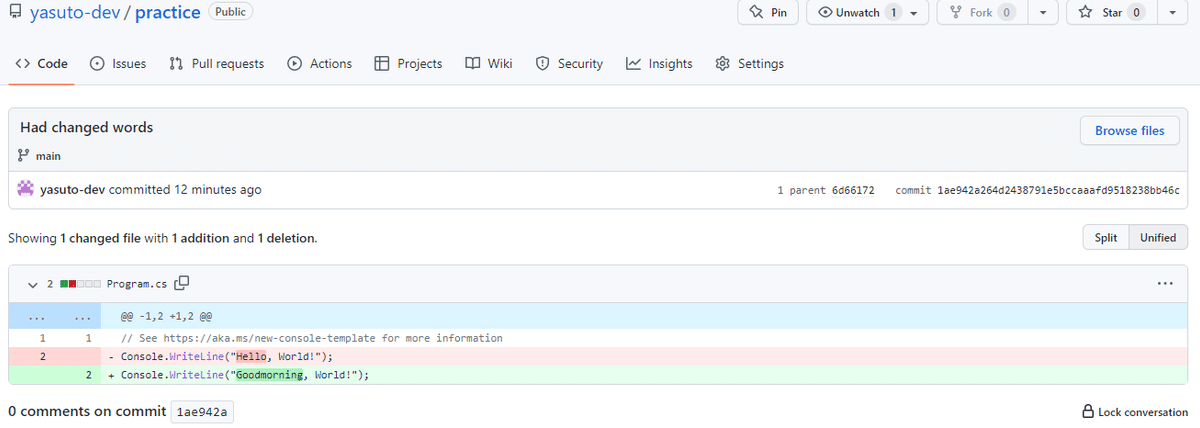
git commit -m "Had changed words"git pushします。
Web上で更新を確認します。コミットメントの本文とコードが変更されていればOK。
プルリクエストについて
プルリクエストとは・・・プルをお願いすることです。
本番ブランチや、開発の本流に乗せてもらうことをお願いするための作業になります。
ここでは開発の本流の担当者がコードを見て修正をした場合、修正のお知らせをする機能を紹介します。
※このnoteでは自分で作業ディレクトリを変えて行うだけのため、今までの作業フォルダを閉じて、新しいフォルダを作成し、再度開きなおします
プルリクエスト用の新しいフォルダーを作成
mkdir practice_pull_req
C:\practice_pull_req
git clone でローカルにさきほどつくったリポジトリをコピーをしてきます。
git clone https://github.com/yasuto-dev/practice.gitディレクトリを移動します。
cd practiceプルリクエスト用のブランチpull_reqを作成。
git checkout -b pull_req

Switched to a new branch 'pull_req'
変更されたので、今度は一行追加していきます。
// See https://aka.ms/new-console-template for more information
Console.WriteLine("Goodmorning, World!");
Console.WriteLine("And, Welcome!");
追加してコミットメントに変更箇所を追記、プルリクエスト用にプッシュします。
git add Program.cs
git commit -m "changed words welcome"
git push origin pull_req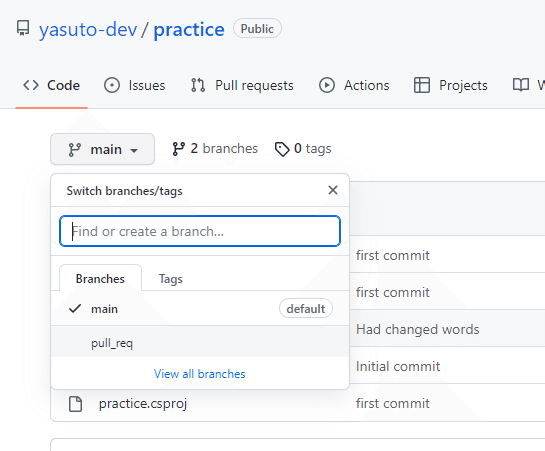
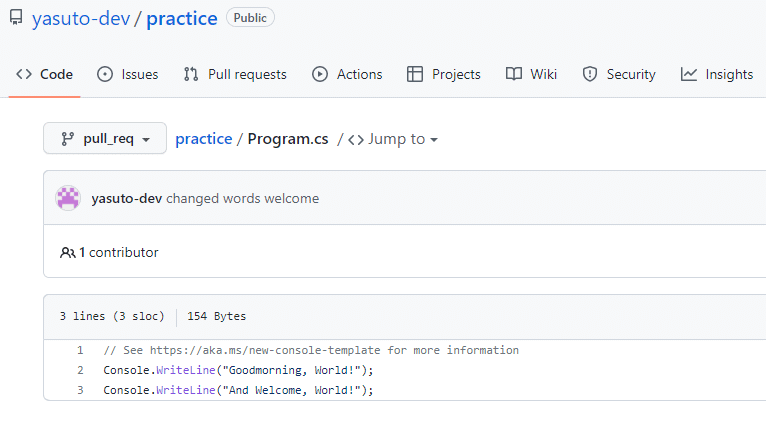
pull_reqブランチがアップされていればOKです。
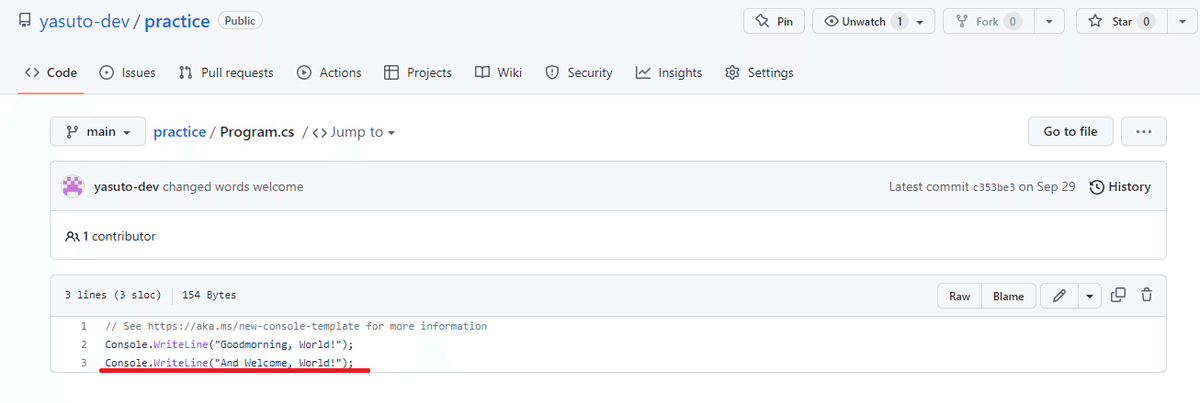
画面上ではpull_reqリポジトリに新たな行が追加されました。
プルリクエストを作成
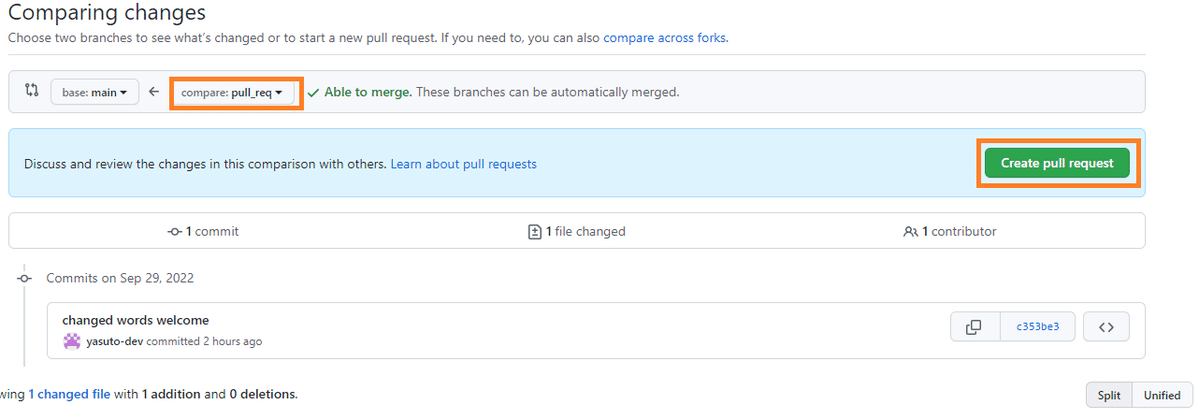
Web上で確認するとプルリクエスト用の差分ができています。
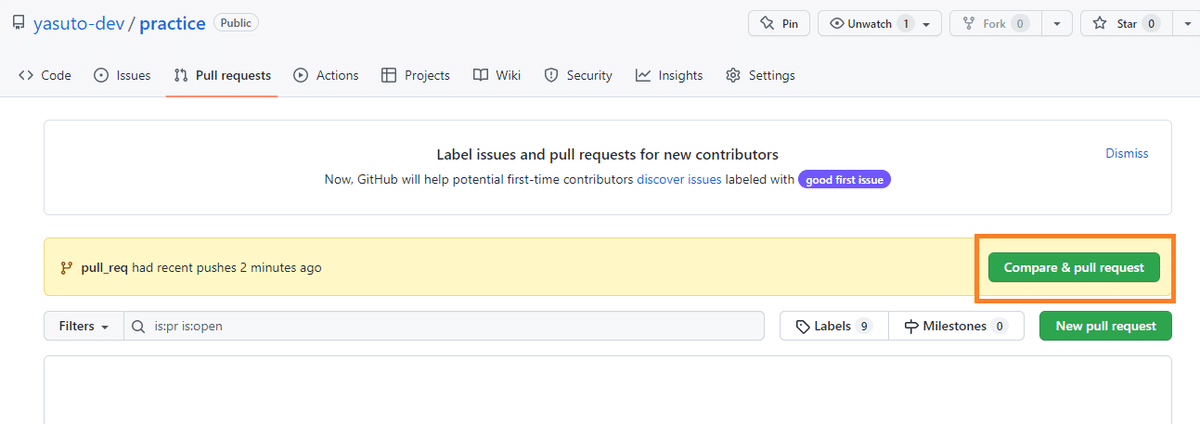
プルリクエストをします。
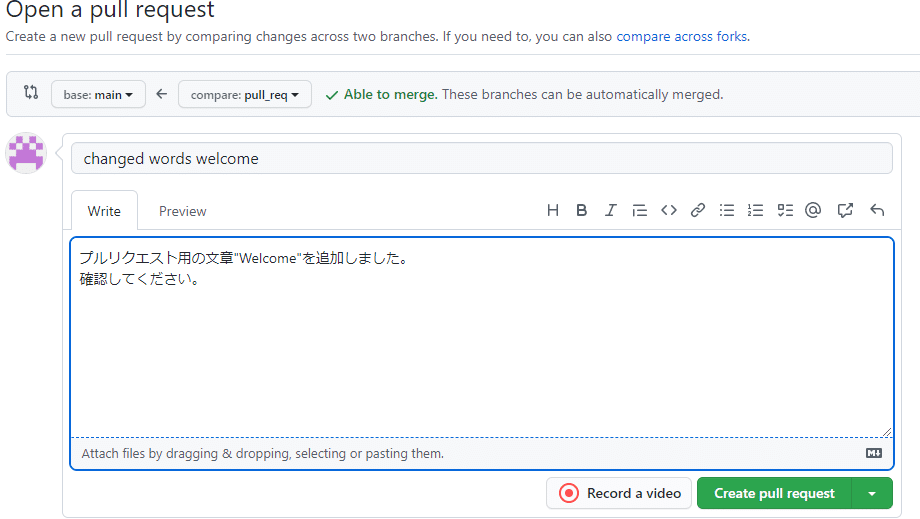
コメントを入力します。完了したらCreate pull requestを押します。
アップが終わるとプルリクエストが1つたまり、確認できるようになっています。
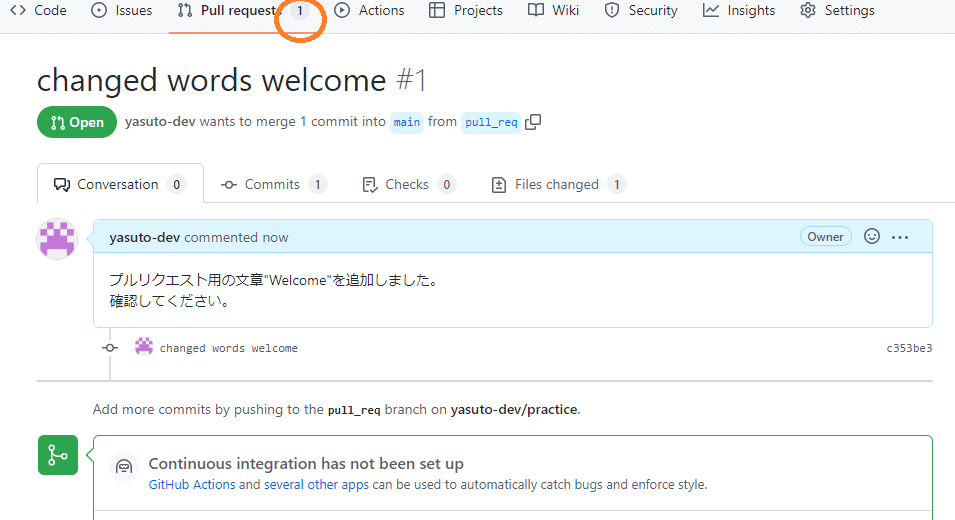
プルリクエストにコメントをつける
追加依頼や修正依頼などリクエストしてくれた人に対してコメントを残すことができます。
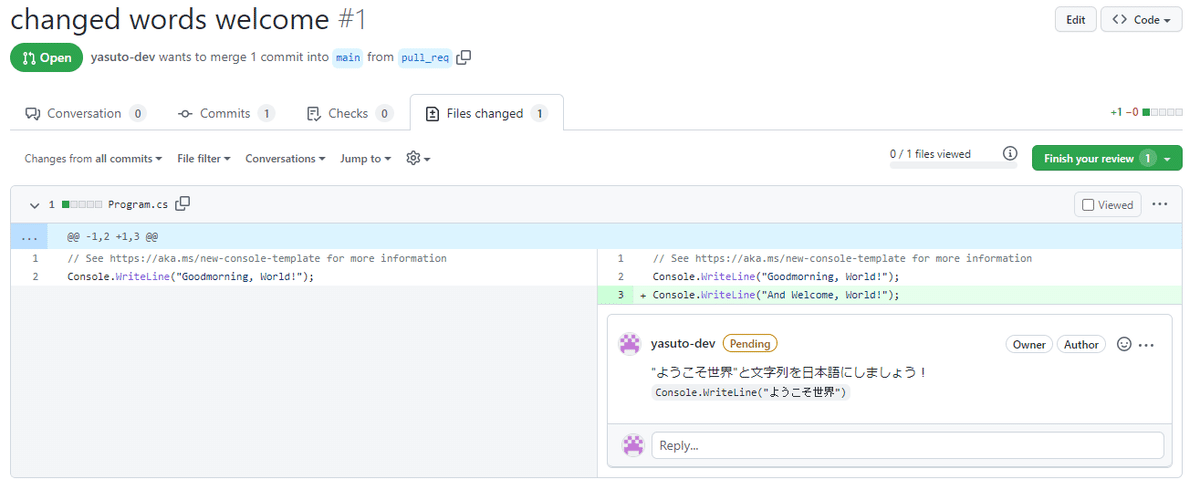
File Changedを選択し、
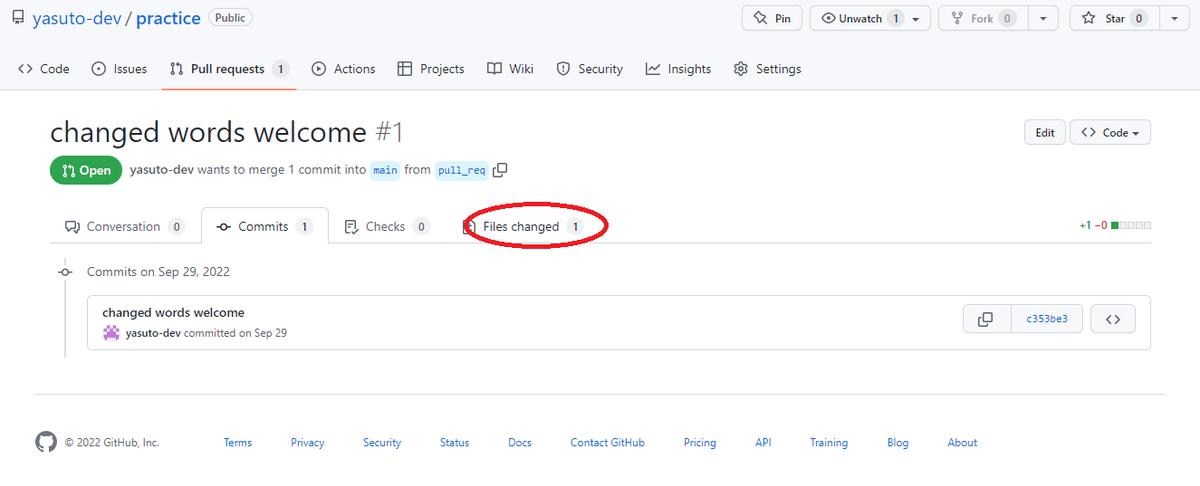
practiceとpull_reqとの差分が出てきます。
左が修正前・右が修正後のリクエスト
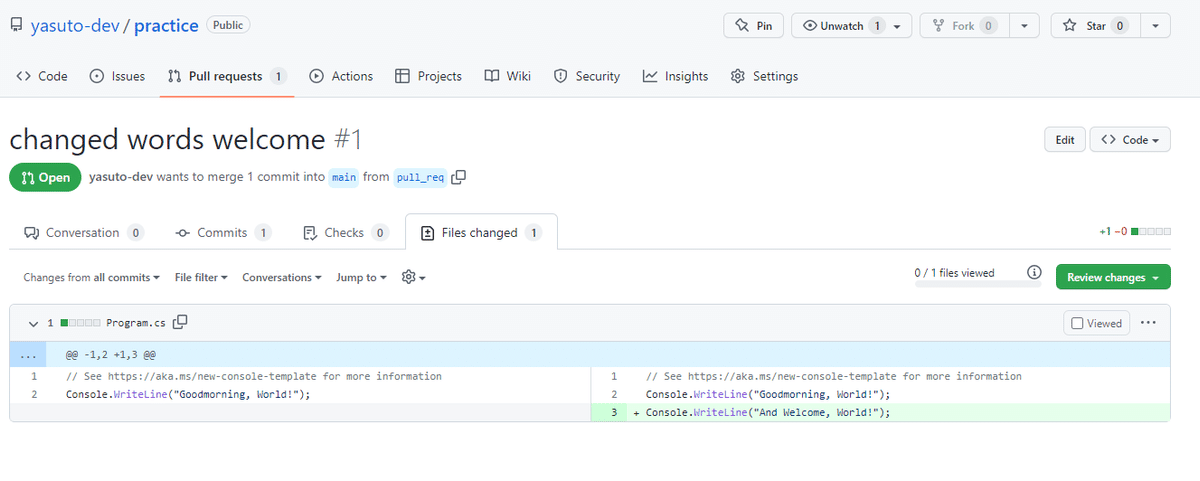
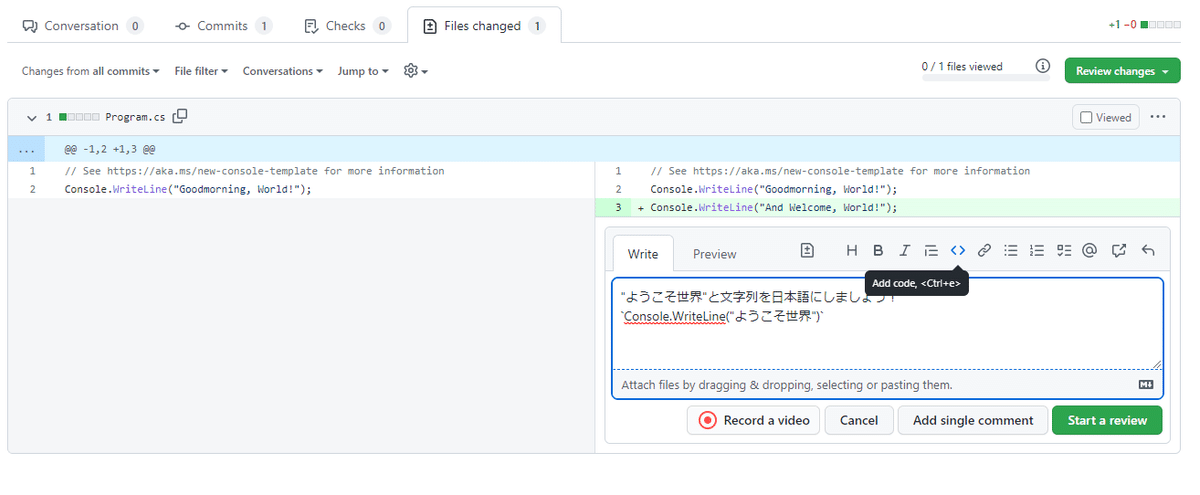
カーソルを置くと、「+」表示になり、コメントを残すことができます。

コメントに「<>」タブでコード挿入をすることもできます。
保存するときは「Start a review」ボタンを押します。
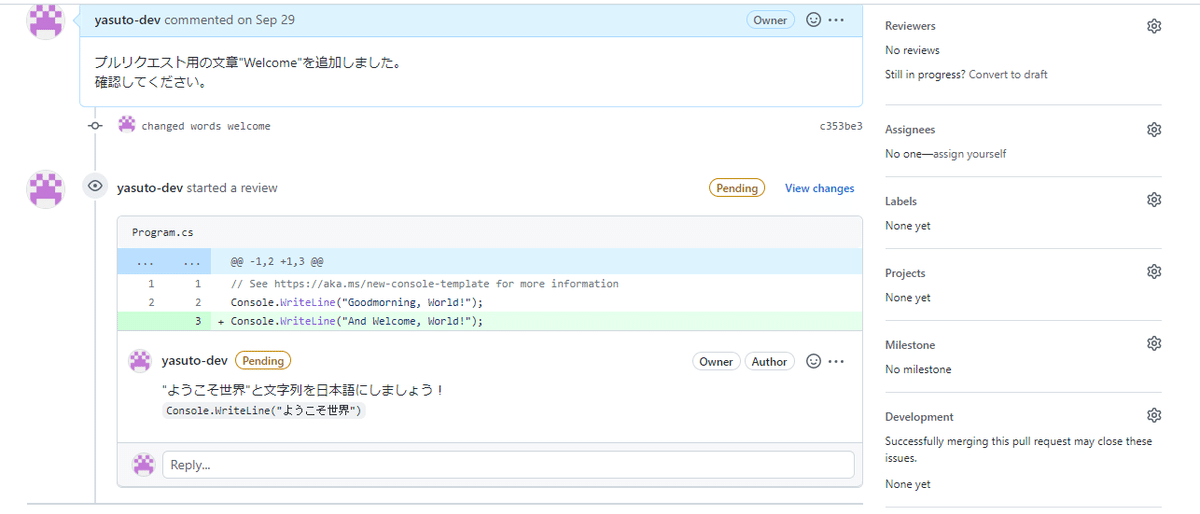
変更コメントがアップされました。
プルリクエストの画面でツリー形式で確認できます。
変更を許可し、マージ
修正の変更がOKになりましたら、本線にくっつけます。
下部のMarge pull requestボタンを押し、Create a marge commitタブを選択し、
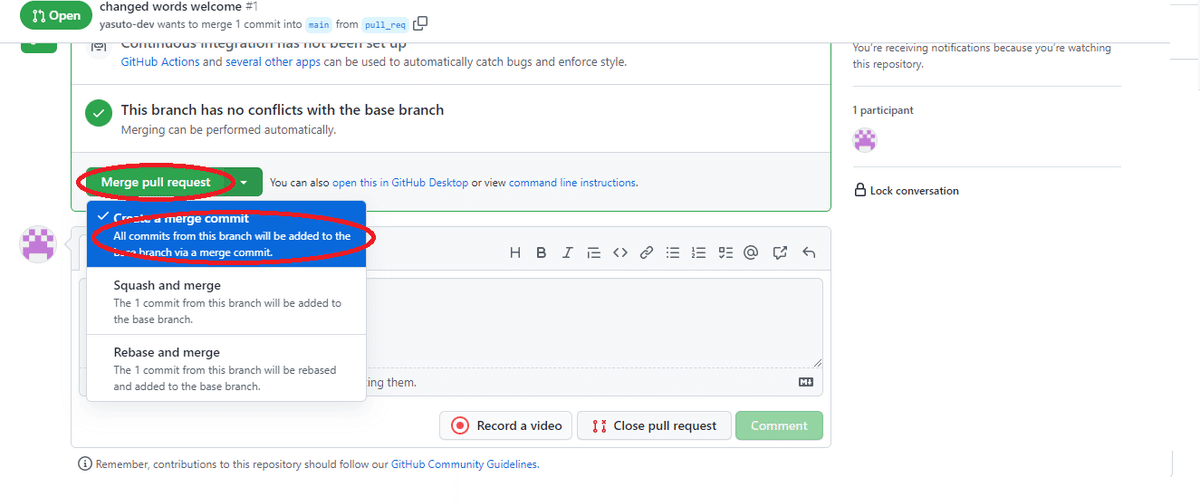
Confirm margeします。
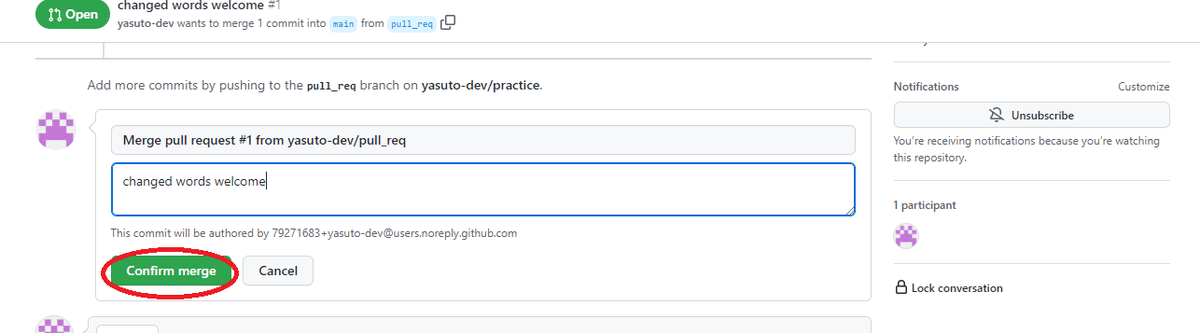
ダイアログが出て無事にマージが完了しました。

プルリクエストの(1)の数字が消え、確認すると一行追加されていますね!
こちらで成功です。
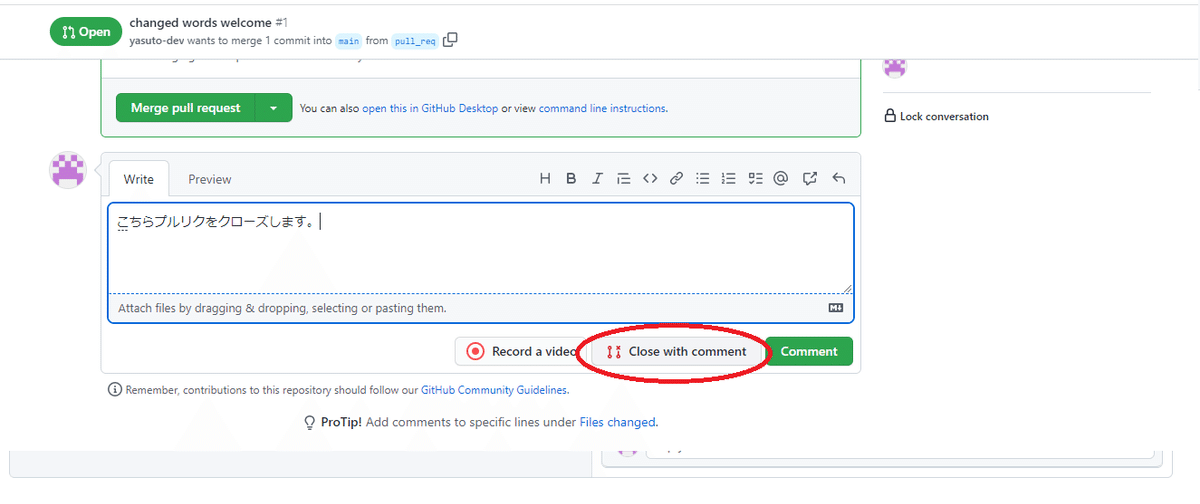
プルリクエストを取り消し・クローズ(却下)する場合
ページ最下部までいき、Close with commentでコメントを残しプルリクエストを取り消し・クローズ(却下)できます。
いいなと思ったら応援しよう!