
google/siglip-base-patch16-256-multilingual を使って、ローカルの画像を日本語で検索してみる

今年1月に、Googleから、SigLIPという、画像とテキストの両方をベクトルとして扱うことができるモデルのmultilingual版(多言語対応版)が公開されました。transformers 4.37以降で対応しています。日本語も対応しています。
これを使って、以前、昨年11月に公開された stabilityai/japanese-stable-clip-vit-l-16 を使ってやってみたときと同じように、ローカルの画像を日本語で検索してみるというのをやってみました。
やることは
手元の画像を google/siglip-base-patch16-256-multilingual を使ってベクトルにして、それをまとめてJSONに保存
検索したい言葉を google/siglip-base-patch16-256-multilingual を使ってベクトルにして、1.で作成したJSONに記録したベクトルとコサイン類似度で比較して、類似度が高いものを返す
というシンプルなことです。今回はGoogle Colabで動くようにしてみました。
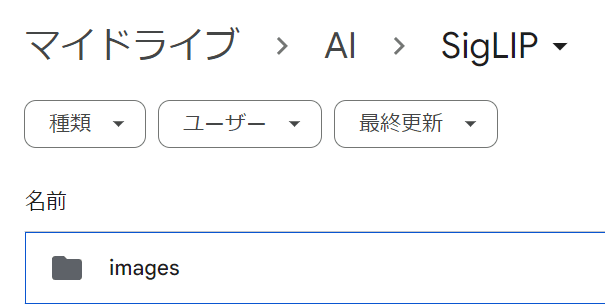
まず、自分のGoogle Driveに、以下のようなフォルダを作って、検索対象となる画像を保存しておきます。私の場合は、自分で撮影した写真を500枚ほど入れました。画像の素材集などを入れても良いかもしれません。
マイドライブ → AI → SigLIP → images
!pip install ftfy pillow requests transformers==4.37.1 torch sentencepiece protobuf gradio必要なライブラリをインストールします。Google Colabに標準で入っているtransformersはバージョンが最新ではないので、4.37.1を明示して入れました。
ランタイムのタイプを、T4 GPUに変更しておきます。

続いて、Google DriveをColabに接続します
from google.colab import drive
drive.mount('/content/drive')
作業フォルダを画像を保存したフォルダの上に移動します。
%cd /content/drive/MyDrive/AI/SigLIP/モデルをダウンロードするために、Hugging Faceにログインしておきます。
!huggingface-cli loginHugging Faceのトークンを入力して、「Login successful」が出ればログインOKです。
まずは、入れた全ての画像のベクトルを出して、JSONに保存しておきます。
from transformers import AutoModel, AutoImageProcessor
import os
import glob
from tqdm import tqdm
from PIL import Image
import torch
import json

# モデルとプロセッサーの準備
model = AutoModel.from_pretrained(
    "google/siglip-base-patch16-256-multilingual",
    trust_remote_code=True,
).to("cuda")

processor = AutoImageProcessor.from_pretrained(
    "google/siglip-base-patch16-256-multilingual"
)


# imagesフォルダの中身の画像を全てprocessorでembeddingに変換
image_features = []
for image in tqdm(glob.glob("./images/*")):
    # imageが画像ファイルでないならスキップ
    if not image.endswith(('.jpg', '.png', '.jpeg')):
        continue
    # imageのファイルネームを取得
    filename = os.path.basename(image)
    try:
        image = Image.open(image)
        image = processor(images=image, return_tensors="pt").to("cuda")
        with torch.no_grad():
            embedding = model.get_image_features(**image)
            embedding = embedding / embedding.norm(dim=-1, keepdim=True)
            image_features.append({'embedding': embedding,
                                  'filename': filename})
    except:
        print('error: ' + filename)
        continue

# image_featuresを文字列に変換
image_features_json = []
for image_feat in image_features:
    image_features_json.append({'embedding': image_feat['embedding'].tolist(),
                                'filename': image_feat['filename']})
# image_featuresをJSONに保存

with open('siglip_image_features.json', 'w', encoding='utf-8') as f:
    json.dump(image_features_json, f, indent=4)
上記の処理が終わると、以下の様な大きなjsonがSigLIPフォルダに作成されているはずです。

つづいて、検索できるUIを立ち上げました。GradioでUIを作ります。
from transformers import AutoModel, AutoTokenizer, AutoProcessor
import ftfy, html, re, torch, gradio as gr
from typing import Union, List
from transformers import BatchFeature
import json

# モデルとプロセッサーの準備
model = AutoModel.from_pretrained(
    "google/siglip-base-patch16-256-multilingual",
    trust_remote_code=True
).to("cuda")
processor = AutoProcessor.from_pretrained(
    "google/siglip-base-patch16-256-multilingual"
)

def basic_clean(text):
    text = ftfy.fix_text(text)
    text = html.unescape(html.unescape(text))
    return text.strip()

def whitespace_clean(text):
    text = re.sub(r"\s+", " ", text)
    text = text.strip()
    return text

def text_processor(text):
    text = whitespace_clean(basic_clean(text))
    inputs = processor(text, return_tensors="pt", padding="max_length", truncation=True, max_length=64).to("cuda")
    with torch.no_grad():
        embedding = model.get_text_features(**inputs)
        embedding = embedding / embedding.norm(dim=-1, keepdim=True)
    return embedding

# image_featuresをJSONから読み込み
with open('siglip_images_features.json', 'r', encoding='utf-8') as f:
    image_features_json = json.load(f)

print(len(image_features_json))

# image_features_jsonをimage_featuresに変換
image_features = []
for image_feat in image_features_json:
    image_features.append({'embedding': torch.tensor(image_feat['embedding']).to('cuda'),
                           'filename': image_feat['filename']})

def find_similar_image_and_display(query: str):

    text_embedding = text_processor(query)


    # 画像の特徴量とテキストの特徴量の間のコサイン類似度を計算
    cos_similarities = torch.stack([torch.nn.functional.cosine_similarity(text_embedding, img_feat['embedding'], dim=-1) for img_feat in image_features]).squeeze()

    # cos_similaritiesが空でないことを確認
    if len(cos_similarities) == 0:
        return []

    top_k = min(4, len(cos_similarities))
    try:
        top_sim_indices = cos_similarities.topk(top_k, largest=True).indices
        selected_images = [image_features[idx]['filename'] for idx in top_sim_indices]
    except RuntimeError as e:
        print("Runtime error occurred:", e)
        return []

    # 画像のファイルパスを返す
    return [f"images/{filename}" for filename in selected_images]

# Gradioインターフェースの出力を変更
iface = gr.Interface(
    fn=find_similar_image_and_display,
    inputs="text",
    outputs=gr.Gallery(label="Images")
)
iface.launch()
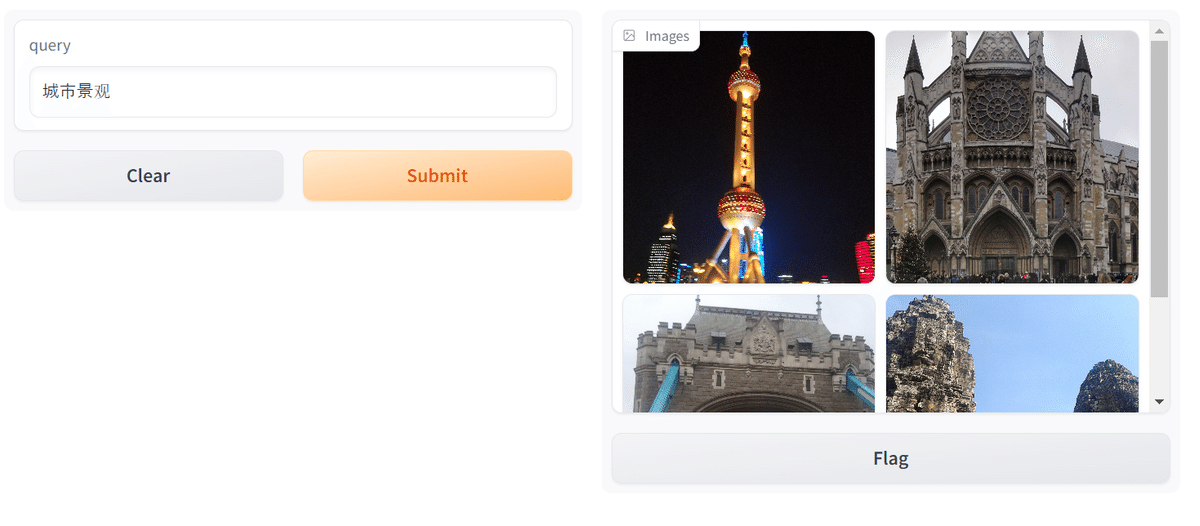
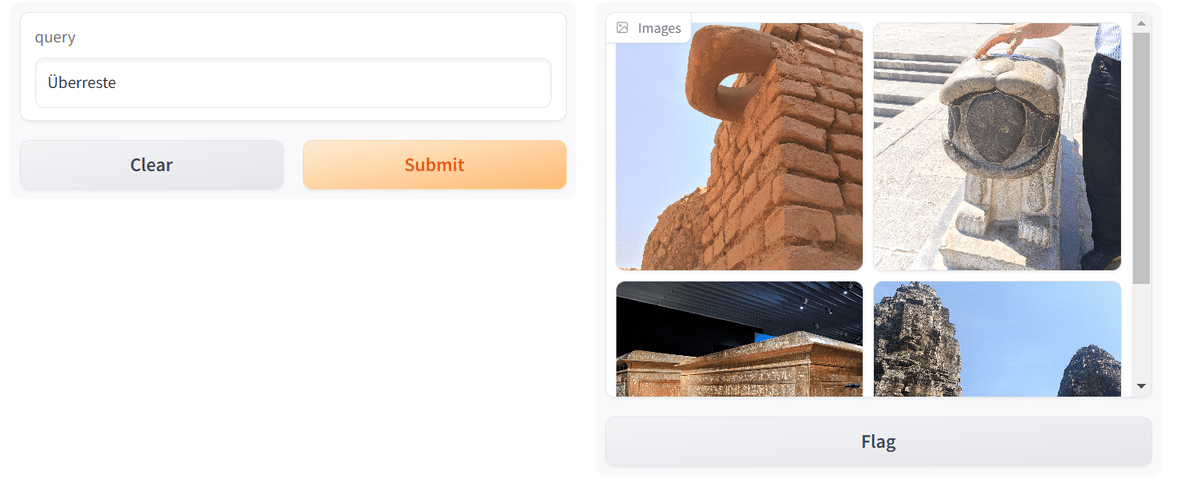
このセルを実行すると、以下の様なUIが立ち上がります。
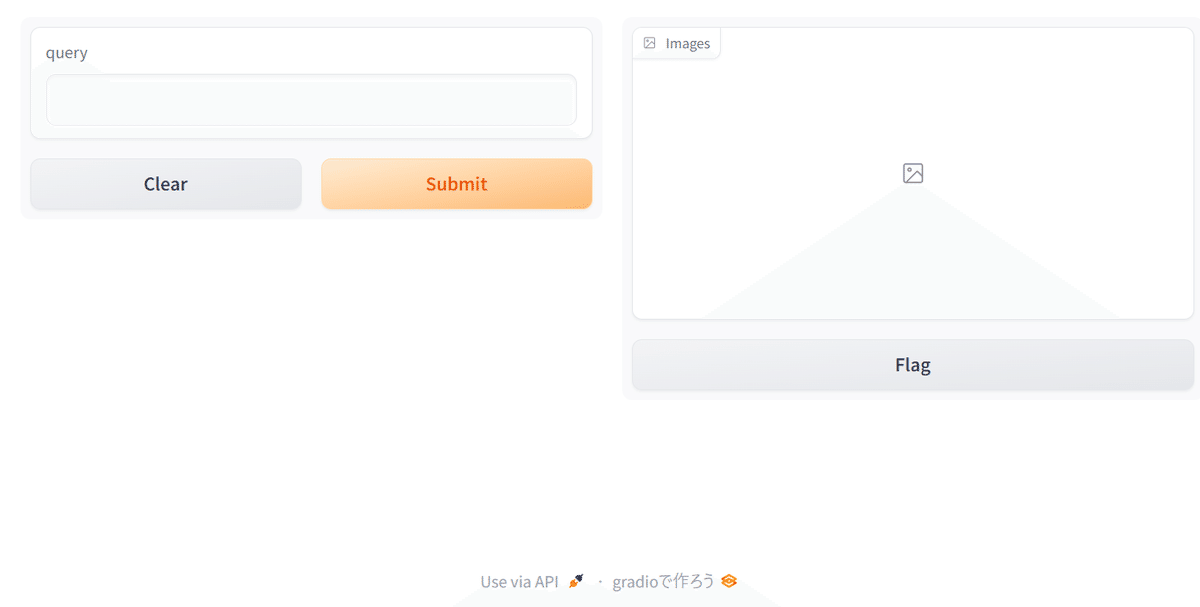
queryの部分に検索したい文字を入れると、自分が入れた画像の中から、入力した文字に近いと判断された画像が出てくるはずです。
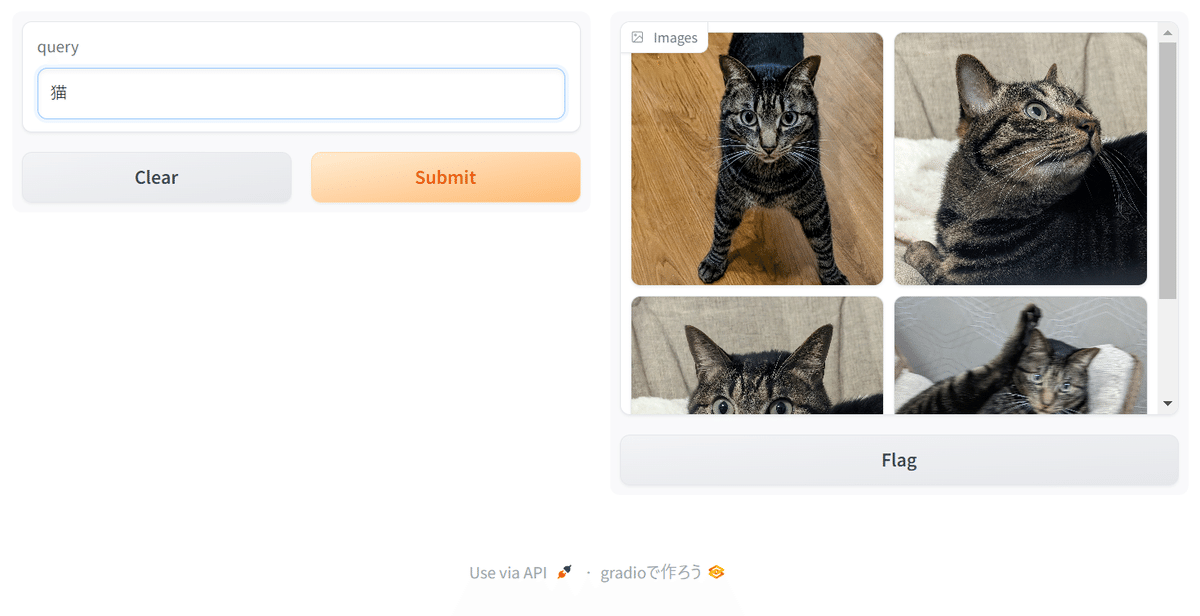
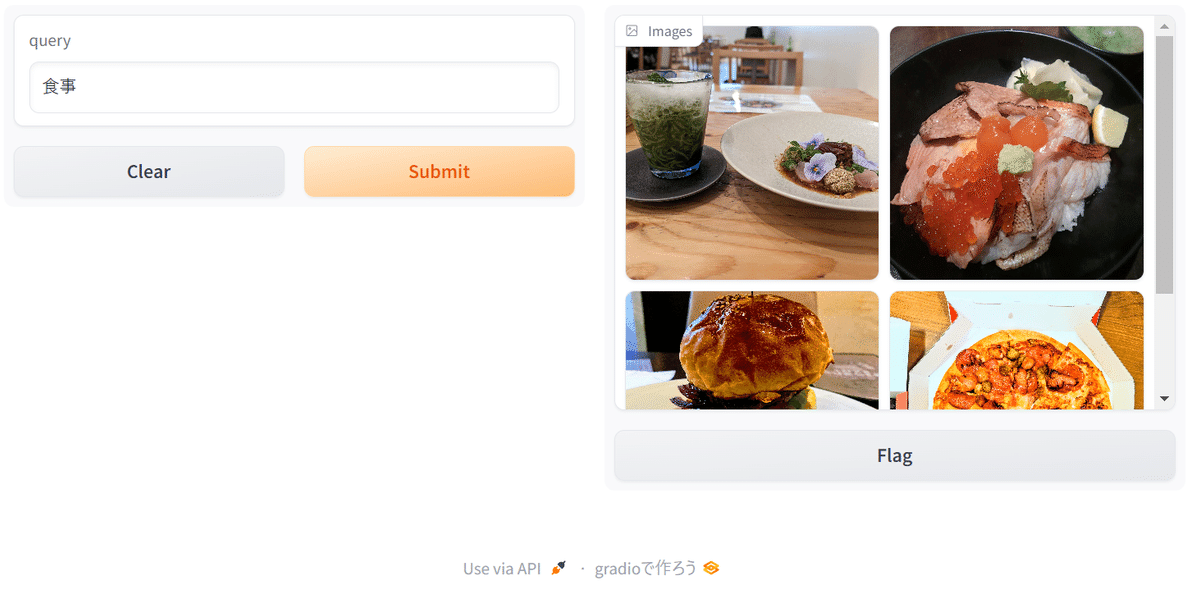
multilingual(多言語)版なので、中国語やドイツ語でも検索できました。
というわけで、検索が実行できました! 画像もテキストもprocessorに放り込むだけなので、コードは stabilityai/japanese-stable-clip-vit-l-16 よりも少し簡単に書けたので、いろいろ活用できそうです。
画像が全てベクトルになるので、クラスタリングとかもいけるかも? 夢が広がります。
CUDAを使いましたが、GPUへの負荷も低かったので、案外CPUでも動かせるかもしれません。