
Hyper-VでVyOSを動かしてみた話 1/2

はじめに
VyOSというDebianベースでNW機器になるOSがあると知ったので、VyOSを使って、ネットワークを構築してみます。
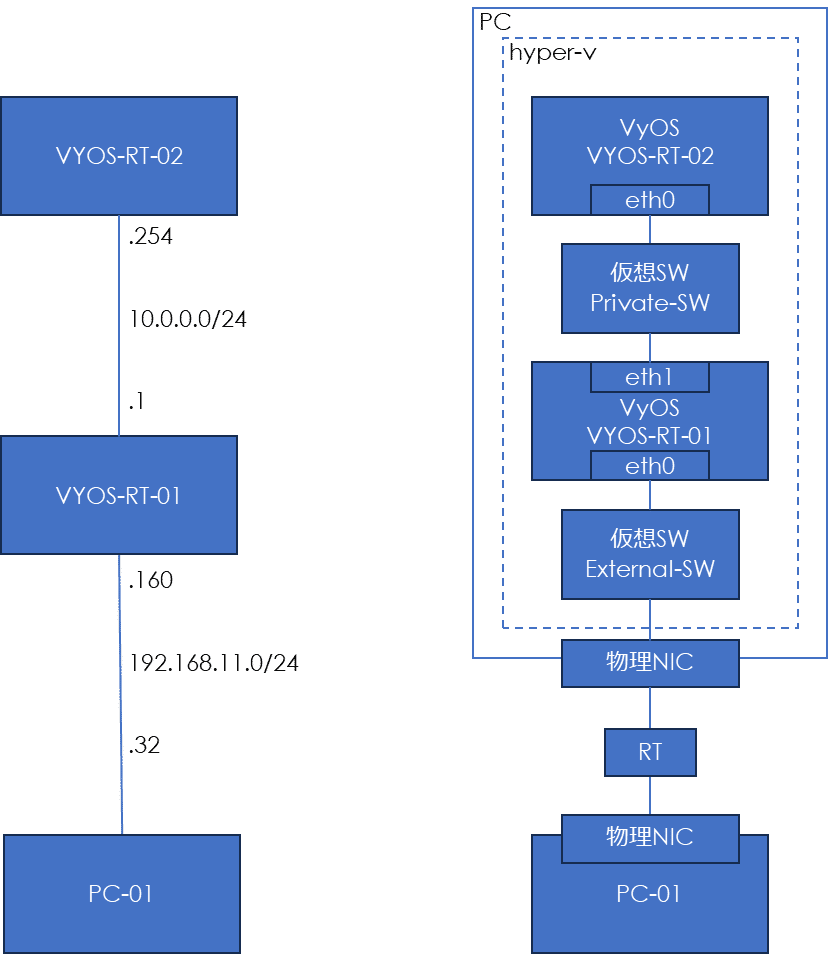
図の左のようなNWを作り、PCからRT-02のアドレスまでpingすることをまずは目指します。
実際の構成は図の右のようになります。(横着したので右下のRTはホームルータ)
VyOSの準備
VyOSのダウンロード
公式サイトに行く
右上の「Download」を押下後、「Free Download」を押下。

一番上のバージョンを左クリックしてダウンロード
※どのバージョンでも
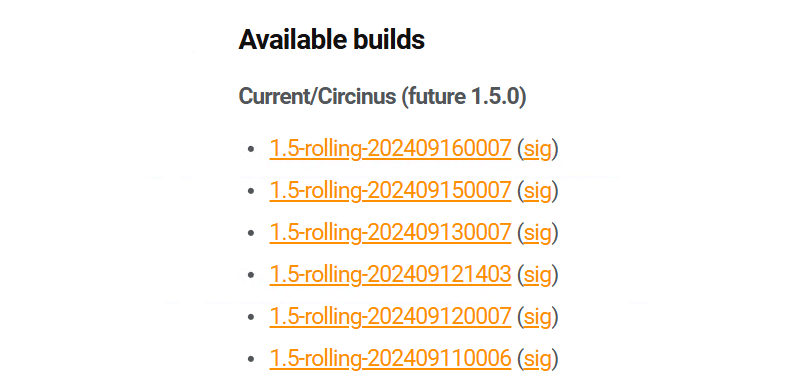
ファイルは「1.5-rolling-202409160007-generic-amd64.iso」で約474MBでした。
※2024/10/21追記
リンクが分かりにくくなっていたのでこちら
必要スペック
公式サイトを要約すると、ユースケース次第ですが下記で動きそうです。
メモリ:1GB
HDD/SSD:2G
CPU:64bit
Hyper-Vで構築
マシンの作成
Hyper-Vマネージャの右から、「新規」→「仮想マシン」を選択

下記でマシン作成
名前と場所の指定 :VyOS-01
世代の指定 :第1世代 ※第2世代は未確認
メモリの割り当て :1024M/動的メモリのチェック無し
ネットワークの構成:接続性ない ※後で設定
仮想ハードディスク:2GB
しばらくするとログインを要求されるので下記でログインする
ユーザ名: vyos
初期パスワード: vyos
ログインしたら下記を入力してマシン停止
shutdown -h now仮想スイッチマネージャーにて仮想スイッチを作成
画像の通り、2つのスイッチを作成します


マシンの設定
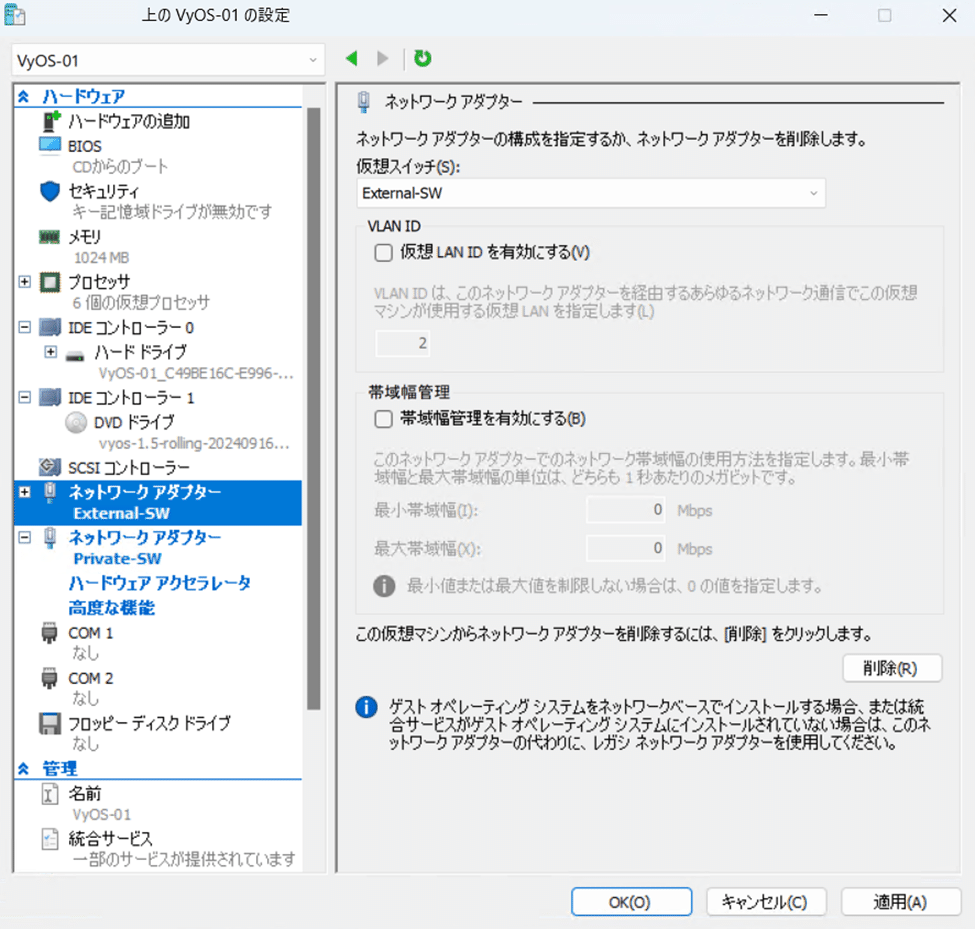
仮想マシンを右クリックし、「設定」を押下すると下記のようなウィンドウが開く
「ハードウェアの追加」から、「ネットワークアダプター」を選択し「追加」押下

「BIOS」は「IDE」を一番上にする
※CDのままだと、仮想マシンを起動するたびにインストール確認されます。

「ネットワークアダプター」に先ほど作ったExternal-SWとPrivate-SWを画像の通り割り当てる。

VyOSの設定
show configrationを実行するとethernetがeth0とeth1の2つある

eth0(External-SW側)の設定
configure
set interfaces ethernet eth0 address 192.168.11.160/24
commit
ping 192.168.11.1
※pingが通ったのでExternal-SW側と分かる
eth1(Internal-SW側)の設定
configure
set interfaces ethernet eth1 address 10.0.0.1/24
commit
ルーティング確認
exitでconfigureモードを抜けた後に、show ip routeで確認可能。
connectedでルートが上がっている

続きは下記