
【ティラノビルダー】全EDクリアで真EDへ行く方法②

タイトル画面の変更
おまけページの作成
【参考記事】
こちらの記事を参考にさせていただきました。
①タイトル画面の変更
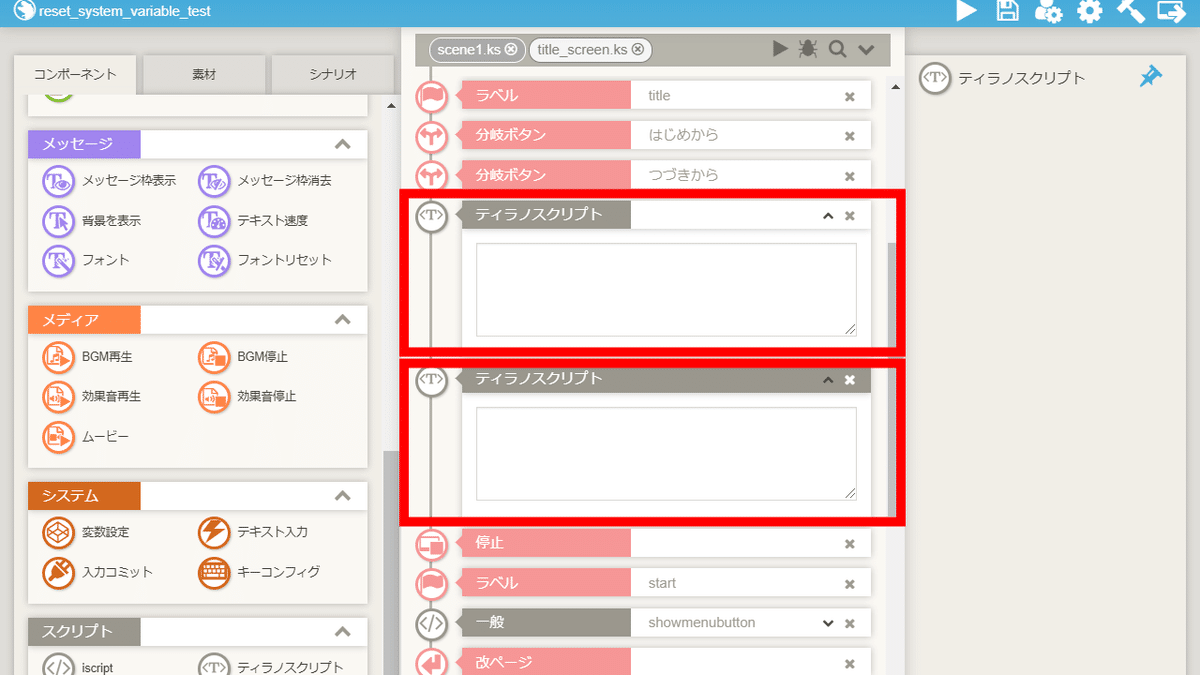
①-(1) ティラノスクリプトコンポーネントの配置

title_screenを開き、ティラノスクリプトコンポーネントを配置します。

コードを貼り付けます。
[if exp="sf.ed1 =='true' && sf.ed2 =='true' && sf.ed3 =='true'"][else][endif]①-(2) 背景変更コンポーネントの配置

背景変更コンポーネントを配置します。
クリア後に表示する背景画像を指定します。
これでクリア後のタイトル画面の変更は完了です。
②おまけページの作成
②-(1) 新規シナリオの追加・編集

新規シナリオファイルを追加します。
今回はシナリオ名をextraとしました。
②-(2) ティラノスクリプトコンポーネントの配置
title_screenに戻り、ティラノスクリプトコンポーネントを配置します。

コードを貼り付けます。
[if exp="sf.ed1 =='true' && sf.ed2 =='true' && sf.ed3 =='true'"][endif]②-(3) 分岐ボタンコンポーネントの配置

分岐ボタンコンポーネントを配置します。
ストレージはextra.ksを指定します。
これで、おまけページの作成は完了です。
以上で解説を終わります。おつかれさまでした。