
【ティラノビルダー】画面キャプチャープラグインの導入方法

画面キャプチャープラグインの導入方法について解説します。
①画面キャプチャープラグインのダウンロード
ティラノプラグインライブラリから、入手ページに移動します。
capimg.zipファイルがダウンロードされます。
これで、プラグインのダウンロードは完了です。
②プラグインのファイルの配置
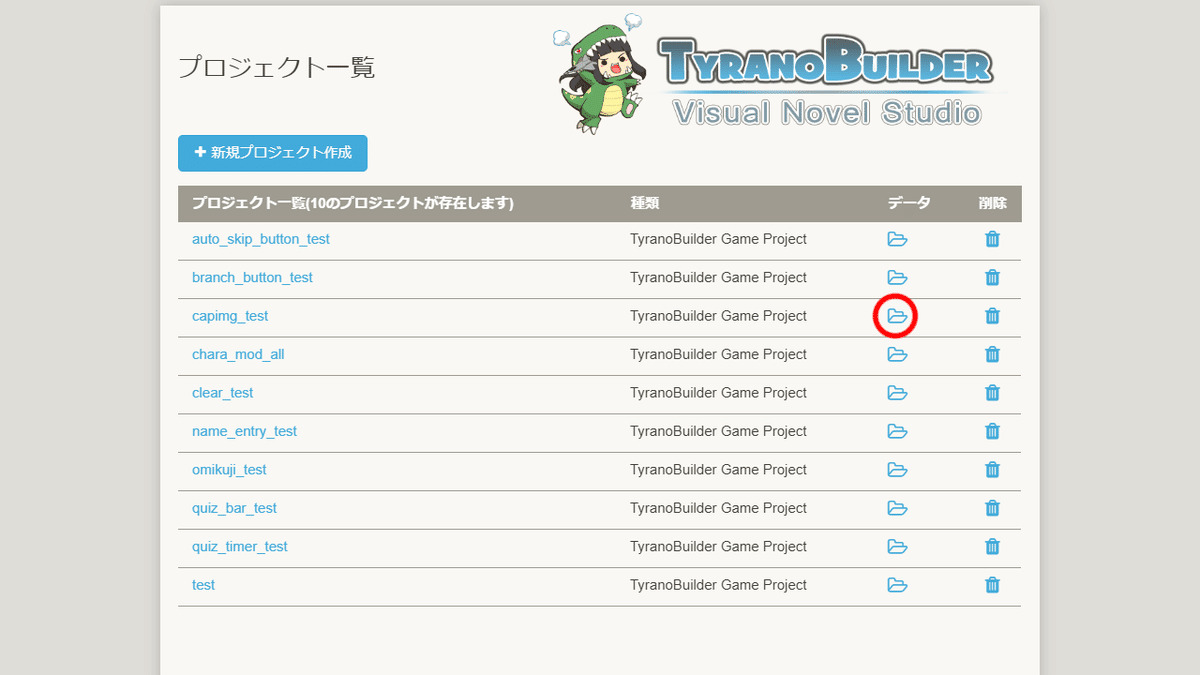
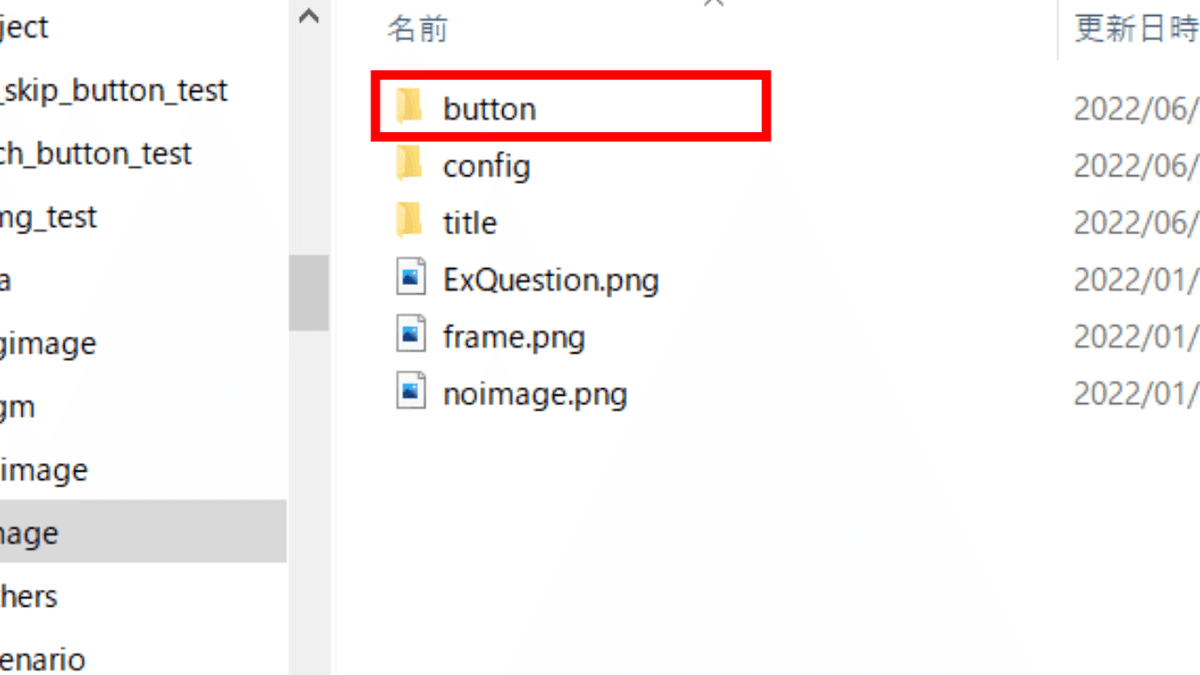
プロジェクト一覧画面からフォルダのアイコンをクリックし、今回プラグインを導入するプロジェクトのフォルダを開きます。

フォルダが開かれるので、othersフォルダをクリックします。

pluginフォルダをクリックします。
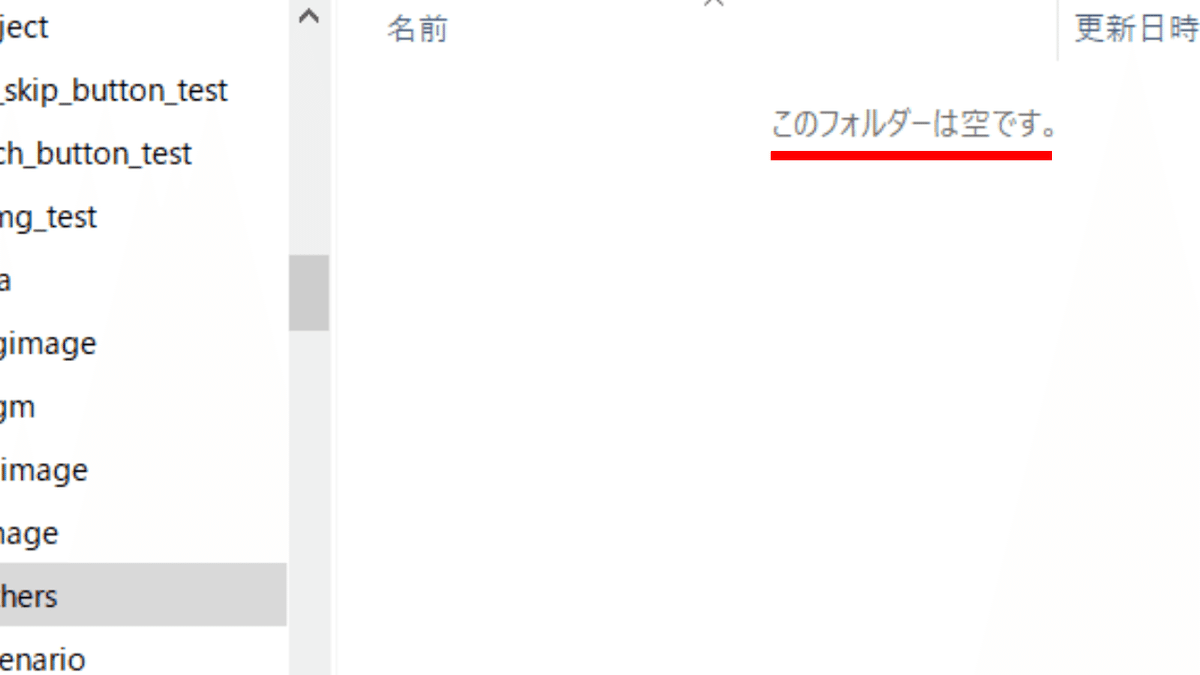
フォルダは空の状態です。
ここで、先程ダウンロードしたcapimg.zipフォルダを展開します。
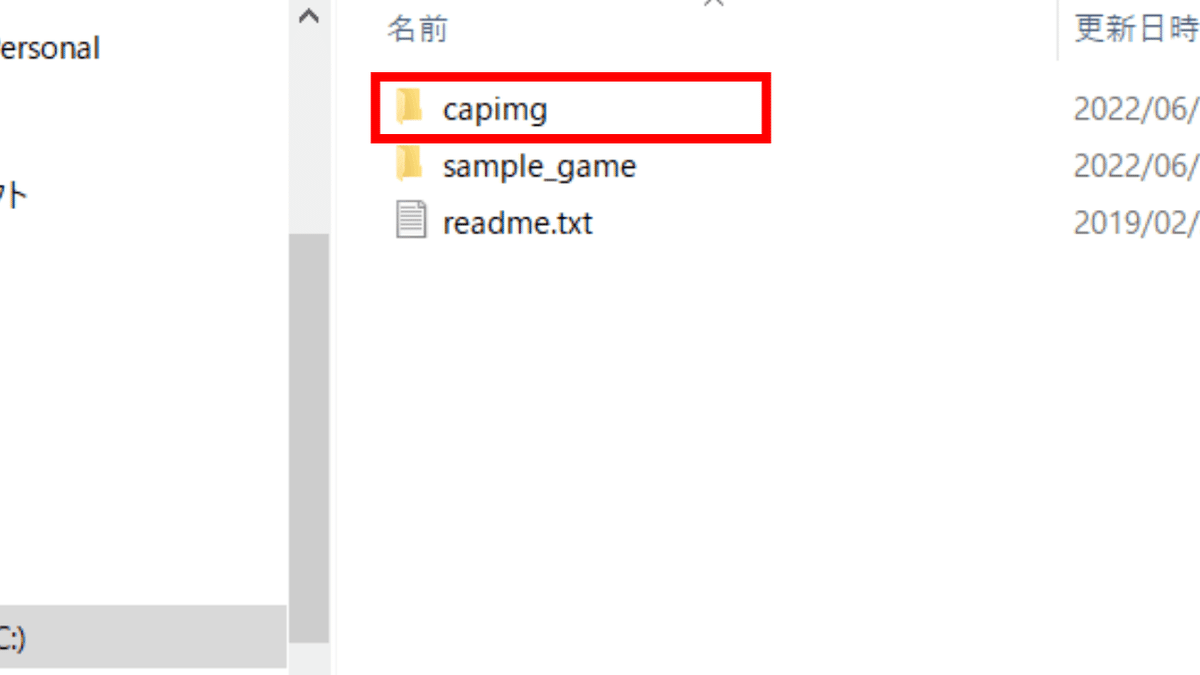
capimg.zipファイルを展開すると、capimgフォルダがあります。

capimgフォルダを先程開いたpluginフォルダに配置します。
これでプラグインのファイルの配置は完了です。
③plugin.ksファイルにコードを記述
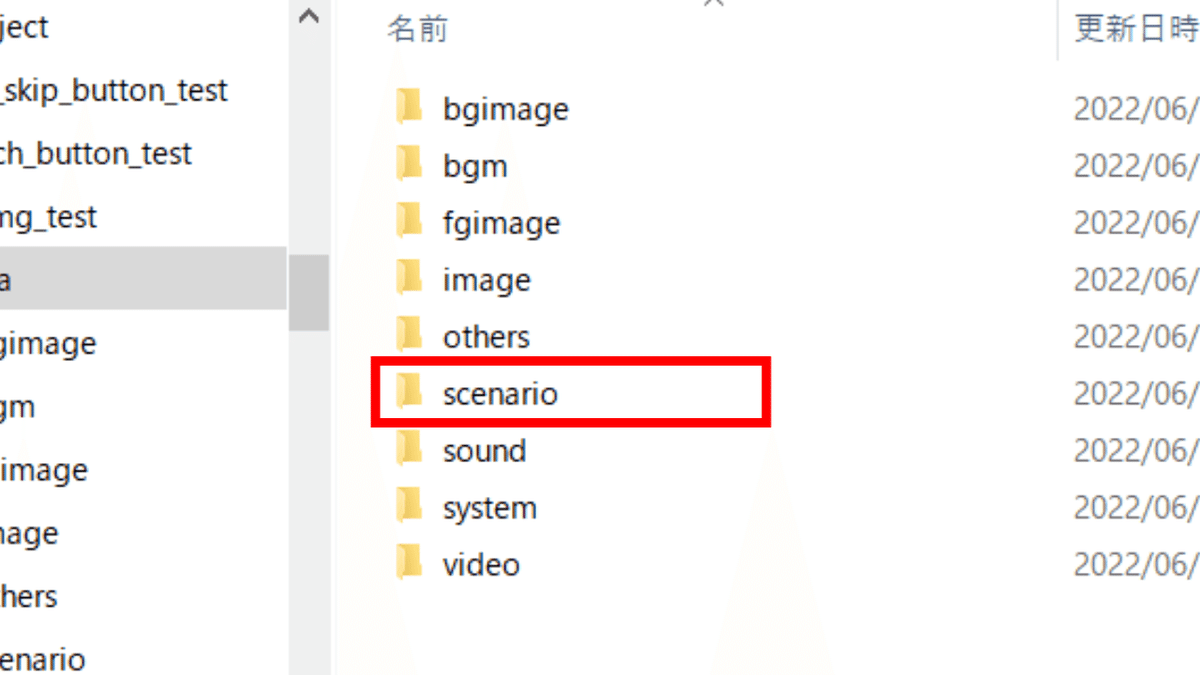
今度は、scenarioフォルダをクリックします。
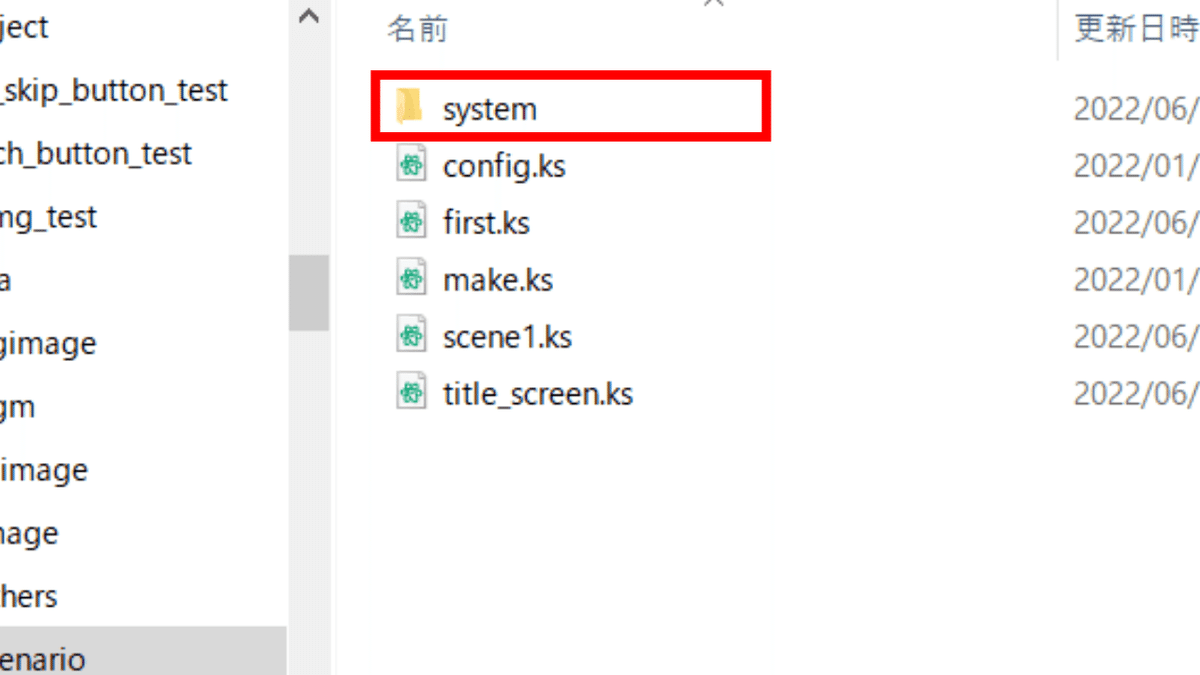
systemフォルダをクリックします。
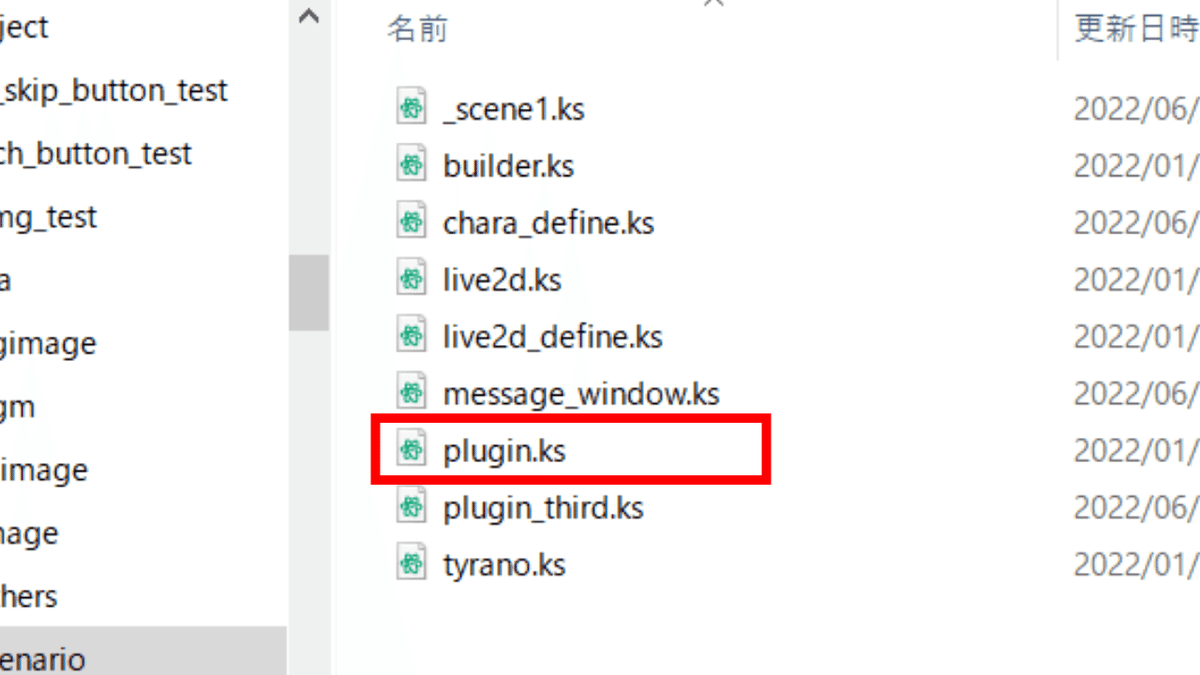
plugin.ksをメモ帳で開きます。
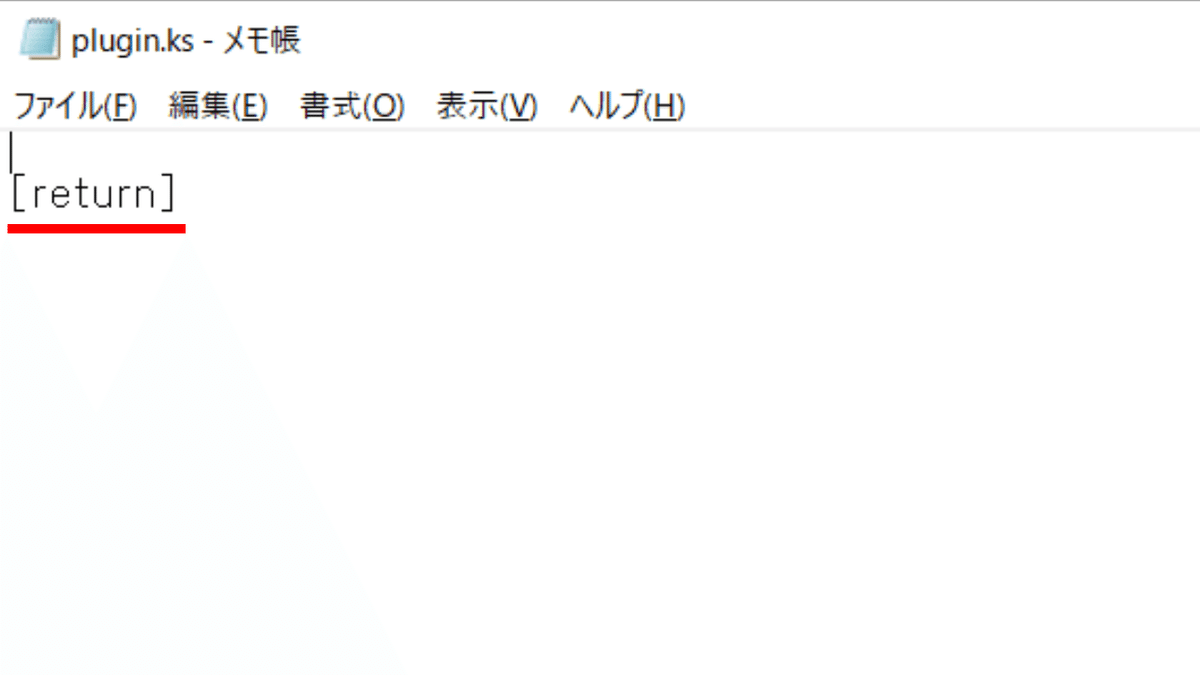
[return]と書かれています。このコードは絶対に消さないでください。

[plugin name="capimg"]上記のコードを貼り付けます。
最後に上書き保存します。
これでplugin.ksファイルへのコードの記述は完了です。
④画面キャプチャープラグインの使用例
使用例1と使用例2のお好きな方をお選びください。
使用例1は、ゲームのプレイ中お好みのタイミングで画面を撮影できるようにします。
使用例2は、特定のページに移動し、画面を撮影できるようにします。
画面キャプチャープラグインの使用例1
使用例1は、ゲームのプレイ中お好みのタイミングで画面を撮影できるようにします。
(1) 画像の配置

こちらの画像を撮影ボタンに使用します。
今回は、imageフォルダの中にあるbuttonフォルダに配置します。
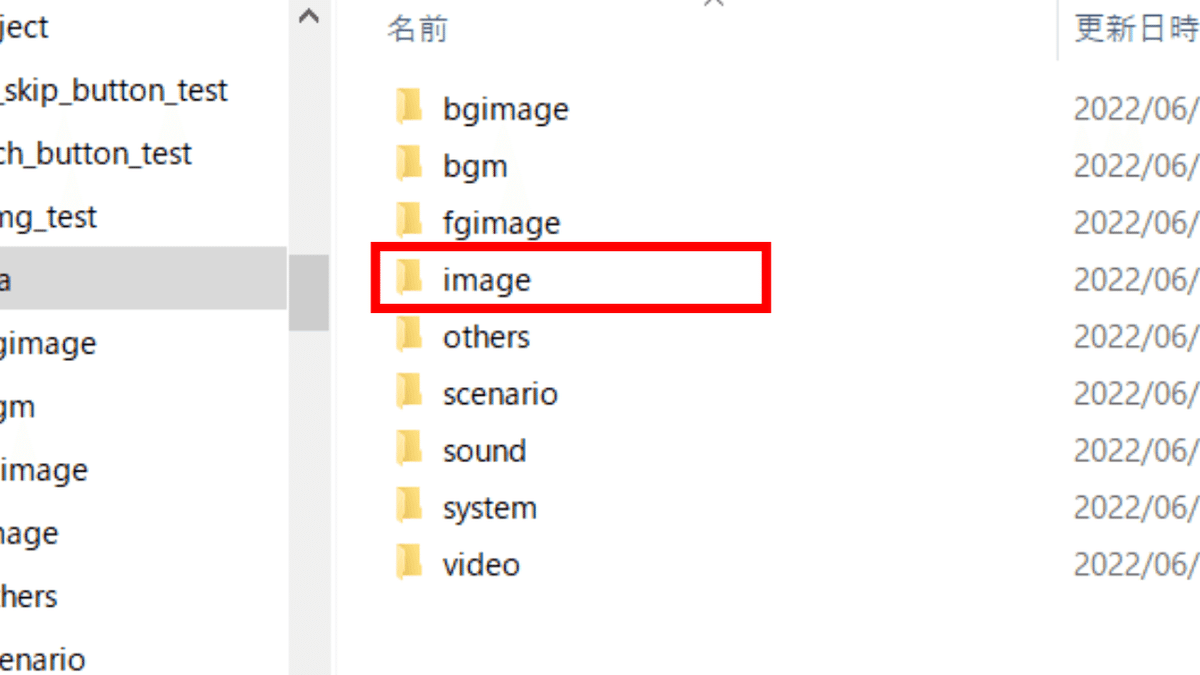
imageフォルダをクリックします。
buttonフォルダをクリックします。
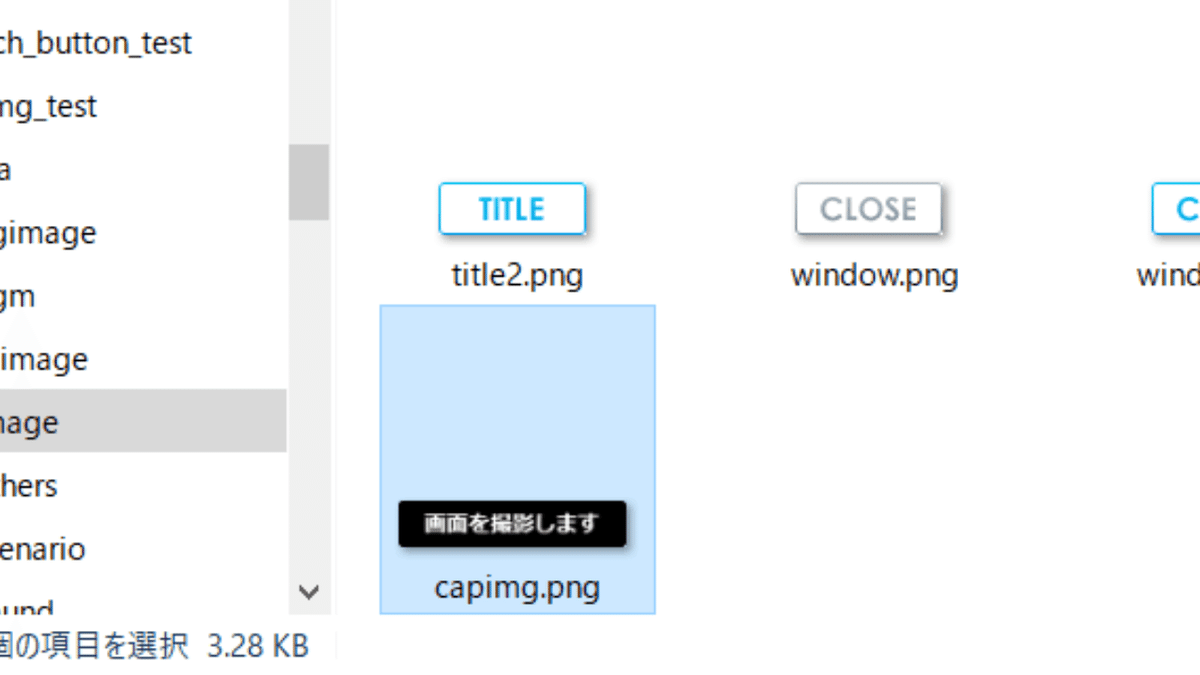
画像を配置しました。
これで、画像の配置は完了です。
(2) 新しいシナリオファイルを作成

新しいシナリオファイルを作成します。
今回は、capimgとしました。
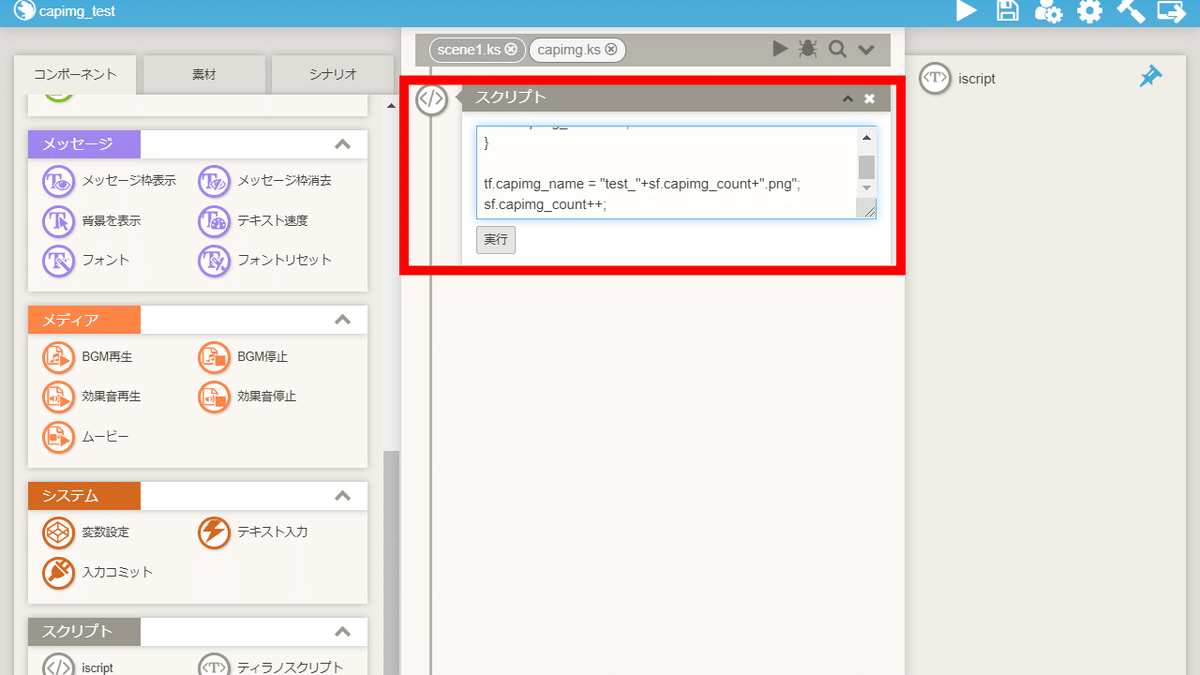
iscriptコンポーネントを配置します。
iscriptコンポーネントに以下のコードを貼り付けます。
if (sf.capimg_count == undefined) {
    sf.capimg_count = 1;
}

tf.capimg_name = "test_"+sf.capimg_count+".png";
sf.capimg_count++;
上記のコードの場合、撮影した画像のファイル名は、
test_1.png、test_2.png、test_3.png……と連番になります。
別のファイル名を指定したい場合は、"test_"の部分をお好きな名前に変更してください。

ティラノスクリプトコンポーネントを配置します。
ティラノスクリプトコンポーネントに以下のコードを貼り付けます。
[capimg ui="true" filename="&tf.capimg_name" saveas="true"]
[return]
【画面の撮影時に、メッセージウィンドウやボタンも撮影するかどうか】
メッセージウィンドウやボタンも撮影する場合
ui ="true"
メッセージウィンドウやボタンは撮影しない場合
ui ="false"
【撮影した画像の保存場所】
保存場所をプレイヤーに選択させる場合
saveas="true"
自動的に保存する場合
saveas="false"
(3) 撮影ボタンの配置

ティラノスクリプトコンポーネントを配置します。
ティラノスクリプトコンポーネントに以下のコードを貼り付けます。
[button graphic="button/capimg.png" storage="capimg.ks" x="1000" y="100" fix="true" auto_next="false"]【画像の場所】
graphic
【移動先のシナリオ】
storage
【横の位置】
x
【縦の位置】
y
以上で使用例1の解説を終わります。おつかれさまでした。
画面キャプチャープラグインの使用例2
使用例2は撮影ボタンを作成し、特定のページに移動し、画面を撮影できるようにします。
(1) 画像の配置


こちらの画像を使用します。
今回は、imageフォルダの中にあるbuttonフォルダに配置します。

imageフォルダをクリックします。

buttonフォルダをクリックします。
画像を配置しました。
これで、画像の配置は完了です。
(2) 新しいシナリオファイルを作成

新しいシナリオファイルを作成します。
今回は、capimgとしました。

ティラノスクリプトコンポーネントを配置します。
ティラノスクリプトコンポーネントに以下のコードを貼り付けます。
[layopt layer="message0" visible="false"]

[clearfix]

[stop_keyconfig]

[free_layermode time="100" wait="true"]

[reset_camera time="100" wait="true"]

[iscript]
$(".layer_camera").empty();
$("#bgmovie").remove();
[endscript]

[hidemenubutton]

[cm]
背景変更コンポーネントを配置します。
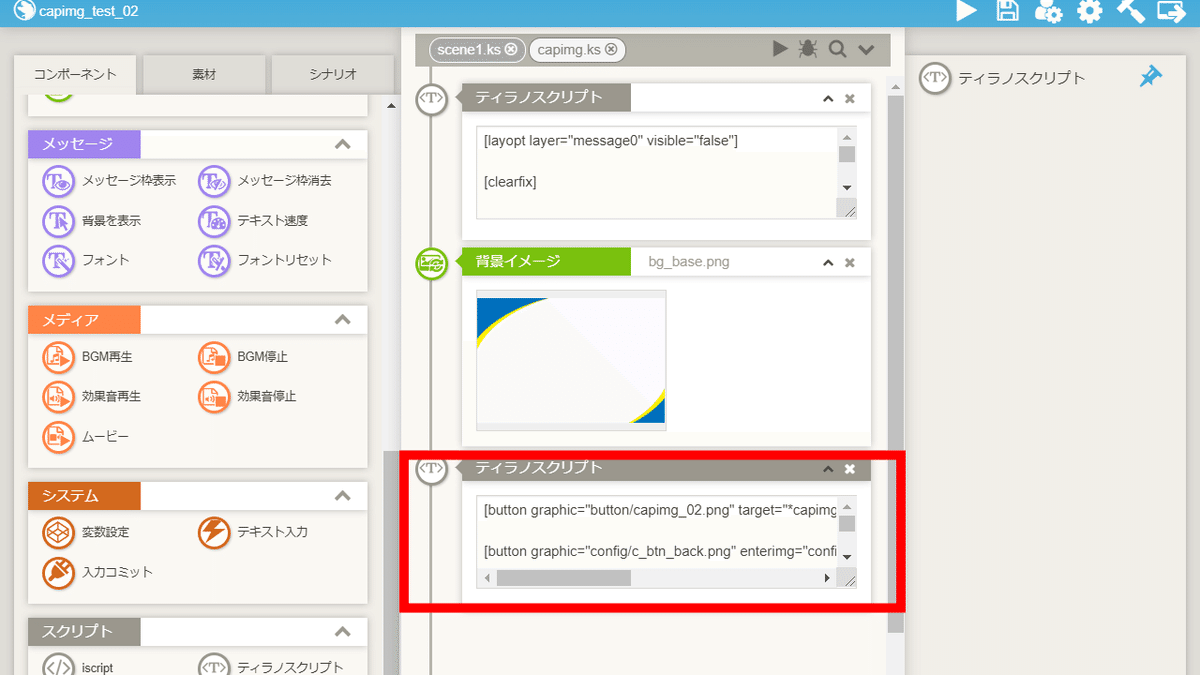
ティラノスクリプトコンポーネントを配置します。
ティラノスクリプトコンポーネントに以下のコードを貼り付けます。
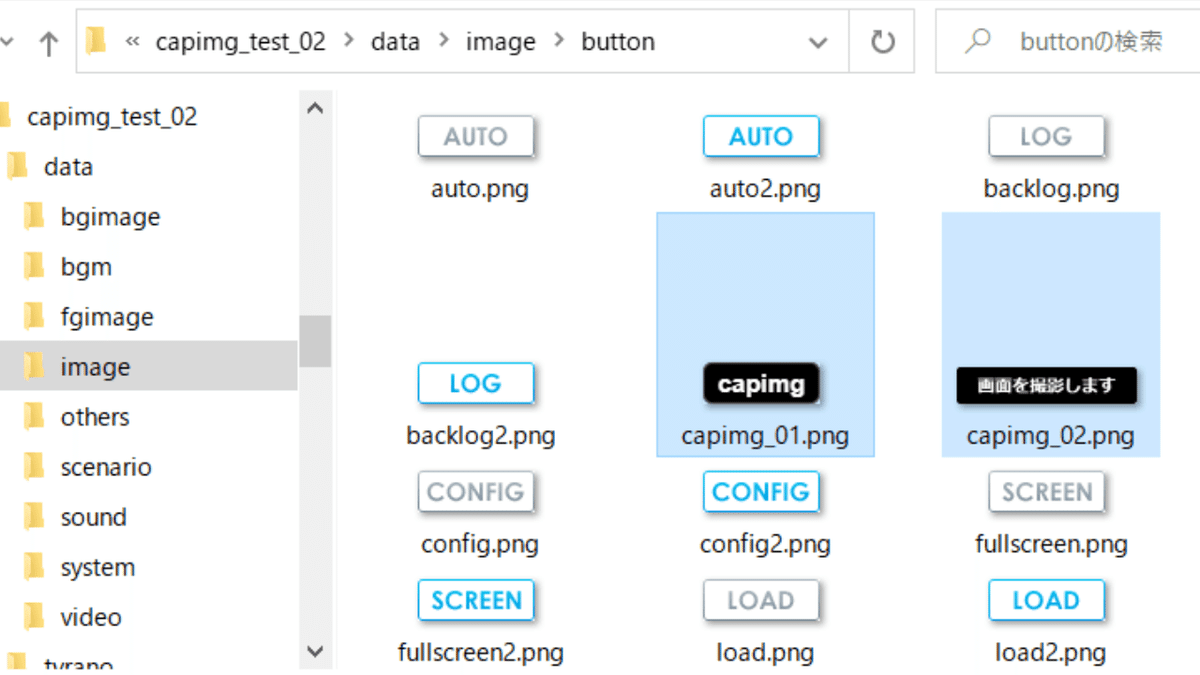
[button graphic="button/capimg_02.png" target="*capimg" x="50" y="50" fix="true" auto_next="false"]

[button graphic="config/c_btn_back.png" enterimg="config/c_btn_back2.png" target="*back" x="1160" y="20" fix="true" auto_next="false"]

[s]

*capimg

[iscript]

if (sf.capimg_count == undefined) {
    sf.capimg_count = 1;
}

tf.capimg_name = "test_"+sf.capimg_count+".png";
sf.capimg_count++;

[endscript]

[capimg ui="true" filename="&tf.capimg_name" saveas="true"]

[return]

*back

[clearfix]

[start_keyconfig]

[clearstack]

[awakegame]
【コードの内容】
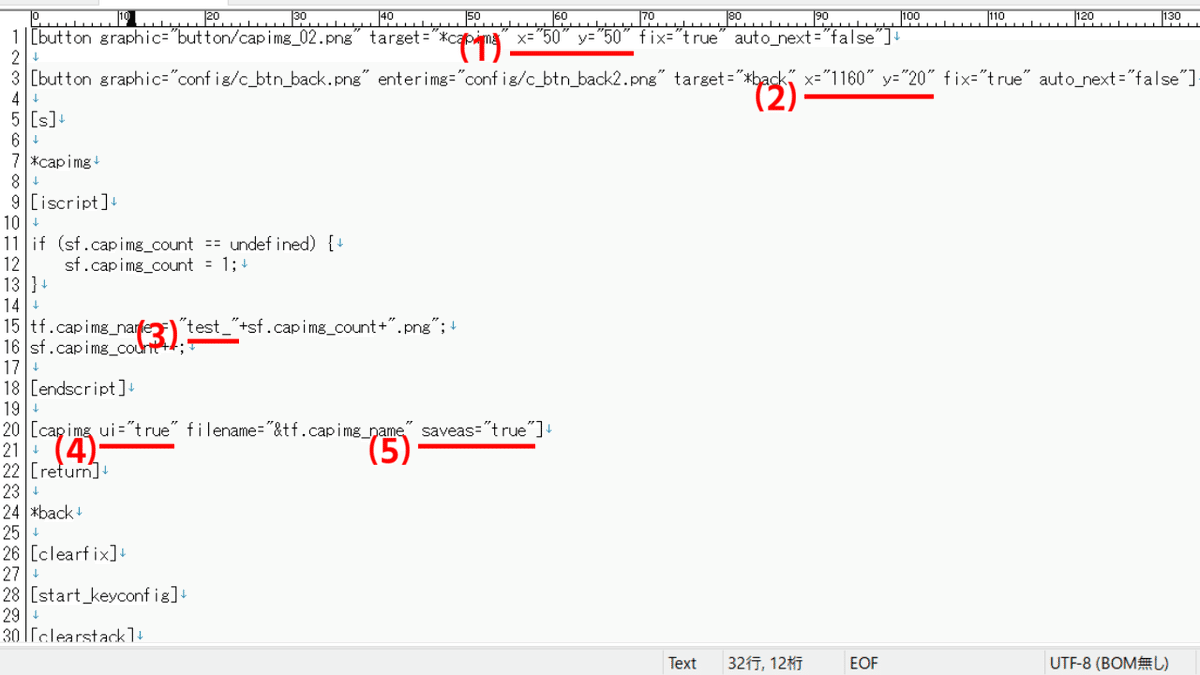
(1) capimg_02.pngの位置
(2) 戻るボタンの位置
(3) 撮影した画像のファイル名
上記のコードの場合、撮影した画像のファイル名は、
test_1.png、test_2.png、test_3.png……と連番になります。
別のファイル名を指定したい場合は、"test_"の部分をお好きな名前に変更してください。
(4) 画面の撮影時に、メッセージウィンドウやボタンも撮影するかどうか
メッセージウィンドウやボタンも撮影する場合
ui ="true"
メッセージウィンドウやボタンは撮影しない場合
ui ="false"
(5) 撮影した画像の保存場所
保存場所をプレイヤーに選択させる場合
saveas="true"
自動的に保存する場合
saveas="false"
これで、新しいシナリオファイルの作成は完了です。
(3) capimgシナリオを呼び出すボタンの配置
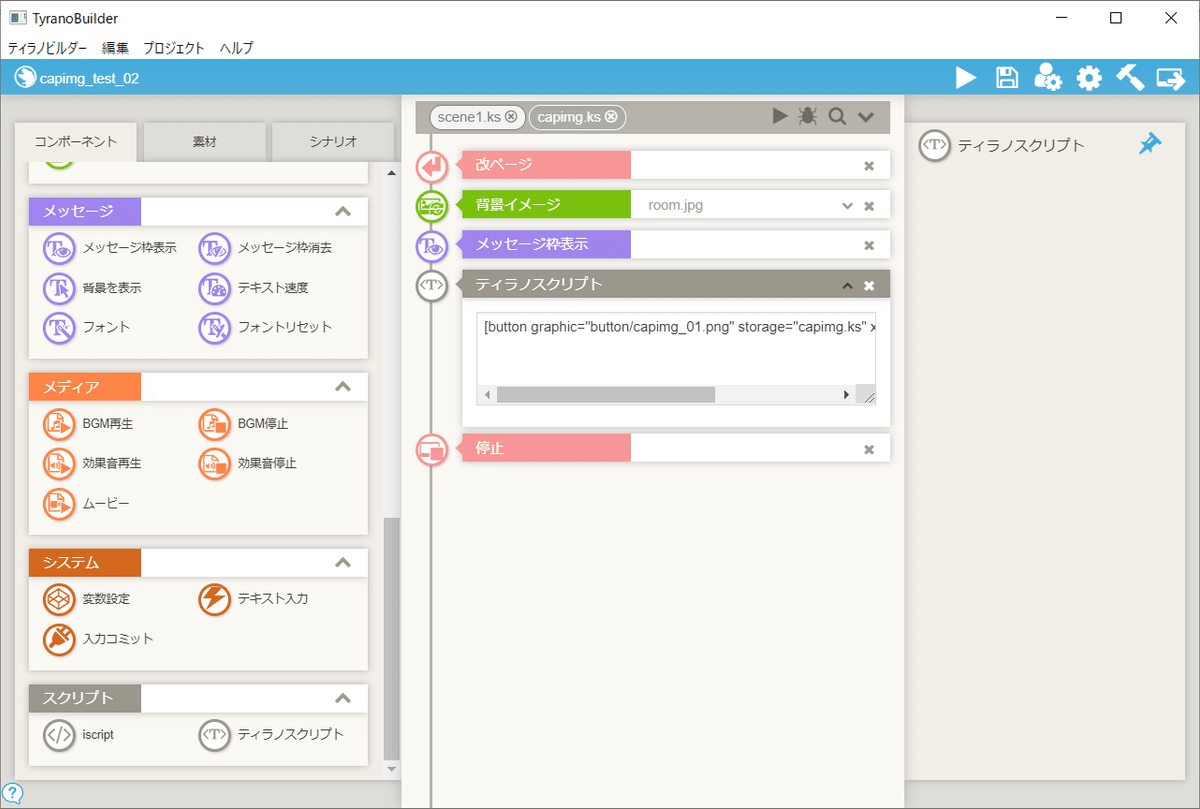
ティラノスクリプトコンポーネントを配置します。
ティラノスクリプトコンポーネントに以下のコードを貼り付けます。
[button graphic="button/capimg_01.png" storage="capimg.ks" x="890" y="590" role="sleepgame"]【画像の場所】
graphic
【移動先のシナリオ】
storage
【横の位置】
x
【縦の位置】
y
以上で使用例2の解説を終わります。おつかれさまでした。