
【ティラノビルダー】回想モードの作成方法

ティラノビルダーで回想モードを作成しました。 pic.twitter.com/HkGp4yxaZ2
— サイバーノーツ (@Cyber_Noughts) December 17, 2022
ティラノビルダーの回想モードの作成方法について解説します。
【参考記事】
上記の記事を参考にさせていただきました。
①シナリオの準備
title_screen
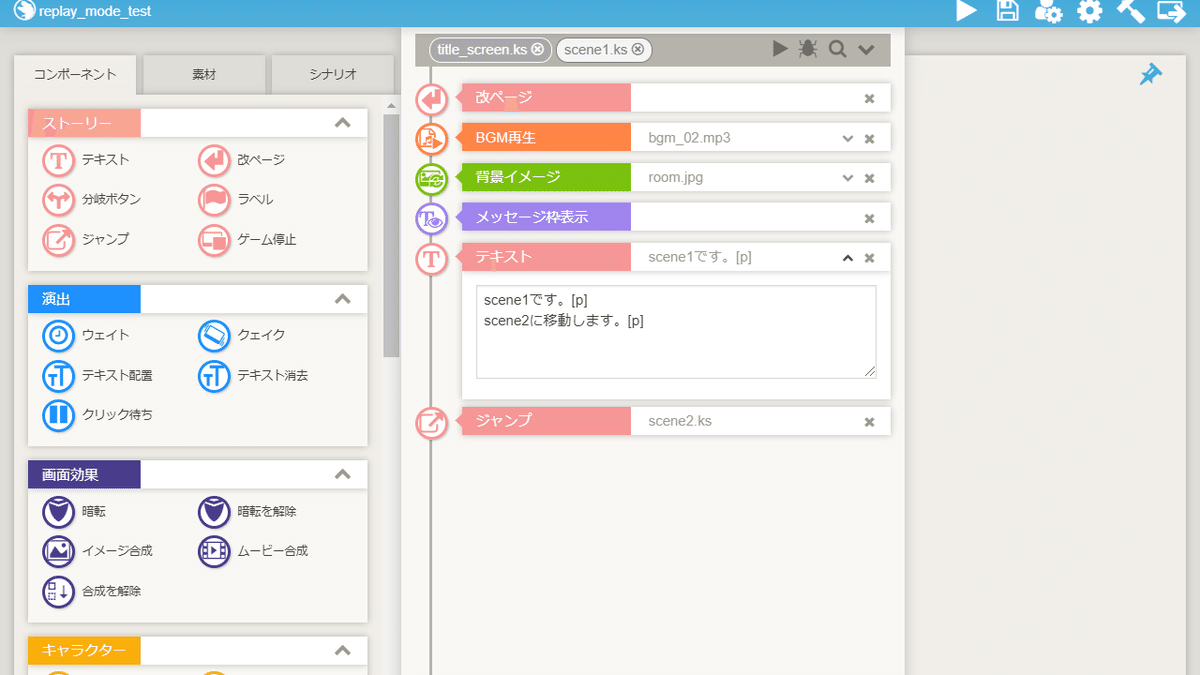
scene1
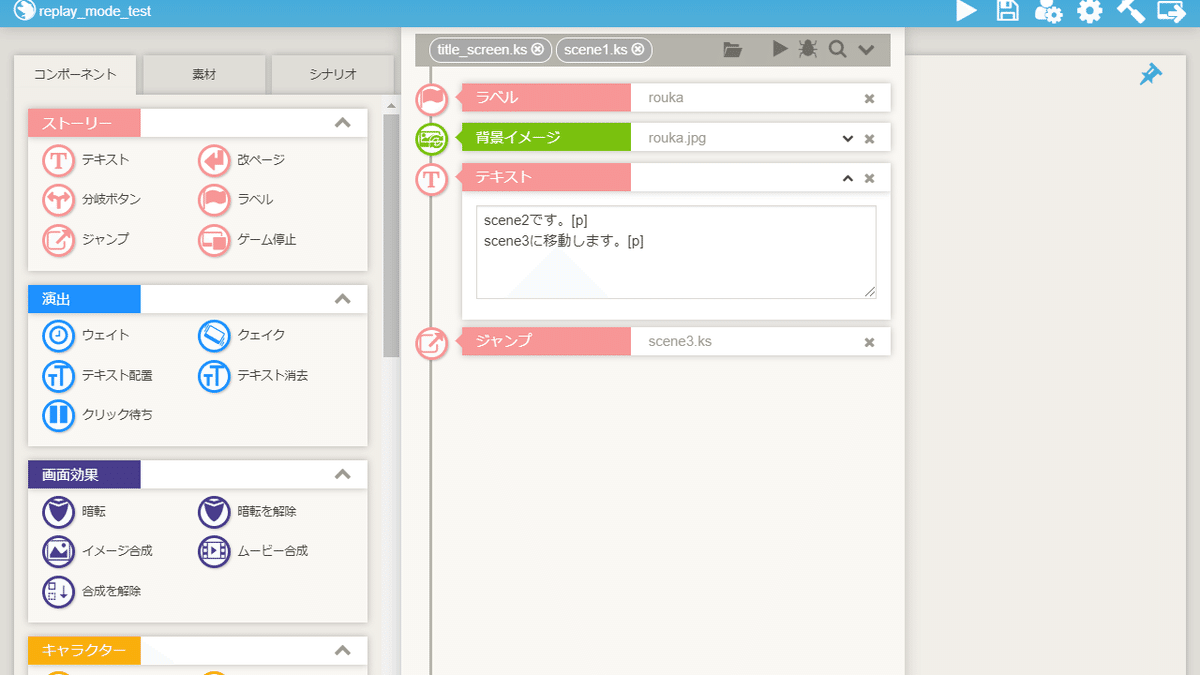
scene2
scene3
上記の4つのシナリオを準備します。
今回は、scene2を回想シーンに指定します。
それぞれのシナリオのコンポーネントの配置は以下の通りです。


これで、シナリオの準備は完了です。
②ゲームセッティング画面を開く

「プロジェクト」→「ゲームコンフィグ」をクリックし、ゲームセッティング画面を開きます。
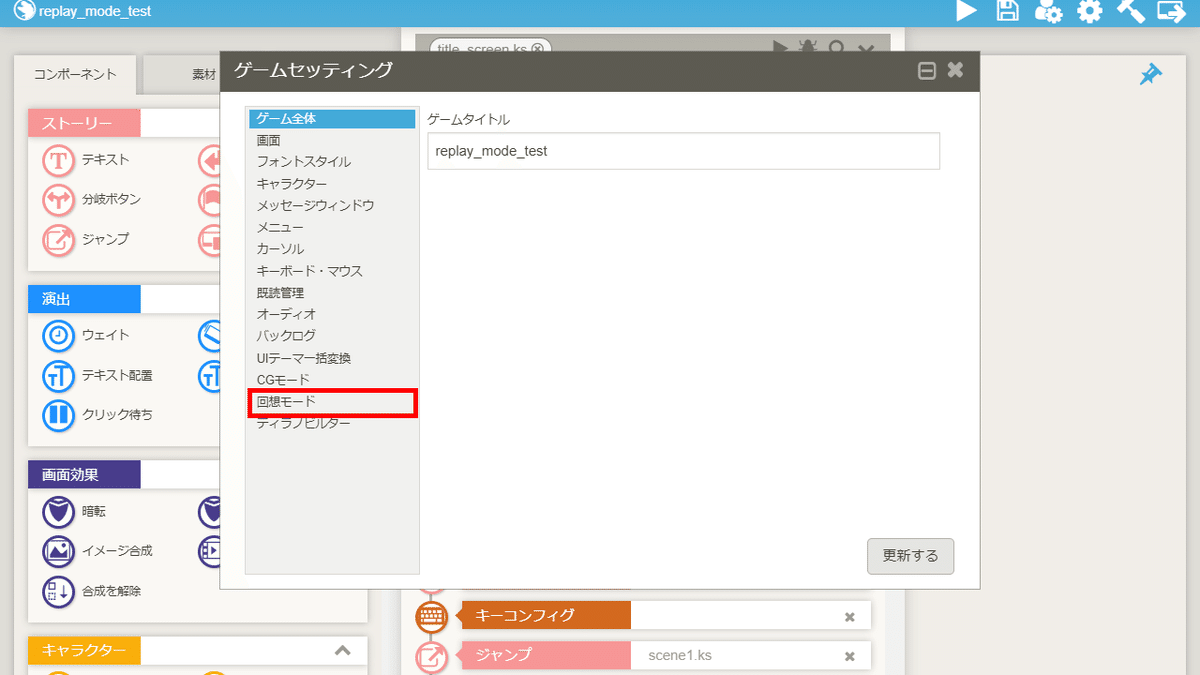
「回想モード」をクリックします。
②シナリオの追加
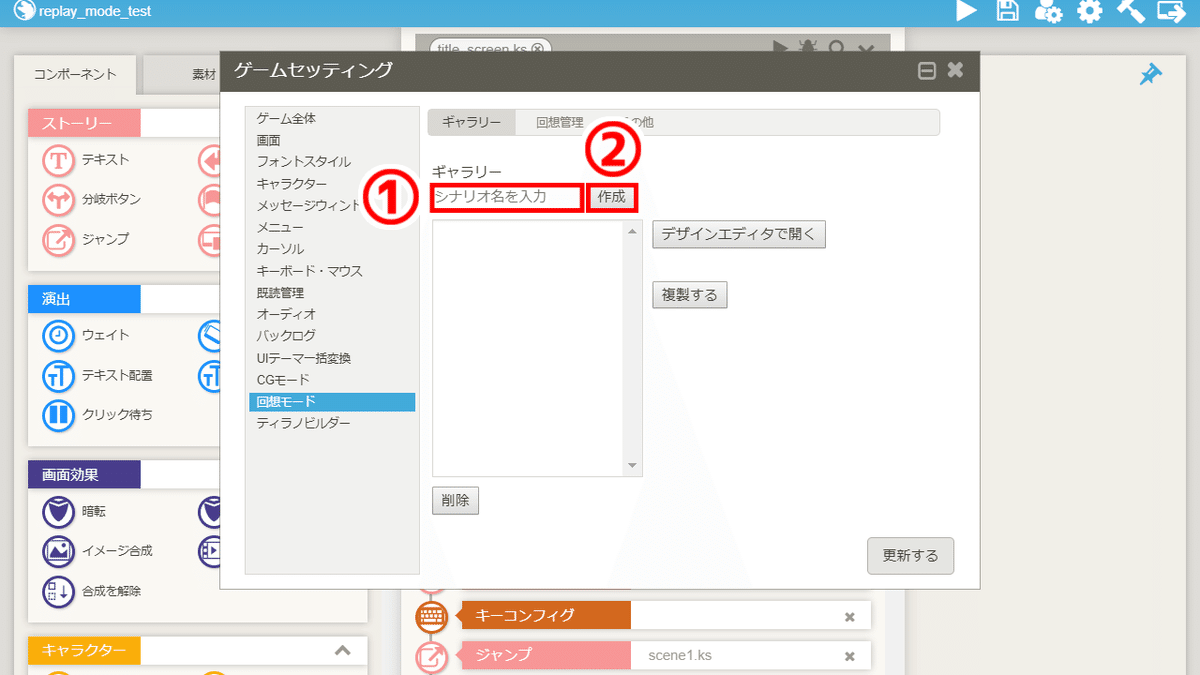
①シナリオ名を入力し、②作成をクリックします。
今回は、シナリオ名をreplaypage1としました。

先程作成したシナリオの名前が表示されます。
最後に、更新するをクリックしてください。
これで、シナリオの追加は完了です。
③回想シーンの登録
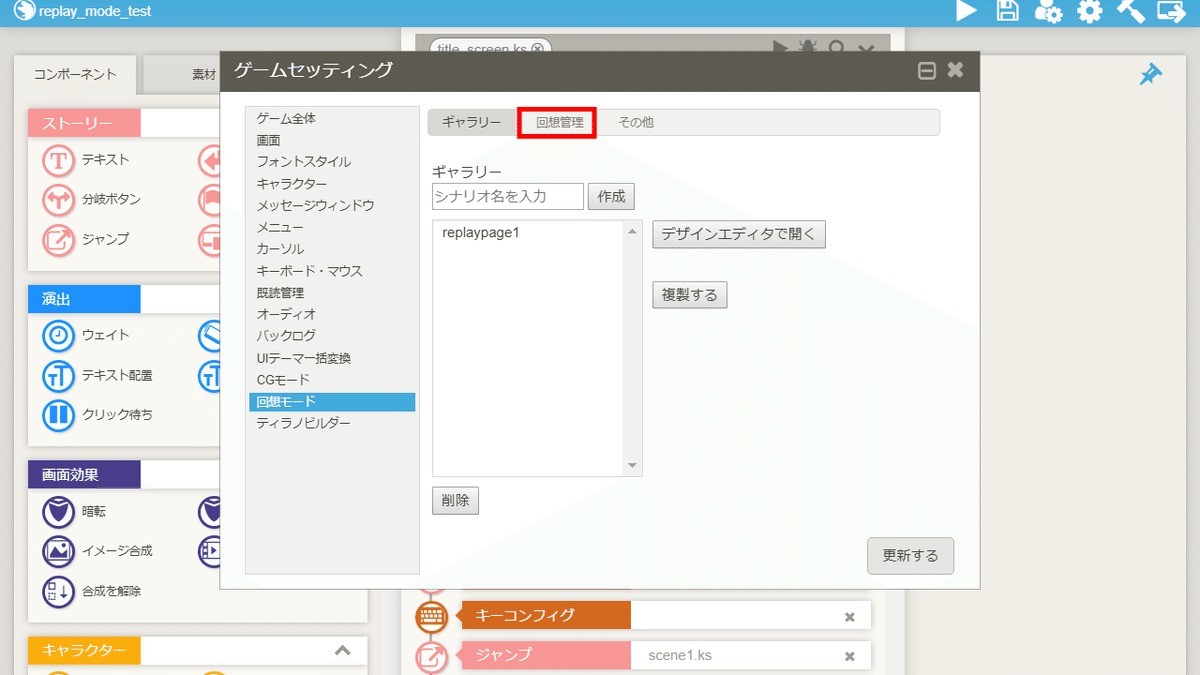
回想管理をクリックします。
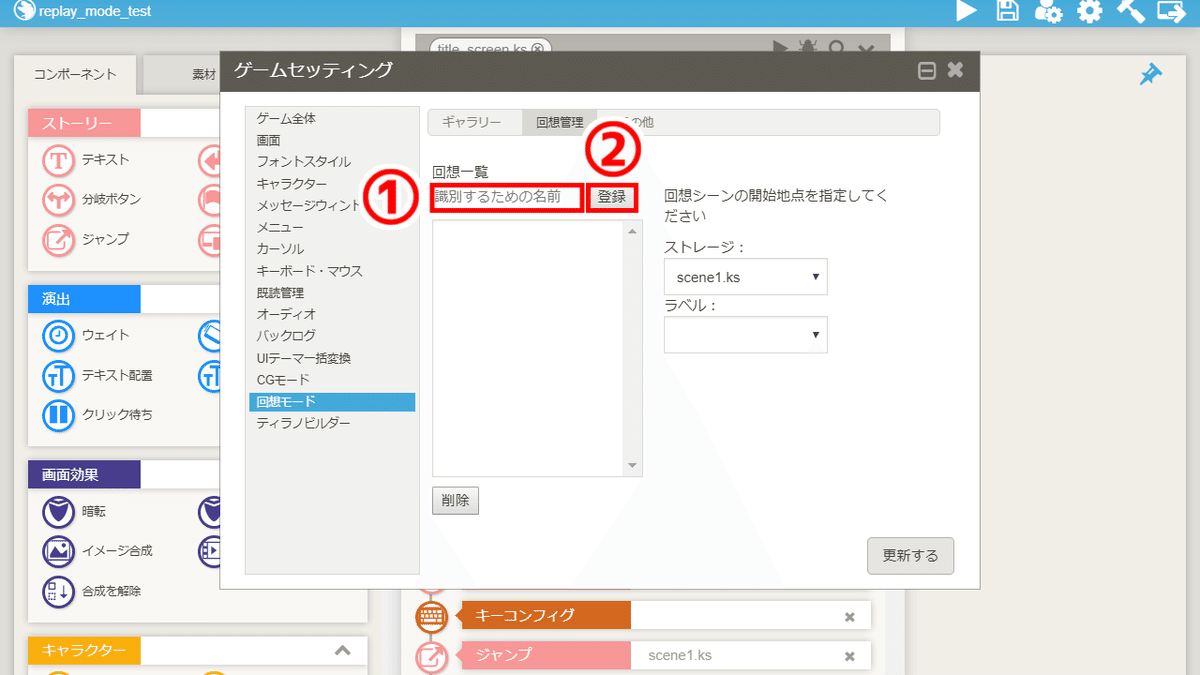
①識別するための名前を入力し、②登録をクリックします。
今回は、識別するための名前をroukaとしました。
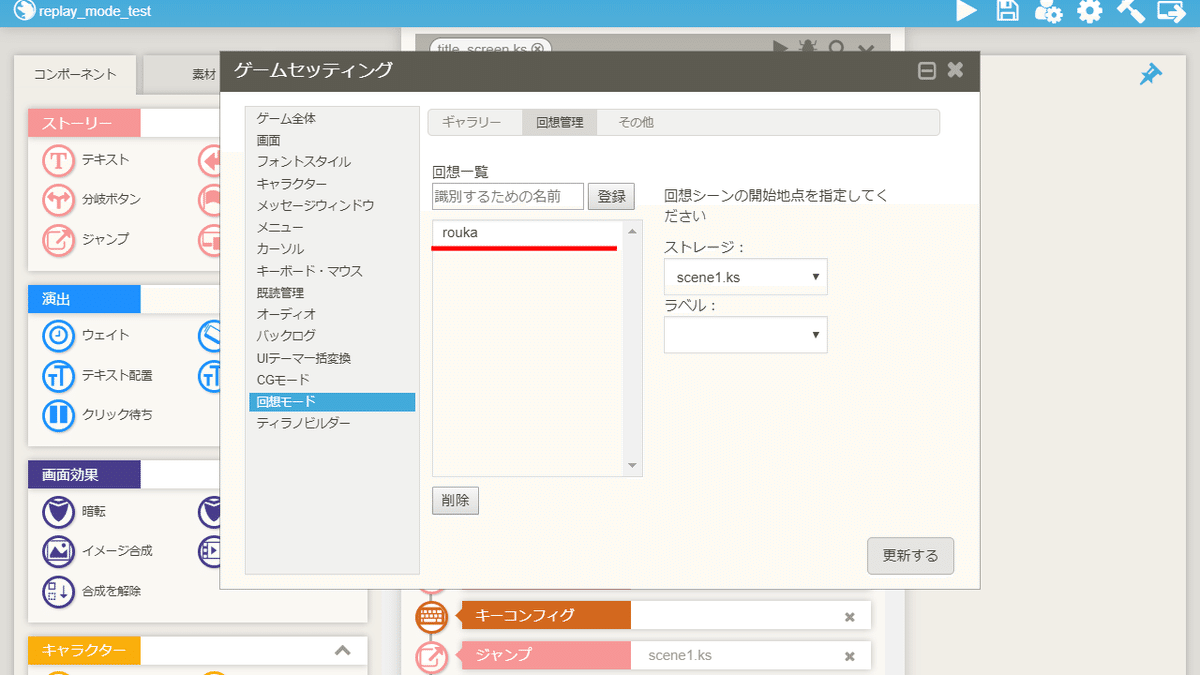
先程登録した回想シーンの名前が表示されます。

回想シーンの名前をクリックします。
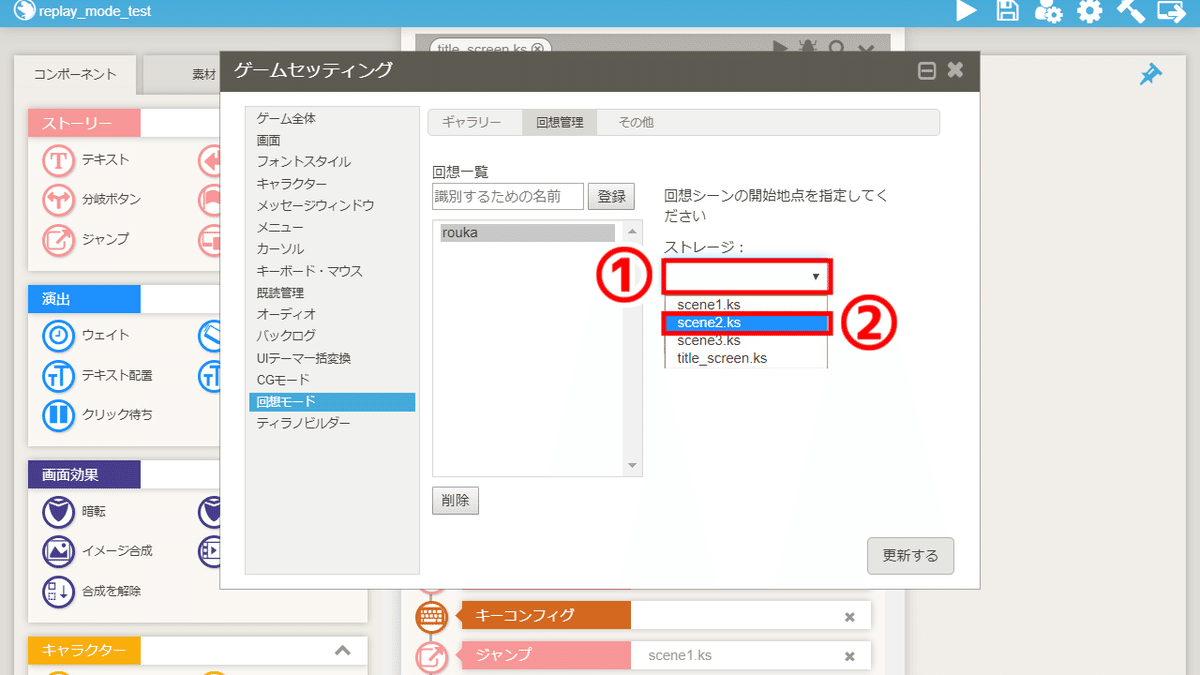
①ストレージと書かれている下の部分をクリックし、
②scene2.ksをクリックします。
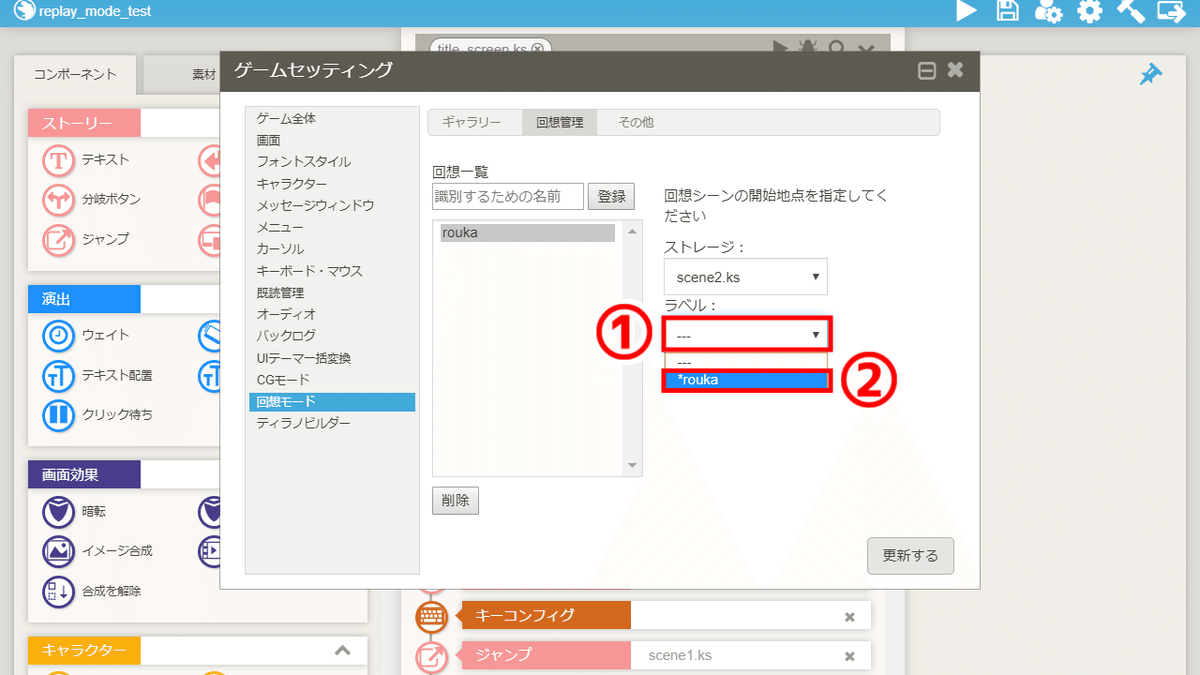
①ラベルと書かれている下の部分をクリックし、
②roukaをクリックします。

最後に、更新するをクリックしてください。
これで、回想シーンの登録は完了です。
④ビジュアルデザインツール画面を開く

ギャラリーをクリックします。
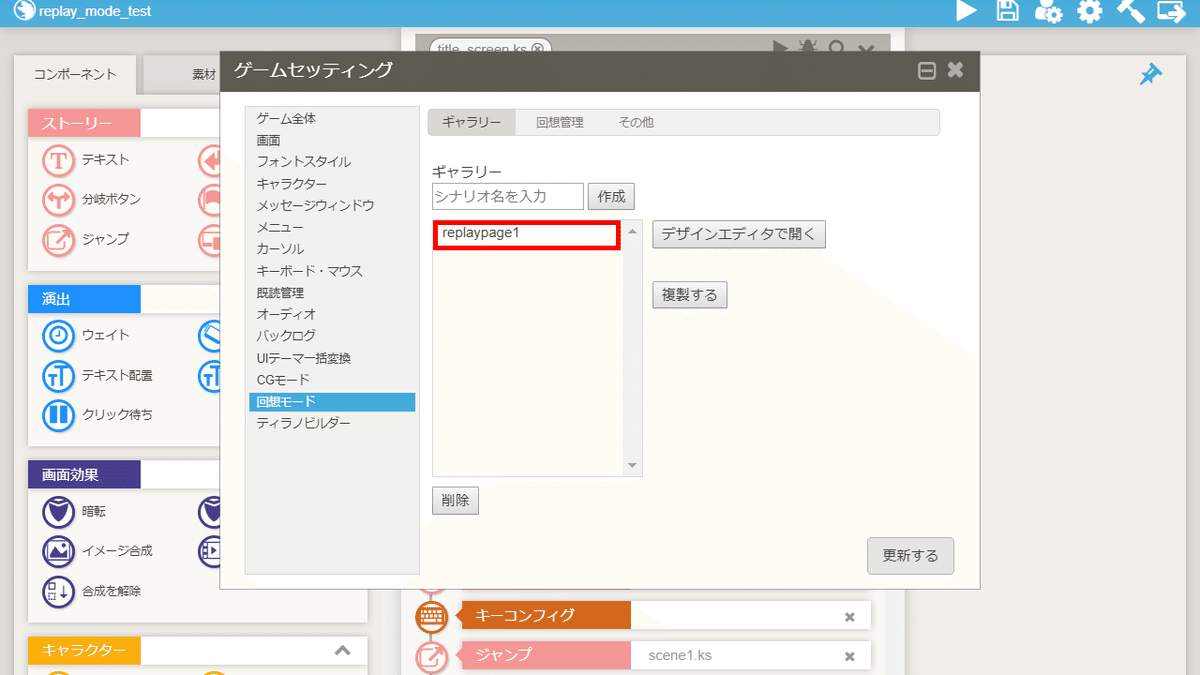
シナリオの名前をクリックします。

デザインエディタで開くをクリックします。
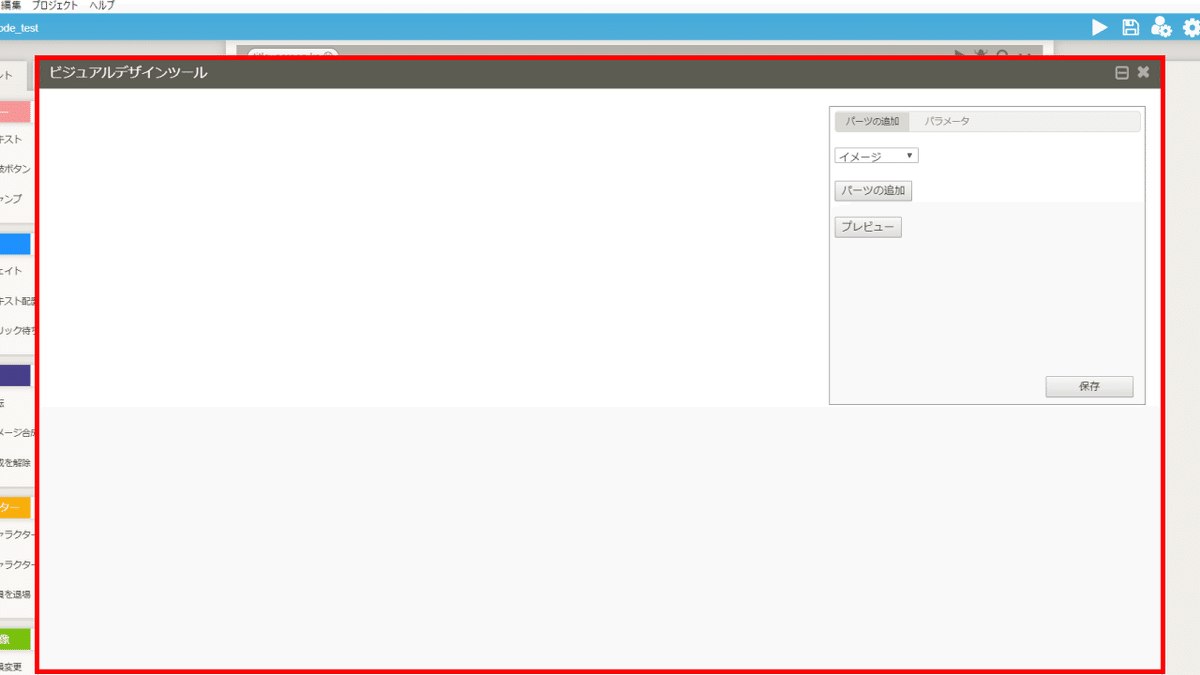
ビジュアルデザインツール画面が開かれます。
⑤背景の追加
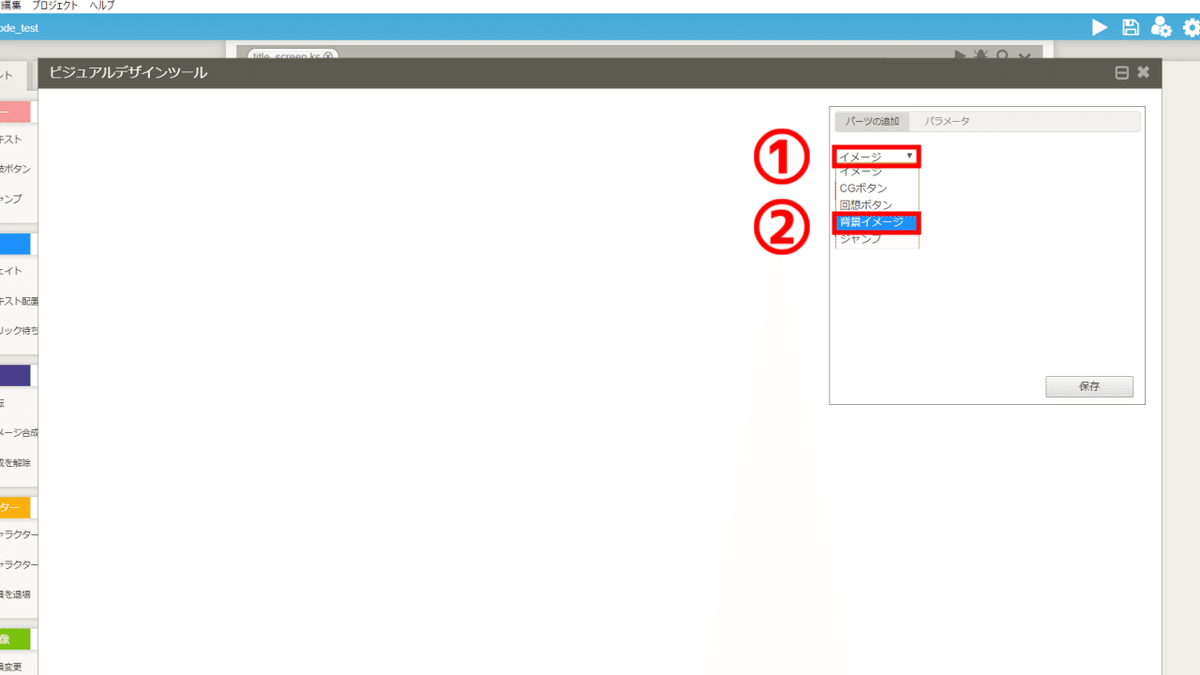
①イメージをクリックし、②背景イメージをクリックします。
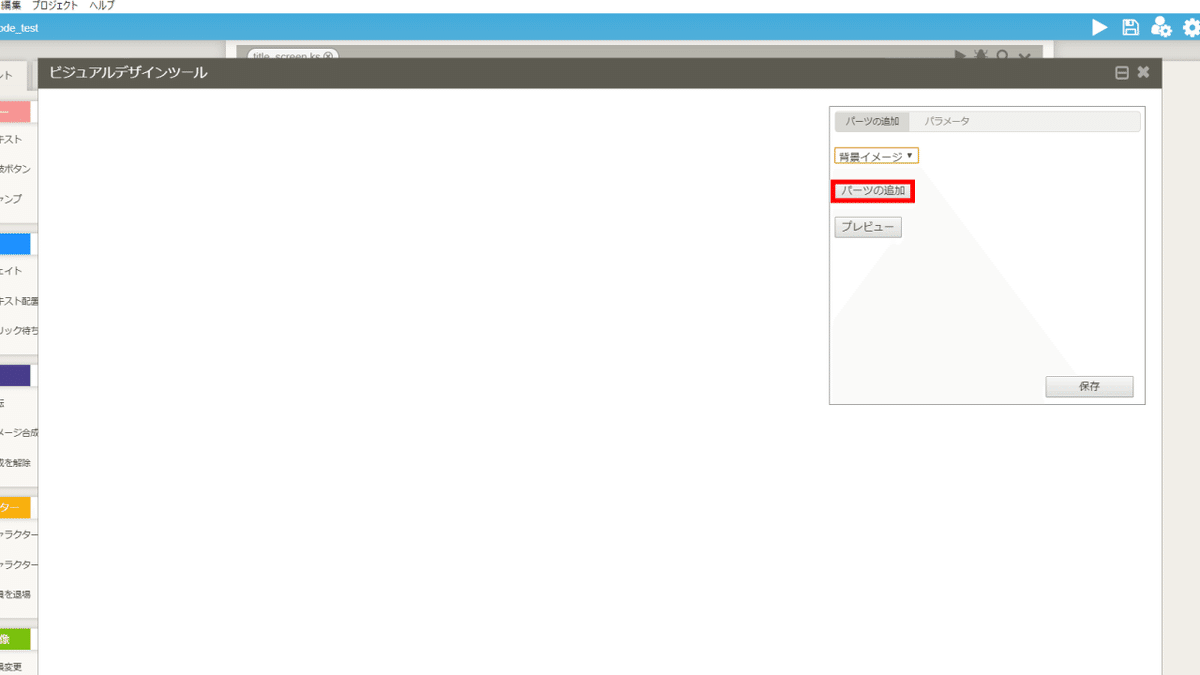
パーツの追加をクリックします。

背景が表示されました。
【参考】背景を変更する方法
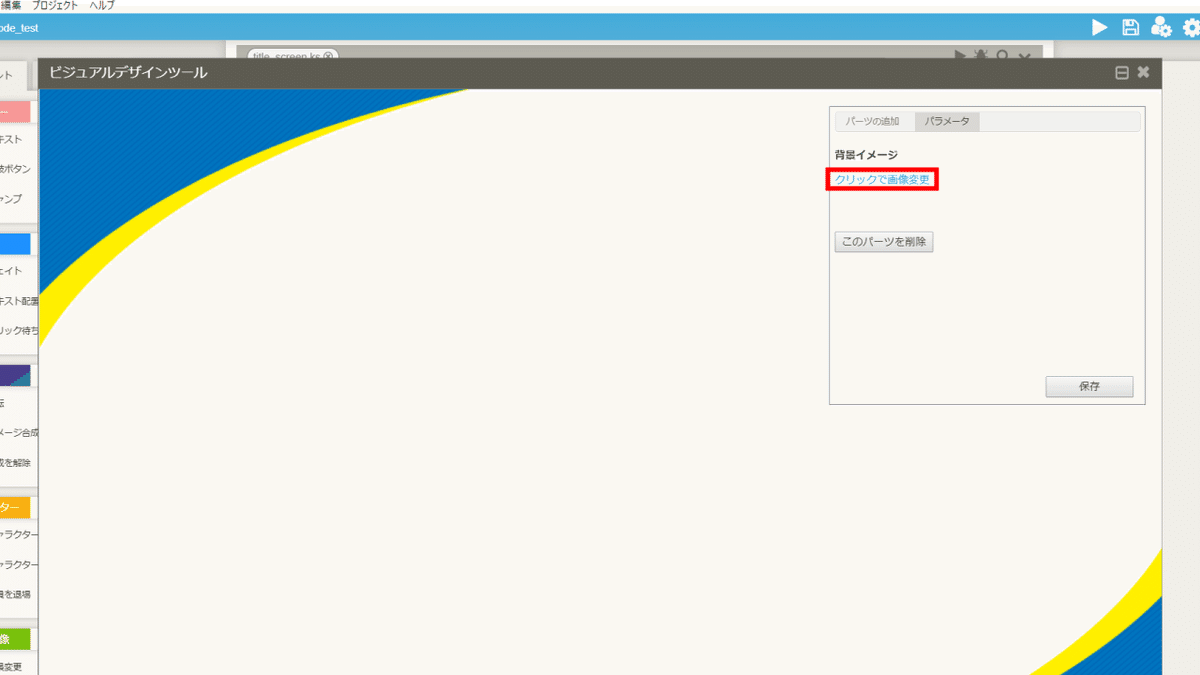
クリックで画像変更をクリックします。

イメージ選択画面が開かれます。お好みで背景を変更してください。
これで、背景の追加は完了です。
⑥回想ボタンの追加

パーツの追加をクリックします。

①背景イメージをクリックし、②回想ボタンをクリックします。

パーツの追加をクリックします。

回想ボタンが追加されました。

クリックで画像変更をクリックします。
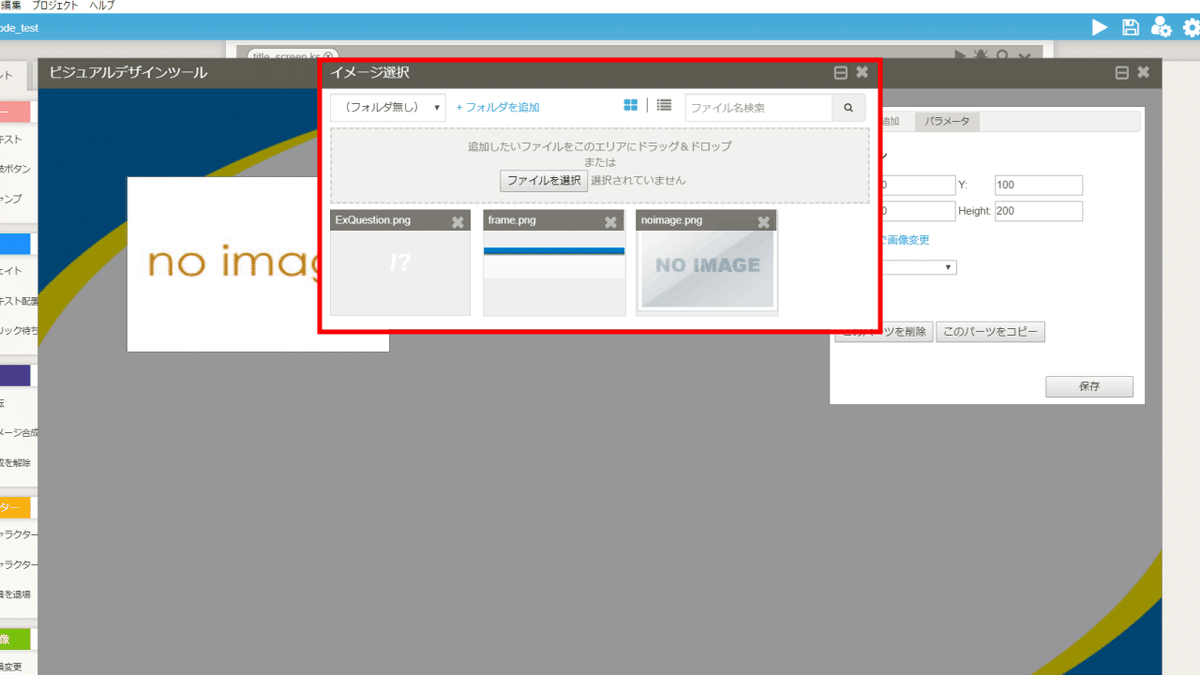
イメージ選択画面が開かれます。

画像を選択し終えたら、回想と書かれている右横の部分をクリックします。

登録した回想シーンを選択します。今回はroukaを選択します。
これで、回想ボタンの追加は完了です。
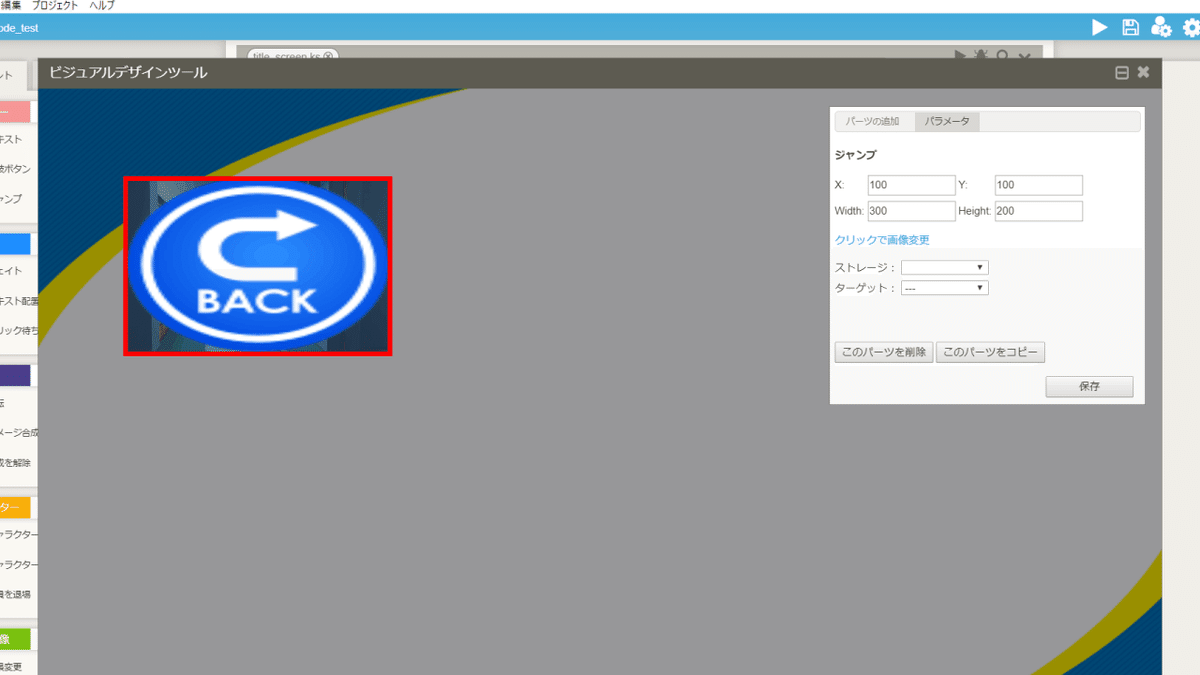
⑦タイトル画面に戻るボタンの追加

パーツの追加をクリックします。

①回想ボタンをクリックし、②ジャンプをクリックします。

パーツの追加をクリックします。

ボタンが追加されました。

クリックで画像変更をクリックします。
今回は、コンフィグ画面の戻るボタンを使用します。

イメージ選択画面が開かれます。
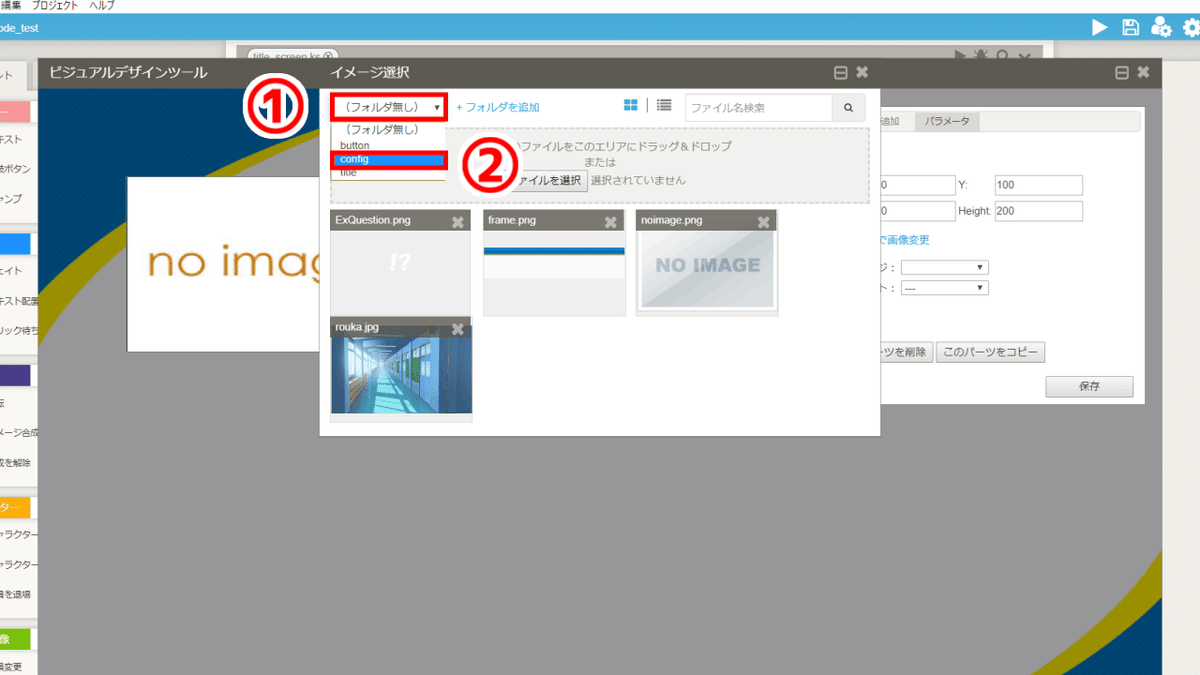
①フォルダ無しをクリックし、②configをクリックします。

c_btn_back.pngをクリックします。
画像が変更されました。

お好みで位置、サイズを変更してください。

①ストレージと書かれている右横の部分をクリックし、
②title_screen.ksをクリックします。
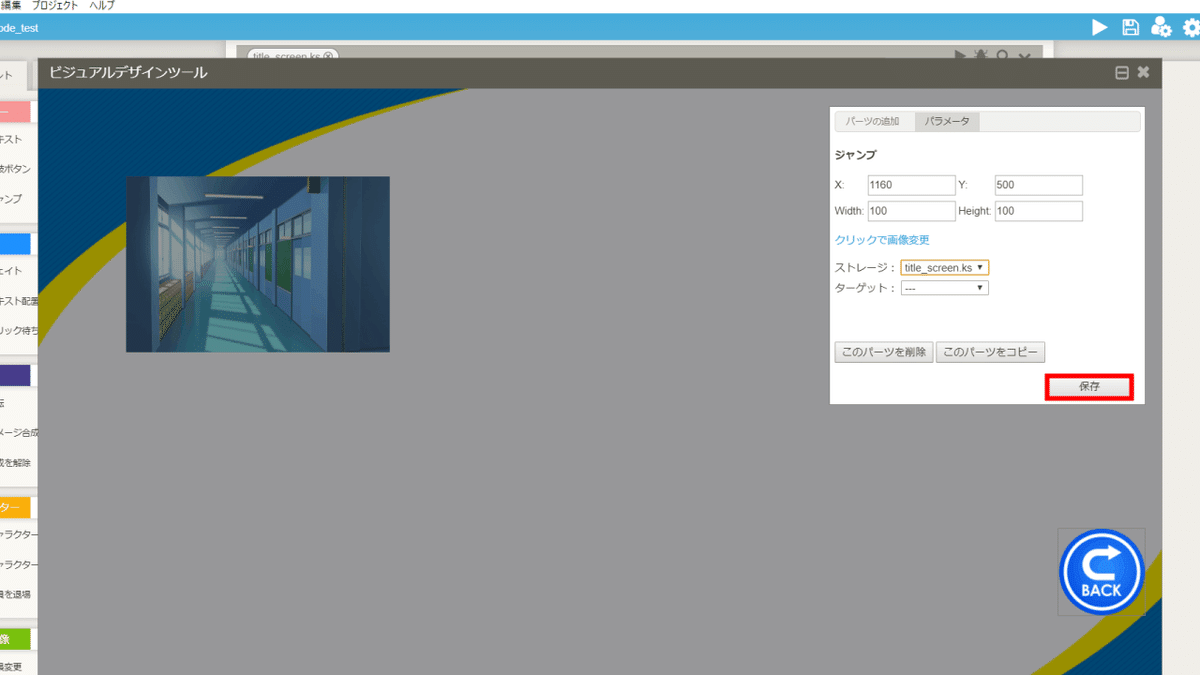
最後に、保存をクリックします。
保存し終えたら、ビジュアルデザインツール画面を閉じます。
これで、タイトル画面に戻るボタンの追加は完了です。
⑧回想ボタンの画像(未開放の状態)の変更
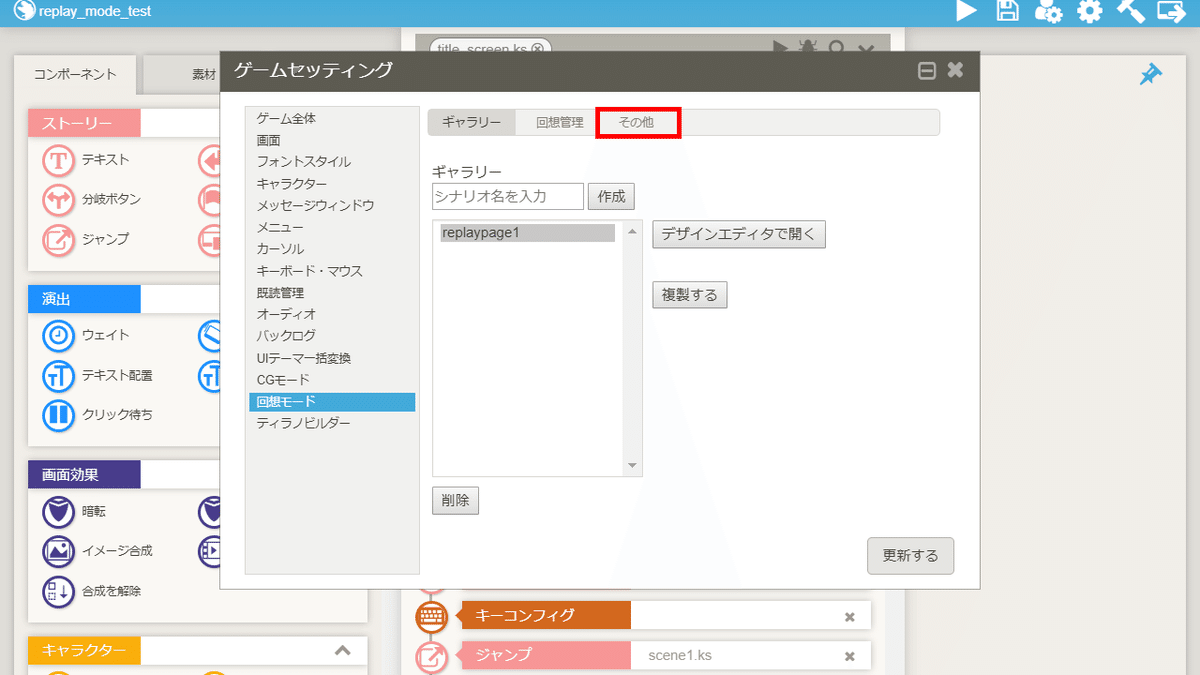
その他をクリックします。
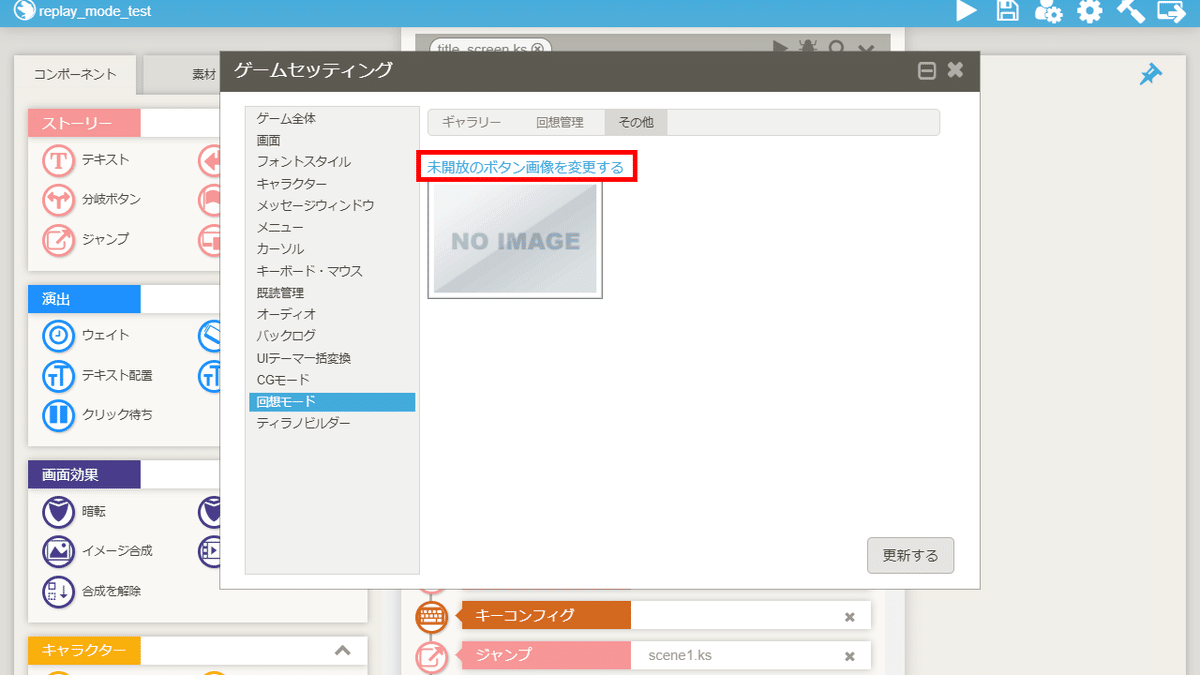
未開放のボタン画像を変更するをクリックします。
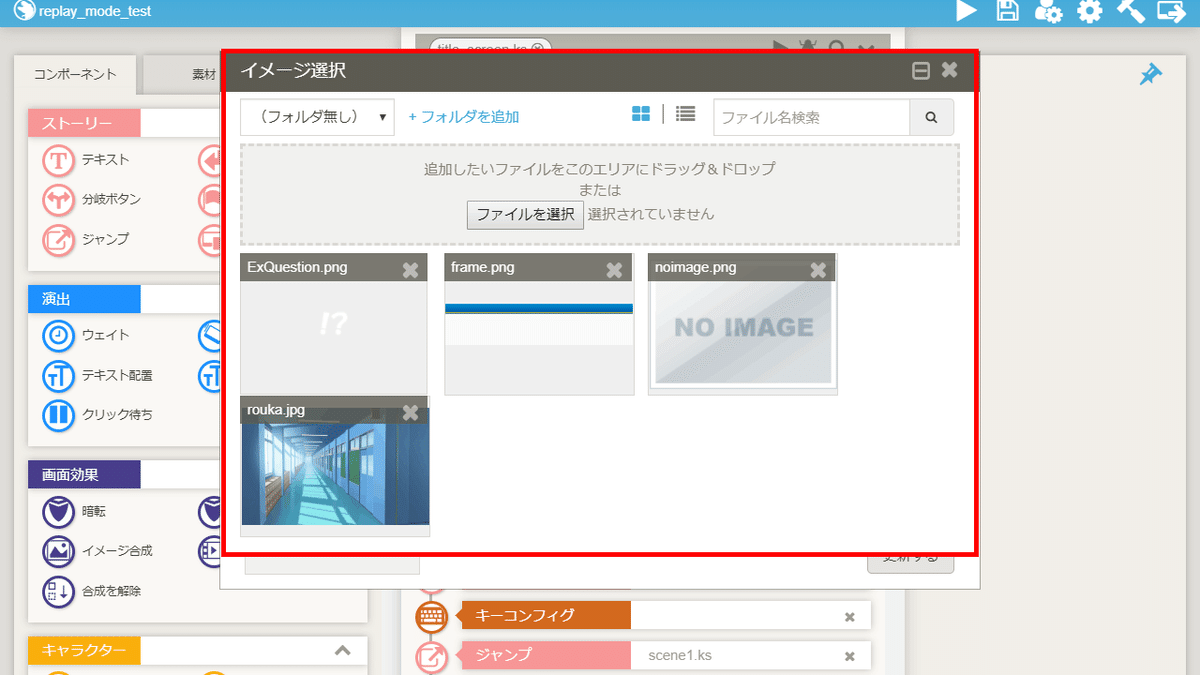
イメージ選択画面が開かれます。お好みで画像を変更してください。
最後に更新するをクリックし、ゲームセッティング画面を閉じます。
これで、回想ボタンの画像(未開放の状態)の変更は完了です。
⑨title_screen.ksの編集
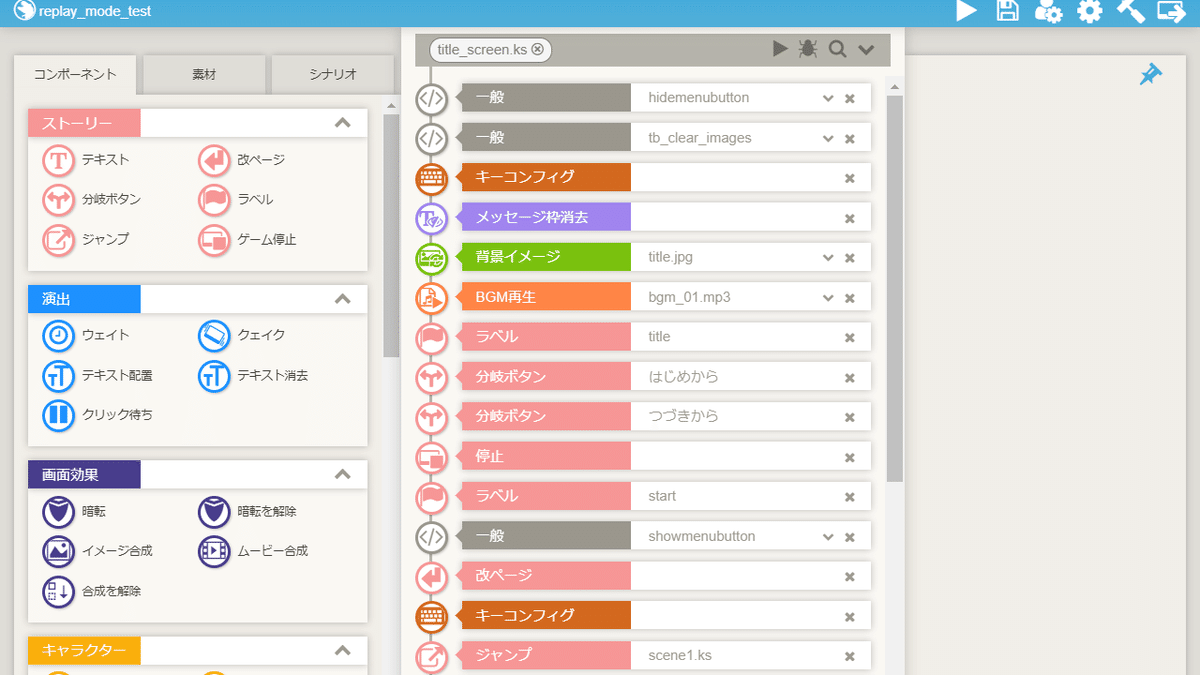
title_screen.ksを開きます。

①分岐ボタンコンポーネントを配置し、②replaypage1.ksを指定します。
これでtitle_screen.ksの編集は完了です。

上記の画像は、保存した後、プレビューで確認したものです。
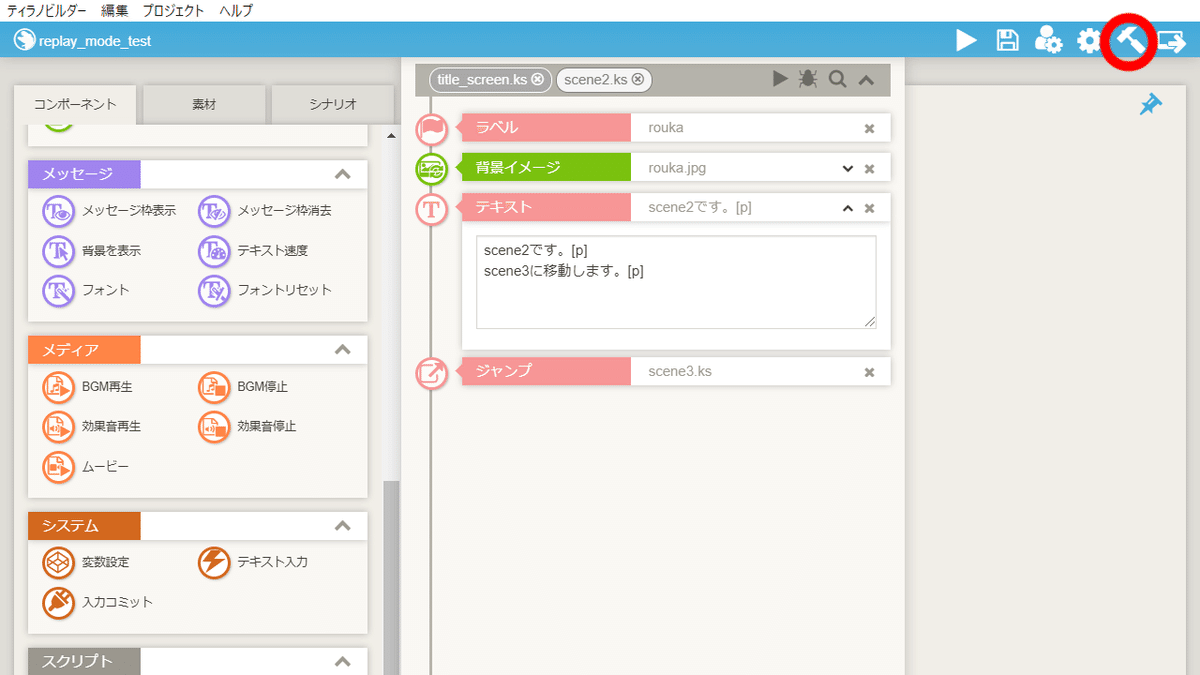
⑩scene2.ksの編集

scene2.ksを編集します。
⑩-(1) 回想シーンの開始・終了の処理
回想スタートコンポーネント・回想エンドコンポーネントを使用します。
【参考】コンポーネントが表示されていない場合
右上のアイコンをクリックします。

①回想スタートにチェックを入れ、
②回想エンドにチェックを入れ、
③適用するをクリックします。
最後に、コンポーネント管理画面を閉じます。

コンポーネントが表示されました。

回想スタートコンポーネントを配置します。
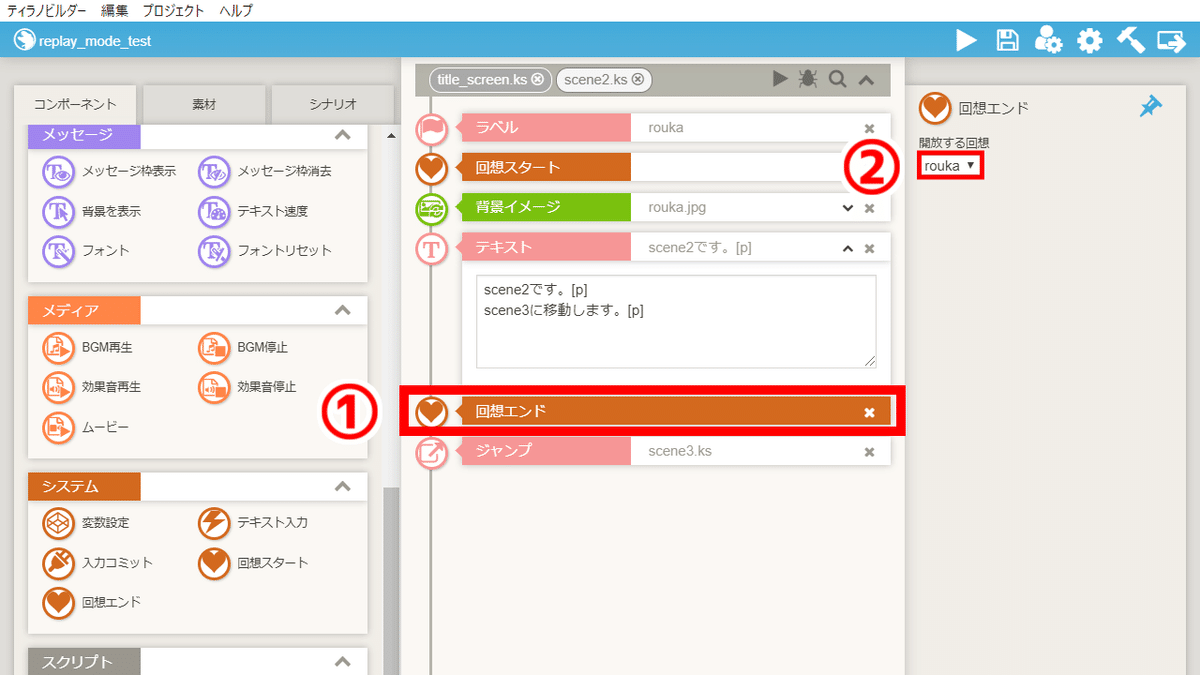
①回想エンドコンポーネントを配置し、②roukaを選択します。
これで、回想シーンの開始・終了の処理は完了です。
⑩-(2) 回想シーン開始時の処理
回想シーン開始時は、replaypage1.ksから移動したため、以下の状態になっています。
キーコンフィグが無効
scene1で再生したBGMが再生されていない
メッセージウィンドウが非表示
上記の状態を変更するため、回想モード中のみ処理を行います。

ティラノスクリプトコンポーネントを2つ配置します。
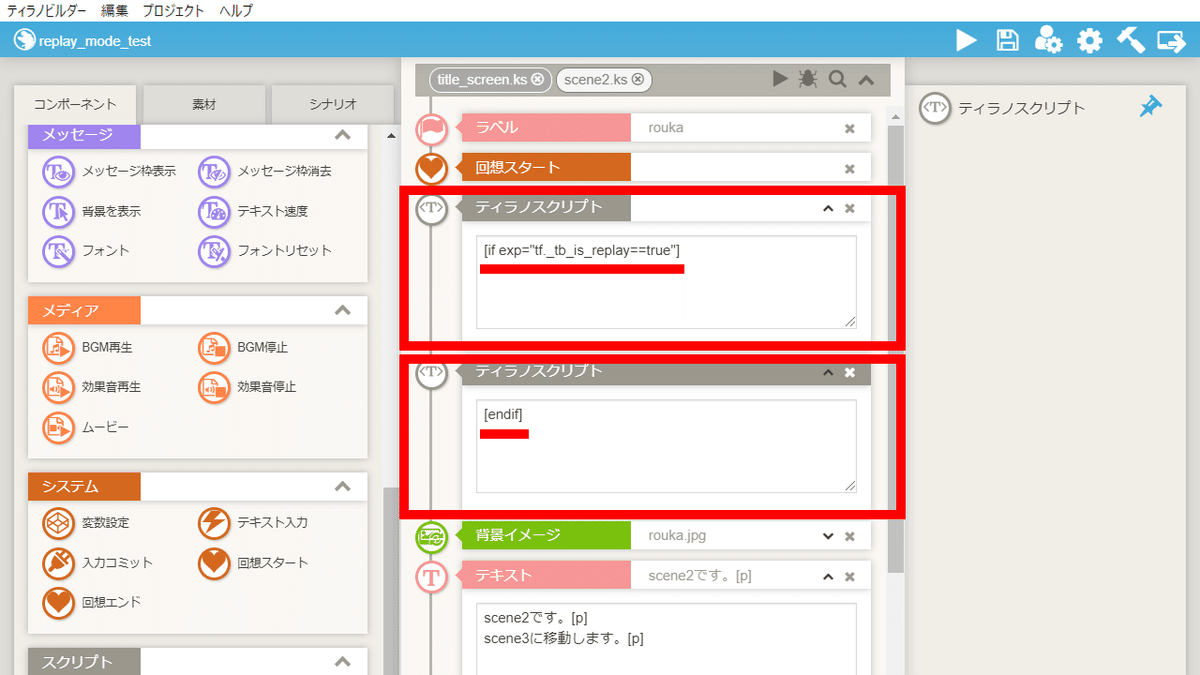
下記のコードを貼り付けます。
[if exp="tf._tb_is_replay==true"][endif]
キーコンフィグコンポーネントが非表示の場合は、コンポーネント管理画面で設定してください。
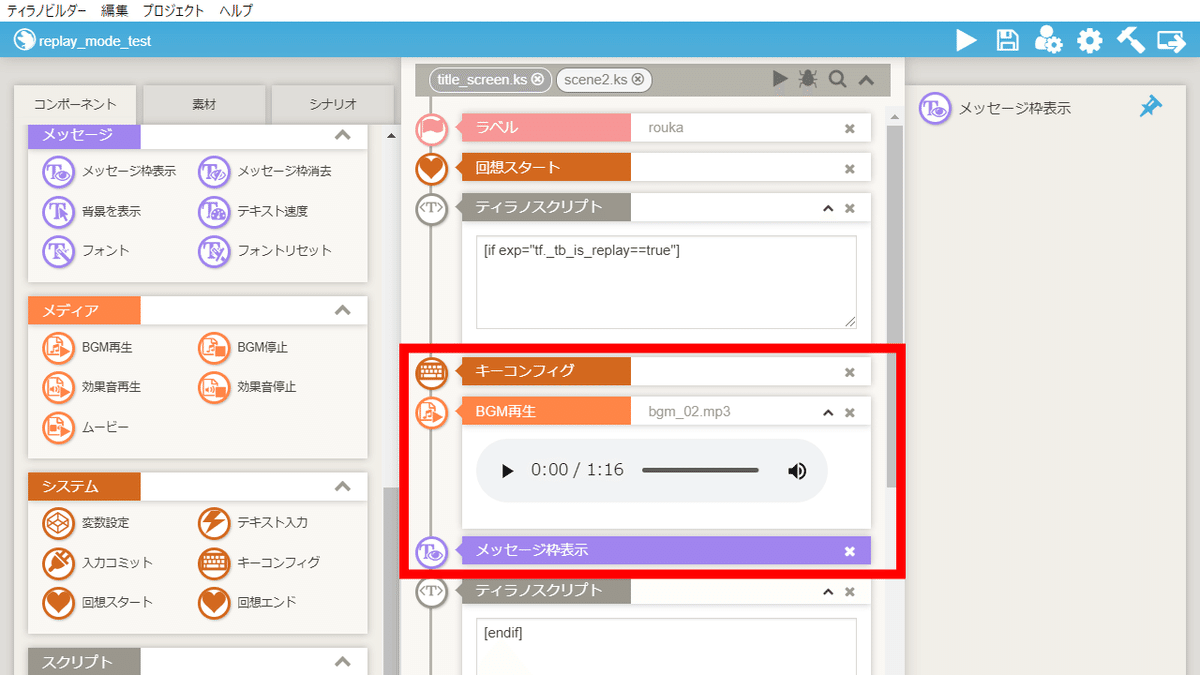
キーコンフィグコンポーネント、
BGM再生コンポーネント、
メッセージ枠表示コンポーネントを配置しました。
これで、回想シーン開始時の処理は完了です。
⑩-(3) 回想シーン終了時の処理
回想シーン終了時は、回想シーン内で再生したBGMがそのまま再生されている状態です。
回想シーン終了後、title_screen.ksで再生していたBGMを再生するように変更します。
上記の状態を変更するため、回想モード中のみ処理を行います。

ティラノスクリプトコンポーネントを2つ配置します。

下記のコードを貼り付けます。
[if exp="tf._tb_is_replay==true"][endif]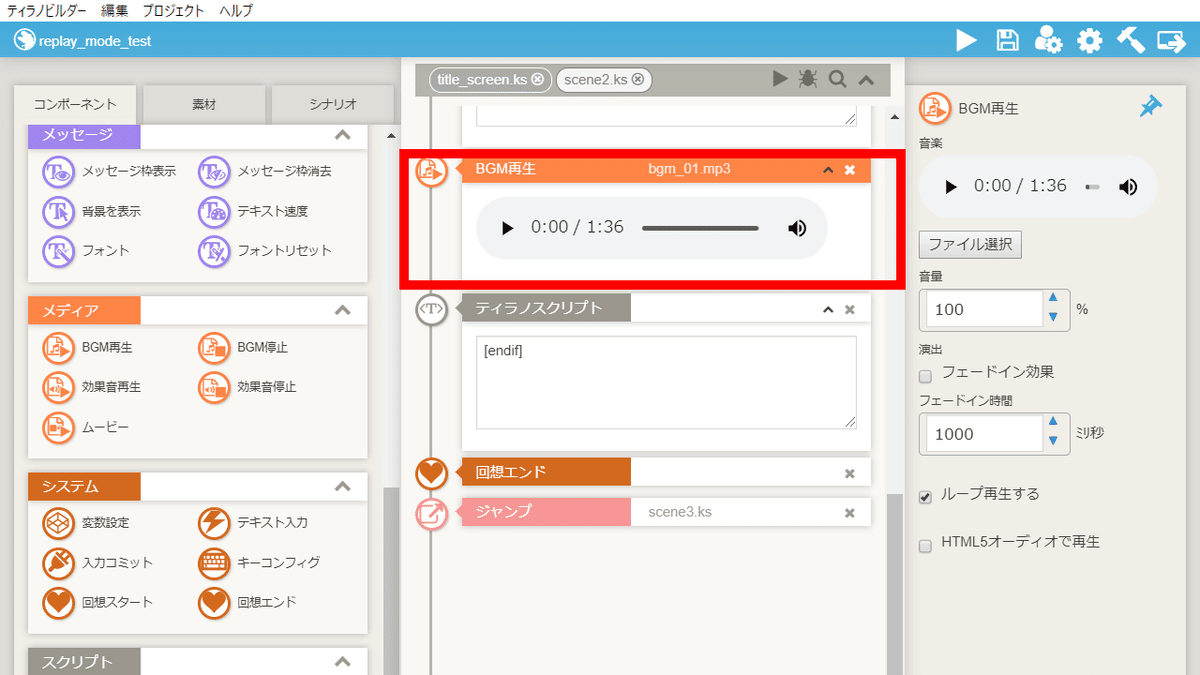
BGM再生コンポーネントを配置しました。
これで、回想シーン終了後の処理は完了です。
⑪title_screen.ksの編集
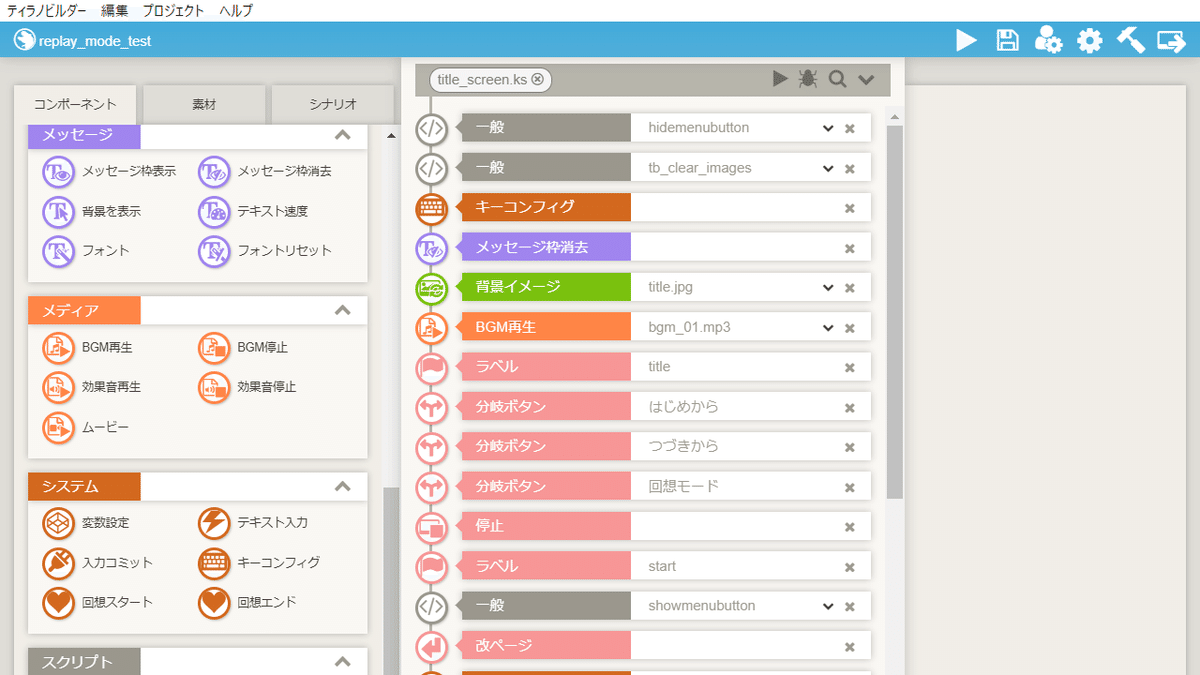
title_screen.ksを開きます。
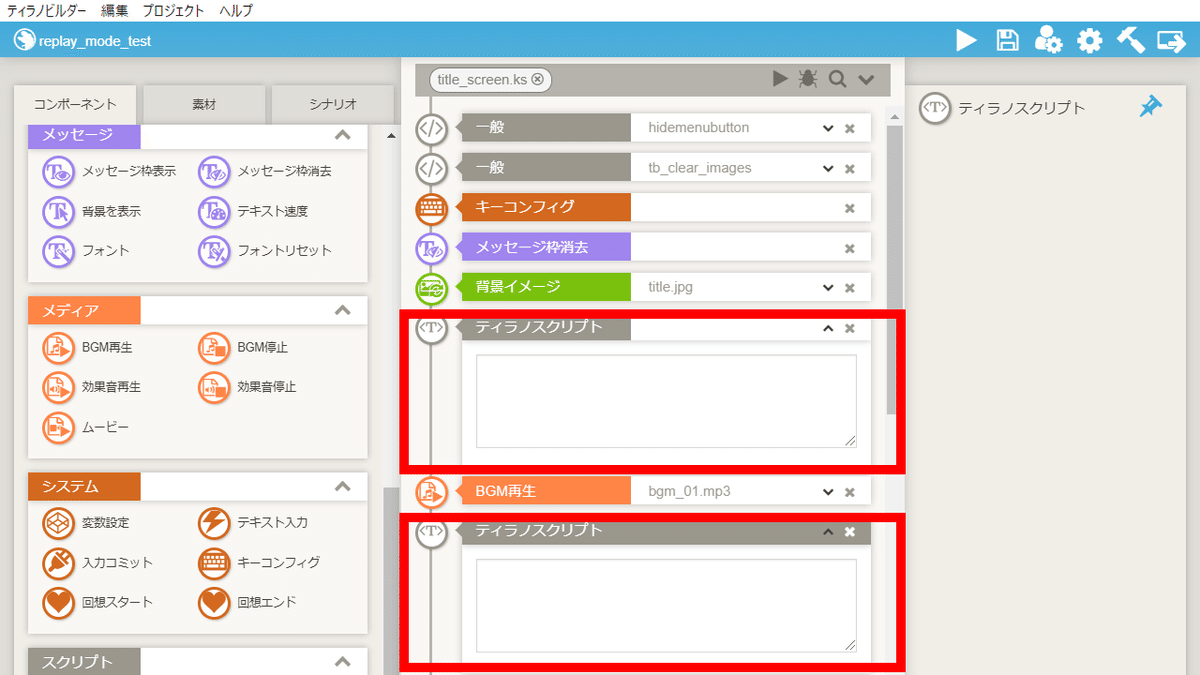
ティラノスクリプトコンポーネントを2つ配置します。

下記のコードを貼り付けます。
[if exp="TYRANO.kag.stat.current_bgm !== 'bgm_01.mp3'"][endif]これで、回想モードの作成手順は完了です。
【参考】初期化してもう一度確認したい場合
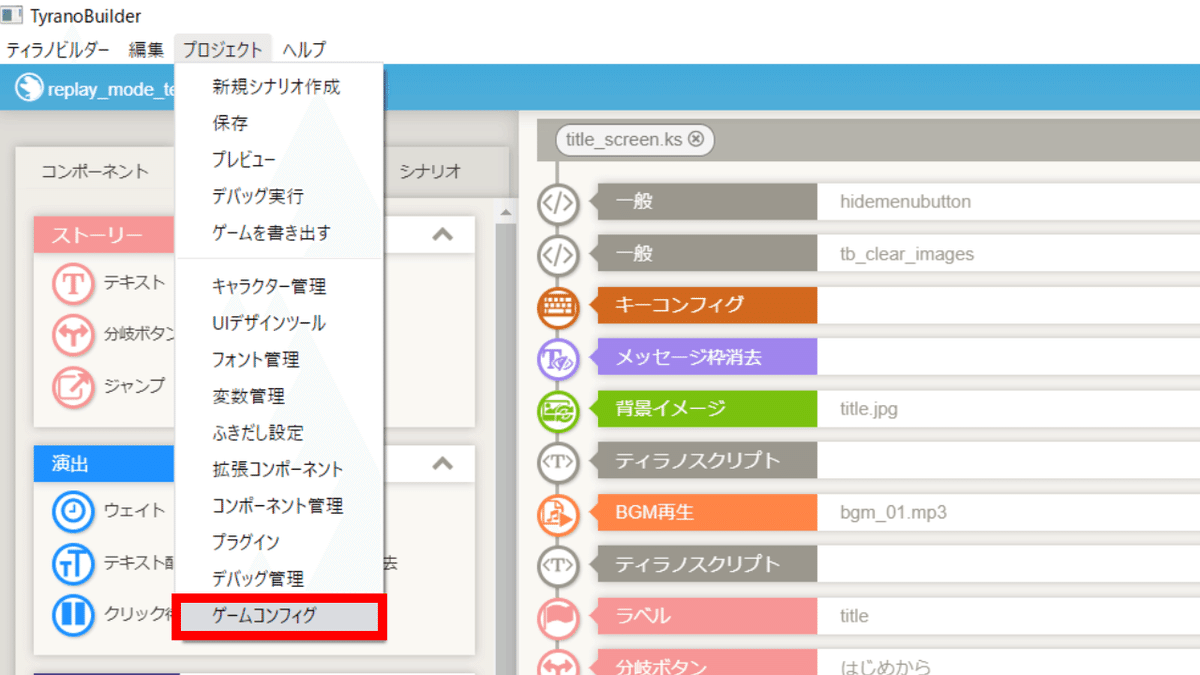
「プロジェクト」→「ゲームコンフィグ」をクリックし、ゲームセッティング画面を開きます。

メニューをクリックします。
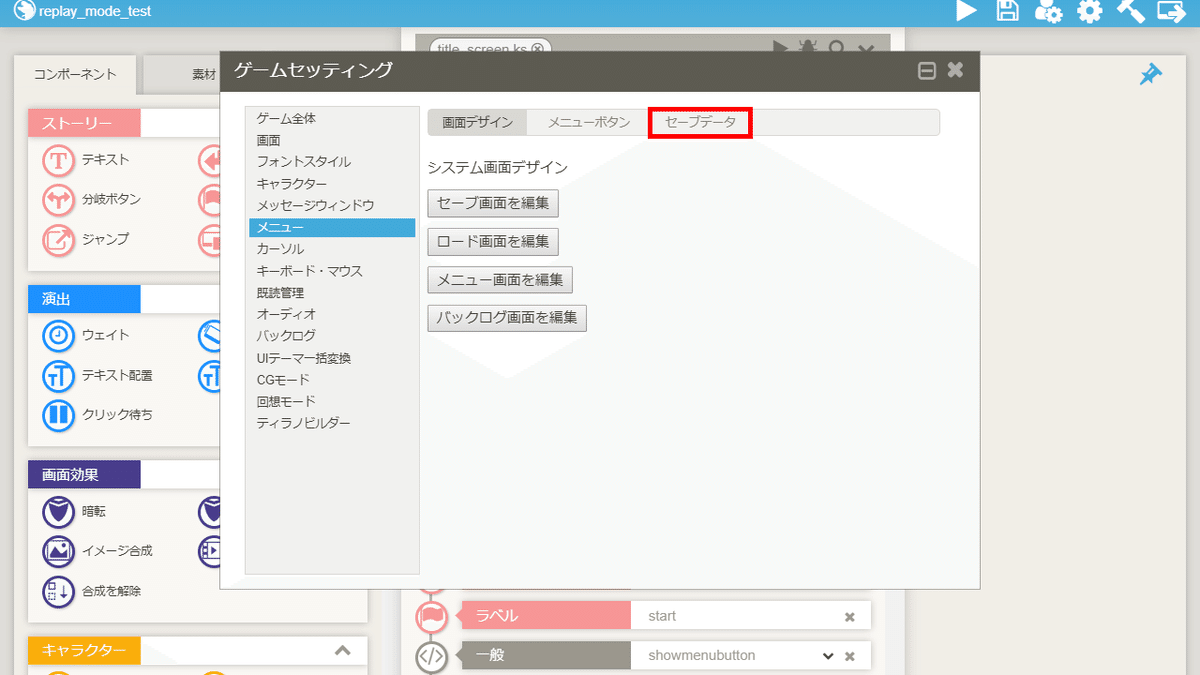
セーブデータをクリックします。

セーブデータを初期化するをクリックします。
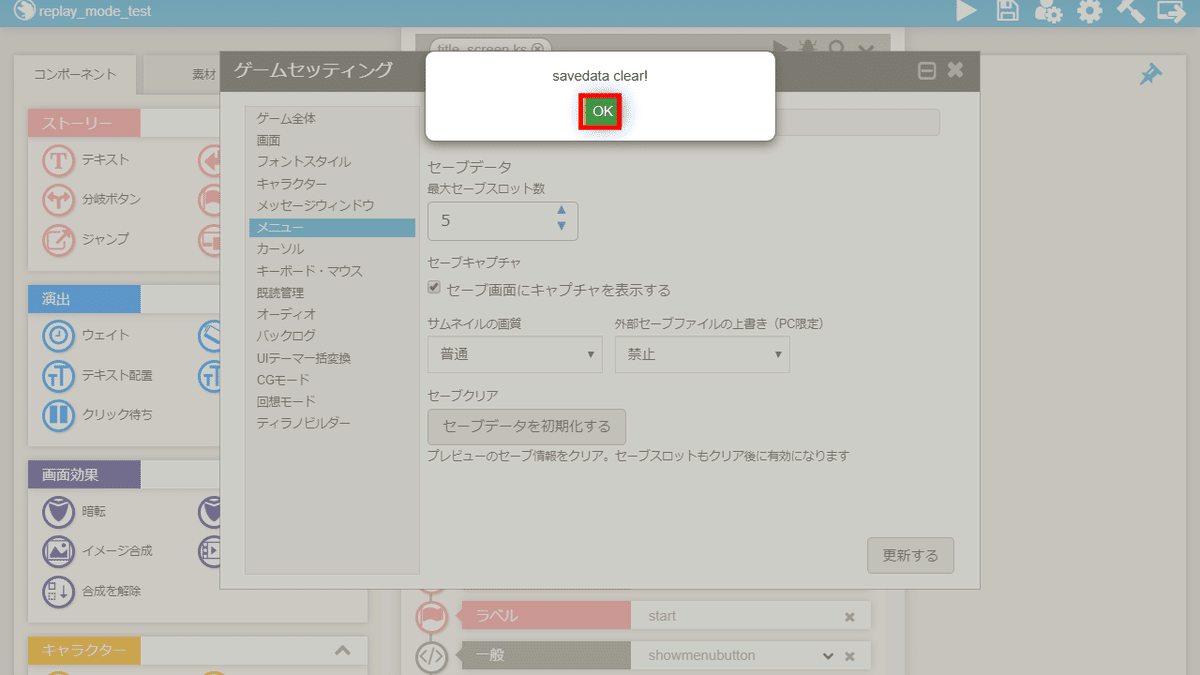
OKをクリックし、ゲームセッティング画面を閉じます。
これで、初期化は完了です。
以上で解説を終わります。おつかれさまでした。