
【Dify】悪用厳禁!!撮影した問題に回答してくれるAIを作る方法

問題文を撮影するとそれに回答してくれるAIの紹介です。
無料部分のみで作成方法まで公開しています。
例えば、以下のような専門知識が必要な問題に対して、

回答は以下のようになりました。
ちゃんと正解できています。
# 回答
2. Self Attentionは、同じ系列内の要素間の関係性を学習するためのメカニズムです

# 理由
Self Attentionについての理解が重要であり、それが正しい選択肢となる。

# 問題文
問題:
Transformerモデルのアーキテクチャについて、正しい説明はどれですか?

選択肢:
1. エンコーダーとデコーダーの間には、Cross Attentionメカニズムが存在しません
2. Self Attentionは、同じ系列内の要素間の関係性を学習するためのメカニズムです
3. デコーダーでは、未来の情報も参照できるBi-directional Attentionを使用します
4. Position Encodingは不要で、入力の順序情報は無視して処理を行います
内部ではGoogle検索を行って回答を生成しているので、ほとんどの問題に対して正確な回答を生成できます。
手軽に撮影→回答生成ができるのでスマホでのアクセスがおすすめです。
有料部分ではご自身の環境にインポートすれば利用できるようになるDSLファイルと、すぐに使える環境のURLを公開しています。
また、他にもDifyに関しては以下の記事を書いていますので、興味のある方はこちらも読んでみてください。
では解説を始めます。
作り方
ワークフローの流れは以下のとおりです。
画像から問題文を読み込む
Google検索のためのクエリを作成する
Google検索をする
回答を生成する
結果を出力する

一つずつ説明していきます。
1. 画像から問題文を読み込む

開始ノードには、入力フィールドとしてimagesを設定します。
フィールドタイプはSingle Fileではなく、File Listを選択し、複数の画像を入力できるようにします。
これにより、問題文を複数の画像に分けて撮影するような使い方ができるようになります。

問題読み取りには、gpt-4oを利用します。
gpt-4o-miniでもある程度は対応できるのですが、たまに読み取り精度が悪いことがあったので、gpt-4oを利用しています。
gemini-flashなども良い精度を出すことを確認しているので、geminiを使っても良いと思います。
設定パラメータは以下のとおりです。
(重要な部分のみ抜粋)
システムプロンプト
Your task is to extract the problem statement from the input image.
If there is more than one input image, extract one problem from multiple images.

If there are choices, please include them as well.
The language is Japanese.
ユーザープロンプト
Please read the problem statement accurately.ビジョン : 開始/images
解像度 : 低い

2. Google検索のためのクエリを作成する

検索クエリ作成にはgpt-4o-miniを使用します。
出力フォーマットを工夫し、miniでも十分な精度を出しています。
設定パラメータは以下のとおりです。
(重要な部分のみ抜粋)
モデル : gpt-4o-mini-2024-07-18
Response Format : json_schema
JSON Schema
{
  "name": "google_search_query",
  "description": "Schema for structuring a Google search query process and content.",
  "strict": true,
  "schema": {
    "type": "object",
    "properties": {
      "thought_process": {
        "type": "array",
        "items": {
          "type": "string"
        },
        "description": "Array of strings representing the thought process behind the search."
      },
      "query": {
        "type": "string",
        "description": "The actual search query to be executed on Google."
      }
    },
    "required": ["thought_process", "query"],
    "additionalProperties": false
  }
}
システムプロンプト
Your task is to think about the information you need to solve the problem statement and the Google search queries you need to use to obtain that information.
Please think about it step by step.
ユーザープロンプト
The problem statement is as follows.

{{問題読み込み/text}}
特に重要な部分はJSON Schemaです。
"thought_process"パラメータを用意することによって、ステップバイステップで出力するようになり、gpt-4o-miniでも精度の高い生成ができます。
JSON Schemaを使って出力精度を上げる方法については近い内に解説記事を作成しますので、興味のあるかたはフォローをお願いします。
検索クエリを生成したら、JSON PARSEを用いて抽出します。
以下のように設定するだけで、簡単に生成したJSONからqueryだけを抽出できます。

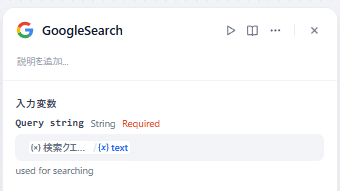
3. Google検索をする

Google Searchツールを使って検索を行います。
設定は超単純です。
Google Searchツールの出力はjson_objectなので、そのままでは次のブロックに渡せません。
そのため、テンプレートブロックを用いて、stringに変換します。

4. 回答を生成する

回答の生成にはgpt-4o-miniを使用します。
こちらもJSON Schemaを使用することにより、miniでも十分な精度を発揮しています。
設定パラメータは以下のとおりです。
(重要な部分のみ抜粋)
モデル : gpt-4o-mini-2024-07-18
Response Format : json_schema
JSON Schema
{
  "name": "answer_to_problem",
  "description": "Schema for structuring the answer to a problem with accompanying thought process and summary.",
  "strict": true,
  "schema": {
    "type": "object",
    "properties": {
      "thought_process": {
        "type": "array",
        "items": {
          "type": "string"
        },
        "description": "Array of strings representing the thought process behind arriving at the answer."
      },
      "thought_process_summary": {
        "type": "string",
        "description": "A clear, concise summary explaining why this answer was chosen. The explanation should be understandable to a third party and output in Japanese."
      },
      "answer": {
        "type": "string",
        "description": "The answer to the problem, to be output in Japanese."
      }
    },
    "required": ["thought_process", "thought_process_summary", "answer"],
    "additionalProperties": false
  }
}
システムプロンプト
Your task is to answer the question.
Please think about it step by step based on the information in the context.

The question format is either free response, true/false quiz, or multiple choice.

==context==
{{テンプレート.output}}
ユーザープロンプト
{{問題読み込み.text}}
回答結果だけでなく、思考過程も出力させることによって精度を高めるとともに、後から回答が正しかったかどうかを検証することができます。
5. 結果を出力する

これまでに出力した、回答、回答理由、問題文を見やすいフォーマットで出力させます。
まず、JSON PARSEを用いて、回答生成の結果からthought_process_summaryとanswerを抽出します。


最後にテンプレートブロックで、出力フォーマットを指定し、終了ブロックで出力します。


性能検証
試しに、生成AIパスポートのテキストの問題をランダムに10問抽出し解かせてみたところ、全問正解しました。
かなり実用的な性能を出せていると思います。
有料部分について
有料部分では、このアプリを作成するためのDSLファイルと、すぐに使用できる環境のURLを貼り付けています。
購入するときは以下の点に注意してください。
有料部分にはすぐに使える環境のURLが含まれていますが、この環境の永続的な利用を保証するものではありません
URLの環境は筆者の都合でユーザーへの説明なく使えなくなる可能性があります
永続的に使用したい場合は、ご自身で管理しているDify環境にアプリを構築してください
DSLファイルは筆者の環境で動作確認をしていますが、ユーザーの環境での動作を保証するものではありません
利用にはOpenAI APIとGoogle Searchが使えるDify環境が必要です
ここから先は
この記事が気に入ったらチップで応援してみませんか?