Photo by
blue_69
Flutterでナビゲーションドロワーを実装する
初めましてblueです。
現在、ITベンチャー企業でWEBキャンペーンシステムの運用並びに要件定義、ECサイトの開発を行っています。
今回はFlutterでナビゲーションドロワーを実装する方法について記事にしてみました!
ナビゲーションドロワーとは
ナビゲーションドロワーとは、モバイルOS「Android」およのAndroidアプリにおいて、ナビゲーションメニューの表示に用いられるドロワーのこと、ドロワーの形で導入されたナビゲーションメニューのことである。
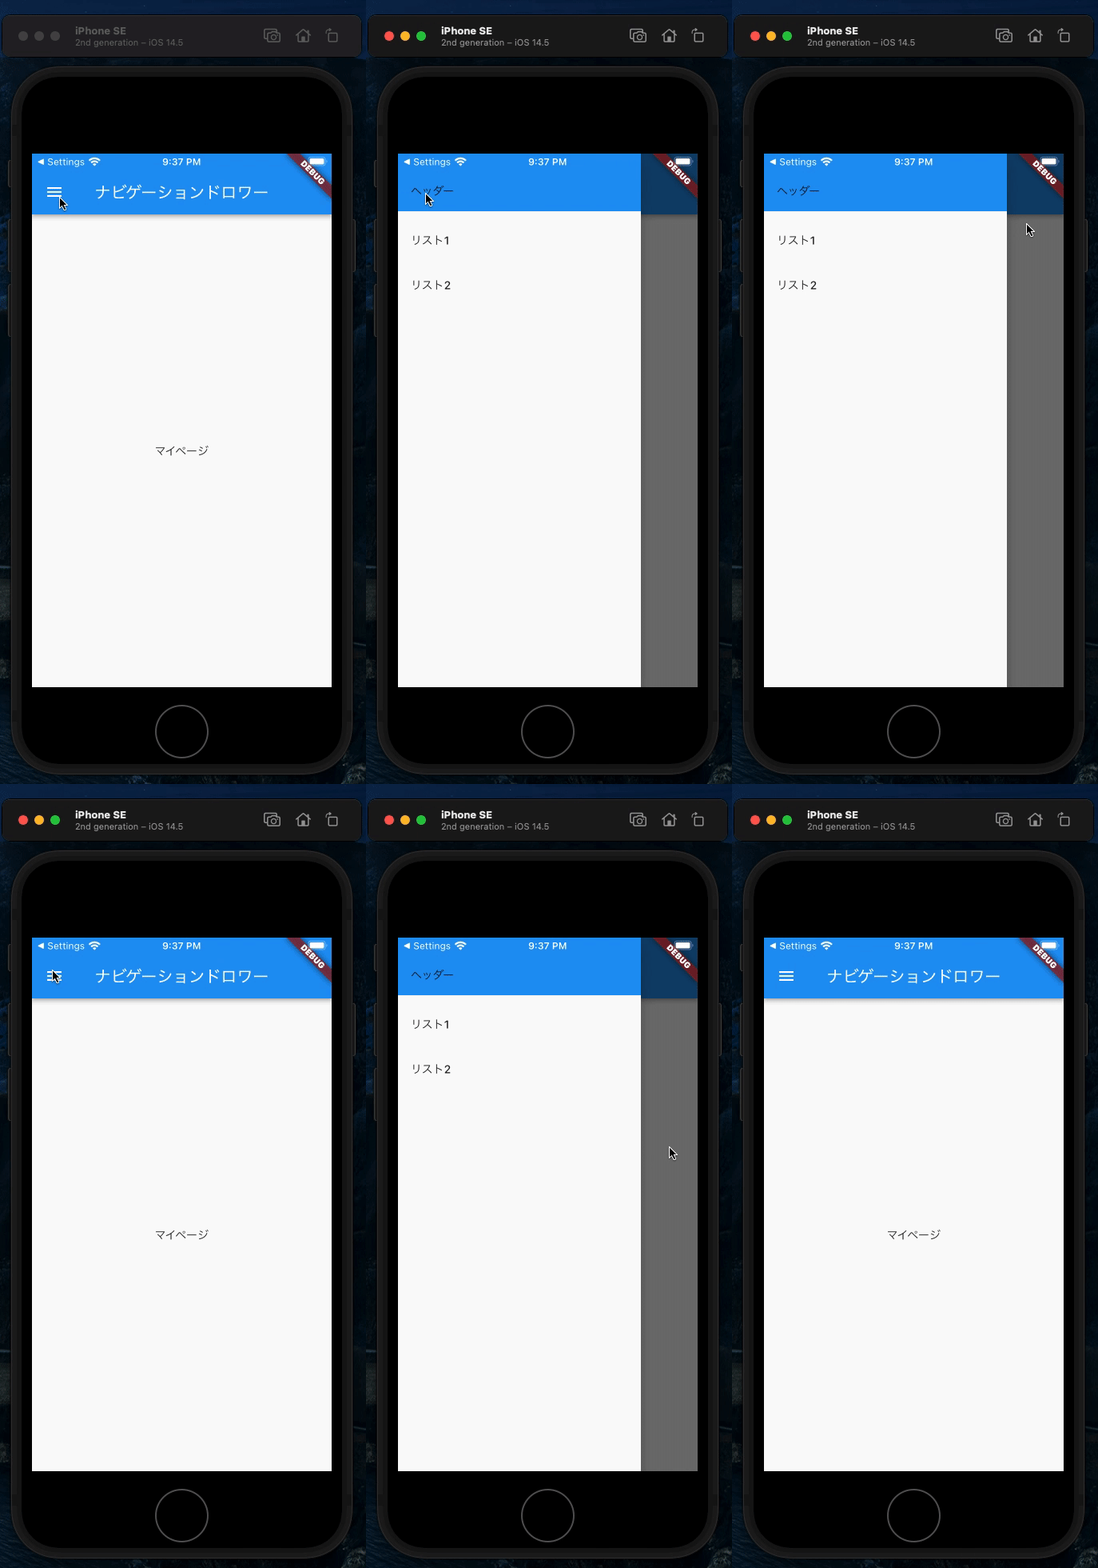
要はこんなやつのことです

使用するメソッド
実装コード
drawer: Drawer(
  child:
)
これでドロワーが作成されます。
全体コード
import 'package:flutter/material.dart';

void main() => runApp(const MyApp());

class MyApp extends StatelessWidget {
 const MyApp({Key? key}) : super(key: key);

 static const appTitle = 'ナビゲーションドロワー';

 @override
 Widget build(BuildContext context) {
   return const MaterialApp(
     title: appTitle,
     home: MyHomePage(title: appTitle),
   );
 }
}

class MyHomePage extends StatelessWidget {
 const MyHomePage({Key? key, required this.title}) : super(key: key);

 final String title;

 @override
 Widget build(BuildContext context) {
   return Scaffold(
     appBar: AppBar(title: Text(title)),
     body: const Center(
       child: Text('マイページ'),
     ),
     drawer: Drawer(
       child: ListView(
         padding: EdgeInsets.zero,
         children: [
           const SizedBox(
             height: 80,
             child: DrawerHeader(
               decoration: BoxDecoration(
                 color: Colors.blue,
               ),
               child: Text('ヘッダー'),
             ),
           ),
           ListTile(
             title: const Text('リスト1'),
             onTap: () {
               Navigator.pop(context);
             },
           ),
           ListTile(
             title: const Text('リスト2'),
             onTap: () {
               Navigator.pop(context);
             },
           ),
         ],
       ),
     ),
   );
 }
}
実装画面

いいなと思ったら応援しよう!

