
YOYOGIMORIアバターのYMtoon→liltoonへの置き換え(服&肌編)

更新履歴
2024/10/26 投稿
概要
この記事では、YOYOGIMORIアバターで使用されるYMtoonをliltoonに変換する際の手順についてメモ的な感じで書いていきます。
基本的な手順は、髪と一緒ですので以前書いたこちらも参考にしてください。以前と同じところはざっくり説明してます。
注意
あくまで私流のやり方でこれが正しい方法であるという保証は全くないです。改変素人の記事ですので間違ってる可能性が大いにあります。許してね。もっと良い方法があるって方はそっとスルーしていただけると嬉しいです。(教えてください。)
事前準備
Unity ver.2022.3.22f1
Clip studio paint(PSDファイルが扱えるソフトであれば可能だと思います)
YMtoonとliltoonを事前にプロジェクトにインポートしておいてください。
マテリアル作成
ここではContainerちゃんの服を例に解説します。
1.元のマテリアルの複製&ShaderをLitoonに変える

2.変えるとこんな感じ

マスク・ノイズテクスチャの作成
1.改変用テクスチャをダウンロード
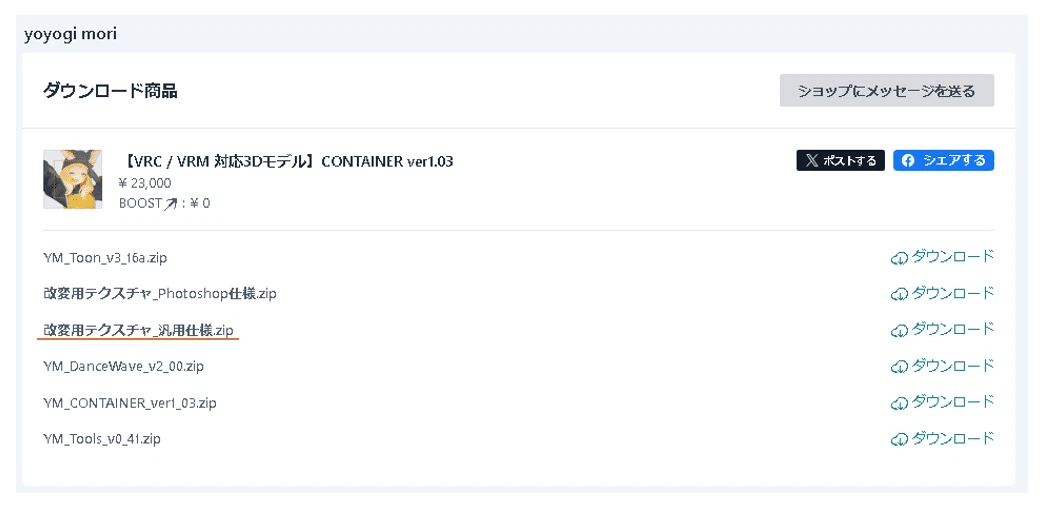
2.使うテクスチャ一覧
opt.psdはアウトラインマスク用。spe_opt.psdは光沢設定やリムライト用です。(多分)

3.アウトライン用マスクの作成
opt.psdを編集ソフトにインポート
G Outlineのみを書き出し

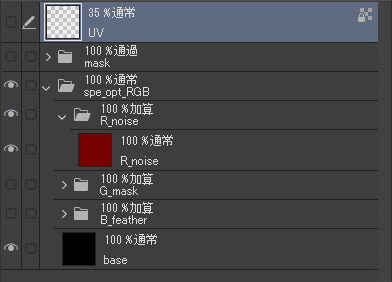
4.ノイズテクスチャ/マスクの作成
spe_opt.psdを編集ソフトにインポート
R_noiseとG_maskを同様に書き出し

それぞれ作成出来たらマテリアルの調整にはいります。
マテリアルの調整
1.基本設定
Cull Modeは今回はBackでいいと思います。裏面の透けが見える場合はoffにしましょう。

2.ライティング・明るさ設定
ライト方向のオーバーライドの値を変更する

3.影設定
影色のテクスチャは、元のT_○○_○○_a_clo_shdとかを設定してあげます。
範囲やぼかしなどを調整して好みの影を表現してください。


4.ノーマルマップ
ある場合はせっていしてあげましょう。0.5くらいがおすすめ。

5.光沢設定(反射)
滑らかさ/先ほど作成したR_noiseテクスチャを設定
金属度/先ほど作成したG_maskテクスチャを設定
色・マスク/もともとある、T_○○_○○_a_clo_spe.psdを設定する
合成モードは加算です
反射率、範囲、ぼかしなどをうまくいじってあげましょう。

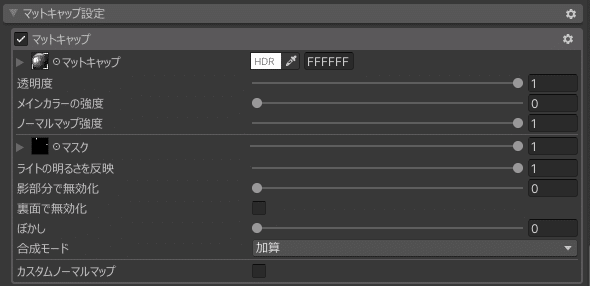
6.マットキャップ
ある場合は設定してあげましょう。マスクも用意されているはずです。
今回はContainerの衣装の金属部品用です。

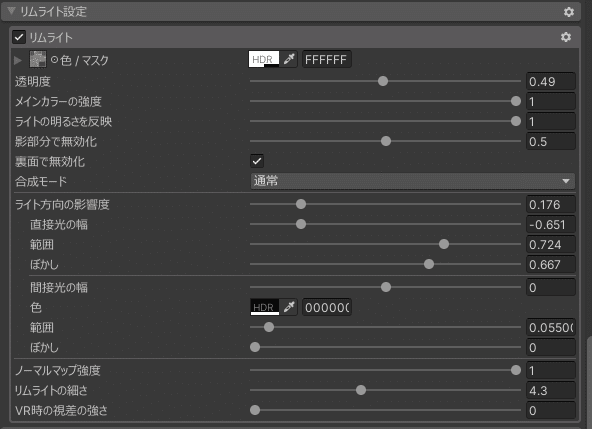
7.リムライト
色/マスク→T_○○_○○_a_アバター名_hair_spe.tgaを設定してあげましょう。
数値はSceneみながらいろいろいじって調整してください。画像は一例です。
8.輪郭線
マスクと太さ→作成したOutline用のマスクを設定してあげます。
色や太さをお好みで調整してください。

9.完成!

VRC上での見た目
後で載せます

