PCでPWMを生成してラジコンサーボを動かそう

今回は、H/Wの追加をほとんどせずにサーボを動かす実験です。マイコンでは簡単にPWMでラジコンやロボットのサーボを動かすことが出来ますが、OSでH/Wを保護されているPCではGPIOへのアクセシスが困難ですし、sもそもM/BにGPOIが出ていることはほぼありません。今回はGPIOを使わずに動かす方法です。多分、この方法しか無いと思います。
PC-Speakerは8253/8254タイマのチャネル2につながっている
8253/54はカウンタ/タイマLSIで初期のPC-XT/ATからずっと使われています。レガシーファンクションとして今ではお荷物のようになっていますが、デファクトスタンダードとしてAT互換機には必ず内蔵されています。現在の多くのPCで搭載されているWindopwsやLinuxではハードウエアを直接操作することはとても危険ですけど、Rasbery-Piは平気でハードウエアをプログラミングしています。そうしないと様々なセンサーやペリフェラルが使えないからです。さてWindowsやLinuxが動いているPCでPWM出力を得るにはどうすればいいでしょう? 組み込み用ではGPIO専用のUSBドングルやPCIeカードがあリます。でも、一つだけ方法があります。前述の8253/54タイマのch2をプログラミングする手です。
PC-Speakerはどうなっているか
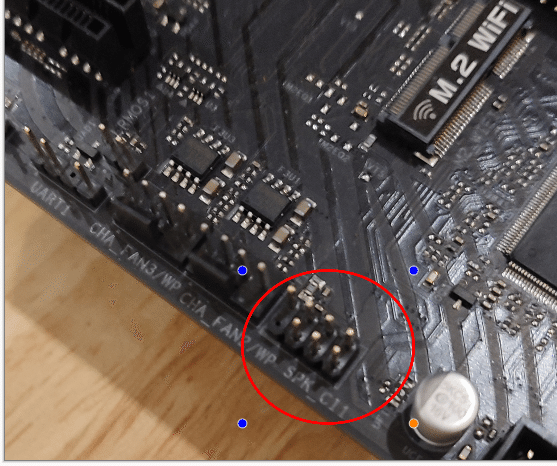
マザーボードには以下のようなコネクタが必ずあります。赤の丸の中、SPKと書かれたコネクタです。組み上がったPCではスピーカ又はブザーが繋がれています。今回はここを使います。ビープ音は余程のことがない限り重要な機能ではないので、スピーカやブザーは抜いてしまいます。
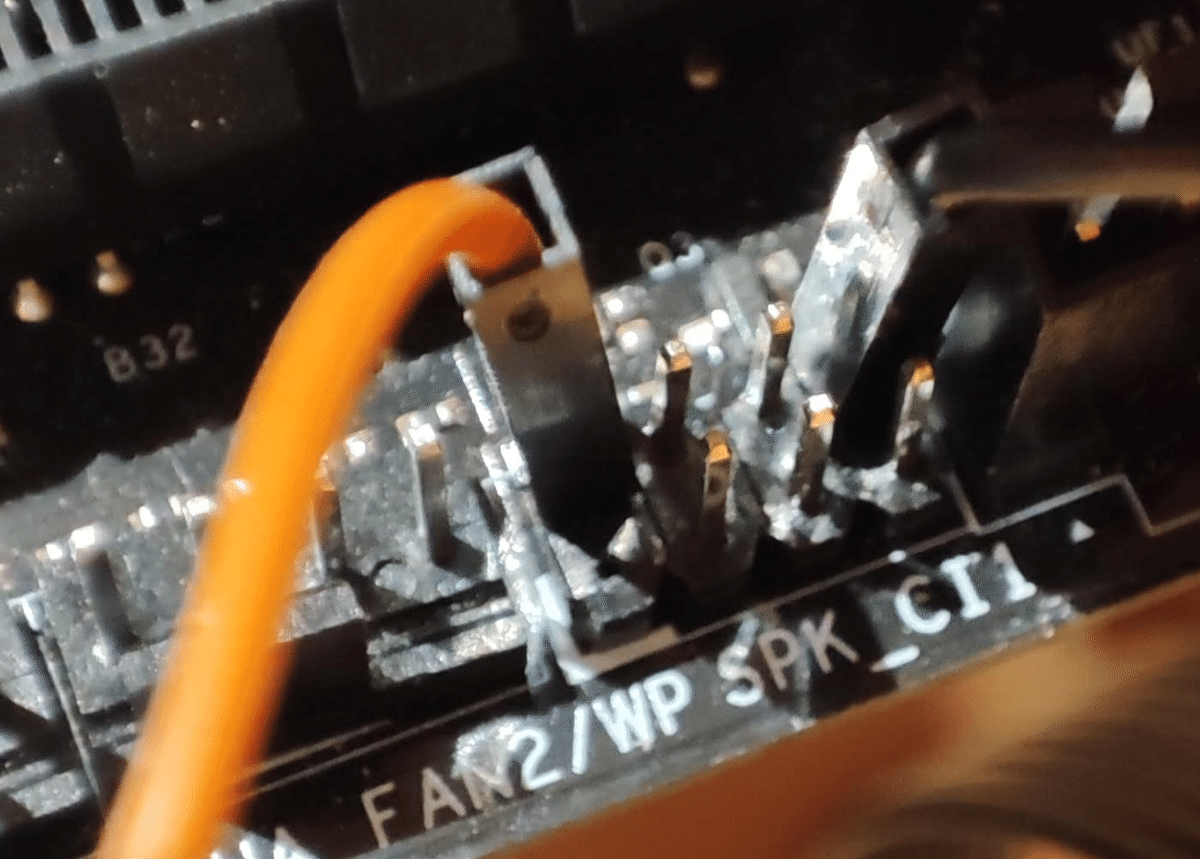
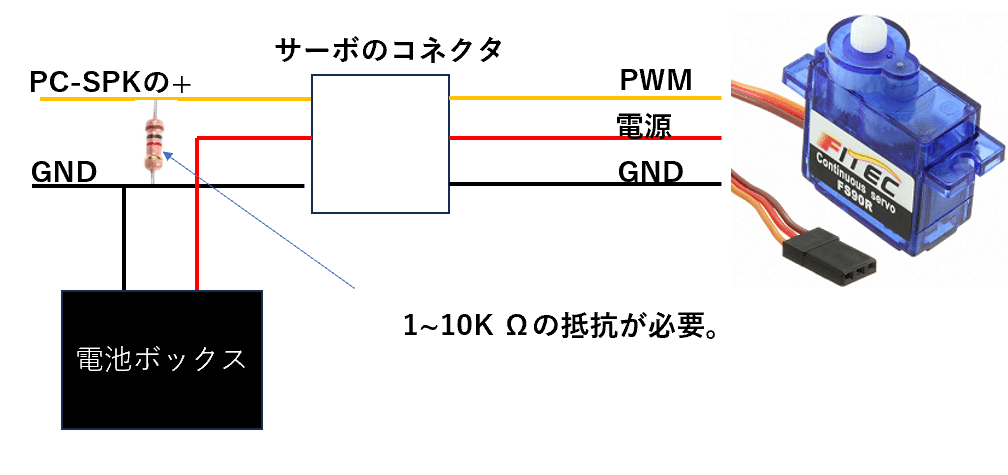
ここに配線します。4本並んでいる側の左側がプラス、右側がGNDです。ここ大事です。
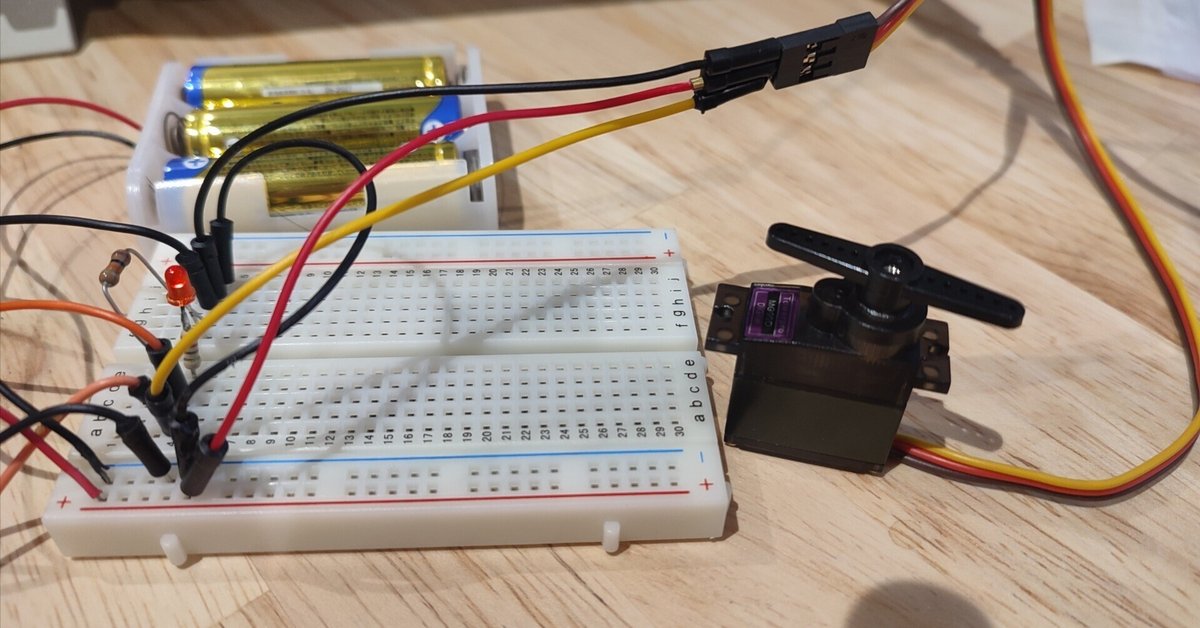
で、この先にサーボが接続されます。左側の橙色の配線と黒の配線が上の画像に写っている各配線につながっています。あとは電池(小型のサーボは5Vが多いのでここでは1.5V乾電池x3個で4.5Vを使っています)。
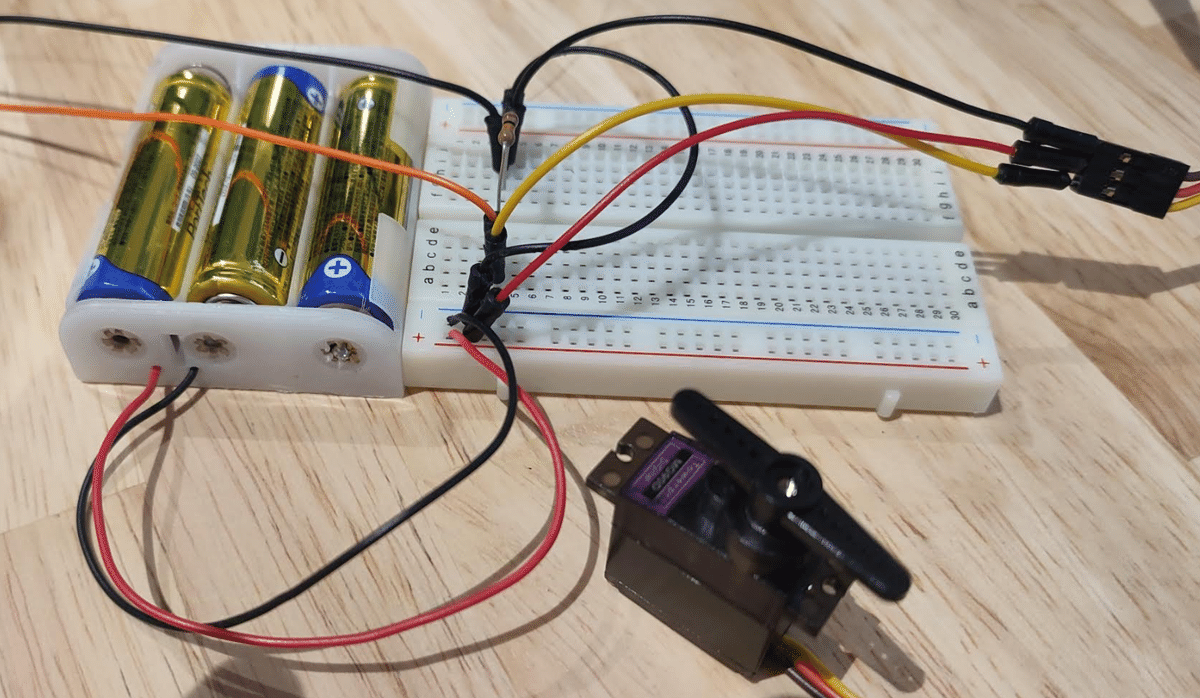
接続図
簡単です。抵抗が1本必要なだけです。1~10KΩぐらいです。
ソフトウエアを動かす
環境の準備
I/Oアクセスするためにはroot権限が必要です。アプリソフトをroot権限で動かすので必要なモジュールもrootでインストールします。
sudo pip install portio
sudo pip install gradio
コントロール用のソースコード (*注 11/29パルスのジッタ除去)
import gradio as gr
import threading
import portio
import time

# Define constants
TIMER_CONTROL_PORT = 0x43
TIMER_CHANNEL_2 = 0x42
SPEAKER_PORT = 0x61
BASE_CLOCK = 1193182

# Global variables
stop_flag = False
pwm_thread = None
current_period = 20  # ms
current_pulse_width = 0.9  # ms

def configure_pwm(period, duty_cycle):
    #Configure the 8253 timer for PWM using Mode 1 or Mode 2. ,  period: Total period in ms., duty_cycle: Duty cycle as a percentage (0-100).
    if not (0 <= duty_cycle <= 100):
        raise ValueError("Duty cycle must be between 0 and 100")
    high_time = (duty_cycle / 100) * period * 2  # OUT=1/2 for timer
    low_time = period - high_time
    high_divisor = int(BASE_CLOCK * (high_time / 1000))
    low_divisor = int(BASE_CLOCK * (low_time / 1000))
    if high_divisor < 2 or low_divisor < 2:
        raise ValueError("Divisor values too small for timer")
    portio.outb(0xB6, TIMER_CONTROL_PORT)
    portio.outb(high_divisor & 0xFF, TIMER_CHANNEL_2)
    portio.outb((high_divisor >> 8) & 0xFF, TIMER_CHANNEL_2)

    enable_speaker()
    time.sleep(high_time / 2000)  # Adjusted for timer's 1/2 toggle
    disable_speaker()

    portio.outb(0xB6, TIMER_CONTROL_PORT)
    portio.outb(low_divisor & 0xFF, TIMER_CHANNEL_2)
    portio.outb((low_divisor >> 8) & 0xFF, TIMER_CHANNEL_2)
    time.sleep(low_time / 1000)

def enable_speaker():
    speaker_control = portio.inb(SPEAKER_PORT)
    portio.outb(speaker_control | 0x03, SPEAKER_PORT)

def disable_speaker():
    speaker_control = portio.inb(SPEAKER_PORT)
    portio.outb(speaker_control & ~0x03, SPEAKER_PORT)

def pwm_thread_func():
    global stop_flag, current_period, current_pulse_width
    while not stop_flag:
        try:
            duty_cycle = (current_pulse_width / current_period) * 100
            configure_pwm(current_period, duty_cycle)
            time.sleep(current_period / 1000)
        except ValueError as e:
            print(f"Error: {e}")
            stop_flag = True

def start_pwm():
    global stop_flag, pwm_thread
    stop_flag = True
    if pwm_thread is not None:
        pwm_thread.join()
    stop_flag = False
    pwm_thread = threading.Thread(target=pwm_thread_func)
    pwm_thread.start()
    return f"PWM started: Period = {current_period} ms, Pulse Width = {current_pulse_width:.2f} ms"

def stop_pwm():
    global stop_flag, pwm_thread
    stop_flag = True
    if pwm_thread is not None:
        pwm_thread.join()
        pwm_thread = None
    disable_speaker()
    return "PWM stopped."

def set_pulse_width(pulse_width):
    global current_pulse_width
    current_pulse_width = pulse_width
    return start_pwm()

def set_period(period):
    global current_period
    current_period = period
    return start_pwm()

def main():
    with gr.Blocks() as demo:
        gr.Markdown("## PWM Control")
        pulse_width_slider = gr.Slider(0.1, 3.0, value=0.9, label="Pulse Width (ms)", interactive=True)
        period_slider = gr.Slider(10, 30, value=20, label="Period (ms)", interactive=True)
        status_output = gr.Textbox(label="Status", value="PWM stopped")

        with gr.Row():  # Buttons are placed side by side
            start_button = gr.Button("Start PWM")
            stop_button = gr.Button("Stop PWM")

        pulse_width_slider.change(set_pulse_width, pulse_width_slider, status_output)
        period_slider.change(set_period, period_slider, status_output)
        start_button.click(start_pwm, outputs=status_output)
        stop_button.click(stop_pwm, outputs=status_output)

    demo.launch()

if __name__ == "__main__":
    portio.iopl(3)
    try:
        main()
    finally:
        portio.iopl(0)
アプリを起動
上記コードをpwm_gradio.pyで作成します。以下で起動
sudo python pwm_gradio.py起動したどころ
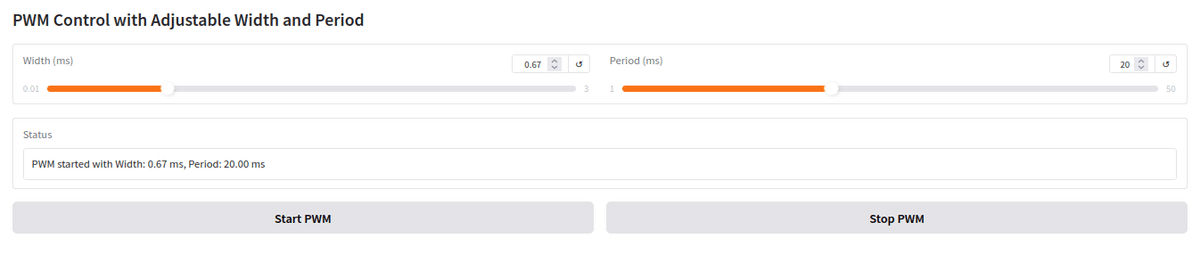
スライダーを動かすとサーボが動きます。サーボごとにSPECが違うのですラーダーで動きを確かめることが出来ます。ここまでできればアプリからスライダーと同じようにbase_period, pulse_widthを設定して
update_pwm(width, period)
を呼び出せば動かすことができるはずです。以下説明です。ChatGPTの解説をコピペしてます。
コードのポイント
GradioでのUI作成:
Slider を用いてwidth(パルス幅)とperiod(周期)を範囲指定して調整可能。
Number ボックスで直接入力も可能。
PWMスレッド管理:
PWM信号生成は別スレッドで実行し、stop_flagで停止を管理。
UIの同期:
スライダーと入力ボックスは相互に同期されます。
動作の開始と停止:
「Start PWM」ボタンで設定した値でPWM信号を開始。
「Stop PWM」ボタンでPWM信号を停止。
終わりに
AI系のソフト開発をやっていらっしゃる方々も最近は物理デバイスを動かしたい場合もあると思います。専用ハードやマイコンを使わずにとりあえずサーボを1個動かすことはできるようになったことは、ありがたいことだと思います。