
#029 ABookBizを使ってアプリを動かそう!オブジェクトVR編

「ABookBizを使ってアプリを動かそう!」の第6弾です。
過去の記事のまとめはこちらです。
今回はABookBizを利用して、オブジェクトVRを表示してみたいと思います。
✅ そもそもオブジェクトVRって何?
✅ ABookBizを使ったことがあるけど、オブジェクトVRを使ったことがない
✅ オブジェクトVRの使い方を知りたい
そんな方にぜひこの記事を読んでいただきたいです。
オブジェクトVRとは?
オブジェクトVRとは、Web上で写真を3Dのように回転させ、被写体を360度あらゆる角度から観察できる技術のことです。

通常のVRと異なり、オブジェクトVRは特定の物体に焦点を当て、ユーザーがその物体を自由に操作し、拡大縮小や回転させることが可能です。これにより、製品やアート作品などの詳細な確認ができ、オンラインショッピングやデザインの分野での利用が増えています。
撮影方法
オブジェクトVRの撮影方法は、主に次のステップで行われます。
①準備: 撮影する物体を選び、適切な照明と背景を設定します。物体が均等に照らされ、背景が一貫していることが重要です。
②カメラの設定: 物体の周りを一定の角度で囲むようにカメラを配置します。多くの場合、ターンテーブルを使用し、物体を回転させながら撮影します。これにより、あらゆる角度からの写真を撮ることができます。
③撮影: カメラを一定間隔で移動させながら、物体の写真を撮影します。これにより、360度全方位の画像が得られます。
④画像の編集: 撮影した画像を編集し、一つの連続したインタラクティブな3Dモデルとして統合します。これには、専用のソフトウェアやツールが必要です。
活用例
オブジェクトVRは様々な分野で活用されています。以下はその具体例です。
オンラインショッピング:
オンラインショップでは、商品を詳細に確認できるようにするため、オブジェクトVRが利用されています。これにより、顧客は実際に商品を手に取ることができない代わりに、360度ビューで商品を確認し、購入の判断がしやすくなります。
教育:
科学教育や歴史教育などで、オブジェクトVRを使って学生が実物を見ることが難しい物体を詳細に学ぶことができます。例えば、恐竜の骨格模型や歴史的遺物などを3Dで表示し、学生が自由に操作できます。
アートとデザイン:
アーティストやデザイナーは、自分の作品をオブジェクトVRで展示することで、観客に新たな視覚体験を提供できます。これにより、展示会やギャラリーでの作品の見せ方が大きく変わる可能性があります。
エンジニアリングと製造:
エンジニアや製造業者は、製品のプロトタイプをオブジェクトVRで確認することで、デザインや機能の最終確認を行うことができます。これにより、製品開発の効率が向上し、コスト削減につながります。
営業:
営業担当者は、オブジェクトVRを使って製品の魅力をより効果的に伝えることができます。従来のカタログや写真では伝えきれない細部や機能を、顧客にリアルタイムで体験させることができます。特に複雑な製品や高価な商品では、この技術を用いることで、顧客に対する説得力が増し、成約率の向上が期待できます。
このように、オブジェクトVRは様々な分野で活用されている技術であり、活用できれば大幅な業務改善も可能です。
オブジェクトVRについて理解できたと思いますので、次は実際に作成して、ABookBizで動かしてみたいと思います。
3DモデルからオブジェクトVR画像を作成
先ほど解説した、ターンテーブルを利用した撮影方法は、実在する物体をオブジェクトVRにする場合を想定しています。
一方で、3Dモデルを利用すれば、機材不要で簡単にオブジェクトVRを作成することが可能です。
今回は、手軽にできる3Dモデルを利用したオブジェクトVR作成を試してみたいと思います。
作成準備
オブジェクトVRに必要なものは画像ファイルのみです。
しかし、単純に画像を作成しようとすると、モデリングソフトを使って、ターンテーブルで撮影するようにカメラ位置を変更しながら画像を出力する必要があります。
それでは時間がかかるため、自動で画像を出力するプログラムを作成していきます。
今回もChatGPTを利用して、サクッとプログラミングしてもらいました。
htmlファイル
<!DOCTYPE html>
<html lang="en">
<head>
    <meta charset="UTF-8">
    <meta name="viewport" content="width=device-width, initial-scale=1.0">
    <title>GLTF Rotation Screenshot</title>
    <style>
        body { margin: 0; }
        canvas { display: block; }
        #uploadContainer {
            position: absolute;
            top: 10px;
            left: 10px;
            z-index: 10;
            background-color: rgba(255, 255, 255, 0.8);
            padding: 10px;
            border-radius: 5px;
        }
        #inputContainer {
            position: absolute;
            top: 65px;
            left: 10px;
            z-index: 10;
            background-color: rgba(255, 255, 255, 0.8);
            padding: 10px;
            border-radius: 5px;
        }
    </style>
</head>
<body>
    <div id="uploadContainer">
        <input type="file" id="fileInput" accept=".gltf, .glb">
        <button id="startButton">Start Rotation & Capture</button>
    </div>
    <div id="inputContainer">
        <label for="cameraDistance">Camera Distance:</label>
        <input type="number" id="cameraDistance" name="cameraDistance" min="1" max="100" value="2" step="0.1">
        <br>
        <label for="screenshotCount">Screenshot Count:</label>
        <input type="number" id="screenshotCount" name="screenshotCount" min="1" value="15" step="1">
        <br>
        <label for="backgroundColor">Background Color:</label>
        <input type="color" id="backgroundColor" name="backgroundColor" value="#EDEDED">
    </div>
    <script src="https://cdn.jsdelivr.net/npm/three@0.128.0/build/three.min.js"></script>
    <script src="https://cdn.jsdelivr.net/npm/three@0.128.0/examples/js/loaders/GLTFLoader.js"></script>
    <script src="https://cdnjs.cloudflare.com/ajax/libs/jszip/3.7.1/jszip.min.js"></script>
    <script>
        // シーン、カメラ、レンダラーを設定
        const scene = new THREE.Scene();
        const camera = new THREE.PerspectiveCamera(75, 1, 0.1, 1000);
        const renderer = new THREE.WebGLRenderer({ preserveDrawingBuffer: true });

        renderer.setSize(800, 800);
        document.body.appendChild(renderer.domElement);

        // 環境光と方向光の追加
        const ambientLight = new THREE.AmbientLight(0x404040, 2); // 強度を2に設定
        scene.add(ambientLight);

        const directionalLight1 = new THREE.DirectionalLight(0xffffff, 1);
        directionalLight1.position.set(1, 1, 1).normalize();
        scene.add(directionalLight1);

        const directionalLight2 = new THREE.DirectionalLight(0xffffff, 1);
        directionalLight2.position.set(-1, -1, -1).normalize();
        scene.add(directionalLight2);

        const pointLight1 = new THREE.PointLight(0xffffff, 1, 100);
        pointLight1.position.set(10, 10, 10);
        scene.add(pointLight1);

        const pointLight2 = new THREE.PointLight(0xffffff, 1, 100);
        pointLight2.position.set(-10, -10, -10);
        scene.add(pointLight2);

        // 真上からのライトを追加
        const topLight = new THREE.DirectionalLight(0xffffff, 10);
        topLight.position.set(0, 10, 0);
        scene.add(topLight);

        // 背景色の設定
        const backgroundColorInput = document.getElementById('backgroundColor');
        backgroundColorInput.addEventListener('input', (event) => {
            renderer.setClearColor(event.target.value);
        });

        // 初期背景色の設定
        renderer.setClearColor(backgroundColorInput.value);

        // カメラ距離の調整
        const cameraDistanceInput = document.getElementById('cameraDistance');
        cameraDistanceInput.addEventListener('input', (event) => {
            updateCameraPosition(event.target.value);
        });

        let model;
        let bbox;
        let imagesCaptured = 0;
        let totalImages = 16; // デフォルト値
        const loader = new THREE.GLTFLoader();

        function updateCameraPosition(distanceFactor) {
            if (bbox) {
                const size = bbox.getSize(new THREE.Vector3());
                const center = bbox.getCenter(new THREE.Vector3());
                camera.position.set(center.x, center.y, center.z + size.z * distanceFactor);
                camera.lookAt(center);
            }
        }

        document.getElementById('fileInput').addEventListener('change', () => {
            const fileInput = document.getElementById('fileInput');
            const file = fileInput.files[0];
            if (file) {
                const reader = new FileReader();
                reader.onload = (event) => {
                    const contents = event.target.result;
                    const blob = new Blob([contents], { type: file.type });
                    const url = URL.createObjectURL(blob);
                    loader.load(url, (gltf) => {
                        if (model) {
                            scene.remove(model);
                        }
                        model = gltf.scene;
                        scene.add(model);

                        // Calculate bounding box
                        bbox = new THREE.Box3().setFromObject(model);
                        updateCameraPosition(cameraDistanceInput.value);
                    }, undefined, (error) => {
                        console.error(error);
                    });
                };
                reader.readAsArrayBuffer(file);
            }
        });

        document.getElementById('startButton').addEventListener('click', () => {
            const screenshotCountInput = document.getElementById('screenshotCount');
            totalImages = parseInt(screenshotCountInput.value, 10);
            imagesCaptured = 0;
            captureImages();
        });

        const captureImages = () => {
            if (imagesCaptured < totalImages) {
                model.rotation.y += (Math.PI * 2) / totalImages;
                renderer.render(scene, camera);
                saveScreenshot();
                imagesCaptured++;
                setTimeout(captureImages, 500); // 少し待ってから次のスクリーンショットを取得
            } else {
                createZip();
            }
        };

        const screenshots = [];

        const saveScreenshot = () => {
            const imgData = renderer.domElement.toDataURL("image/png");
            screenshots.push(imgData.split(',')[1]);
        };

        const createZip = () => {
            const zip = new JSZip();
            for (let i = 0; i < totalImages; i++) {
                const fileName = `screenshot_${String(i + 1).padStart(2, '0')}01.png`;
                zip.file(fileName, screenshots[i], { base64: true });
            }
            zip.generateAsync({ type: 'blob' }).then((content) => {
                const link = document.createElement('a');
                link.href = URL.createObjectURL(content);
                link.download = 'screenshots.zip';
                document.body.appendChild(link);
                link.click();
                document.body.removeChild(link);
            });
        };


        const animate = function () {
            requestAnimationFrame(animate);
            renderer.render(scene, camera);
        };

        animate();
    </script>
</body>
</html>
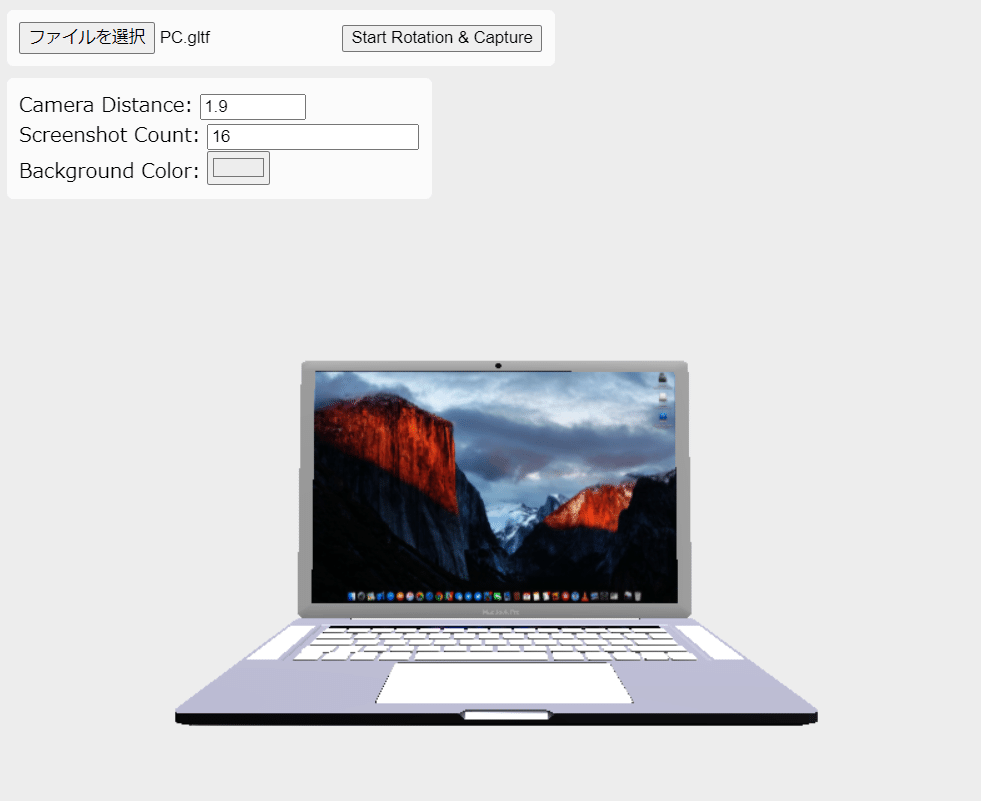
こちらが実行した画面です。htmlなので、どのブラウザでも実行することができます。
gltf形式の3Dモデルデータを選択し、指定した枚数分のスクリーンショットを取得することができます。
用途は限定されますが、3Dモデルを画像に変換したい方はぜひ使ってみてください。
以下のように画像が出力されます。

あとは作成した画像をABookBizにアップロードし、プレゼン資料にオブジェクトVRを埋め込めば完成です。
オブジェクトVRを動かしてみよう
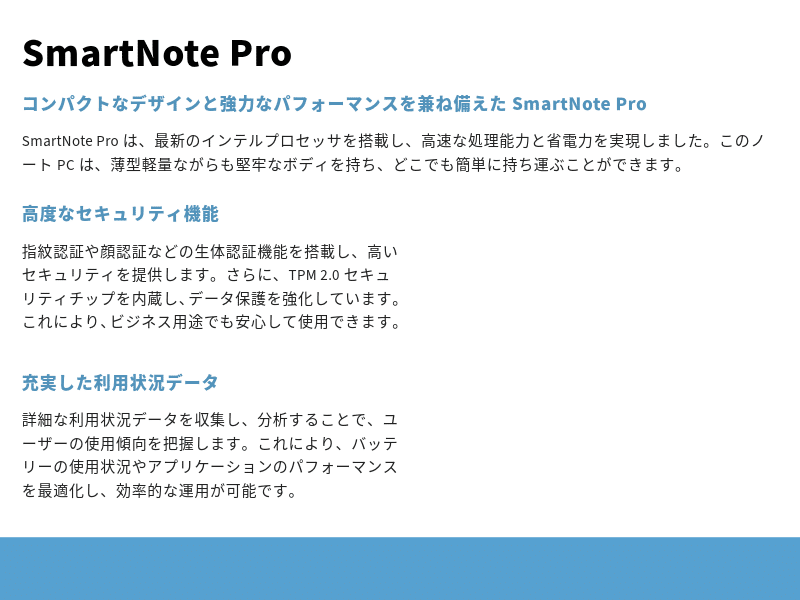
例として、以下のプレゼン資料にオブジェクトVRを埋め込んでみたいと思います。
編集画面でオブジェクトを配置します。

用意した画像をセットすれば完了です。
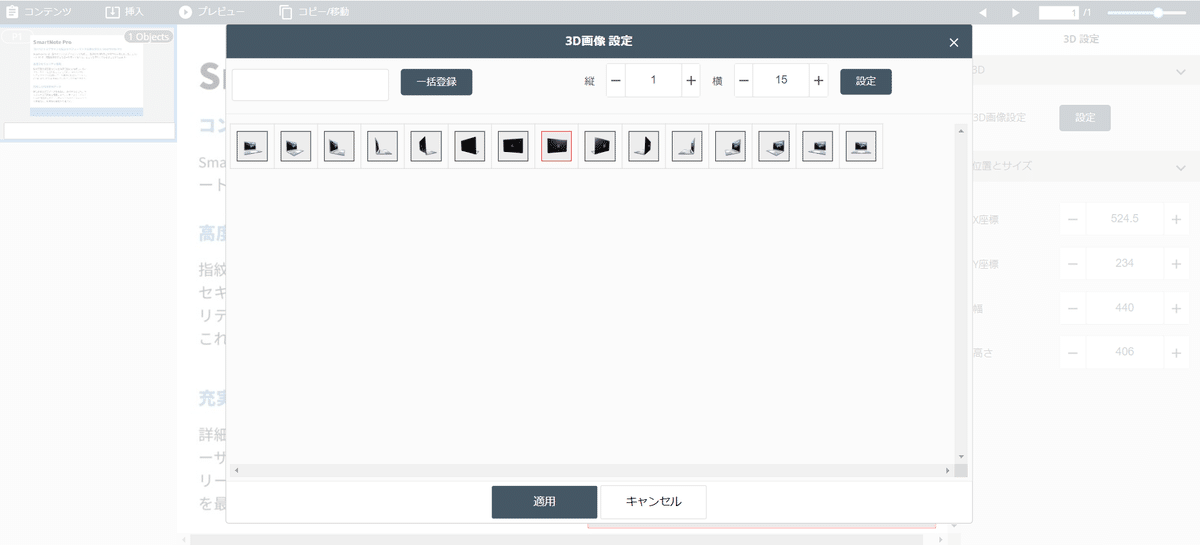
簡単ですよね!
それでは実際の画面を見てみましょう。

オブジェクトをタップすると実際に動かせるようになります。

このようにABookBizではノーコードで魅力的なコンテンツを簡単に制作することができます。
さいごに
いかがでしたか?
今回はABookBizの機能の一つであるオブジェクトVRを動かしてみました。
今後もABookBizはさらにアップデートされていきます。ぜひABookBizを使い倒して、営業活動にお役立てください。
それでは!