
【Blender】綾目ローレット加工の表現方法

はじめに
ローレット加工とは
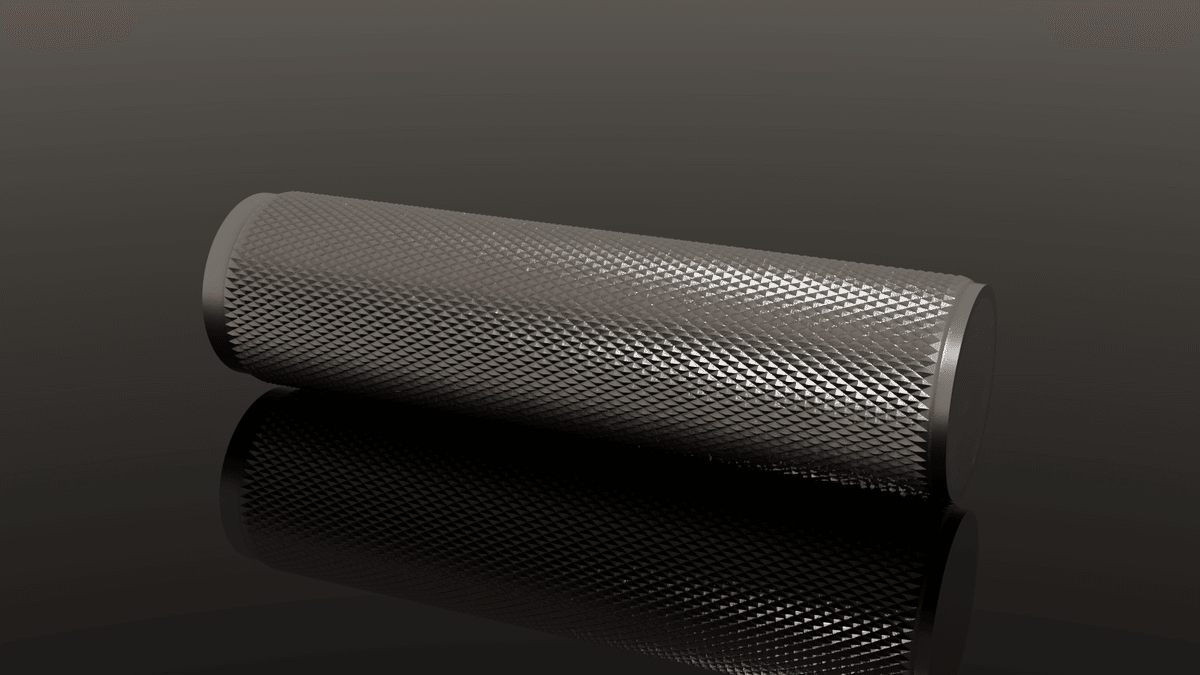
ローレット加工とは、滑り止めや装飾などを目的として、金属の表面に凹凸の切り込みを入れる加工のことです。
機械部品から日用品までいたるところで使われています。
今回は、この模様をBlenderで簡単に表現する方法を解説したいと思います。
ハードサーフェスに関しては結構見かける模様になりますので、ぜひチャレンジしてみてくださいね。
難易度/使用ツール
難易度:初級(Blenderモデリングの基本操作が一通りわかる程度)
使用ツール:Blender Ver.3.6.9
製作
基本形状の作成
まずはベースとなる部分の形状を作成します。
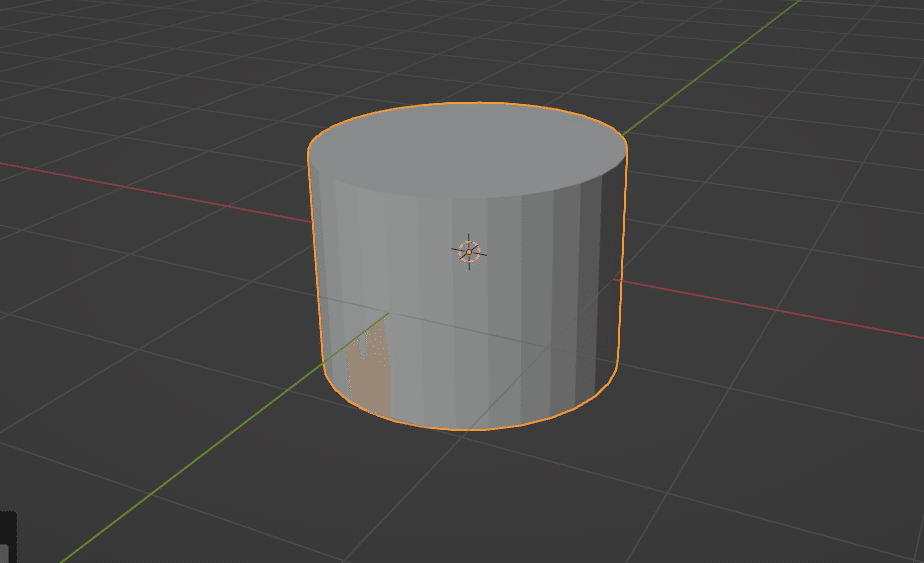
1.シリンダーを作成
私の場合は頂点数32で作成し、Z方向に少し縮めました。
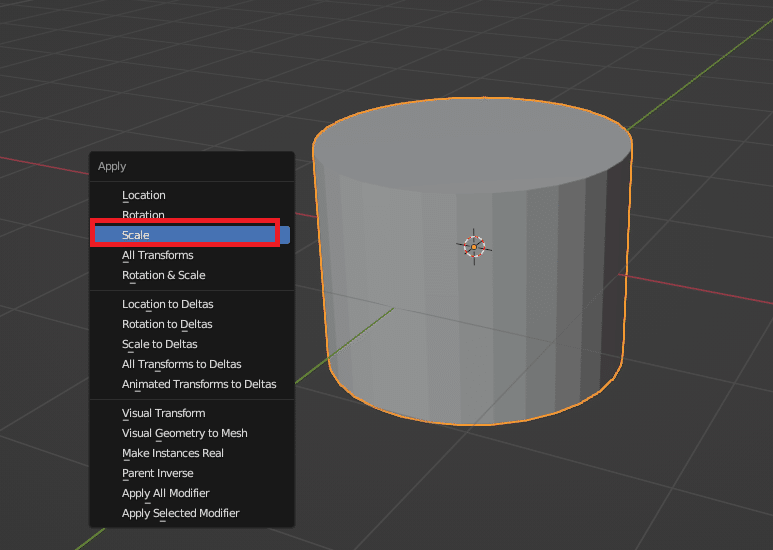
そしてオブジェクトを選択した状態で、[ctrl] + [A] の適用項目から[Scale]を選択し、「scale」をすべて1.000 にリセットします。
※次の工程でベベルを掛けるのですが、Scaleをすべて「1」にしておかないとベベルがうまくかけれません。初心者の段階では結構つまづくポイントですのでご注意ください。
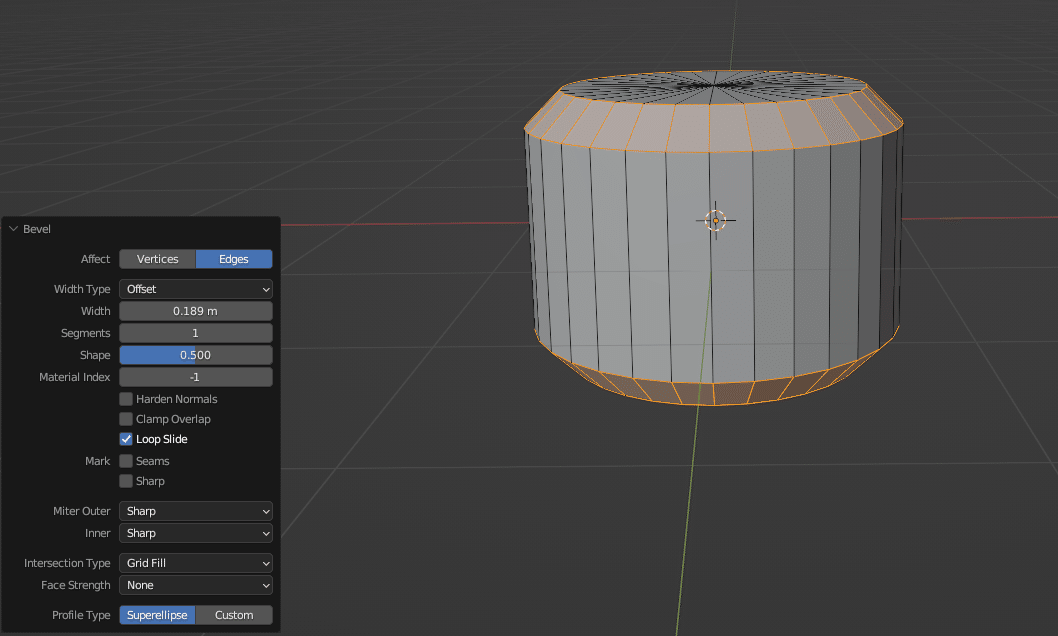
2.ベベル処理
ねじの頭っぽく見せるため上下の辺にベベルをかけます。
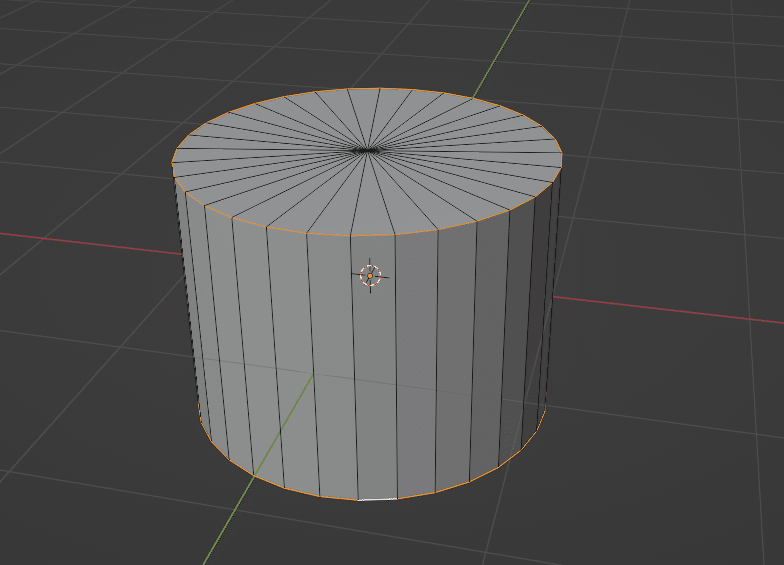
まずは上下の蓋が多角ポリゴンになって
いますので3角ポリゴンにしておきます。
※これをしないとベベルがうまくかからない場合があります。
次に上下の円の辺をすべて選択し[ctrl] + [B] でベベルをかけます。
ローレット加工部分の作成
ここからが本題です。
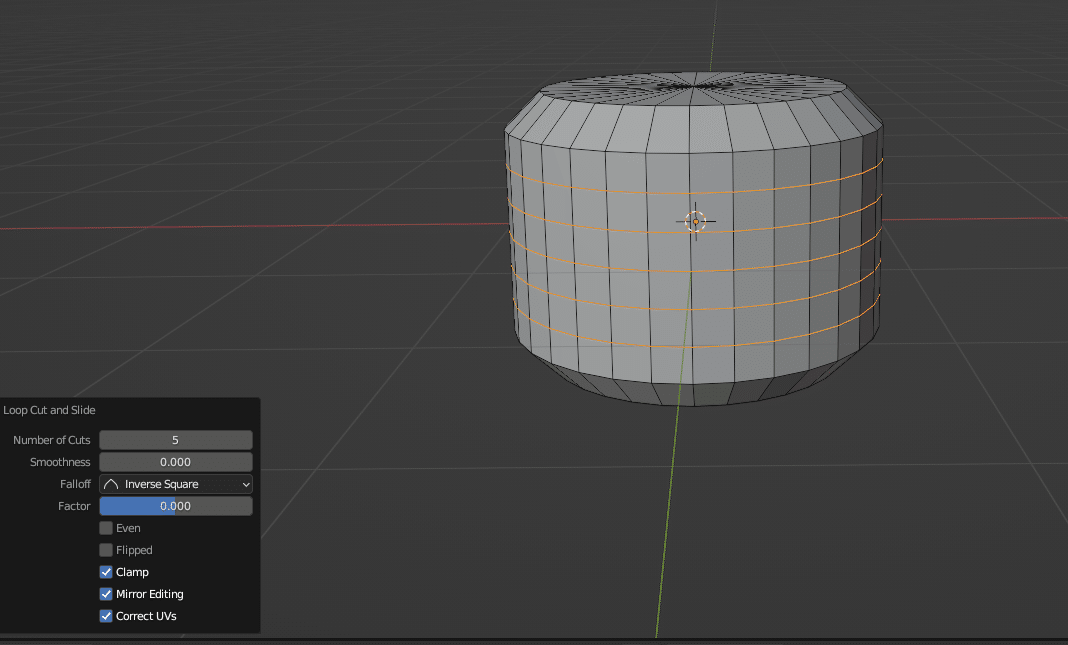
1.メッシュの分割
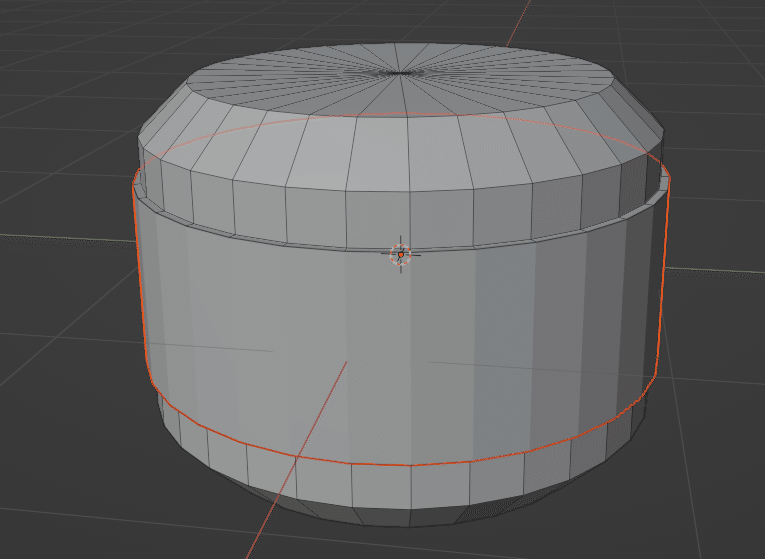
加工部分を作るため側面を[ctrl] + [R]で分割します。
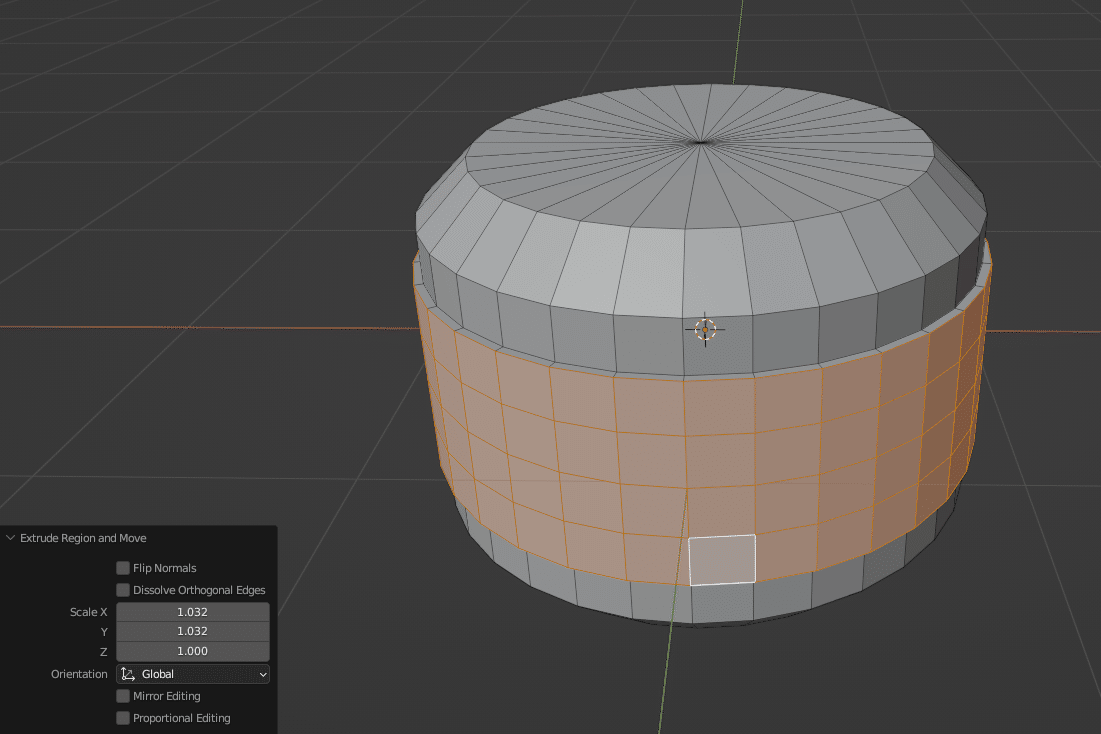
2.ローレット加工部分の押し出し
ローレット加工する部分をわかりやすくするためほんの少しだけ押し出します。
[E](押し出し) ⇒ [S](拡大)⇒ [shift] + [Z](Z方向には拡大しない)
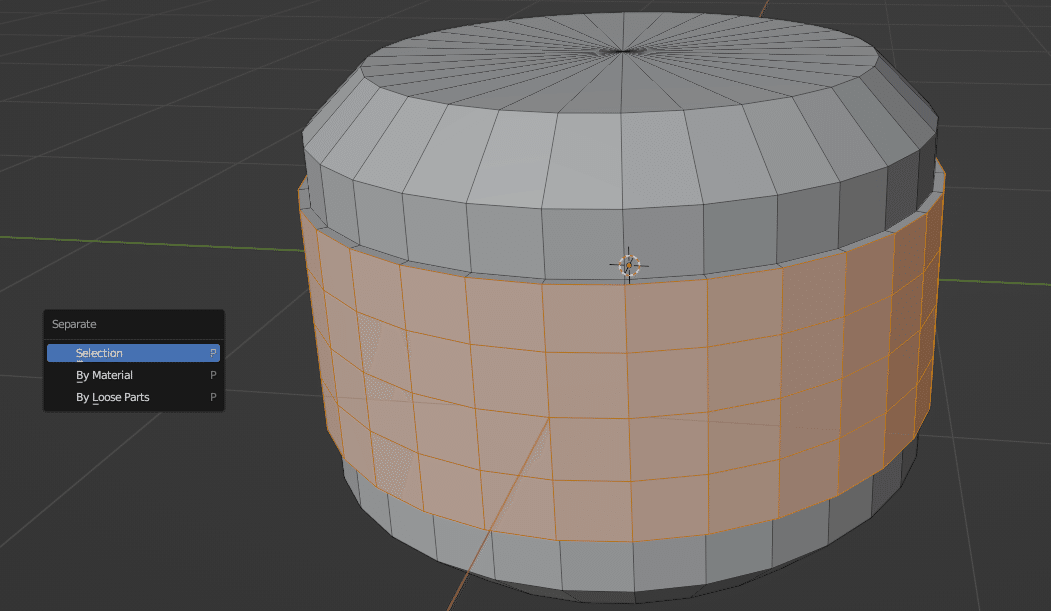
3.ローレット加工する面を一旦別のオブジェクトに分割
後の作業で出てくる面や頂点の一括選択を楽にするため、一旦加工面を別オブジェクトにしましょう。
「P」キーで出現する「Separate」メニューの中から「Selection」を選択します。
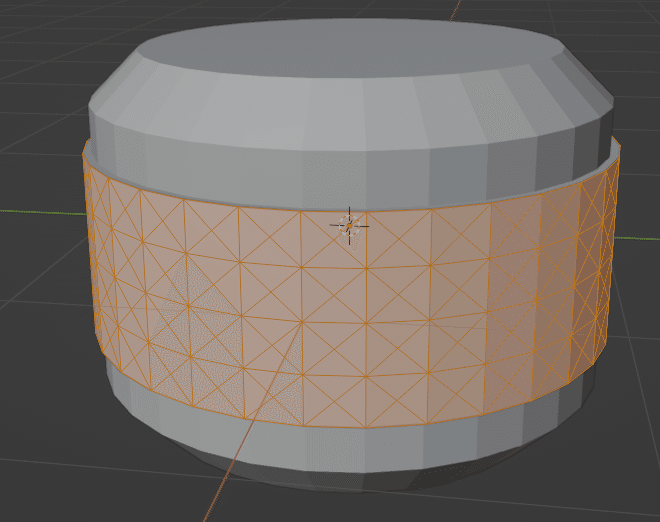
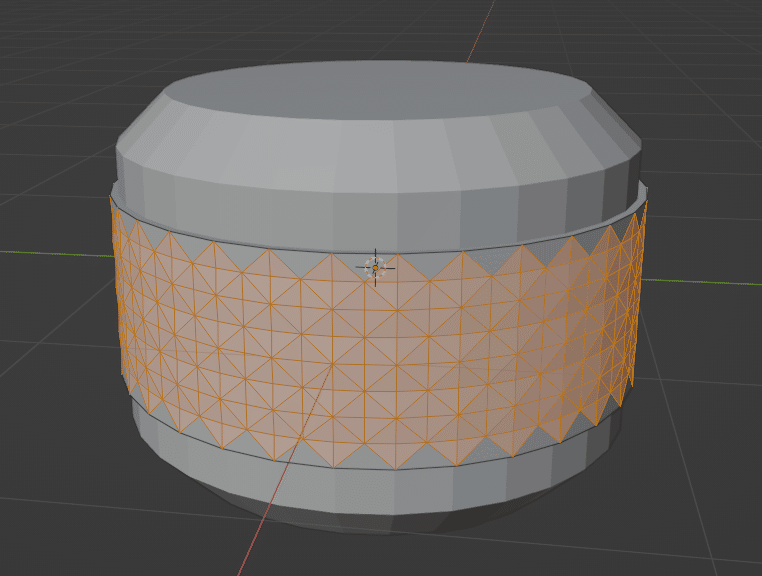
4.ダイヤモンドの形にメッシュを分割
ここからは加工面のオブジェクトに切り替えます。
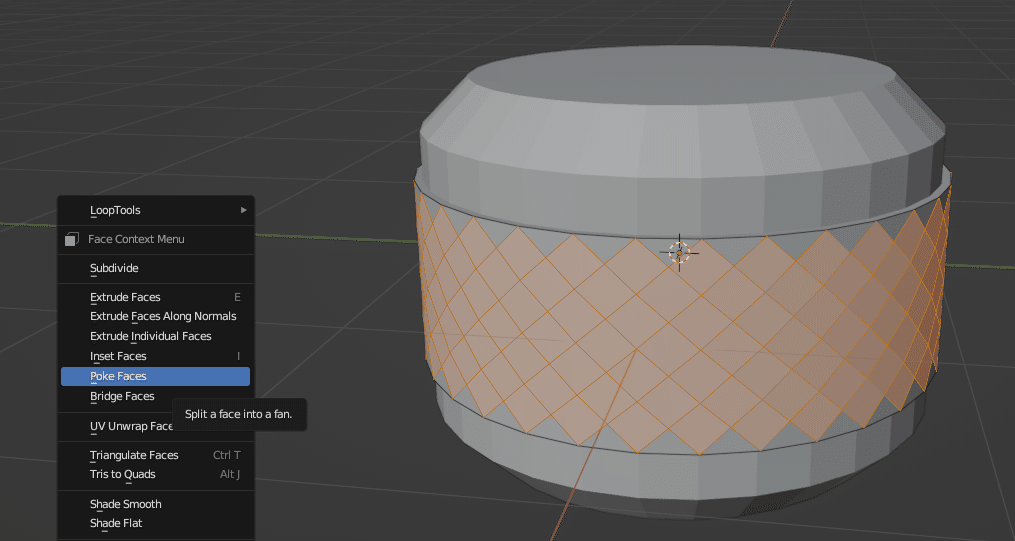
ローレット加工したい面を全選択し、右クリックメニューから「Poke Faces」(扇状に分離)を選択します。

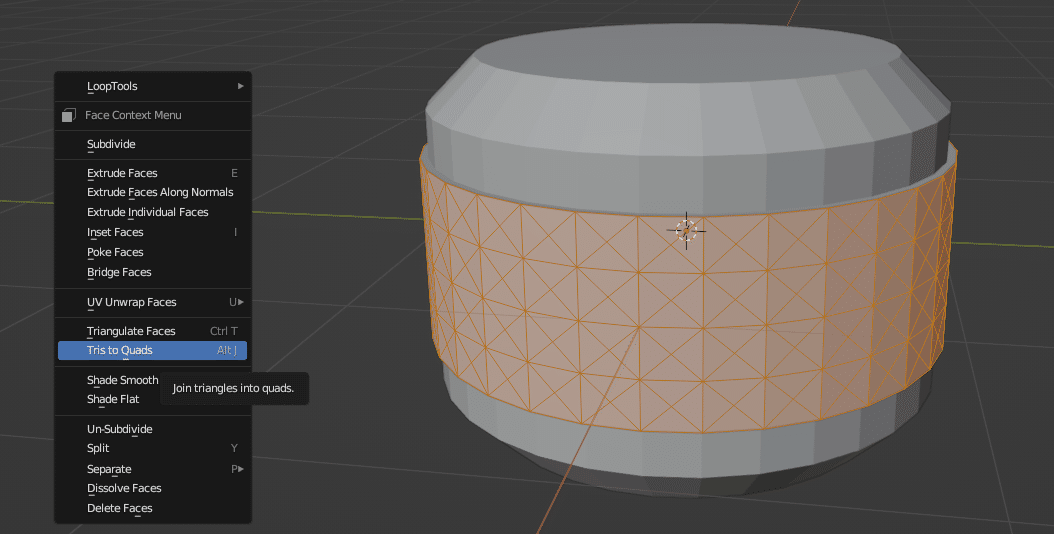
5.ダイヤモンド形状を斜めに
ローレット加工のダイヤの形は斜めになっていることが多いですのでそれを再現します。
ローレット加工する面が全選択されている状態のまま右クリックメニューから「Tris to Quad」(三角面を四角面に)を選択します。
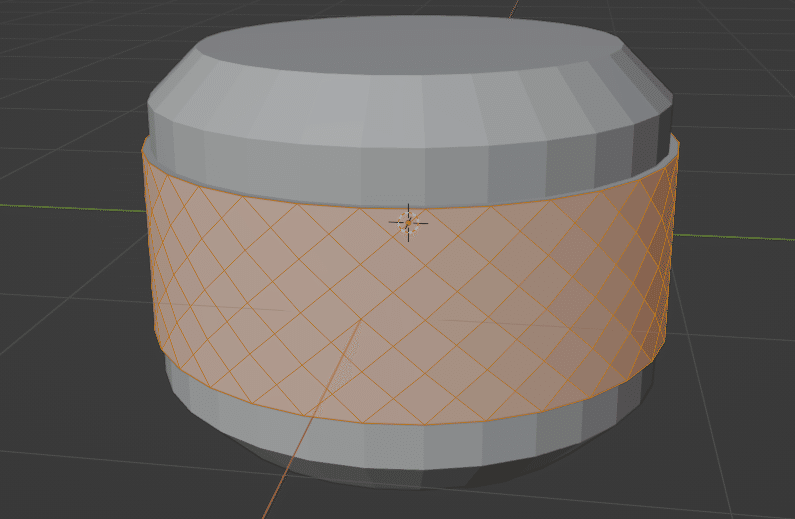
加工面の上下の縁の辺に隣接している面は四角ポリゴンになっていないため選択から除外します。
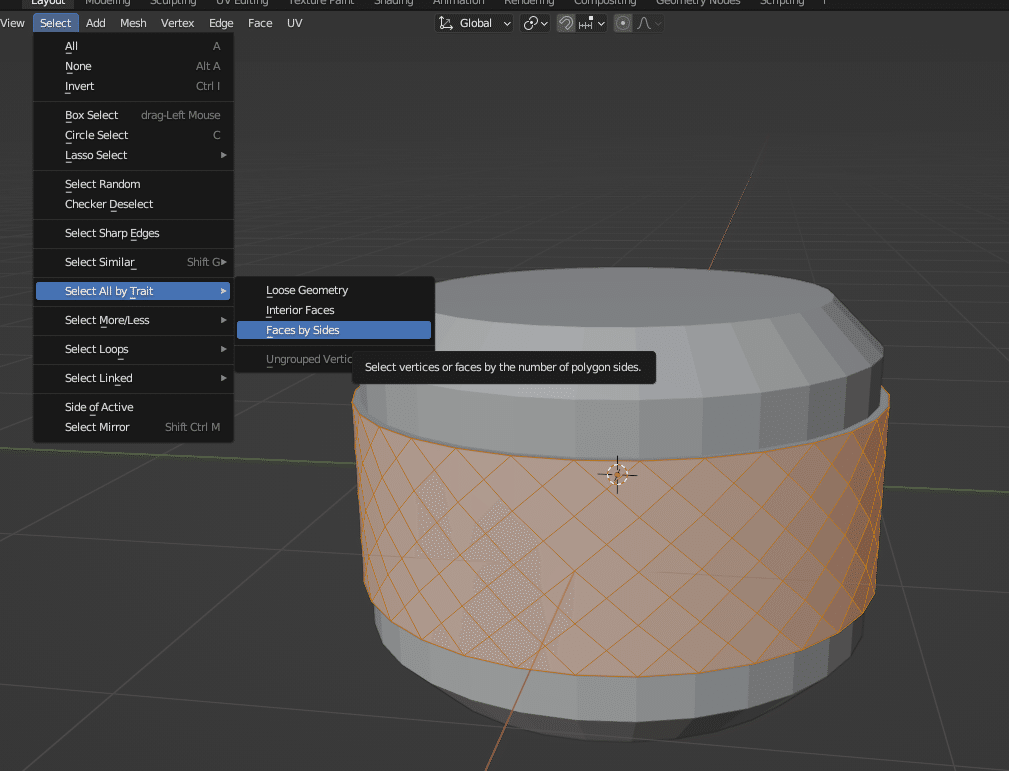
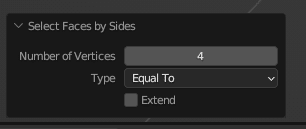
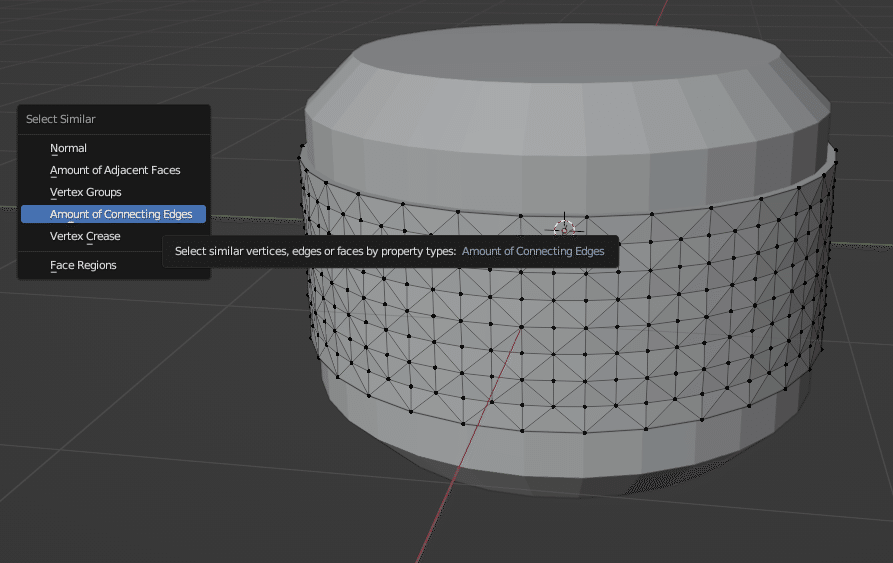
対象の面が全選択されていることを確認してから、画面左上の「Select」メニューより「Select All by Trait」(特徴で全選択)の「Faces by Sides」(面の辺数)を選択。
「Number of Vertices」(頂点数)4、「Type」を「Equal To」(同じ)に設定して四角ポリゴンのみ選択します。
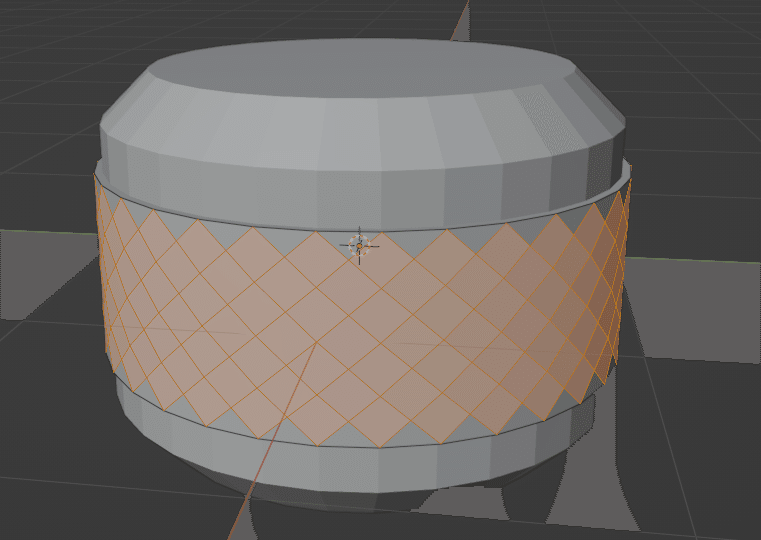
この状態のままもう一度右クリックメニューより、「Poke Faces」(扇状に分離)を選択します。
6.頂点押し出し
今度は「頂点選択」モードにして、ダイヤモンドの中心にしたい頂点をどこでもいいので1つ選択します。
そして「Shift」+「G」で出現する「Select Similar」(類似選択)メニューの中から「Amout of Connecting Edges」(繋がっている辺の数)を選択します。
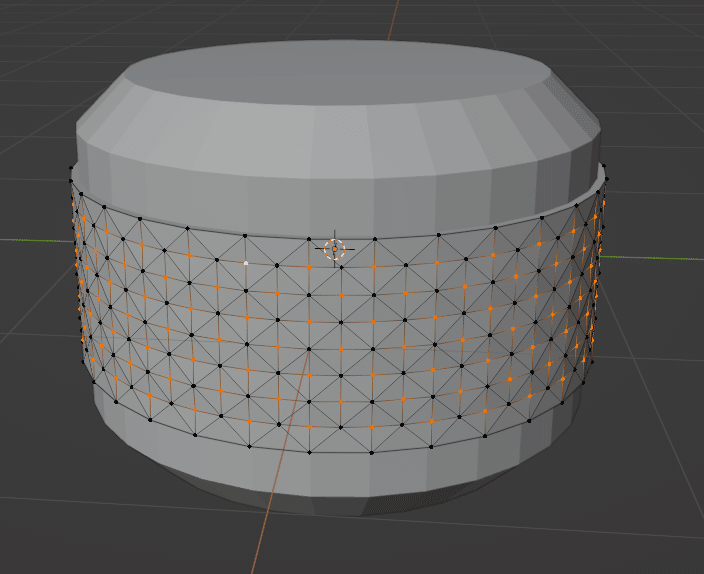
選択されている頂点を「S」⇒「Shift+「Z」(Z方向には拡縮しない)で少し拡大します。
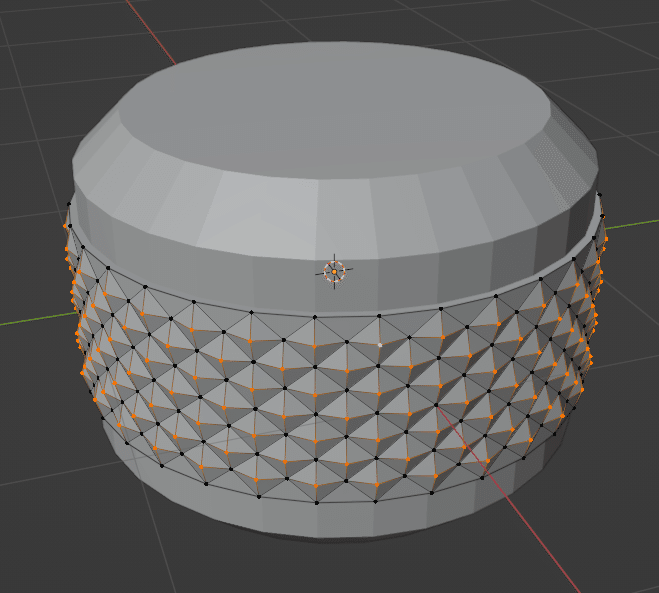
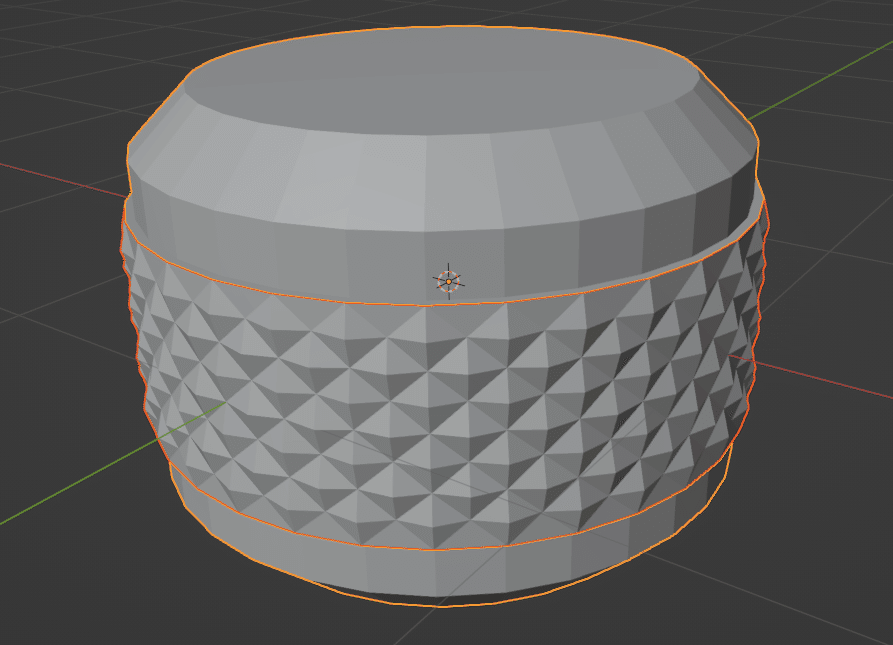
7.オブジェクトの結合
先ほど分離した2つのオブジェクトを、作業が終わりましたので結合します。
2つのオブジェクトを選択状態にして、「ctrl」+「J」で結合。
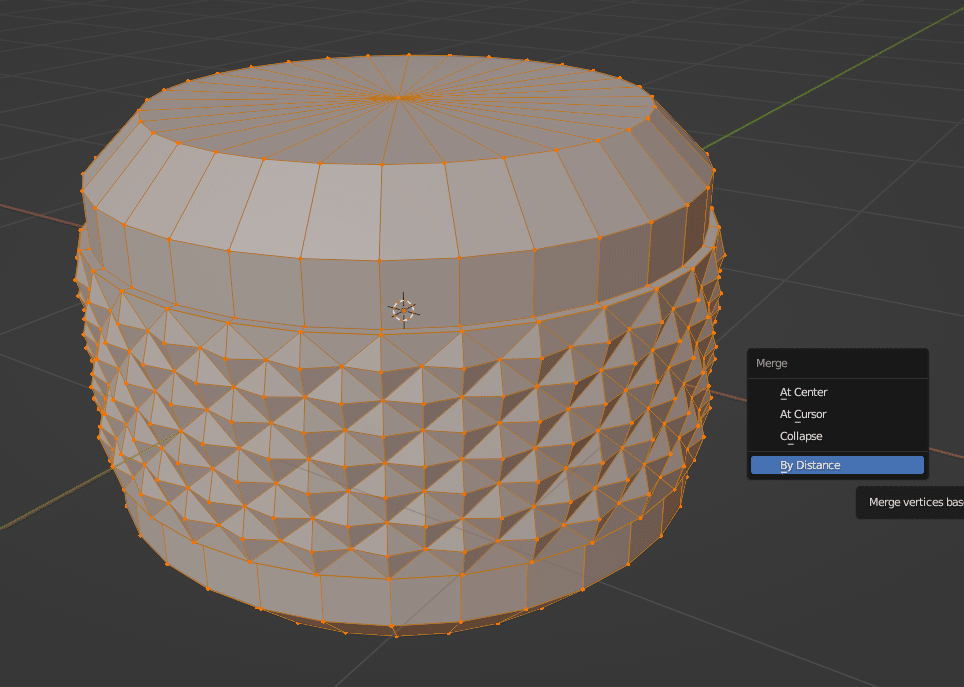
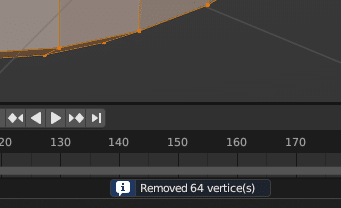
分割されていた箇所の頂点が重複していますので、Editモードに入り「A」キーで頂点を全選択した後、「M」キーで出現する「Merge」メニューから「By Distance」を選択します。
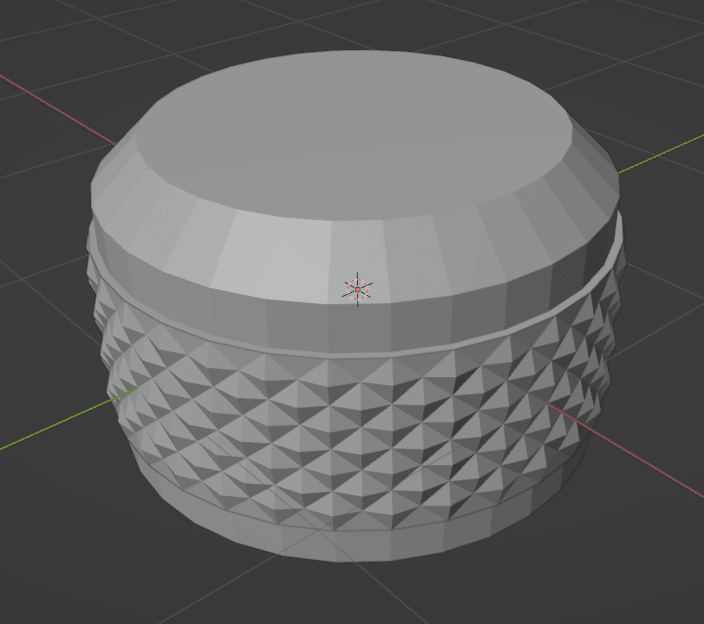
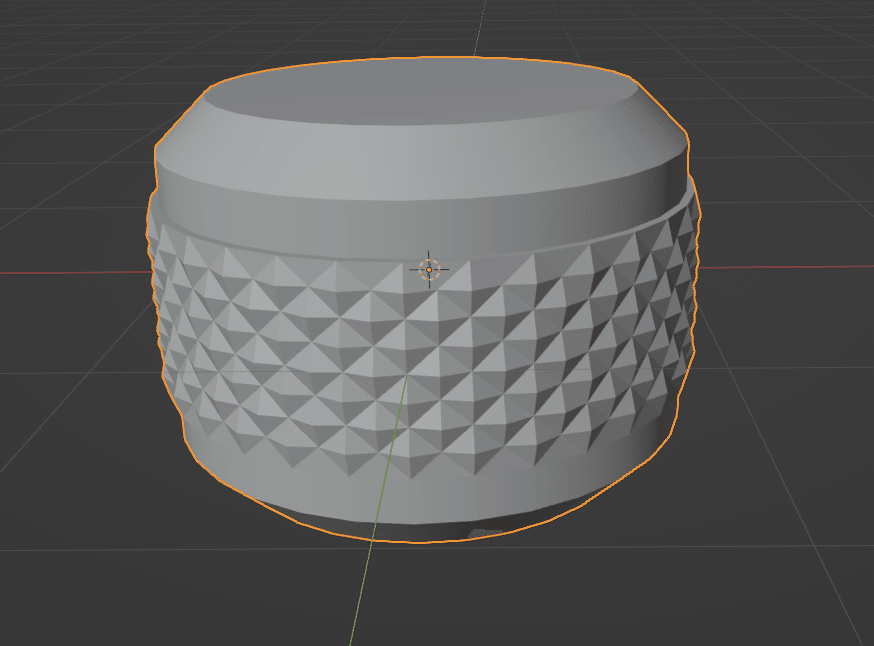
モデル完成
仕上げに「Shade Auto Smooth」をかけましょう。
角度を浅く設定すればうまく必要な箇所のエッジが立つと思います。
レンダリング
せっかくですので適当にマテリアルを付けてレンダリングしてみましょう!

さいごに
以上でローレット加工表現の説明は終了です。
Blenderの機能をフル活用すれば意外と簡単に作成できますので、いろいろとご活用いただければと思います。
お疲れさまでした!!