
【AWS・Cloudformation】IaCジェネレータでコード化して環境を復元する

はじめに
AWS公式が出しているIaCジェネレータワークショップに倣い、1から作成した各種資産(EC2やサブネットなど)をIaCして、そのコードを用いて環境を再現できるかどうかを見ていきます。
基本的には、CloudFormation の IaC ジェネレーター機能をサクッと試せる「IaC Generator Workshop」の記事と同じ内容ですが、私自身の理解度向上も兼ねて、改めて自分の言葉でまとめていきます。
本来はAWS Cloud Shellなどから実行できるようです。

ただ、「infrastructure-script.sh」が私のAWS Cloud Shellではうまくいかなかった(具体的には、キーペアを作成したのに”見つかりません”となってしまった)ため、shファイルをダウンロードしてその中身を1つずつ実行する形で進めています。
※shのダウンロード方法は、「https://static.us-east-1.prod.workshops.aws/public/3504d63d-fa82-4160-9cdc-e9e8dae8ae22/static/infrastructure-script.sh」にアクセスするだけです。
ちなみに、shの中身はこのようになっています。
#!/bin/bash -e

## This script was written for deploying reources into an AWS Account for the "IaC Generator Workshop"
## Written by: Troy Ameigh SSA
## Version: 1.0

# Varibles
keypair=$1
region="us-east-1"
ami_id="ami-01989ebfd388ea377"

# Check for input
if [ -z "$keypair" ]
then
    echo 'Input cannot be blank please enter keypair name.'
    exit 1
fi

# Check if key pair exists
aws ec2 describe-key-pairs --key-names $keypair

# Create a vpc
aws ec2 create-vpc --cidr-block 10.0.0.0/16 --query Vpc.VpcId --output text --tag-specification ResourceType=vpc,Tags='[{Key="Workshop Name",Value="IaC Generator WorkShop"}]' --region $region

# Get VPC ID
vpc_id=$(aws ec2 describe-vpcs --filters Name=tag:"Workshop Name",Values="IaC Generator WorkShop" --query 'Vpcs[].VpcId' --output text --region $region)

# Add Subnet to VPC
aws ec2 create-subnet --vpc-id $vpc_id --cidr-block 10.0.128.0/20 --query Subnet.SubnetId --output text --tag-specification ResourceType=subnet,Tags='[{Key="Workshop Name",Value="IaC Generator WorkShop"}]' --region $region

# Create Internet Gateway
aws ec2 create-internet-gateway --query InternetGateway.InternetGatewayId --output text --tag-specification ResourceType=internet-gateway,Tags='[{Key="Workshop Name",Value="IaC Generator WorkShop"}]' --region $region

# Get IGW ID
igw_id=$(aws ec2 describe-internet-gateways --filters Name=tag:"Workshop Name",Values="IaC Generator WorkShop" --query 'InternetGateways[].InternetGatewayId' --output text --region $region)

# Attach IGW to VPC
aws ec2 attach-internet-gateway --vpc-id $vpc_id --internet-gateway-id $igw_id --region $region

# Create a route table
aws ec2 create-route-table --vpc-id $vpc_id  --query RouteTable.RouteTableId --output text --tag-specification ResourceType=route-table,Tags='[{Key="Workshop Name",Value="IaC Generator WorkShop"}]' --region $region

# Get Route Table ID and Subnet ID
rt_id=$(aws ec2 describe-route-tables --filters Name=tag:"Workshop Name",Values="IaC Generator WorkShop" --query 'RouteTables[].RouteTableId' --region us-east-1 --output text --region $region)
subnet_id=$(aws ec2 describe-subnets --filters Name=tag:"Workshop Name",Values="IaC Generator WorkShop" --query 'Subnets[].SubnetId' --output text --region $region)

# Associate Route table
aws ec2 associate-route-table --subnet-id $subnet_id --route-table-id $rt_id --region $region

# Create Security Group
aws ec2 create-security-group --group-name EC2SecurityGroup --description "SG for IaC Generator WorkShop" --vpc-id $vpc_id --tag-specification ResourceType=security-group,Tags='[{Key="Workshop Name",Value="IaC Generator WorkShop"}]' --region $region

# Get SG ID
sg_id=$(aws ec2 describe-security-groups --filters Name=tag:"Workshop Name",Values="IaC Generator WorkShop" --query 'SecurityGroups[].GroupId' --output text --region $region)

# Create SG ingress
aws ec2 authorize-security-group-ingress --group-id $sg_id --protocol tcp --port 22 --cidr 0.0.0.0/0  --tag-specification ResourceType=security-group-rule,Tags='[{Key="Workshop Name",Value="IaC Generator WorkShop"}]' --region $region

# Create EC2 instance
aws ec2 run-instances --image-id $ami_id --count 1 --instance-type t2.micro --key-name $keypair  --security-group-ids $sg_id --subnet-id $subnet_id --associate-public-ip-address --tag-specification ResourceType=instance,Tags='[{Key="Workshop Name",Value="IaC Generator WorkShop"}]' --region $region

#echo "Waiting for instance to create and stablize."
#sleep 30
# Get SG ID
inst_id=$(aws ec2 describe-instances --filters Name=tag:"Workshop Name",Values="IaC Generator WorkShop" "Name=instance-state-code,Values=16" --query 'Reservations[].Instances[].InstanceId' --output text --region $region)

# Displays Resource ID's
echo "These are the resources created, you will need these ids later in the workshop."
echo "Key Pair:  $keypair"
echo "VPC ID: $vpc_id"
echo "Subnet ID: $subnet_id"
echo "Internet Gateway ID: $igw_id"
echo "Route Table ID: $rt_id"
echo "Security Group ID: $sg_id"
echo "Instance ID: $inst_id"
前提1.regionとkeypair、ami_idについて
私のIAMユーザにはMFA認証(多要素認証)が付いています。
そのためそのままでは利用できないので、下記のように予め、SessionTokenのprofileを作成して、実行しています。
本文中にある「CNUT」は、私が名付けた"credentials name use token"の略称で、~\.aws\credentialsファイル内にあるMFA認証ユーザーを指しています。
また、regionはshにあった固定値「us-east-1」を、ami_idは「ami-01989ebfd388ea377」を使っていきます。
前提2.ターミナルについて
私はWindowsユーザーなので、ターミナルはコマンドプロンプト(cmd)を利用していきます。
AWS CLIのパスを通した上で進めてください。
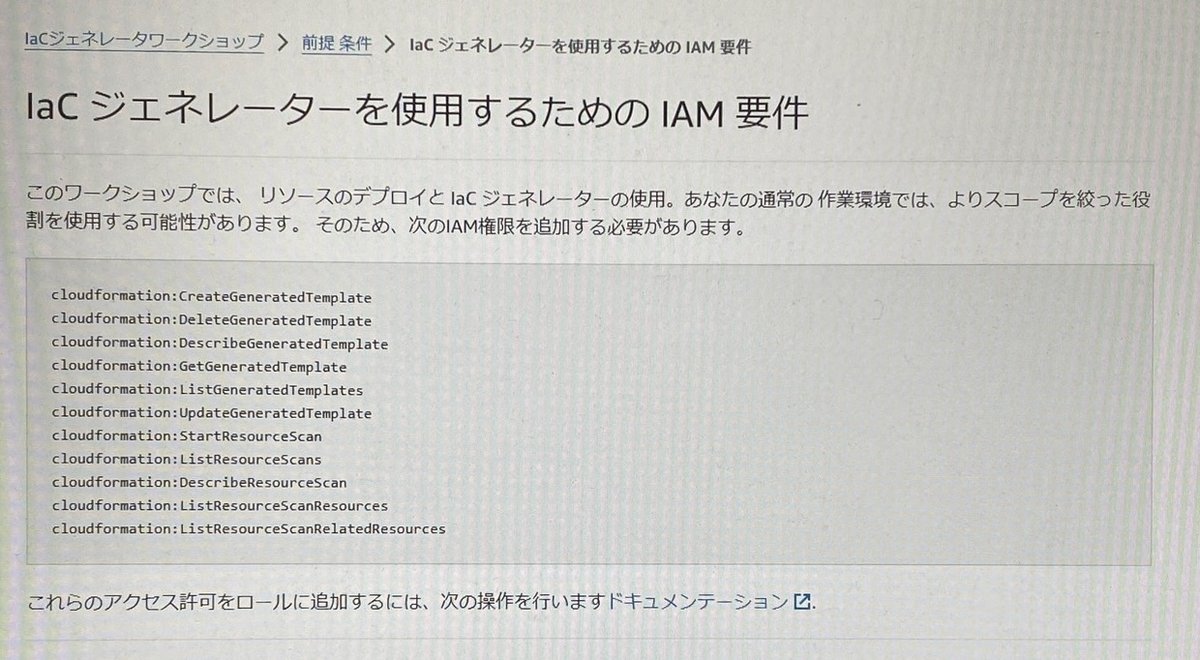
前提3.IaCジェネレータを使うための権限
公式より、以下の権限を有するIAMユーザーで作業する必要があります。
cloudformation:CreateGeneratedTemplate
cloudformation:DeleteGeneratedTemplate
cloudformation:DescribeGeneratedTemplate
cloudformation:GetGeneratedTemplate
cloudformation:ListGeneratedTemplates
cloudformation:UpdateGeneratedTemplate
cloudformation:StartResourceScan
cloudformation:ListResourceScans
cloudformation:DescribeResourceScan
cloudformation:ListResourceScanResources
cloudformation:ListResourceScanRelatedResources
資産の用意
※以降より、shの中身を1つずつ実行し、環境を構築していきます。
手順1.VPCを作成する
aws ec2 create-vpc
--cidr-block 10.0.0.0/16
--query Vpc.VpcId
--output text
--tag-specification ResourceType=vpc,Tags="[{Key=""Workshop Name"",Value=""IaC Generator WorkShop""}]"
--region us-east-1
--profile CNUT
AWSマネジメントコンソールで確認してみます。

今回のregionは”us-east-1”を指定していますので「米国東部(バージニア北部)」内にVPCが作成されます。

しっかり作成されていることが確認できました。
"VPC ID"列には”★1”で返った文字列と一致したものがあればOKです。

手順2.サブネットを作成しVPCに紐づける
aws ec2 create-subnet
--vpc-id vpc-0000aaaa # ★1で返った値
--cidr-block 10.0.128.0/20
--query Subnet.SubnetId
--output text
--tag-specification ResourceType=subnet,Tags="[{Key=""Workshop Name"",Value=""IaC Generator WorkShop""}]"
--region us-east-1
--profile CNUT
AWSマネジメントコンソールで確認してみます。
★2の文字列と一致するものがありました。また、この時の”VPC”列には★1の値が設定されています。正しく作られていることが伺えます。

手順3.インターネットゲートウェイを作成する
aws ec2 create-internet-gateway
--query InternetGateway.InternetGatewayId
--output text
--tag-specification ResourceType=internet-gateway,Tags="[{Key=""Workshop Name"",Value=""IaC Generator WorkShop""}]"
--region us-east-1
--profile CNUT
AWSマネジメントコンソールで確認してみます。
作成されていました。
この段階ではまだ誰とも紐づけていないのでVPCIDも空欄になっており、状態もDetachedになっています。

手順4.VPCにインターネットゲートウェイを付与する
aws ec2 attach-internet-gateway
--vpc-id vpc-0000aaaa # ★1で返った値
--internet-gateway-id $igw_id
--region us-east-1
--profile CNUT
AWSマネジメントコンソールで確認してみます。
手順3で作成したインターネットゲートウェイの状態がAttachedに変わり、★1で作成したVPCと関連付けられました。

手順5.ルートテーブルを作成する
ルートテーブルとは、どの通信をどこへ転送すればいいのか?を記した表です。
aws ec2 create-route-table
--vpc-id vpc-0000aaaa # ★1で返った値
--query RouteTable.RouteTableId
--output text
--tag-specification ResourceType=route-table,Tags="[{Key=""Workshop Name"",Value=""IaC Generator WorkShop""}]"
--region us-east-1
--profile CNUT
AWSマネジメントコンソールで確認してみます。

作成されていました。この段階ではまだサブネットと紐づけていないので「明示的なサブネット….」欄は空欄になっています。

手順6.ルートテーブルにサブネットを紐づける
aws ec2 associate-route-table
--subnet-id subnet-0000aaaa # ★2で返った値
--route-table-id rtb-0000aaaa # ★5返った値
--region us-east-1
--profile CNUT
AWSマネジメントコンソールで確認してみます。
「明示的なサブネットの関連….」欄に紐づけられていることが伺えます。

手順7.セキュリティグループを作成する
aws ec2 create-security-group
--group-name EC2SecurityGroup
--description "SG for IaC Generator WorkShop"
--vpc-id vpc-0000aaaa # ★1で返った値
--tag-specification ResourceType=security-group,Tags="[{Key=""Workshop Name"",Value=""IaC Generator WorkShop""}]"
--region us-east-1
--profile CNUT
AWSマネジメントコンソールで確認してみます。
★7で返った値と同じ文字列で作成されていることが伺えます。

手順8.セキュリティグループに疎通情報を追加する
※ingress: セキュリティグループを通過してよい情報を設定します。
aws ec2 authorize-security-group-ingress
--group-id sg-0000aaaa # ★7で返った値
--protocol tcp
--port 22
--cidr 0.0.0.0/0
--tag-specification ResourceType=security-group-rule,Tags="[{Key=""Workshop Name"",Value=""IaC Generator WorkShop""}]"
--region us-east-1
--profile CNUT
このコマンドを実行すると以下の文字列が返ります。(★8)
{
  "Return": true,
  "SecurityGroupRules": [
    {
      "SecurityGroupRuleId": "sgr-0000aaaa",
      "GroupId": ★7で返った値,
      "GroupOwnerId": "99999999",
      "IsEngress": false,
        :
    }
  ]
}
※このコマンドを実行してもセキュリティグループ画面上は特に変化がなかったので、スクショはありません。
手順9.EC2インスタンスを作成し起動する
※オリジナルのshには「--key-name $keypair」がありますが、私の環境ではキーペア情報を付与できなかったので消しています。
aws ec2 run-instances
--image-id ami-01989ebfd388ea377 # sh冒頭にあった固定値
--count 1
--instance-type t2.micro
--security-group-ids sg-0000aaaa # ★7で返った値
--subnet-id subnet-0000aaaa # ★2で返った値
--associate-public-ip-address
--tag-specification ResourceType=instance,Tags="[{Key=""Workshop Name"",Value=""IaC Generator WorkShop""}]"
--region us-east-1
--profile CNUT
このコマンドを実行すると以下の文字列が返ります。(★9)
{
  "Groups": [],
  "Instances": [
    {
      "AmiLaunchIndex": 0,
      "ImageId": "sh冒頭にあった固定値",
      "InstanceId": "i-0000aaaa",
        :
    }
  ]
}
AWSマネジメントコンソールで確認してみます。
★9で返った"InstanceId"の値でインスタンスが作成されていることが伺えます。

以上で、shの中身の実行が完了です。
IaCコード化
この章では、[資産の用意]章で作成した各種リソース達を、コード化していきます。
手順1.cloudformation画面を開き、スキャンする


手順2.スキャンが完了したら、テンプレートを作成する

手順3.テンプレートの詳細を設定する
テンプレートを準備・・・任意の名称(英数字記号)
削除ポリシー・・・”削除”(ワークショップと同じ設定)
置換ポリシーを更新・・・”保持”(ワークショップと同じ設定)

「削除ポリシー」「置換ポリシー」とは?
下記事参照。
(更新中…)
手順4.[資産の用意]章で作成したリソースを追加する
「スキャンしたリソースを追加」枠内にある「タイプ、タグ、または識別子でリソースを検索する」欄から、[資産の用意]章で作成した各種リソースを追加していきます。

完成図は以下の通りです。

【リソースタイプ】
AWS::EC2::Instance・・・★9で作成した値
AWS::EC2::InternetGateway・・・★3で作成した値
AWS::EC2::RouteTable・・・★5で作成した値
AWS::EC2::SecurityGroup・・・★7で作成した値
AWS::EC2::Sunet・・・★2で作成した値
AWS::EC2::SubnetRouteTableAssociation・・・★6で作成した値
AWS::EC2::VPC・・・★1で作成した値
手順5.関連するリソースを追加する
関連リソースはジェネレータが自動で取捨してくれています。なので、テンプレートとして追加したいリソースを適宜、選択していきます。
※ここではワークショップと同じ設定に倣い、すべてにチェックが入ったままで進めます。

スクショには映っていませんが、画面右下部にある「OK」ボタンを押して次ページへ進みます。
手順6.内容を確認して完了する
下記項目を確認して、問題なければ「テンプレートを作成」ボタンを押します。


下記のように「テンプレートが正常に作成されました」というヘッダメッセージが出れば完了です。
テンプレートはYAML形式かJSON形式かでダウンロードすることができるので、この段階でダウンロードしておきます。

補足.コード化された内容について
別記事でまとめています。下記記事参照。
(更新中…)
IaCコードを使って環境の再構築
(更新中…)
参考資料
エラー解決
〇Parameter validation failed
解決策:コンマやクォーテーションをエスケープする。
例)Windowsの場合、シングルクォーテーションをダブルクォーテーションに変える。など。
〇An error occurred (AccessDenied) when calling the DescribeStacks operation
解決策:ポリシー設定を見直す。
その他参考資料
AWS Cloud Shell画面
https://ap-northeast-1.console.aws.amazon.com/cloudshell/home?region=ap-northeast-1
※アクセスには「cloudshell:CreateEnvironment on resource: *」権限が必要です。https://engineering.nifty.co.jp/blog/24999
https://dev.classmethod.jp/articles/how-to-add-iam-policie-to-generated-lambda-role-in-cdk/
https://qiita.com/a_b_/items/12e3002998d22dfb6385
https://docs.aws.amazon.com/ja_jp/AWSCloudFormation/latest/UserGuide/aws-resource-lambda-function.html#cfn-lambda-function-role
https://qiita.com/ogataro/items/86a56b776b47722c57f8
https://engineering.nifty.co.jp/blog/24999
https://zenn.dev/yururitto_ryuji/articles/c0bd5b66840205