M5 ATOMS3 + ToFセンサ
ごきげんよう、おつかれさまです。
今日は、やっと動いたセンサのソースコード書いておきます。
使用デバイス
M5 ATOM-S3(M5STACK-C123)
ToF 測距センサユニット(M5STACK-TOF-UNIT)
Arduino IDE
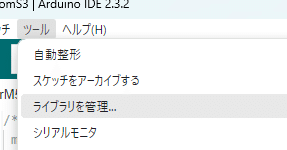
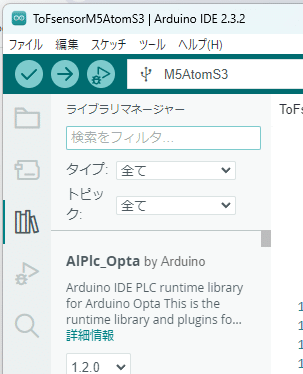
まずライブラリのインストール。
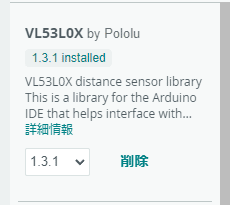
ToFセンサではVI53L0Xを使ってるそうな。意味はわかんないけどそういう名前のチップが入ってるので、この名前でライブラリを検索。


検索画面で「VL53L0X」と入れて検索する。

見つかるので、「インストール」を押す。上記の絵ではすでにインストール済み。
そしてソースコード。基本的には、サンプルプログラムがベースで、AtomS3に合わせていじってある。画面に表示させたかったため。
/* This example shows how to get single-shot range
 measurements from the VL53L0X. The sensor can optionally be
 configured with different ranging profiles, as described in
 the VL53L0X API user manual, to get better performance for
 a certain application. This code is based on the four
 "SingleRanging" examples in the VL53L0X API.

 The range readings are in units of mm. */

#include <M5AtomS3.h>//AtomS3向け
#include <Wire.h>
#include <VL53L0X.h>

VL53L0X sensor;


// Uncomment this line to use long range mode. This
// increases the sensitivity of the sensor and extends its
// potential range, but increases the likelihood of getting
// an inaccurate reading because of reflections from objects
// other than the intended target. It works best in dark
// conditions.

//#define LONG_RANGE


// Uncomment ONE of these two lines to get
// - higher speed at the cost of lower accuracy OR
// - higher accuracy at the cost of lower speed

//#define HIGH_SPEED
#define HIGH_ACCURACY


void setup()
{
  Serial.begin(9600);
  //Wire.begin();
  Wire.begin(2,1.100000);//AtomS3向けに書き換え
  AtomS3.begin();//AtomS3
  AtomS3.Lcd.begin();//AtomS3
  //AtomS3.Lcd.setTextSize(2);//フォントサイズアップ

  sensor.setTimeout(500);
  if (!sensor.init())
  {
    Serial.println("Failed to detect and initialize sensor!");
    while (1) {}
  }

#if defined LONG_RANGE
  // lower the return signal rate limit (default is 0.25 MCPS)
  sensor.setSignalRateLimit(0.1);
  // increase laser pulse periods (defaults are 14 and 10 PCLKs)
  sensor.setVcselPulsePeriod(VL53L0X::VcselPeriodPreRange, 18);
  sensor.setVcselPulsePeriod(VL53L0X::VcselPeriodFinalRange, 14);
#endif

#if defined HIGH_SPEED
  // reduce timing budget to 20 ms (default is about 33 ms)
  sensor.setMeasurementTimingBudget(20000);
#elif defined HIGH_ACCURACY
  // increase timing budget to 200 ms
  sensor.setMeasurementTimingBudget(200000);
#endif
}

void loop()
{
  int i, vol;
  int length = sensor.readRangeSingleMillimeters();
  M5.Lcd.clear();
  AtomS3.Lcd.setTextSize(2);
  M5.Lcd.setCursor(0,10);
  M5.Lcd.printf("%04d",length);
  AtomS3.Lcd.setTextSize(1);
  M5.Lcd.setCursor(0,30);
  vol = (int)(length*128/8190);
  for (i=0; i<vol; i++){
    M5.Lcd.printf("-");
  }
  M5.Lcd.setCursor(0,60);
  M5.Lcd.printf("%03d",vol);

  Serial.print(length);
  if (sensor.timeoutOccurred()) { Serial.print(" TIMEOUT"); }

  Serial.println();
}
はい、コメントが英語ですが、サンプルコードそのままです。
だれかの何かの参考になれば幸いです。
以上。
