BookNotionの設定方法

先日の記事でも少し触れさせて頂きましたBookNotionですが、初期設定が若干複雑なのでこの記事で紹介させて頂きます。
行程は以下です。
アプリのダウンロード
インテグレーショントークンの作成
データベースの作成
それでは順番に説明します。
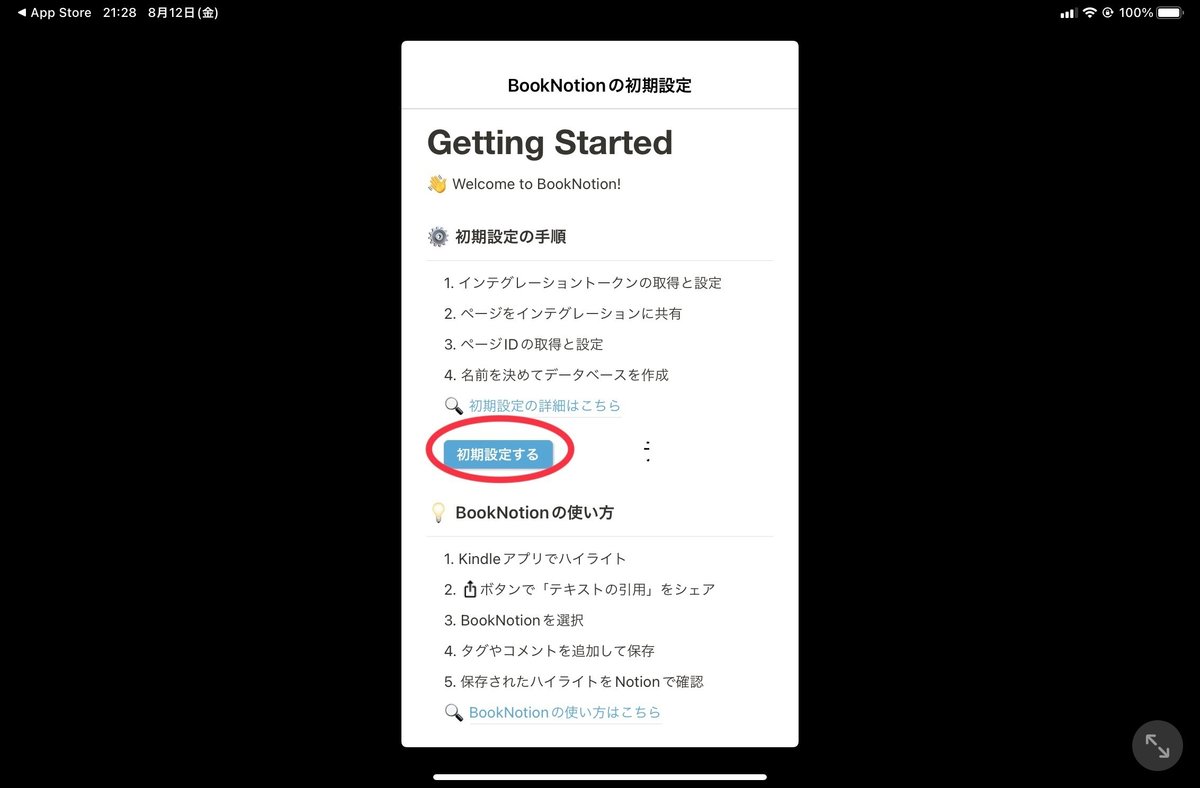
1、最初にBookNotionをダウンロードします
Apple Storeで「BookNotion」と検索すると出てきます。
初期設定ボタンをタップ
2、インテグレーショントークンの作成
これはブラウザで設定した後にアプリに貼り付けてます。
□Notion API にアクセス→https://developers.notion.com/
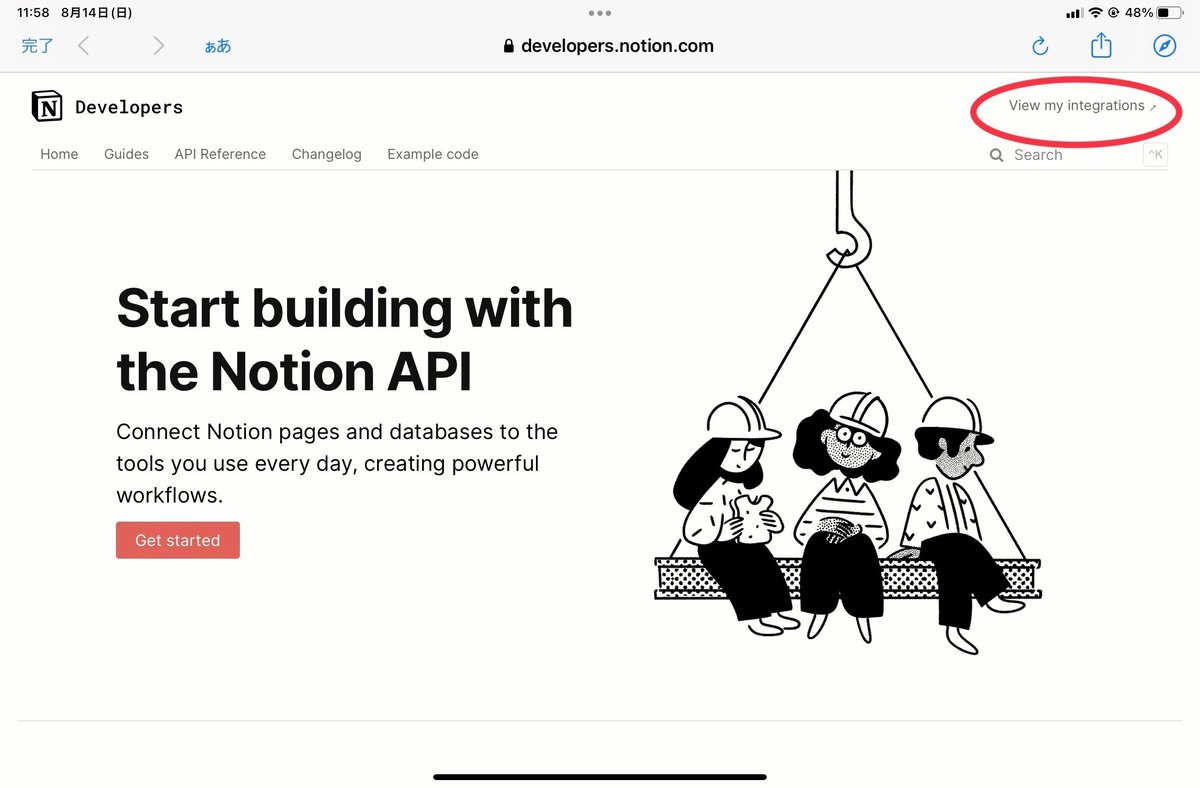
□右上をクリック
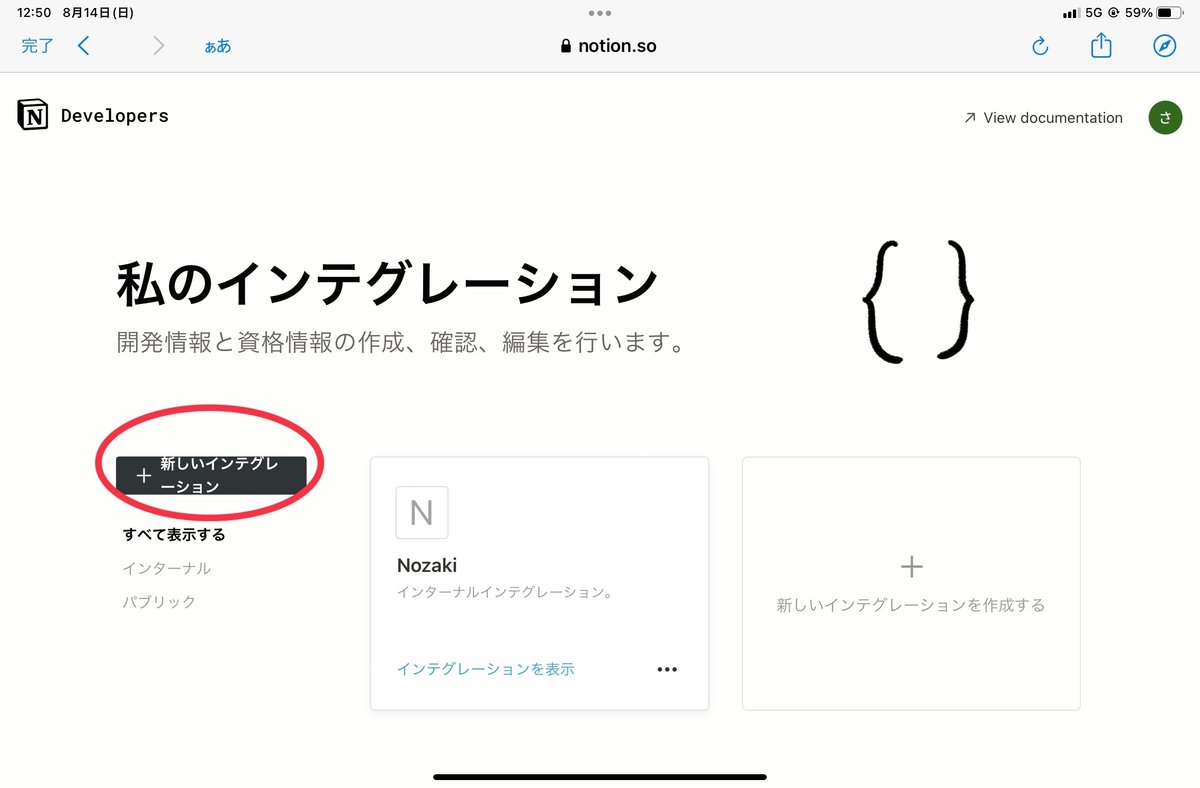
□新しいインテグレーションをクリック
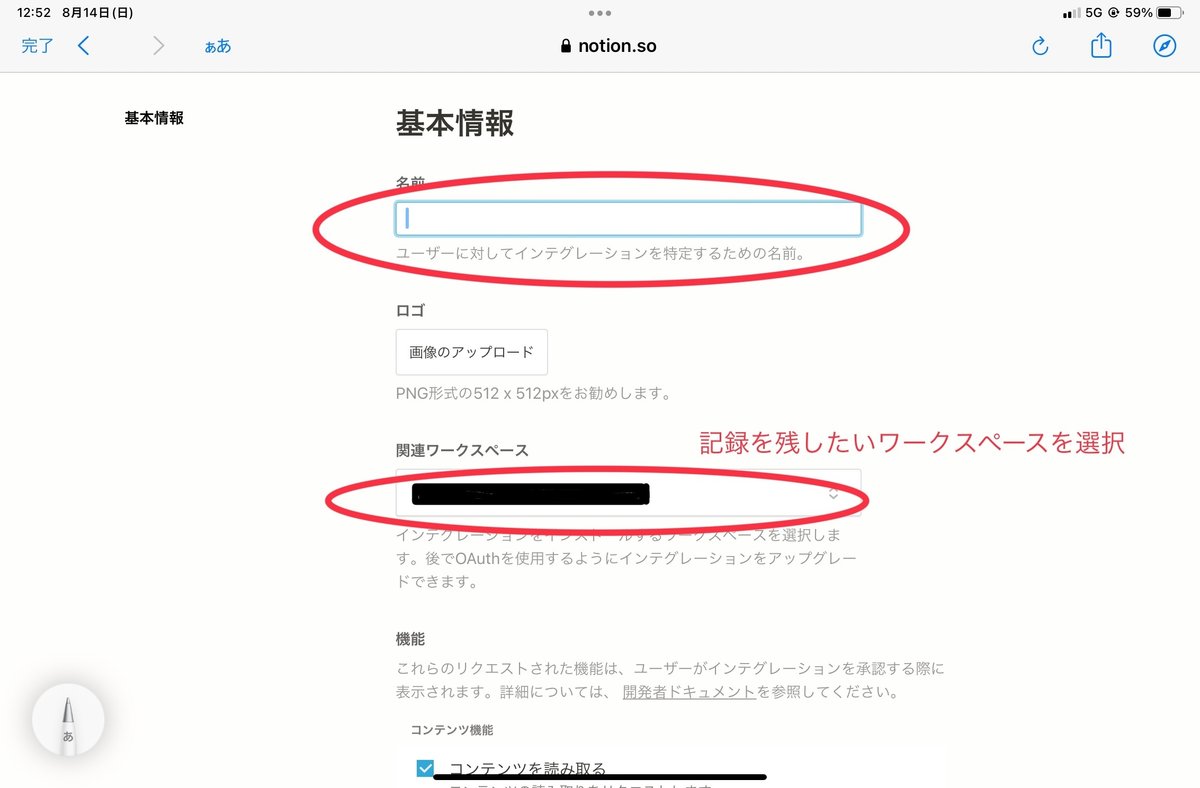
□名前は適当でいいです。今回は「テスト」と入力
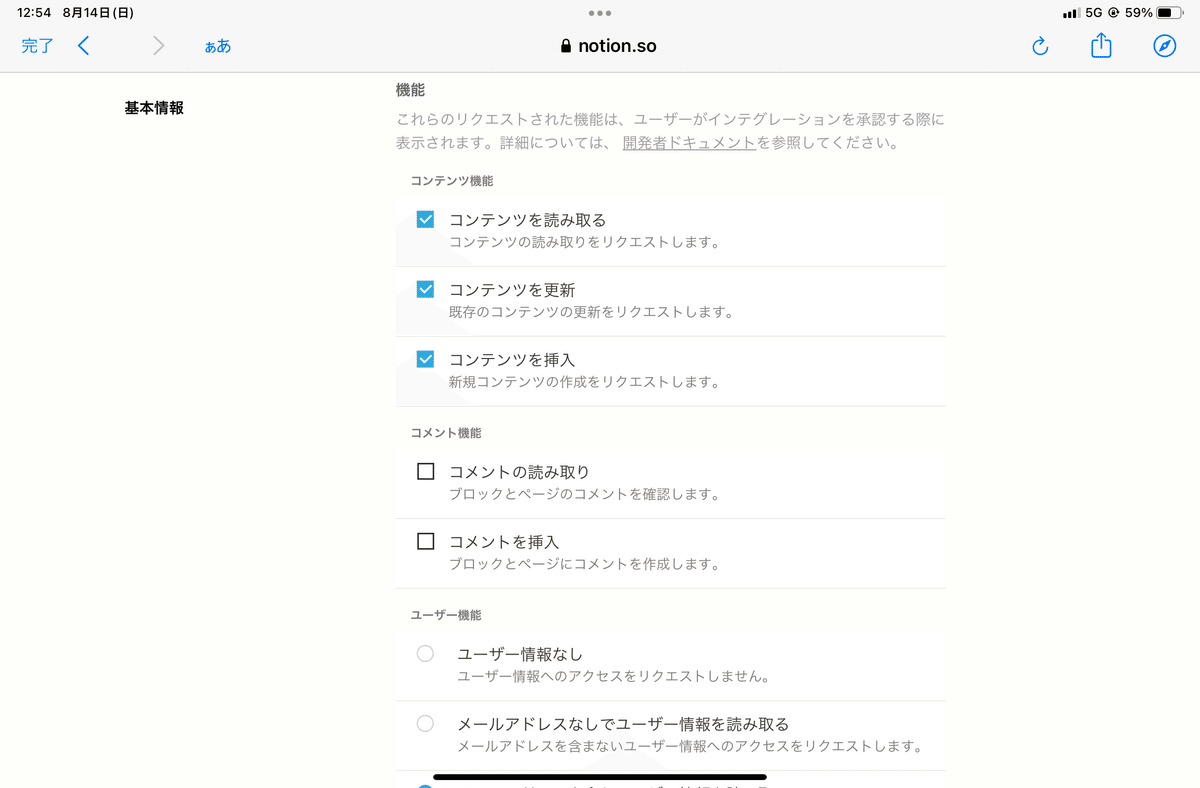
□他の項目はデフォルトでOK
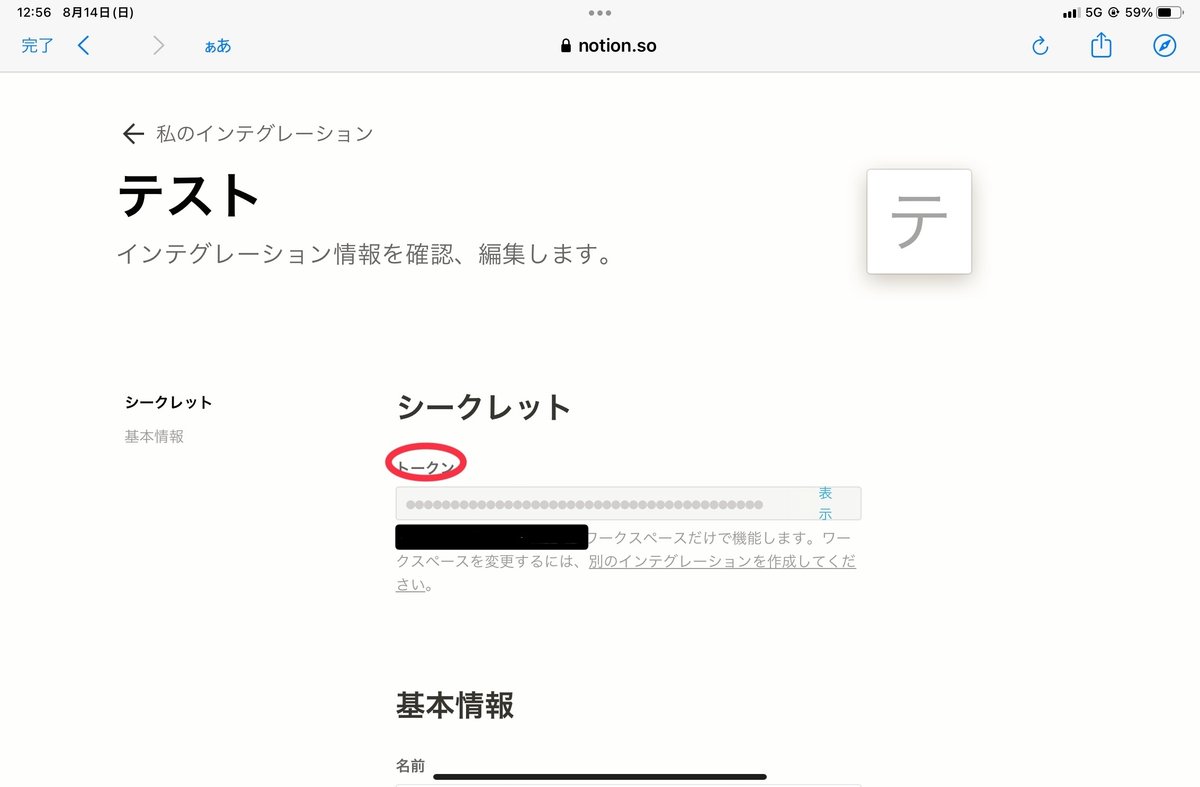
□secret _から始まる値をコピー
□BookNotionに戻りトークンを入力。
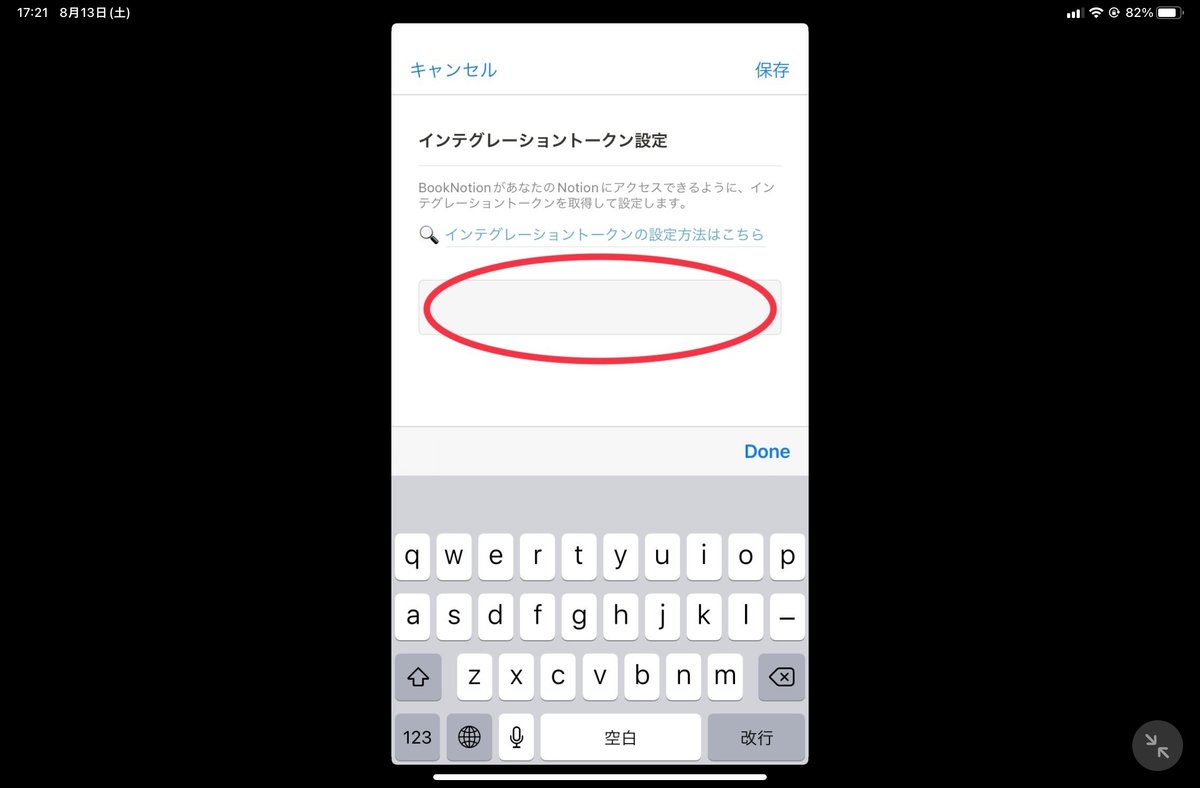
□枠内に先程のコピーをペースト
これでインテグレーショントークンの設定は完了です。
3、データベースの作成
今度はNotionの設定です。
□新しいページを作成して、データベースの名前を入力します。
□次に共有ボタンクリックします。
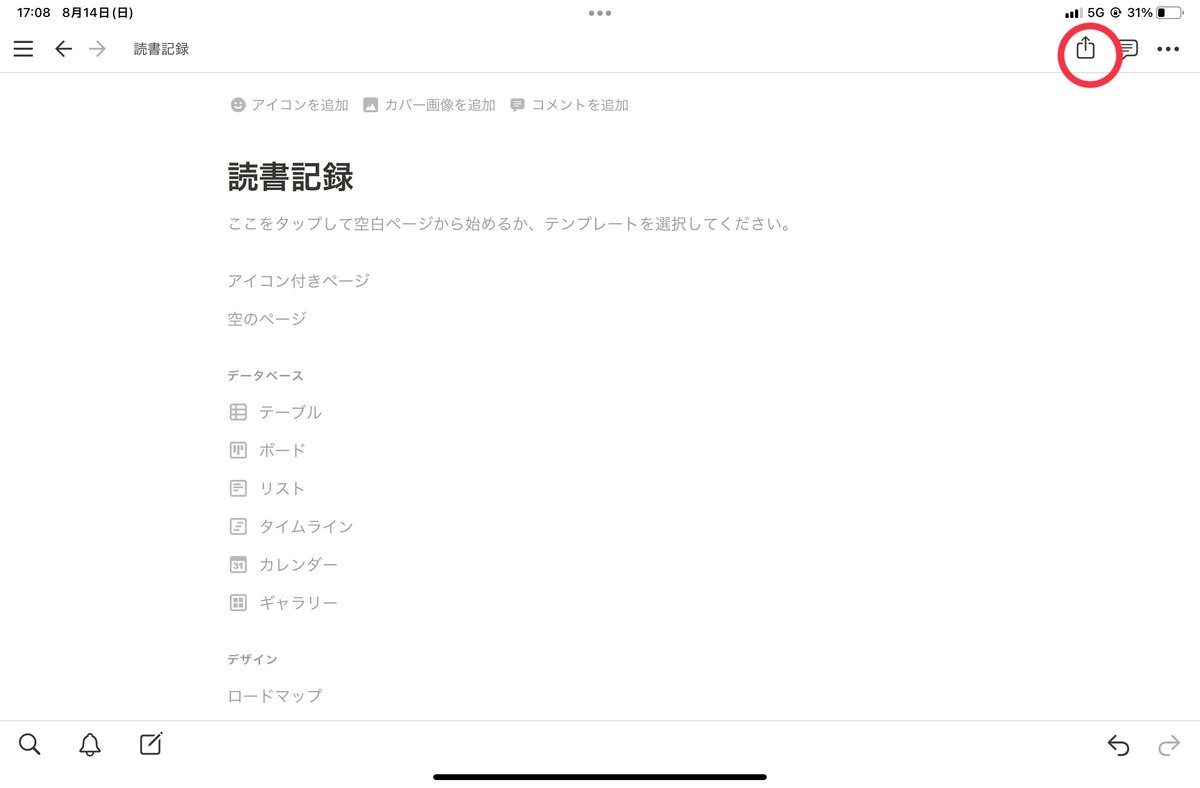
□右上の共有をクリック
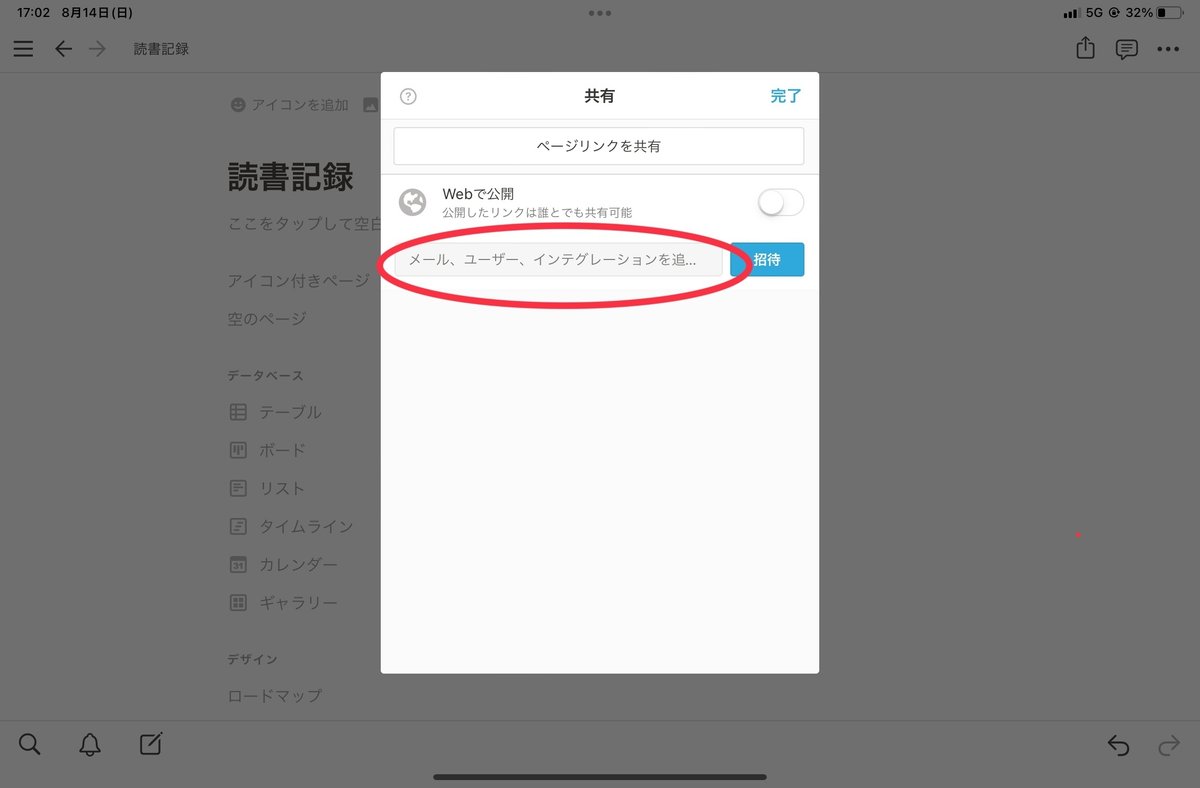
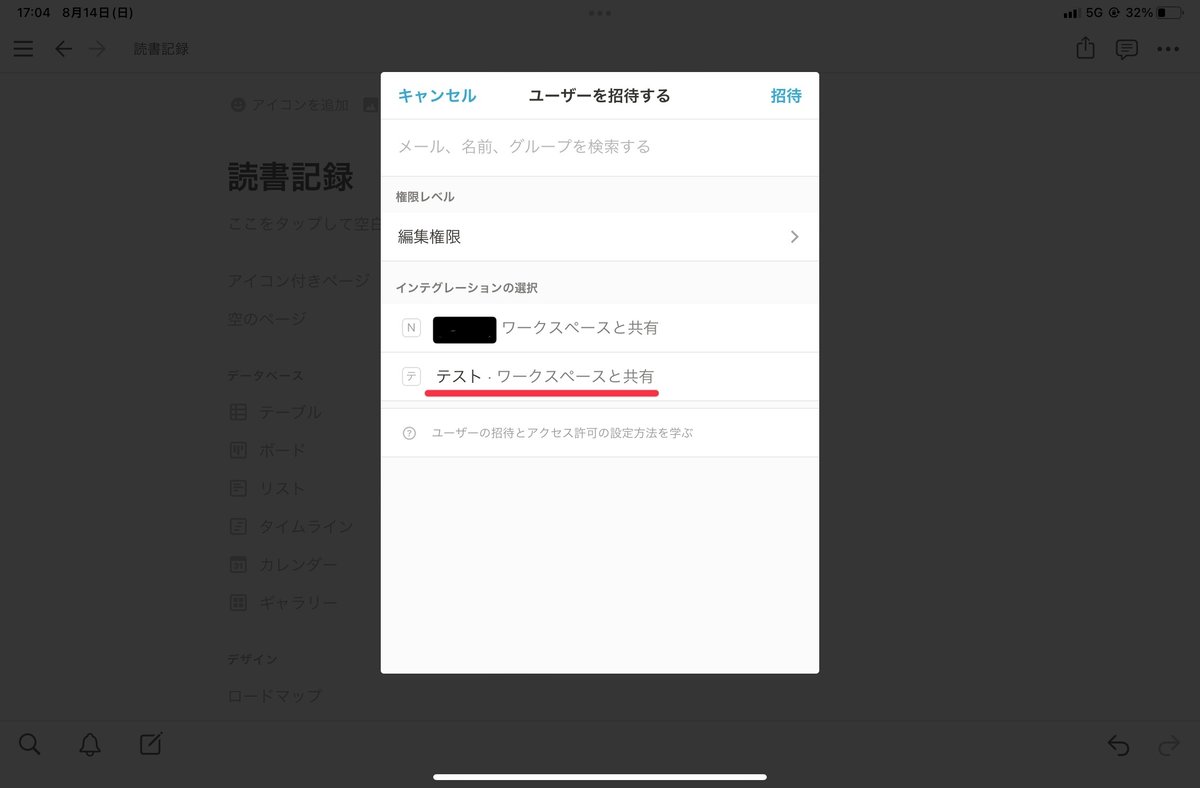
□作成したインテグレーショントークンを選択
次に作成したページIDを取得します。
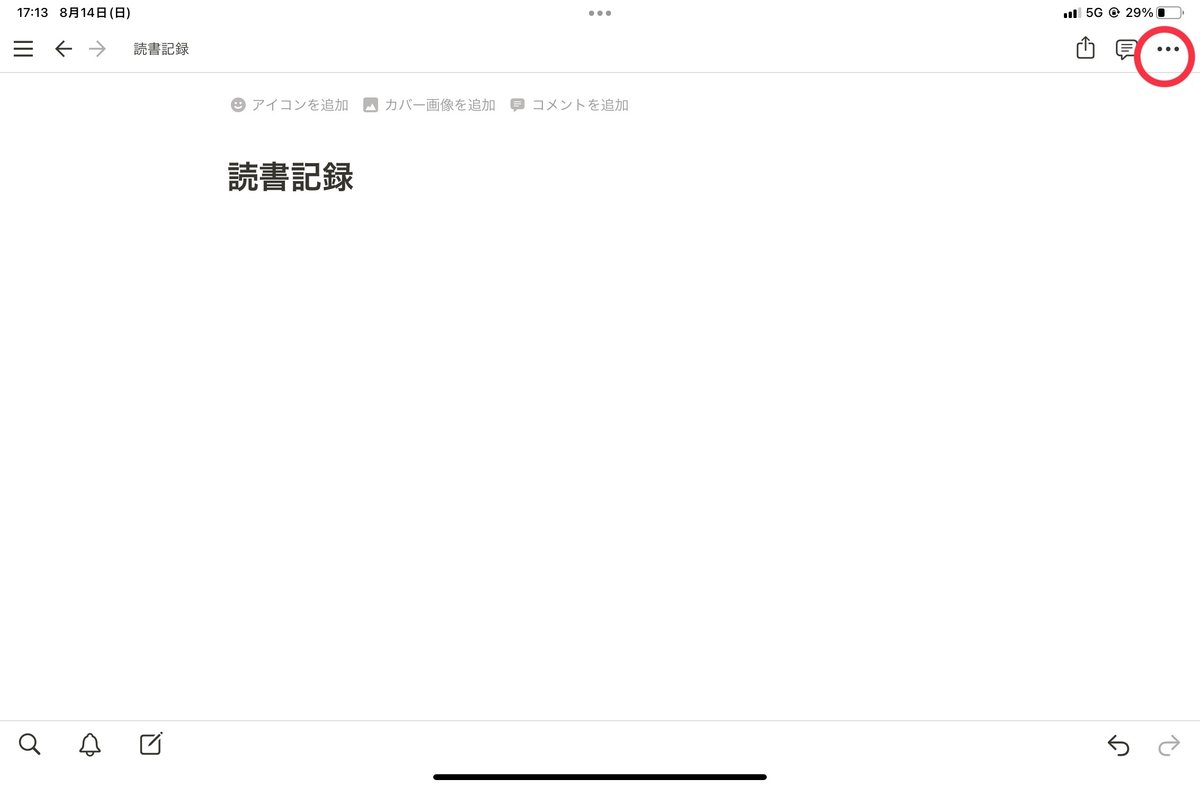

□リンクをコピー
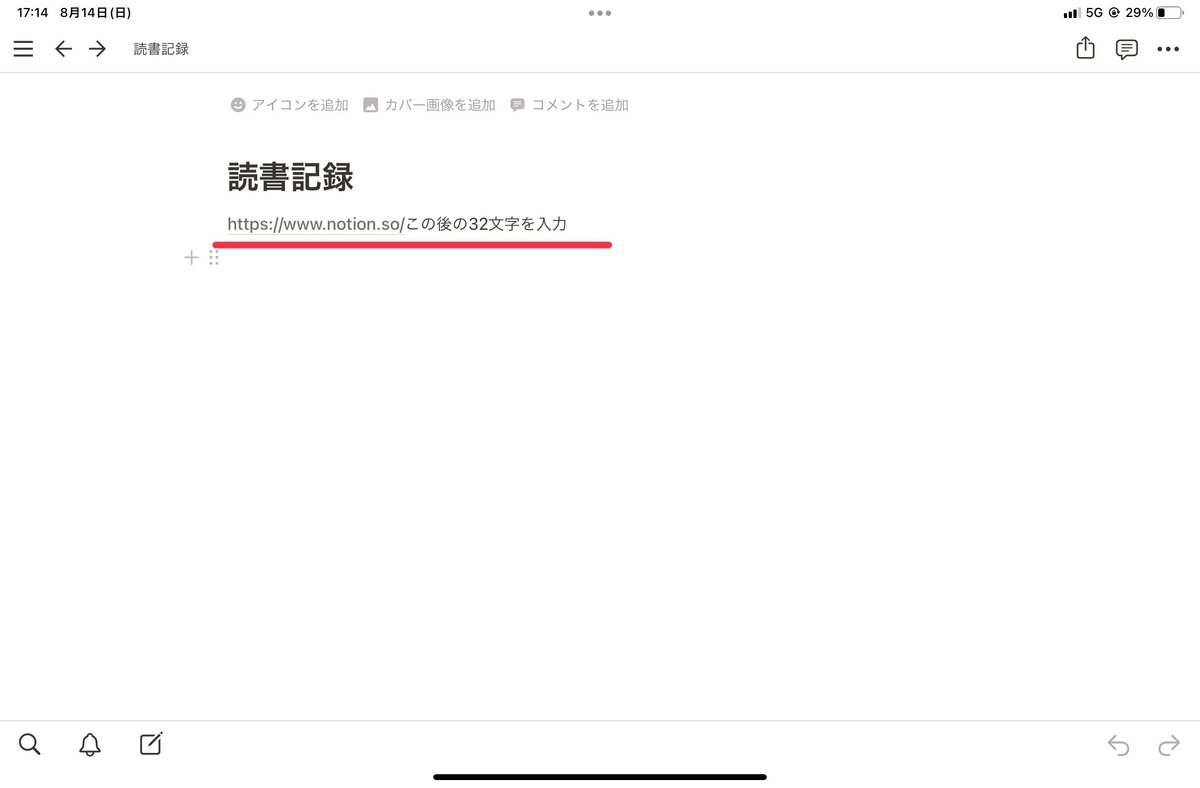
□一旦ページの何処かに貼り付けます。末尾の32文字をコピーして下さい。
ここからBookNotionアプリでの設定に戻ります。
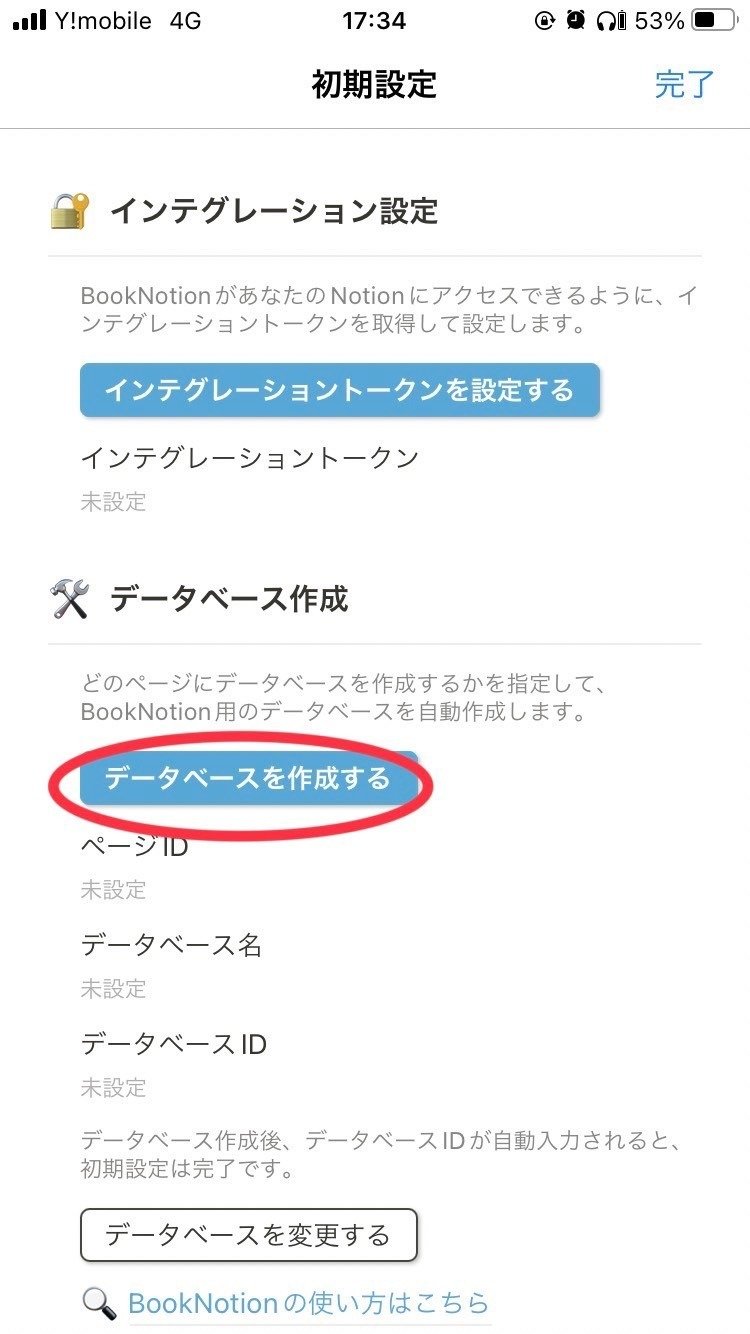

□ページIDの設定に32文字をペーストします。
これでBookNotionとNotionが連携出来ました。
KindleのハイライトからNotionへ
最後にKindleからNotionのやり方です。
□ハイライトした部分を選択
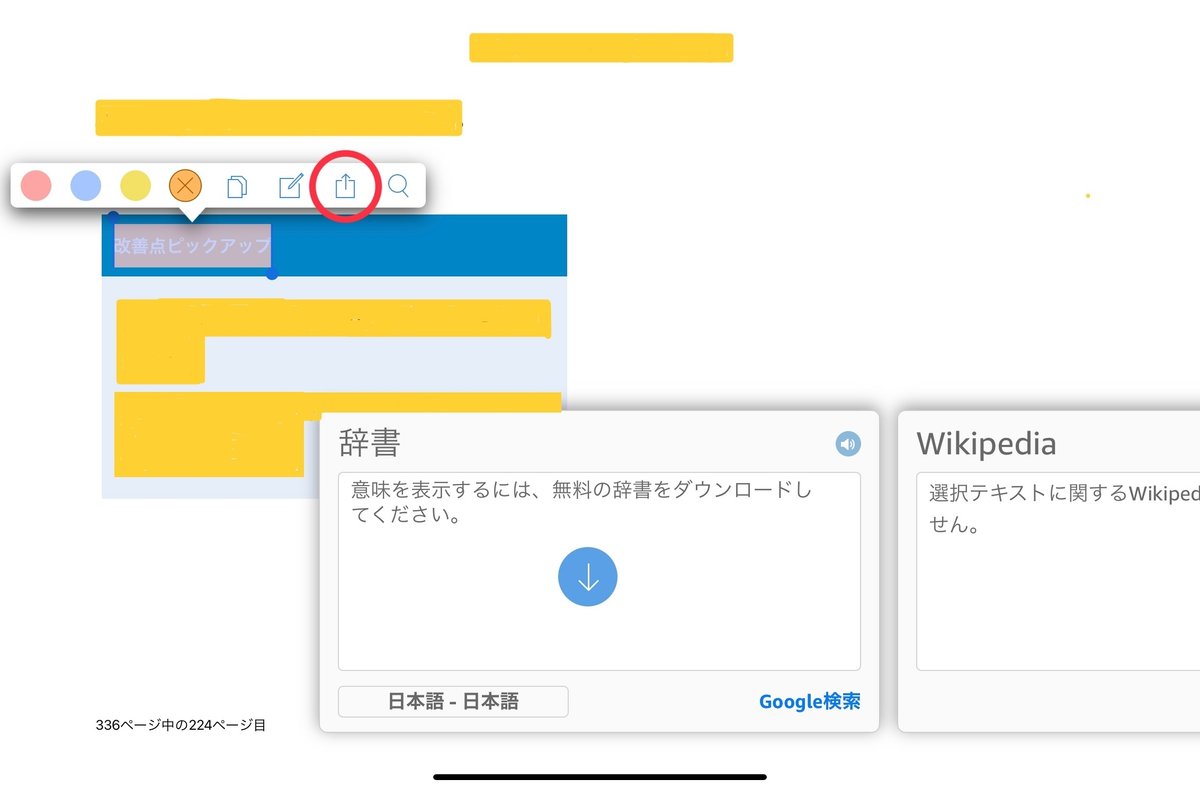
□シェアを選択
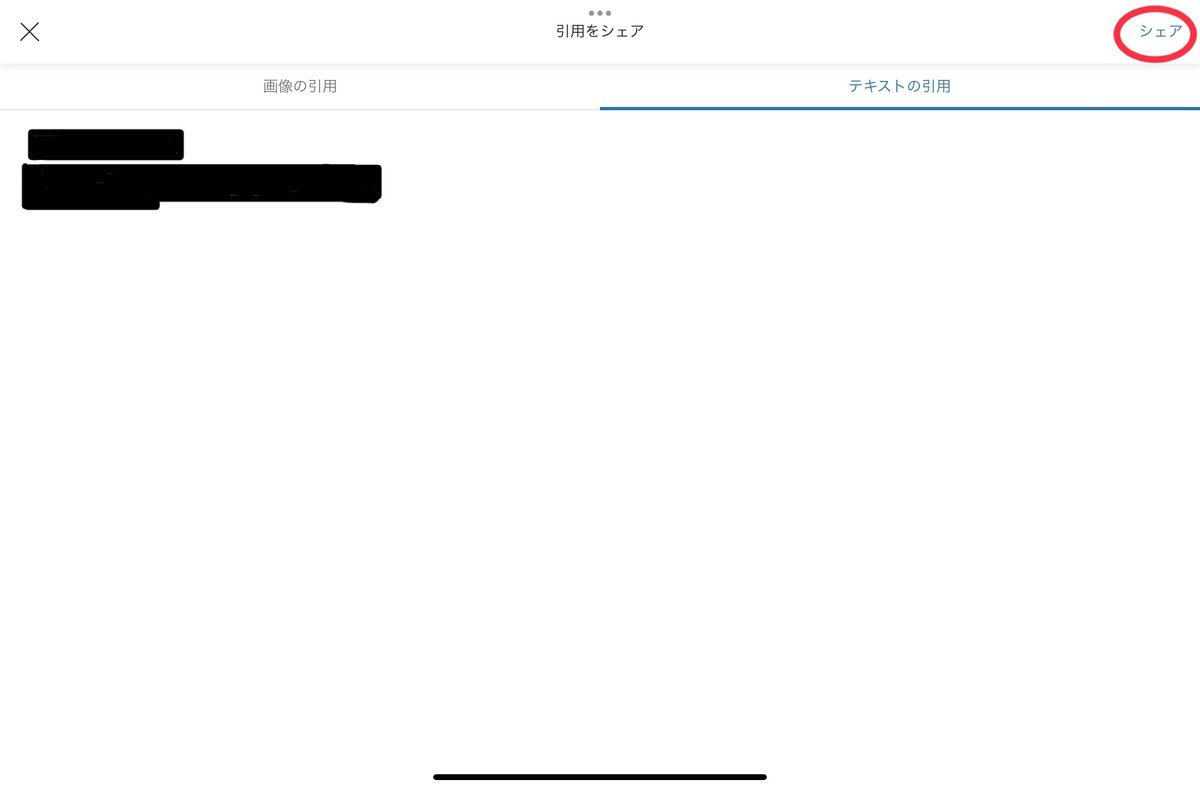
□テキストの引用を選択
画像の引用は出来ません。
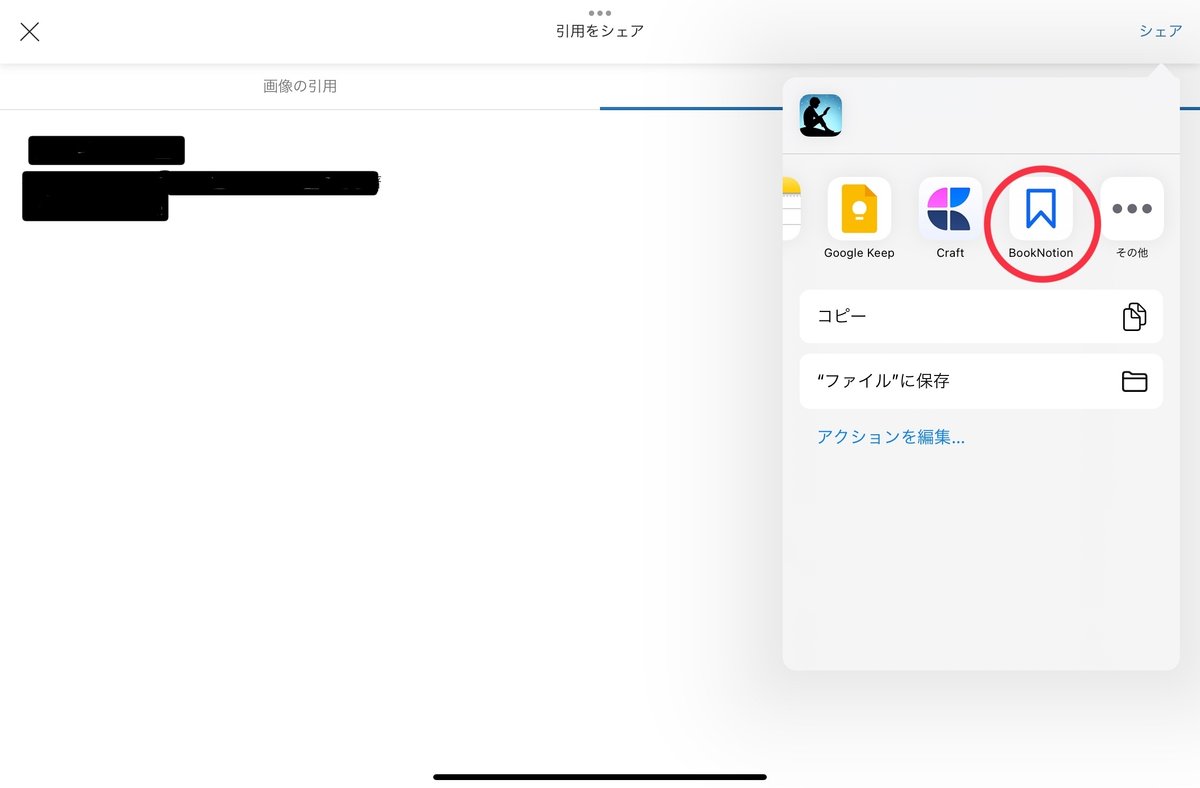
□BookNotion を選択
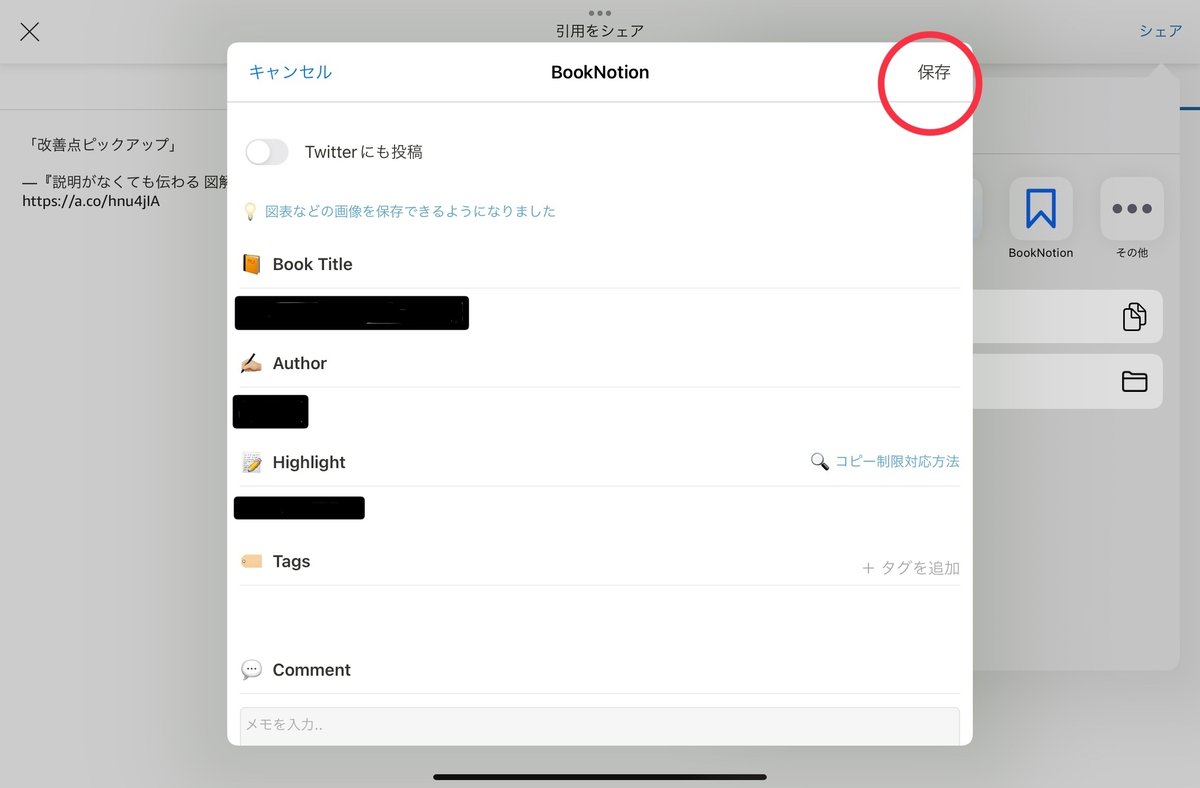
□最後に保存で完了です。
最初の設定は少し複雑ですが、一度設定が出来れば後は簡単です。
今まではハイライトの一覧を全てコピペで読書記録を作成してたので大幅な時間短縮になります。
Kindleで本を読んでいる皆は是非BookNotionを使って読書記録をつけてみて下さい。
いいなと思ったら応援しよう!