
ロケットプールクライアントインストール
事前準備
ロケットプールを実行するユーザーは、いつもログインしている私のものにした。まずはクライアントをダウンロードするディレクトリを作成する。
$ cd
$ mkdir -p ~/bin
rocketpool CLI をダウンロード
$ wget https://github.com/rocket-pool/smartnode-install/releases/latest/download/rocketpool-cli-linux-amd64 -O ~/bin/rocketpool実行フラグのセットとバージョンの確認
$ chmod + x ~/bin/rocketpool
$ cd ~bin
$ ./rocketpool --version

rocketpool version 1.13.0
スマートノードスタックのインストール
$ ./rocketpool service install
The Rocket Pool service will be installed --Version: v1.13.0

If you're upgrading, your existing configuration will be backed up and preserved.
All of your previous settings will be migrated automatically.
Are you sure you want to continue? [y/n]
y

/usr/bin/lsb_release
Step 1 of 9: Installing OS dependencies...
Step 2 of 9: Checking if Docker is installed...
Installing Docker...
Step 2 of 9: Checking if docker-compose-plugin is installed...
Already installed.
Step 3 of 9: Adding user to docker group...
Step 5 of 9: Checking for existing installation...
Step 6 of 9: Creating Rocket Pool user data directory...
Step 7 of 9: Downloading Rocket Pool package files...
Step 8 of 9: Copying package files to Rocket Pool user data directory...
Step 9 of 9: Cleaning up obsolete files from previous installs...

The Rocket Pool service was successfully installed!

______           _        _    ______           _
| ___ \         | |      | |   | ___ \         | |
| |_/ /___   ___| | _____| |_  | |_/ /__   ___ | |
|    // _ \ / __| |/ / _ \ __| |  __/ _ \ / _ \| |
| |\ \ (_) | (__|   <  __/ |_  | | | (_) | (_) | |
\_| \_\___/ \___|_|\_\___|\__| \_|  \___/ \___/|_|

=== Smartnode v1.13.0 ===

Changes you should be aware of before starting:

=== New Notification module ===
The Smartnode alert notification functionality allows you to receive notifications about the health and important events of your Rocket Pool Smartnode. Check `https://docs.rocketpool.net/guides/node/maintenance/alerting` for more details.

=== New Geth Mode: PBSS ===
Geth has been updated to v1.13, which includes the much-anticipated Path-Based State Scheme (PBSS) storage mode. With PBSS, you never have to manually prune Geth again; it prunes automatically behind the scenes during runtime! To enable it, check the "Enable PBSS" box in the Execution Client section of the `rocketpool service config` UI. Note you **will have to resync** Geth after enabling this for it to take effect, and will lose attestations if you don't have a fallback client enabled!


=== Next Steps ===
Run 'rocketpool service config' to review the settings changes for this update, or to continue setting up your node.

NOTE:
Since this is your first time installing Rocket Pool, please start a new shell session by logging out and back in or restarting the machine.
This is necessary for your user account to have permissions to use Docker.
だいたい何かしらのエラーが出て対応しないといけないケースが多いのだが、エラーも出ずあっさりと簡単にインストールが終了した。
Your changes have been saved!
Would you like to start the Smartnode services automatically now? [y/n]
ここでエラーが出る。
permission denied while trying to connect to the Docker daemon socket at unix:///var/run/docker.sock:permission denied while trying to connect to the Docker daemon socket at unix:///var/run/docker.sock:Dockerのパーミションが無いと言われたので、/etc/wheelの中を確認するも問題なさそう。そういえば、全然再起動していないと一旦再起動してみると問題なく起動できた。
$ ./rocketpool service configここからはウィザードに従い順番に設定していく。
Your Smartnode is currently using the Ethereum Mainnet.

Your execution client hasn't synced enough to determine if your execution and consensus clients are on the same network.
To run this safety check, try again later when the execution client has made more sync progress.

Your primary execution client is still syncing (20.79%).
You do not have a fallback execution client enabled.
Your primary consensus client is fully synced.
You do not have a fallback consensus client enabled.
同期完了
Your Smartnode is currently using the Ethereum Mainnet.

Your consensus client is on the correct network.

Your primary execution client is fully synced.
You do not have a fallback execution client enabled.
Your primary consensus client is fully synced.
You do not have a fallback consensus client enabled.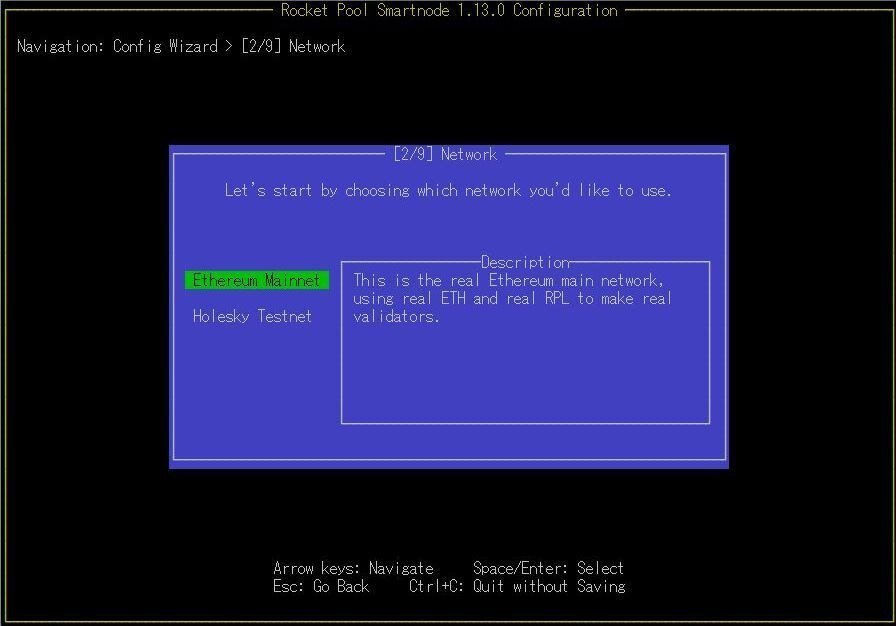
本番環境なのでEthereum Mainnetを選択
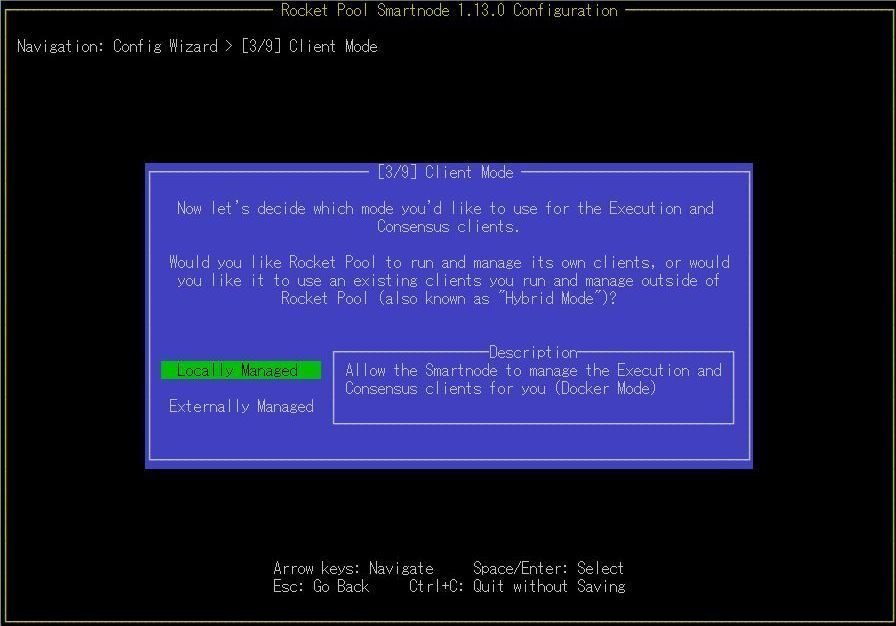
デフォルトのDockerモードを利用するのでLocally Managedを選択
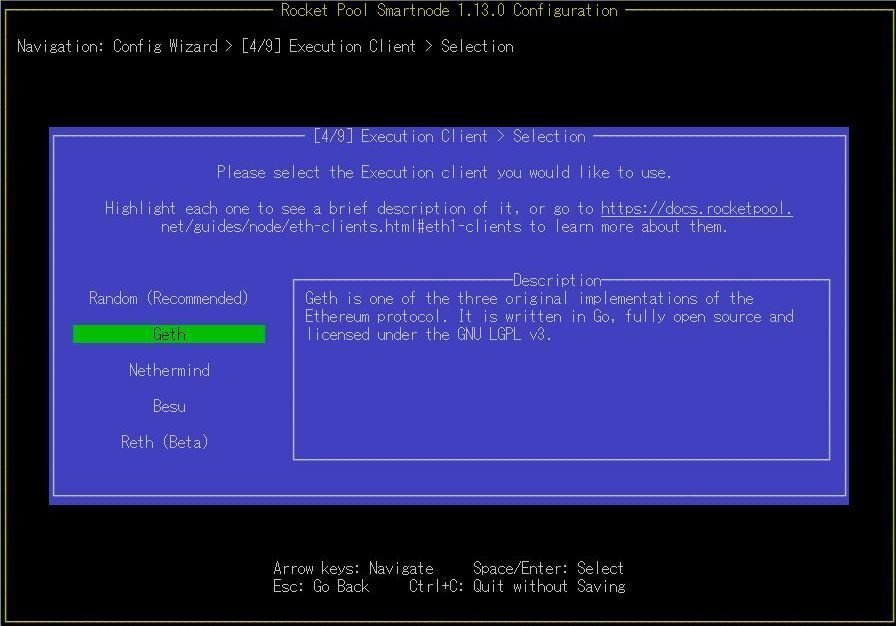
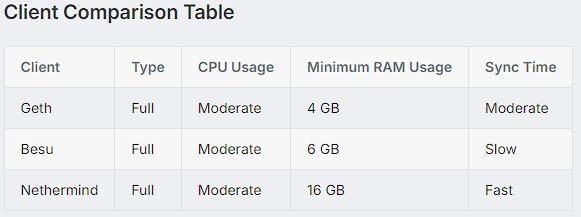
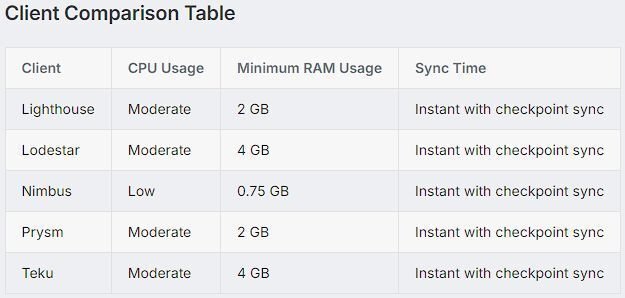
エクゼクションクライアントはリソースに制限のあるスモールPCなのでRondomは選ばず、下記の資料を参考にしGethにした。
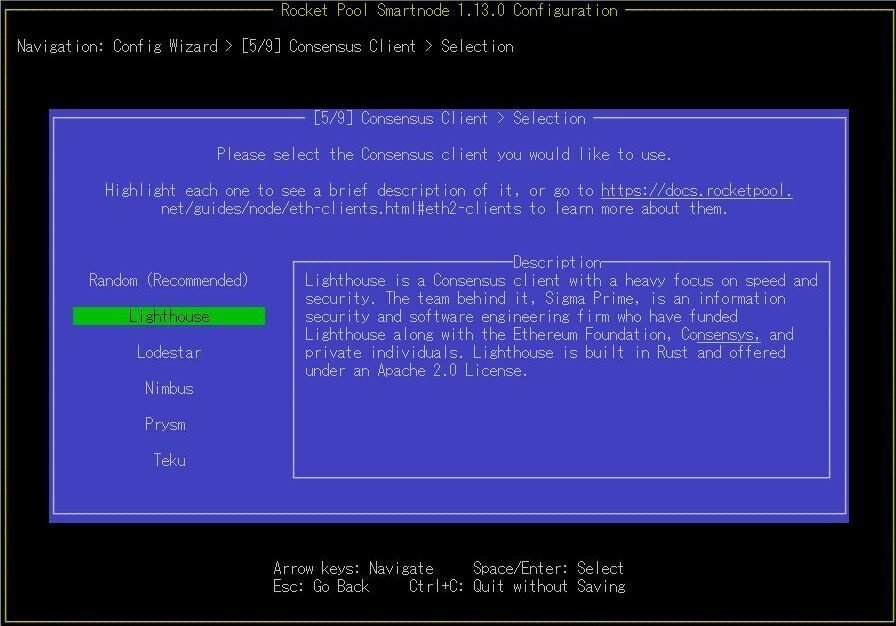
コンセンサスクライアントも制限のあるPCなのでメモリ使用量の少ないのにしようと考えたがNimbusは遅いと書いてあるのでLightHouseにすることにした。
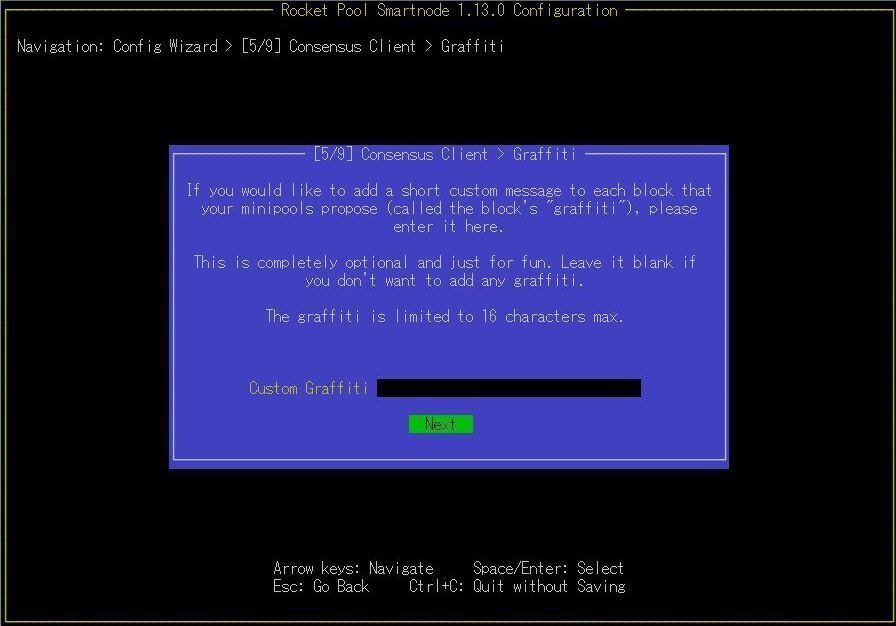
最大16文字ブロックに残せるようですが、特に指定しませんでした。
なにか記念に残しても良かったかもしれない。
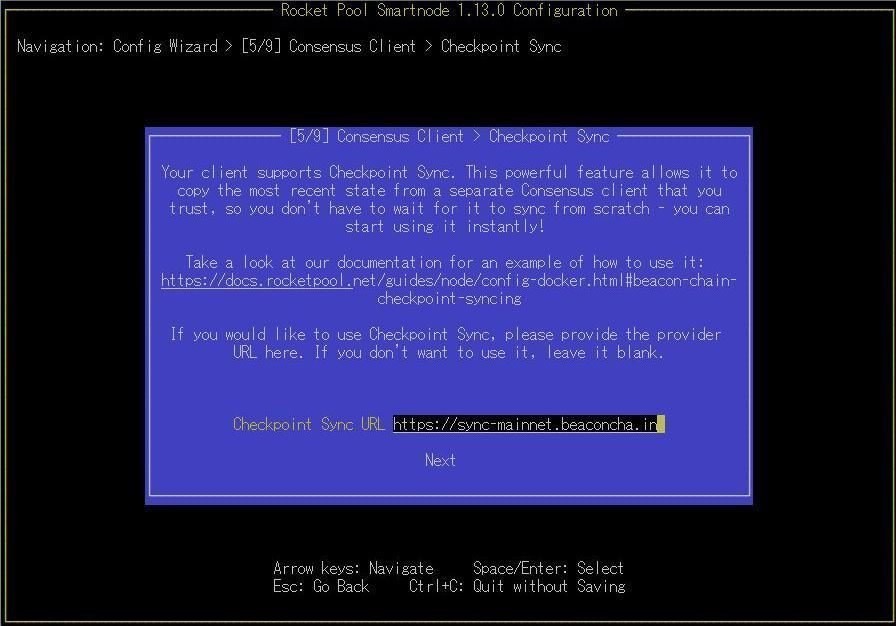
Lighthouseの同期を高速にするために、チェックポイントシンクを設定します。以下のサイトから一番上に出てきたのを選んだ。
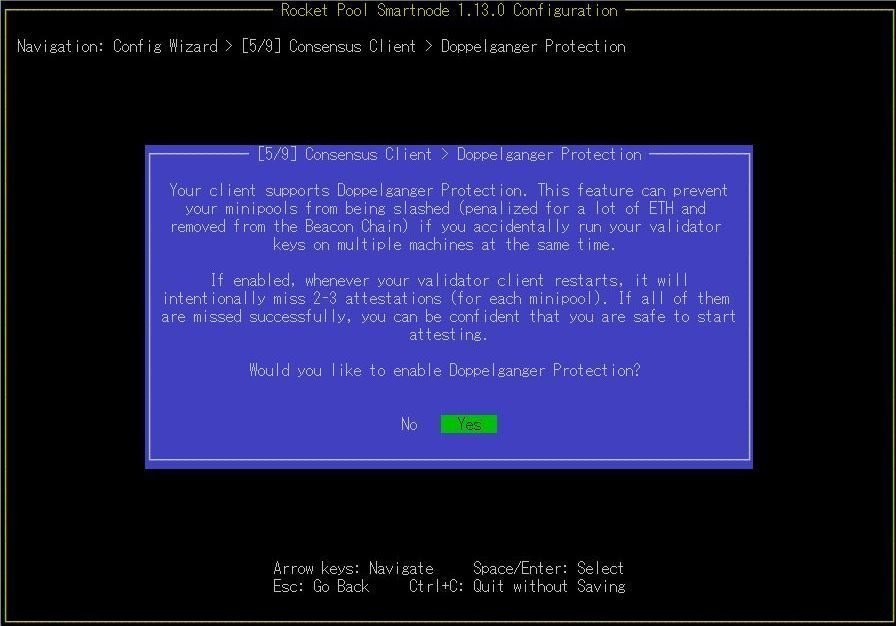
別のマシンでバリデーターキーを実行している場合、二重の証明によるペナルティを受けるのを防ぐ機能です。デフォルトがYesなのでそのままYesとして設定しました。
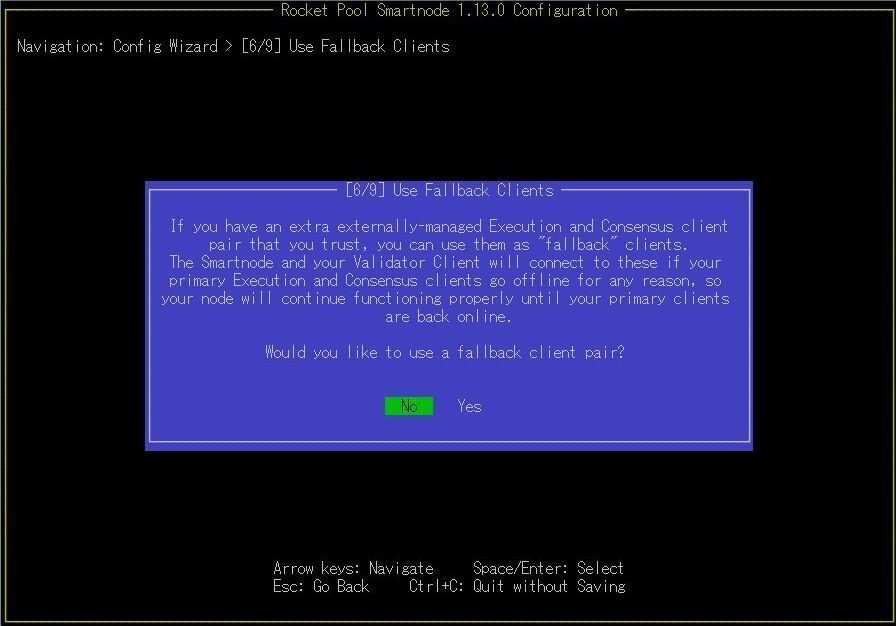
フォールバッククライアントはデフォルトのNoで設定
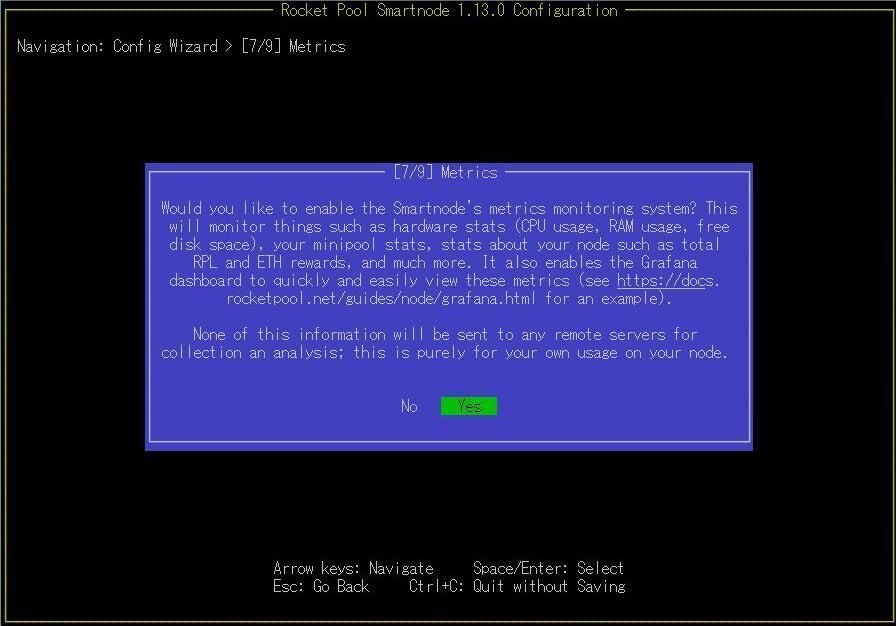
システムの状態を表示することのできるメトリックは面白そうだし、デフォルトでYesなのでそのままYesとした。(基本デフォルトで設定している)
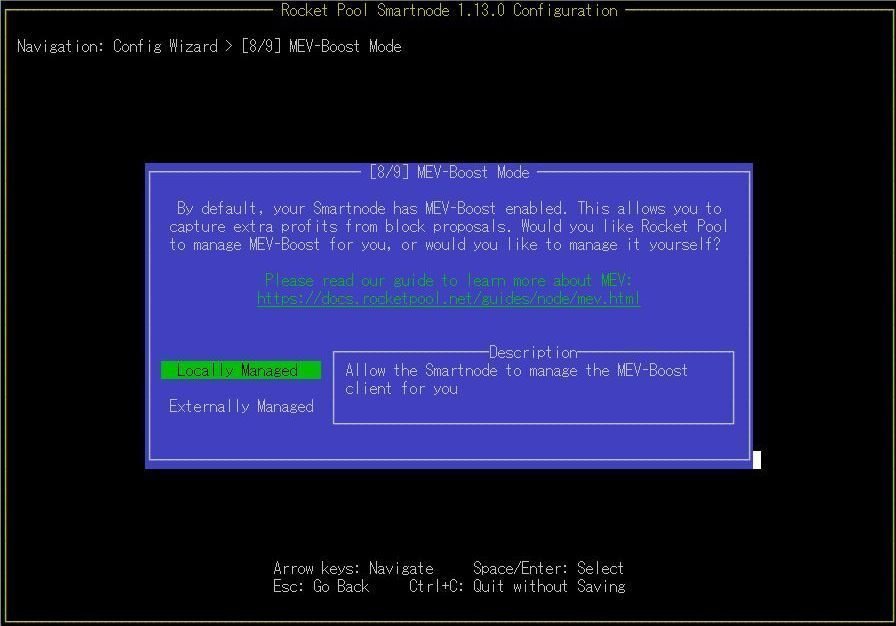
MEV-Boostを動かすと手数料が上乗せされるらしいので迷わずON
Locally Managedにしました(デフォルト)
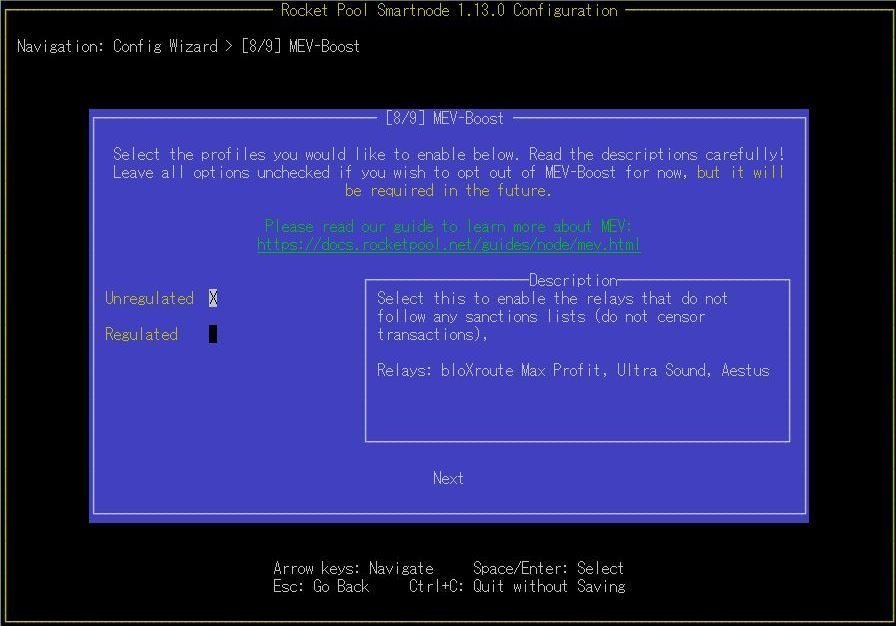
デフォルトのUnregulatedにチェックをつけた(デフォルト)
以上で設定が終了され、起動が始まります。
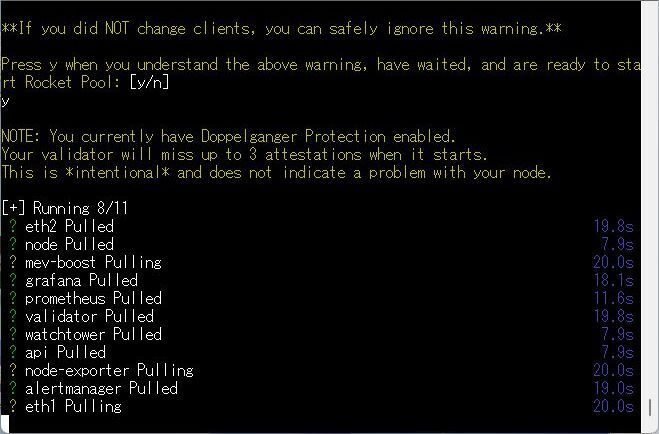
過去に他のクライアント使っていたか聞かれるが使ってないのでyキーを押す。
各ソフトのダウンロードやインストールに少し時間が掛かるが、終了するとブロックの同期が始まります。
Your Smartnode is currently using the Ethereum Mainnet.

Your execution client hasn't synced enough to determine if your execution and consensus clients are on the same network.
To run this safety check, try again later when the execution client has made more sync progress.

Your primary execution client is still syncing (20.79%).
You do not have a fallback execution client enabled.
Your primary consensus client is fully synced.
You do not have a fallback consensus client enabled.
我が家の環境で完全に同期するまで24時間程度かかりました。
