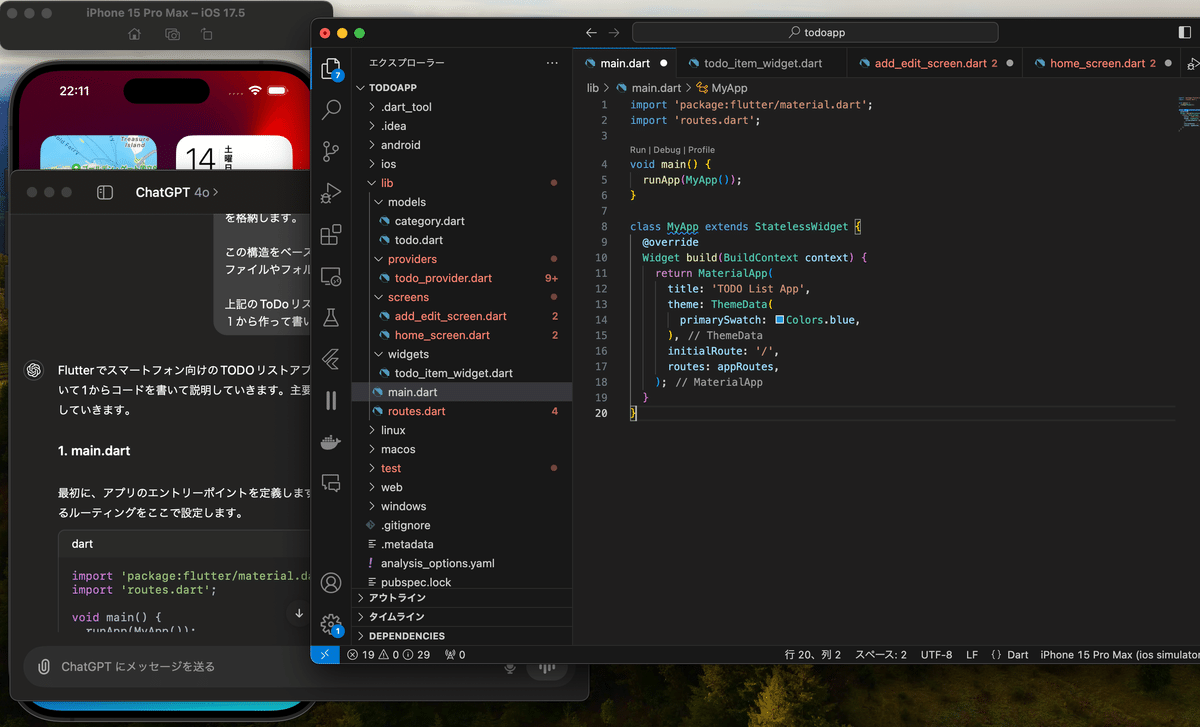
GPT4o vs o1- preview vs o1-mini Flutterアプリコーディング比較
今回はタイトルにあるようにGPT各種にFlutterアプリコーディングをしてもらって比較してみます。
*注意*
書くモデルの回答をそのまま貼り付けているため記事が相当長くなっていますのでご気をつけください。
結論
「GPT4o」と「o1- preview」の生成スピード比べて「o1-mini」が倍速くらいで動いてくれていてめっちゃ早く感じます。
コードを書くなら公式の通りに「o1-mini」だと思います。
また、アプリ全体を通してのコーディングはハードルが高いようなので一つの機能や、ページごとに作っていくのが良い!
「o1-mini」でコードを作って「GPT4o」でつめていくのが利用制限的に考えてもいい使い方かなぁ
はじめに
4o-miniで下記の質問で簡単なToDoアプリケーションの企画を出してもらいます。
質問: flutterでスマートフォン向けのtodoリストに必要な機能とそれぞれのファイル構造を企画化してください。
上でできた企画を同じプロンプトでそれぞれのモデルに投げて比較して行きます。
GPT4oの回答
Flutterでスマートフォン向けのTODOリストアプリを開発する際に、上記の要件に基づいて1からコードを書いて説明していきます。主要なファイルを作成し、その中身を説明していきます。
1. `main.dart`
最初に、アプリのエントリーポイントを定義します。`MaterialApp`と、アプリ全体で利用するルーティングをここで設定します。
import 'package:flutter/material.dart';
import 'routes.dart';

void main() {
  runApp(MyApp());
}

class MyApp extends StatelessWidget {
  @override
  Widget build(BuildContext context) {
    return MaterialApp(
      title: 'TODO List App',
      theme: ThemeData(
        primarySwatch: Colors.blue,
      ),
      initialRoute: '/',
      routes: appRoutes,
    );
  }
}
このファイルでは、アプリのエントリーポイントと、`routes.dart`で定義されたルートを利用しています。
2. `routes.dart`
アプリ内の画面遷移を管理します。`home_screen.dart`など、各画面の遷移をここで定義します。
import 'package:flutter/material.dart';
import 'screens/home_screen.dart';
import 'screens/add_edit_screen.dart';
import 'screens/category_screen.dart';
import 'screens/settings_screen.dart';

final Map<String, WidgetBuilder> appRoutes = {
  '/': (context) => HomeScreen(),
  '/addEdit': (context) => AddEditScreen(),
  '/category': (context) => CategoryScreen(),
  '/settings': (context) => SettingsScreen(),
};
`appRoutes`では、ルートとそれに対応するウィジェット(画面)を定義しています。
3. `models/todo.dart`
TODOアイテムのデータモデルを定義します。
class Todo {
  String id;
  String title;
  String description;
  String categoryId;
  bool isCompleted;
  int priority;
  DateTime? reminderTime;

  Todo({
    required this.id,
    required this.title,
    required this.description,
    required this.categoryId,
    this.isCompleted = false,
    this.priority = 0,
    this.reminderTime,
  });
}
`Todo`モデルは、TODOアイテムの属性(タイトル、説明、カテゴリ、完了状態、優先度、リマインダーなど)を持っています。
4. `models/category.dart`
カテゴリーのデータモデルを定義します。
class Category {
  String id;
  String name;

  Category({required this.id, required this.name});
}
`Category`モデルは、カテゴリー名とIDを持っています。
5. `providers/todo_provider.dart`
TODOアイテムの状態管理を行うプロバイダを定義します。
import 'package:flutter/material.dart';
import '../models/todo.dart';

class TodoProvider with ChangeNotifier {
  List<Todo> _todos = [];

  List<Todo> get todos => _todos;

  void addTodo(Todo todo) {
    _todos.add(todo);
    notifyListeners();
  }

  void updateTodo(Todo todo) {
    int index = _todos.indexWhere((t) => t.id == todo.id);
    if (index != -1) {
      _todos[index] = todo;
      notifyListeners();
    }
  }

  void deleteTodo(String id) {
    _todos.removeWhere((todo) => todo.id == id);
    notifyListeners();
  }

  void toggleTodoStatus(String id) {
    int index = _todos.indexWhere((todo) => todo.id == id);
    if (index != -1) {
      _todos[index].isCompleted = !_todos[index].isCompleted;
      notifyListeners();
    }
  }

  List<Todo> filterByCategory(String categoryId) {
    return _todos.where((todo) => todo.categoryId == categoryId).toList();
  }
}
`TodoProvider`は、TODOリストの追加、更新、削除、状態変更を管理するクラスです。`ChangeNotifier`を使って、リストが変更されたときにUIを更新します。
6. `screens/home_screen.dart`
ホーム画面では、TODOリストを表示します。
import 'package:flutter/material.dart';
import 'package:provider/provider.dart';
import '../providers/todo_provider.dart';
import '../widgets/todo_item_widget.dart';

class HomeScreen extends StatelessWidget {
  @override
  Widget build(BuildContext context) {
    return Scaffold(
      appBar: AppBar(
        title: Text('TODO List'),
        actions: [
          IconButton(
            icon: Icon(Icons.add),
            onPressed: () {
              Navigator.pushNamed(context, '/addEdit');
            },
          )
        ],
      ),
      body: Consumer<TodoProvider>(
        builder: (context, todoProvider, child) {
          return ListView.builder(
            itemCount: todoProvider.todos.length,
            itemBuilder: (context, index) {
              return TodoItemWidget(todo: todoProvider.todos[index]);
            },
          );
        },
      ),
    );
  }
}
ホーム画面は、TODOリストをリストビューで表示し、アイテムの追加ボタンも備えています。
7. `screens/add_edit_screen.dart`
TODOアイテムの追加・編集画面を定義します。
import 'package:flutter/material.dart';
import 'package:provider/provider.dart';
import '../models/todo.dart';
import '../providers/todo_provider.dart';

class AddEditScreen extends StatefulWidget {
  @override
  _AddEditScreenState createState() => _AddEditScreenState();
}

class _AddEditScreenState extends State<AddEditScreen> {
  final _formKey = GlobalKey<FormState>();
  String _title = '';
  String _description = '';
  String _categoryId = '';
  int _priority = 0;

  void _saveTodo() {
    if (_formKey.currentState!.validate()) {
      _formKey.currentState!.save();
      final newTodo = Todo(
        id: DateTime.now().toString(),
        title: _title,
        description: _description,
        categoryId: _categoryId,
        priority: _priority,
      );
      Provider.of<TodoProvider>(context, listen: false).addTodo(newTodo);
      Navigator.pop(context);
    }
  }

  @override
  Widget build(BuildContext context) {
    return Scaffold(
      appBar: AppBar(title: Text('Add/Edit TODO')),
      body: Form(
        key: _formKey,
        child: Padding(
          padding: EdgeInsets.all(16.0),
          child: Column(
            children: [
              TextFormField(
                decoration: InputDecoration(labelText: 'Title'),
                validator: (value) {
                  if (value == null || value.isEmpty) {
                    return 'Please enter a title';
                  }
                  return null;
                },
                onSaved: (value) {
                  _title = value!;
                },
              ),
              TextFormField(
                decoration: InputDecoration(labelText: 'Description'),
                onSaved: (value) {
                  _description = value!;
                },
              ),
              DropdownButtonFormField(
                value: _categoryId,
                items: [], // Category options here
                onChanged: (value) {
                  _categoryId = value.toString();
                },
                decoration: InputDecoration(labelText: 'Category'),
              ),
              DropdownButtonFormField(
                value: _priority,
                items: [
                  DropdownMenuItem(child: Text('Low'), value: 0),
                  DropdownMenuItem(child: Text('Medium'), value: 1),
                  DropdownMenuItem(child: Text('High'), value: 2),
                ],
                onChanged: (value) {
                  setState(() {
                    _priority = value as int;
                  });
                },
                decoration: InputDecoration(labelText: 'Priority'),
              ),
              ElevatedButton(
                onPressed: _saveTodo,
                child: Text('Save'),
              ),
            ],
          ),
        ),
      ),
    );
  }
}
この画面は、TODOアイテムの追加・編集を行うためのフォームです。
8. `widgets/todo_item_widget.dart`
TODOアイテムを表示するカスタムウィジェットを定義します。
import 'package:flutter/material.dart';
import '../models/todo.dart';

class TodoItemWidget extends StatelessWidget {
  final Todo todo;

  TodoItemWidget({required this.todo});

  @override
  Widget build(BuildContext context) {
    return ListTile(
      title: Text(todo.title),
      subtitle: Text(todo.description),
      trailing: IconButton(
        icon: Icon(todo.isCompleted ? Icons.check_box : Icons.check_box_outline_blank),
        onPressed: () {
          // Toggle complete status
        },
      ),
    );
  }
}
これで基本的なTODOリストアプリの構造ができました。このコードを基に、他の機能や詳細な設定を追加していくことで、アプリをさらに拡張することができます。
使ってみての感想
この規模の大きいコードでは1発でエラーなしでコードを出すのは難しいですね。
エラーのコードを入力してエラーを「GPT 4o」に潰してもらうようにすればなんとかなりそうかも、、、

o1-previewの回答
ここから先は
¥ 300
この記事が気に入ったらサポートをしてみませんか?
