[macOS] VSCodeで既存の.NET MAUIアプリをデバッグ実行する

Visual Studio for Macが2024年8月にサポート終了するので、VSCodeに移行せよというお達しが出ています。
Visual Studio for Macで開発していた既存の.NET MAUI (.NET 8)プロジェクトをVSCodeでデバッグ実行するやり方をまとめました。
前提
macOS 14.2.1 (Intel版mac mini)
Visual Studio for Macで開発していた.NET MAUI(.NET 8)プロジェクトがある。
VSCodeがインストールされている。
今回はiOSのシミュレータでアプリが起動できることを目標にします。
やり方
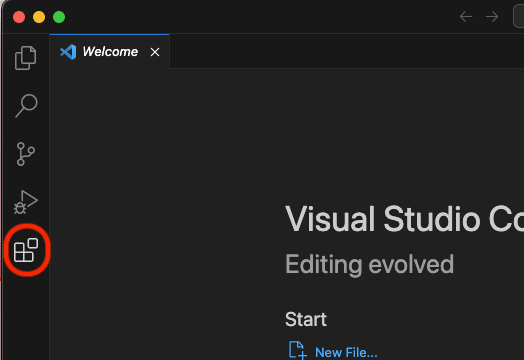
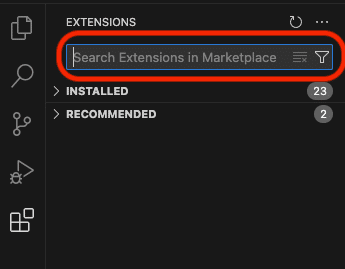
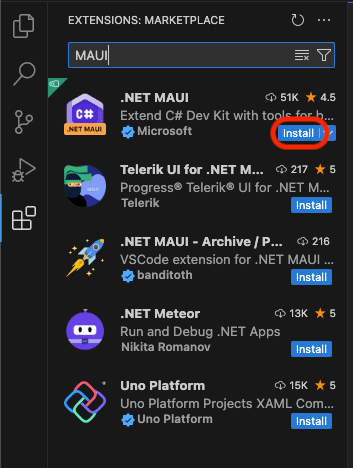
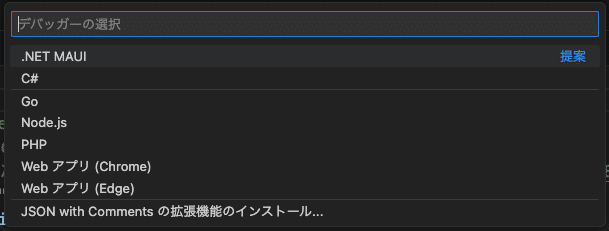
MAUI拡張機能をインストール
VSCodeを起動し、左側の赤枠部分を押下する。
検索欄に「MAUI」と入力する
検索結果に出てきた ".NET MAUI"の "Install" を押下してインストールを行う。
この辺りで日本語拡張機能も入れたので、以下からスクショなどが急に日本語表記になります。
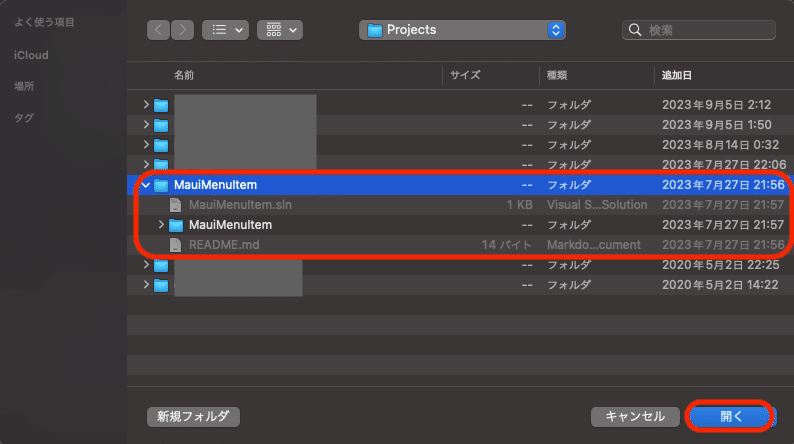
ソリューションを開く
メニュー > ファイル > フォルダーを開く… を選択する。
開きたいソリューション(.slnファイル)が含まれているフォルダを選択し、"開く"を押下する。
ライセンス認証をする
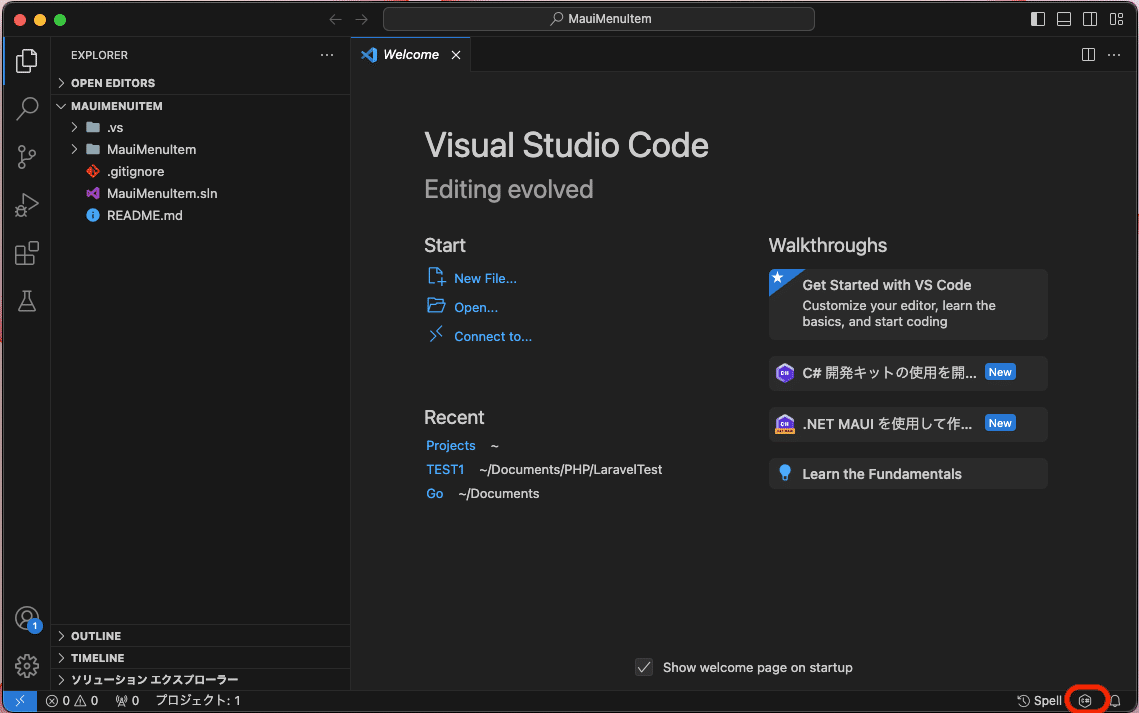
右下にある画像の赤枠部分のマークを押下する。
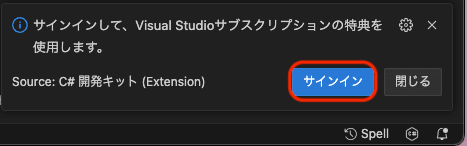
"サインイン"を押下する
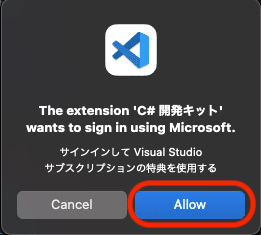
"Allow"を押下する
ブラウザが起動し、Microsoftのアカウントのサインイン画面になる。Visual Studio サブスクリプションのアカウントでサインインを行う。
サインイン完了後、再度右下の"C#"のマークを押下する。
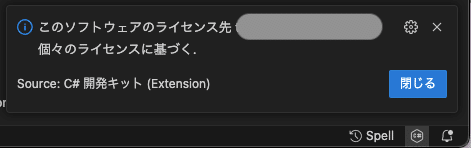
"このソフトウェアのライセンス先"の右に、サインインを行ったアカウントのメールアドレスが記載されていることを確認してから、"閉じる"を押下する。
デバッグ実行を開始する
Command + Shift + P を押下しコマンドパレットを開く。
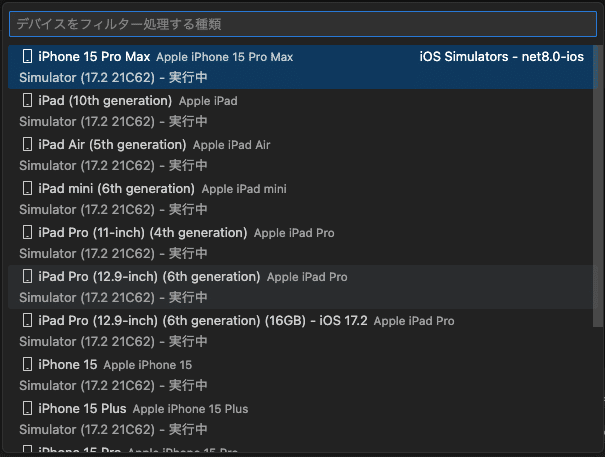
".NET MAUI: スタートアップ デバイスの選択" を選択し、実行したいiOSのシミュレータを選択する。
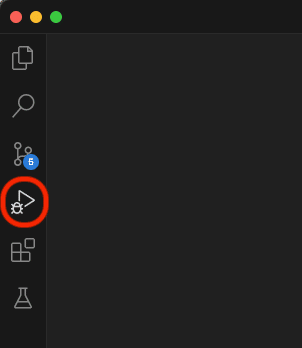
左側の赤枠部分を押下する。
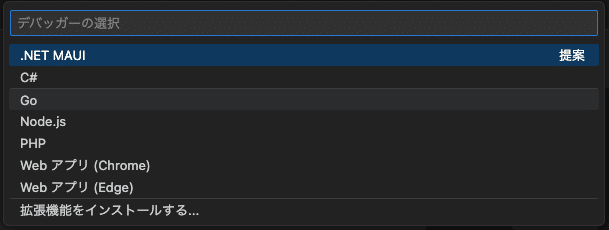
"実行とデバッグ"を押下する。

".NET MAUI"を選択する。
シミュレータが起動し、ビルド+デバッグ実行が始まります。
"デバッグ コンソール" タブが、Visual Studio for Macでいう"アプリケーション出力"に相当します。
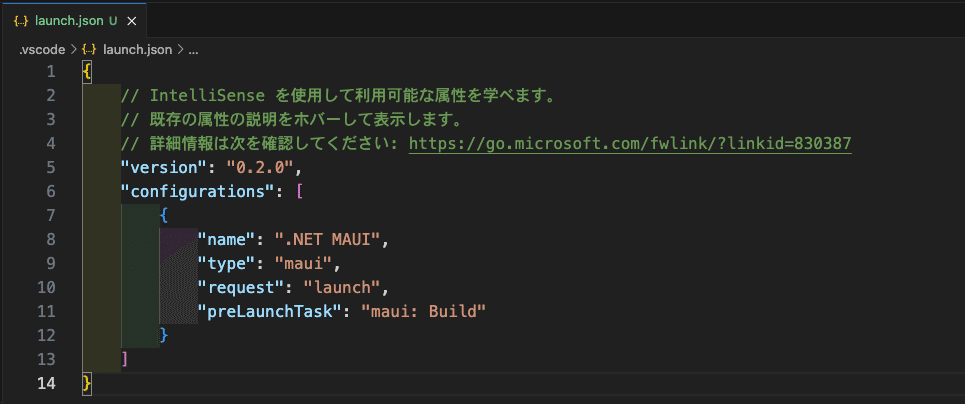
ビルド構成を指定したい場合
Debug構成以外の独自で定義しているビルド構成でビルドや実行をしたい場合は、launch.jsonで設定します。
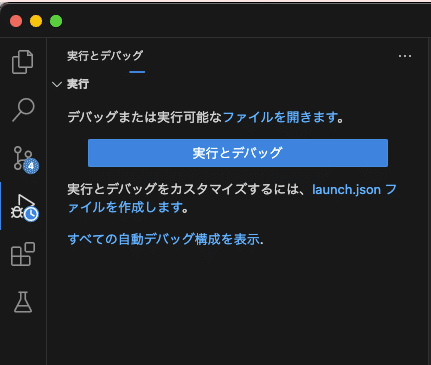
以下の画面で"launch.jsonファイルを作成します"を押下する。
".NET MAUI"を選択する。
launch.jsonファイルが作成される。
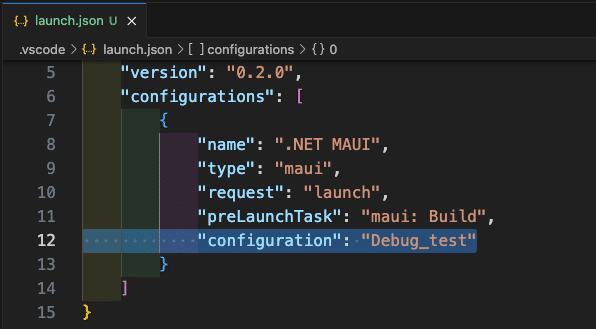
"configration"項目を追加し、独自で定義しているビルド構成を追加する。
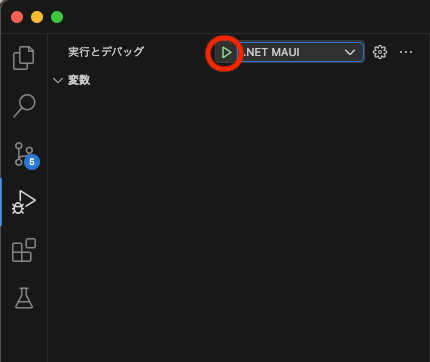
launch.jsonの作成後は、赤枠部分の三角を押下すればデバッグ実行を開始できます。
終わりに
今回はVisual Studio for Macで開発していたプロジェクトをVSCodeでデバッグ実行する手順を紹介しました。本記事執筆時点ではまだVisual Studio for Macでも.NET 8の開発はできるものの、公式ではサポートされていないことになっています。今のうちにVSCodeでの開発に慣れていきたいです。