
Let's Encrypt ワイルドカードSSL/TLS証明書のインストールと更新自動化

こんにちは、うぱです。
使用環境
・Azure Virtual Machine(rhel9.3)
・AWS route53 / IAM
AWS手順
使用するドメインのネームサーバーをAWSのroute53にしてください。
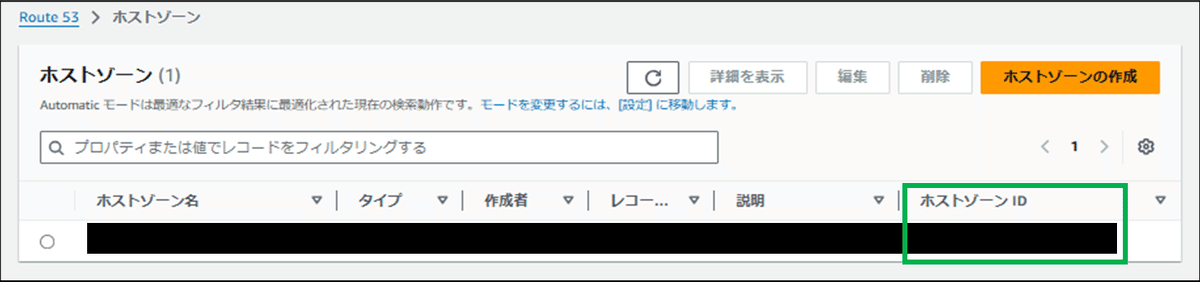
ホストゾーンID確認
Route53 > ホストゾーン > 対象ドメインのホストゾーンIDをメモ帳等にコピーしてください
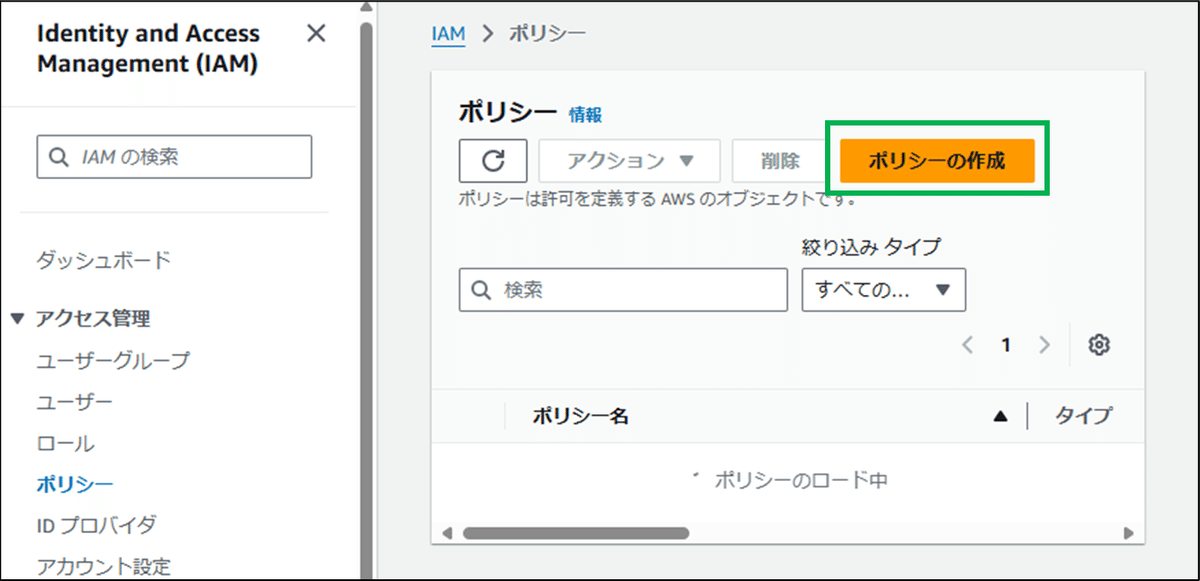
ポリシー作成
IAM > ポリシー > ポリシーの作成
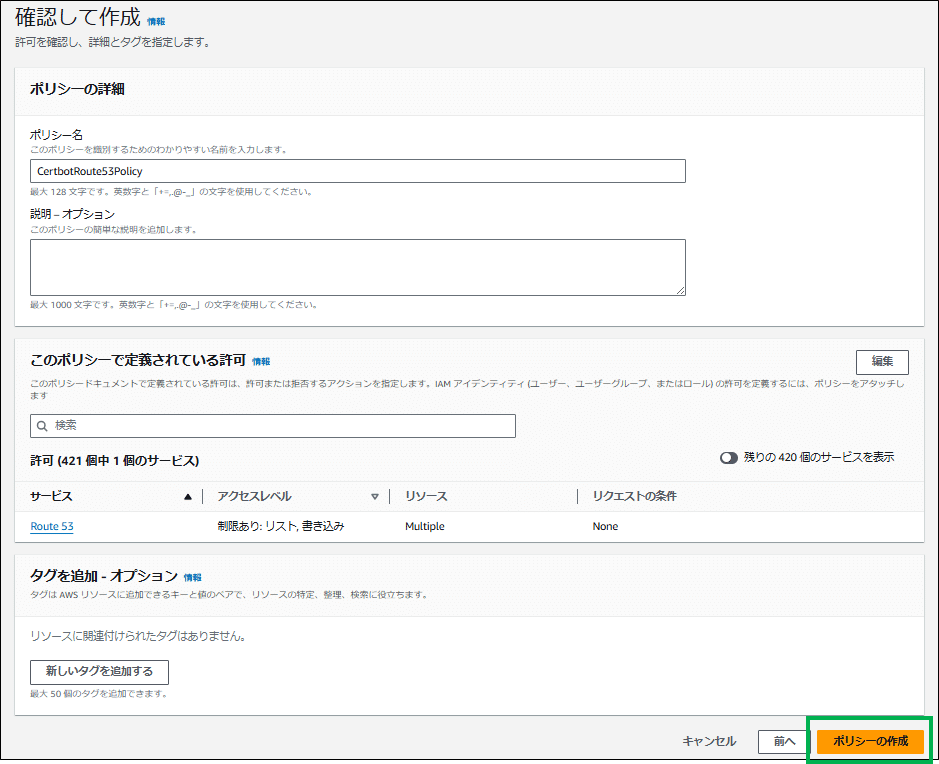
ポリシーエディタをJSONに変更し、コピペースト。
コードの内のホストゾーンIDは、前述の手順でコピーしたホストゾーンIDに変更する。
{
  "Version": "2012-10-17",
  "Statement": [
    {
      "Effect": "Allow",
      "Action": [
        "route53:ListHostedZones",
        "route53:GetChange"
      ],
      "Resource": "*"
    },
    {
      "Effect": "Allow",
      "Action": "route53:ChangeResourceRecordSets",
      "Resource": "arn:aws:route53:::hostedzone/ホストゾーンID"
    }
  ]
}
ポリシー名に「CertbotRoute53Policy」を入力し作成
ユーザー作成とポリシーアタッチ
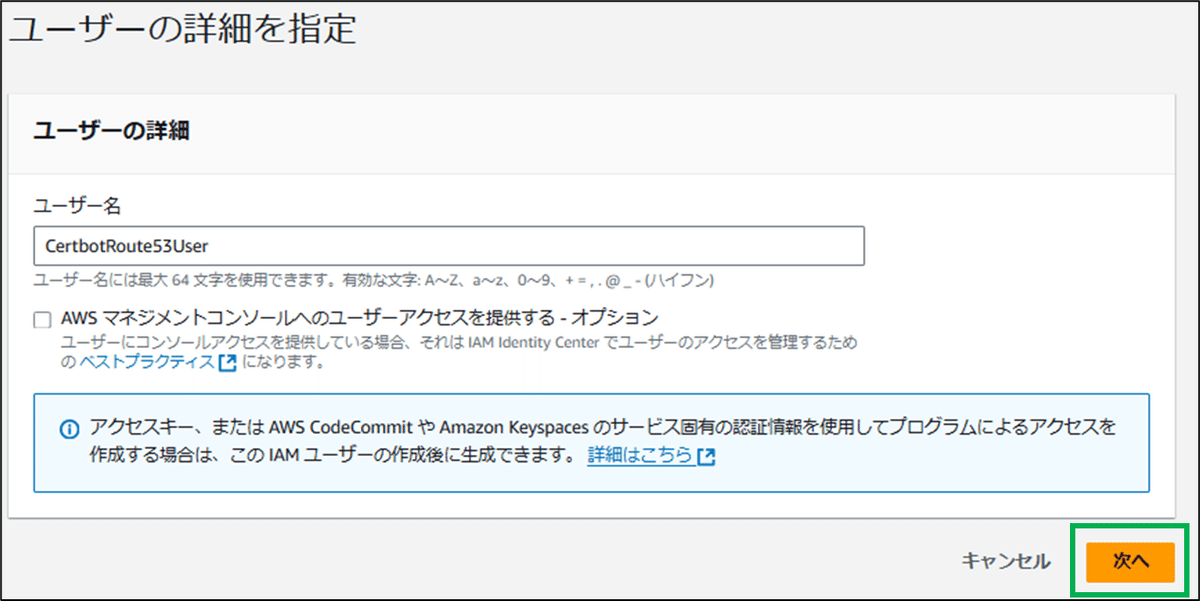
IAM > ユーザー > ユーザーの作成
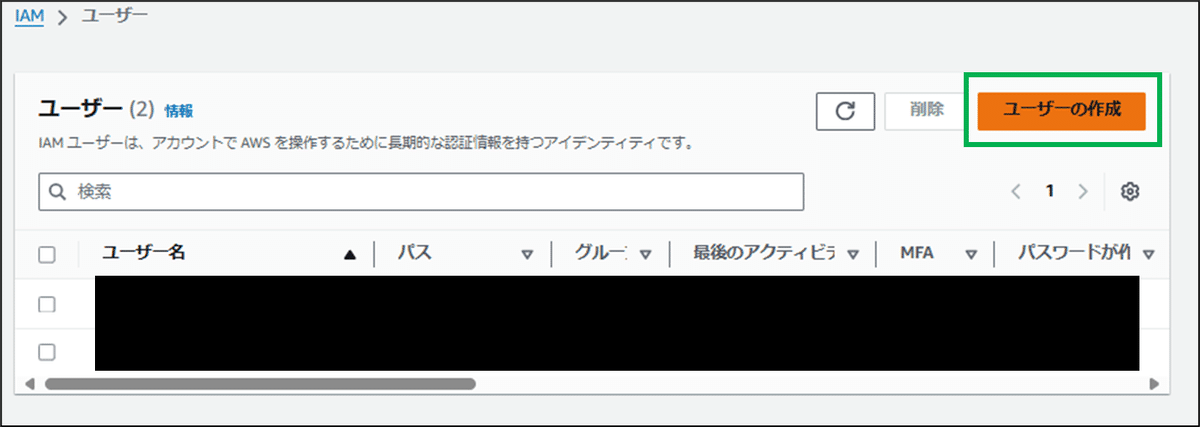
ユーザー名「CertbotRoute53User」を入力 > 次へ
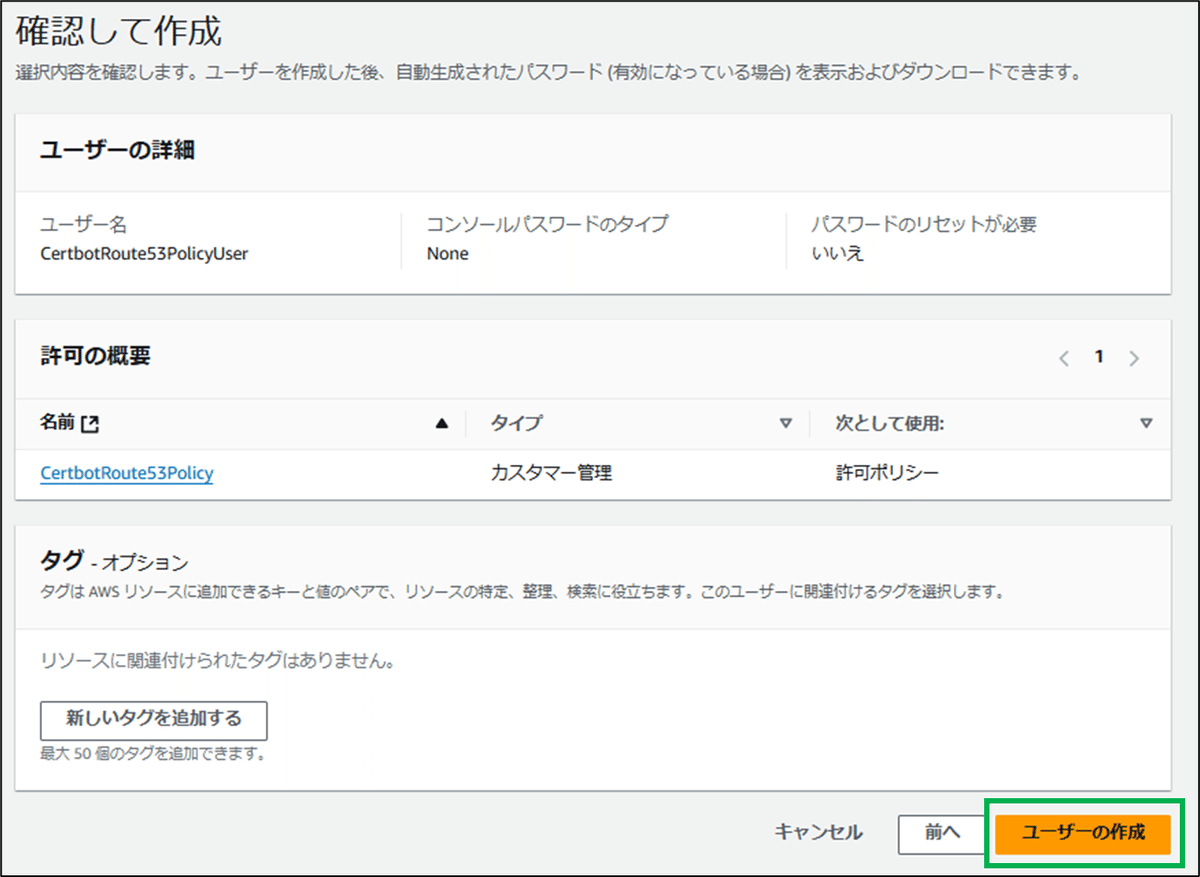
ポリシーを直接アタッチする > 「CertbotRoute53Policy」にチェック > 次へ

ユーザーの作成
アクセスキー作成
IAM > ユーザー > CertbotRoute53User > セキュリティ認証情報 > アクセスキーを作成

AWSの外部で実行されるアプリケーション > 次へ
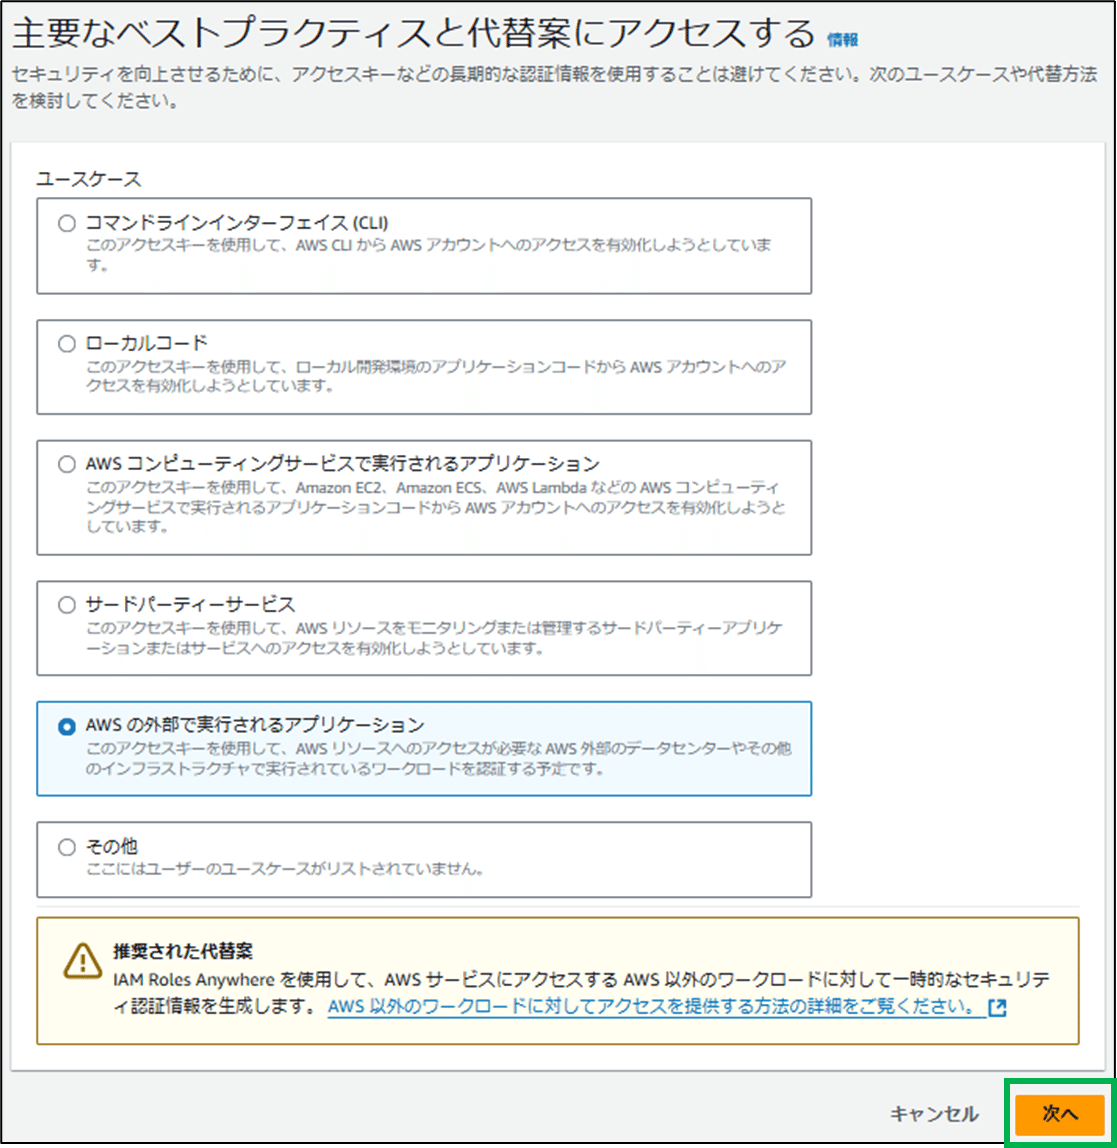
アクセスキーを作成
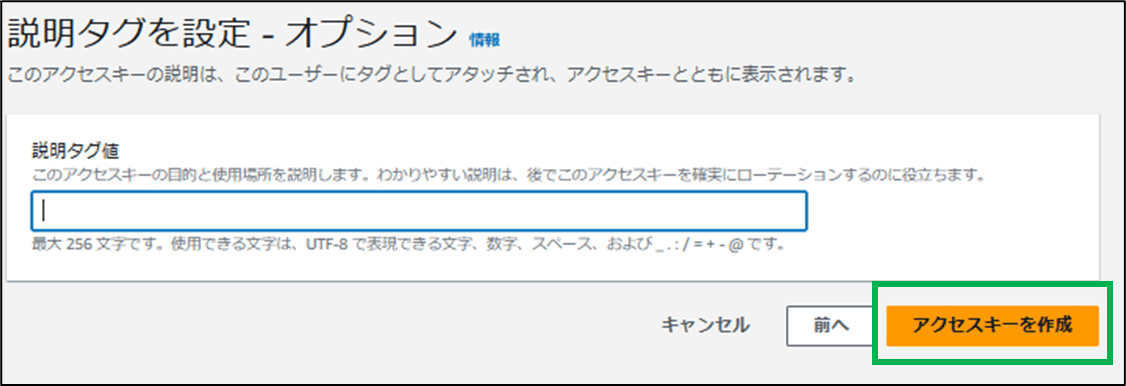
表示された「アクセスキー」と「シークレットアクセスキー」をメモ帳等にコピーして保存

SSL/TLS証明書インストール
epelリポジトリ追加
yum install https://dl.fedoraproject.org/pub/epel/epel-release-latest-9.noarch.rpm -yepelリポジトリ追加確認
yum repolist | grep epelepel Extra Packages for Enterprise Linux 9 - x86_64
epel-cisco-openh264 Extra Packages for Enterprise Linux 9 openh264 (From Cisco) - x86_64
Certbot・Certbot/Apache用プラグイン・Certbot/Route53プラグインをインストール
yum -y install certbot python-certbot-apache python3-certbot-dns-route53AWSの資格情報設定
ディレクトリ作成
mkdir -p ~/.awsファイル開く
vi ~/.aws/credentials資格情報設定
[default]
aws_access_key_id = アクセスキー
aws_secret_access_key = シークレットキー
ワイルドカードのSSL/TLS証明書を発行
sudo certbot certonly \
--dns-route53 \
-d example.com \
-d '*.example.com' \
--agree-tos \
--no-eff-email \
--email メールアドレス
オプション
--dns-route53:AWS Route 53のDNS認証を使用する
-d example.com:取得したいドメインを指定
-d '*.example.com':ワイルドカードSSL/TLS証明書を指定
--agree-tos:Let’s Encryptの利用規約に同意
--no-eff-email:お知らせメールを受け取らない
--email:取得した証明書関する通知メールアドレス
Saving debug log to /var/log/letsencrypt/letsencrypt.log
Requesting a certificate for example.com and *.example.com
Successfully received certificate.
Certificate is saved at: /etc/letsencrypt/live/example.com/fullchain.pem
Key is saved at: /etc/letsencrypt/live/example.com/privkey.pem
This certificate expires on 2025-01-03.
These files will be updated when the certificate renews.
Certbot has set up a scheduled task to automatically renew this certificate in the background.
If you like Certbot, please consider supporting our work by:
Donating to ISRG / Let's Encrypt:https://letsencrypt.org/donate
Donating to EFF: https://eff.org/donate-le
証明書期限確認
openssl x509 -enddate -noout -in /etc/letsencrypt/live/example.com/fullchain.pemnotAfter=Jan 3 05:52:52 2025 GMT
SSL/TLS証明書更新
証明書更新が正常に実行可能かテスト
certbot renew --dns-route53 --dry-run更新自動化
cron設定ファイル開く
crontab -e月2回更新チェックスケージュール
0 0 1,15 * * sudo certbot renew --pre-hook "systemctl stop httpd" --post-hook "systemctl start httpd"課題
・cron実行時にメール通知
・そもそも自動更新できているかが不明(12/5に証明書期限30日前になる)
・確認後、記事を更新する
この記事が気に入ったらサポートをしてみませんか?