
【photoshop】IPPONグランプリ風3階調加工方法

photoshopを使用してのIPPONグランプリ風加工方法のまとめです。 自分の需要に応えるために試行錯誤の結果をここに。

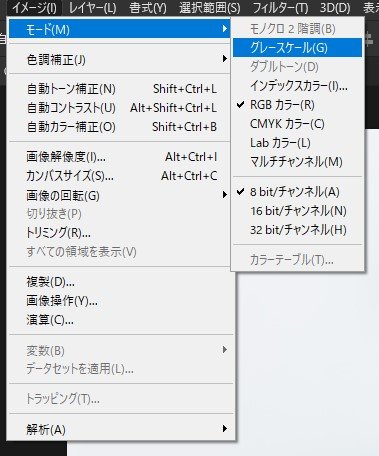
【STEP1】グレースケール化
【メニュー】イメージ
モード
グレースケール
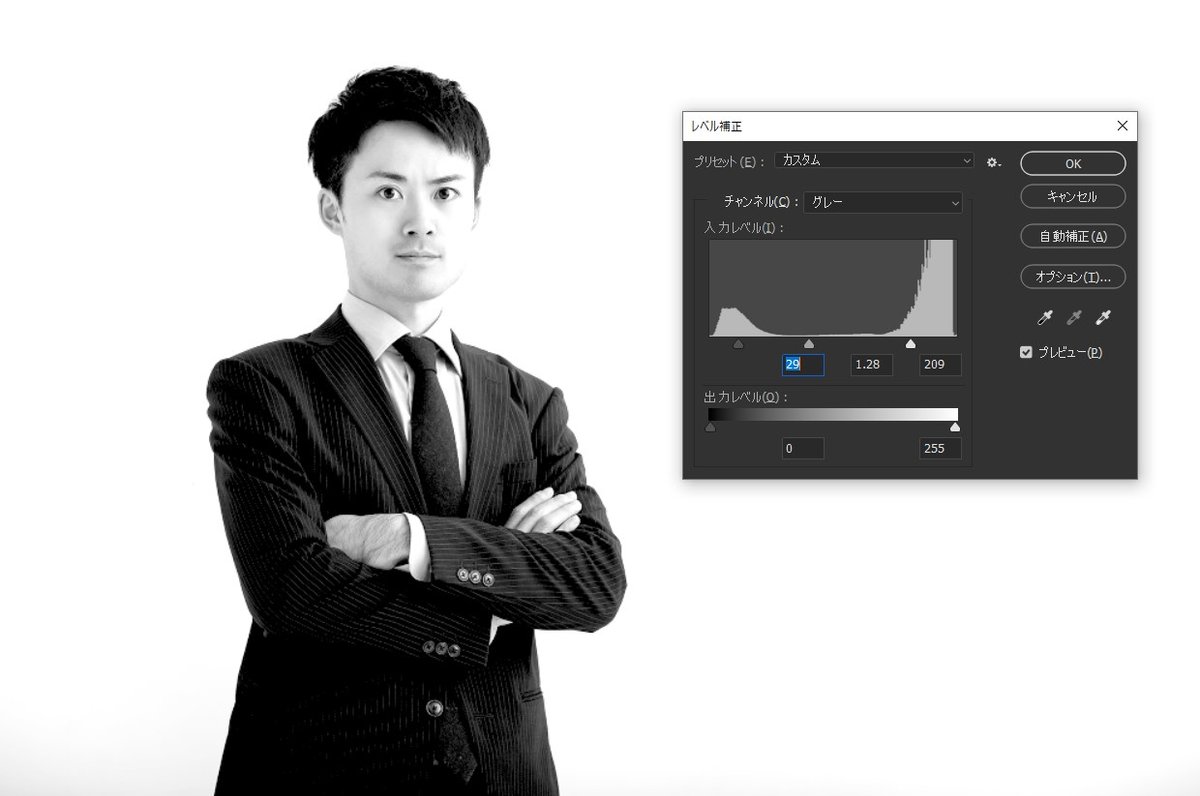
【STEP2】レベル補正
加工したいレイヤーを選択
イメージ
色調補正
レベル補正
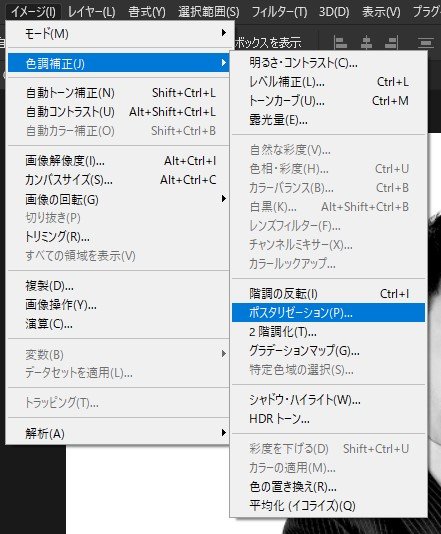
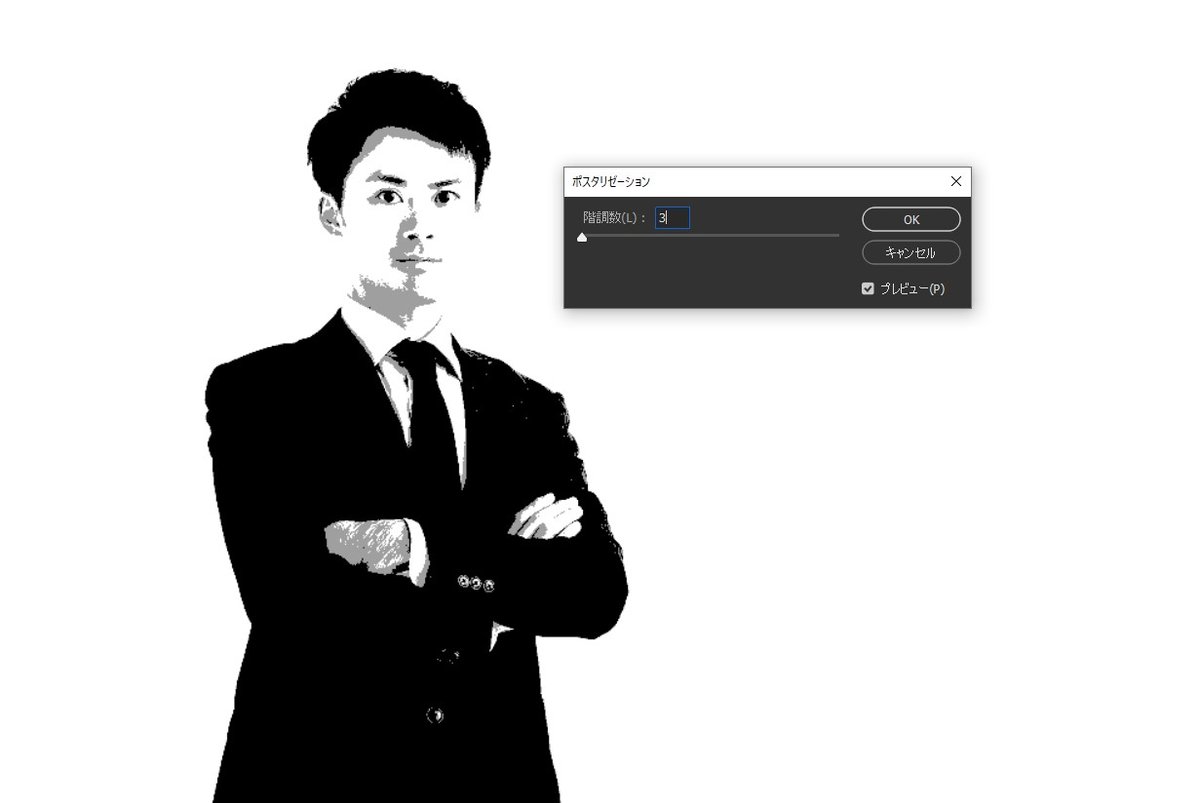
【STEP3】階調分け
イメージ
色調補正
ポスタリゼーション
階調数を「3」に設定にしてOK ※階調数を変更すると色のレイヤーが増えるので適宜変更してもおもしろいかも。
【STEP4】カラーモード変更
イメージ
モード
CMYKカラーを選択
CMYK選択時、レイヤー結合するか聞かれるので、結合しないように
【STEP5】色付け
白部分・中間色部分・黒部分各レイヤーに対して
ダブルクリック
カラーオーバーレイ
通常・不透明度100%の状態にして色を選ぶ

完成!

お好みで諧調の数を増やしたり色のバランスを変えると幅広い表現ができそう。
今日はここまで!