
ControlNet-LLLite学習メモ③

ようやく!ようやくうまくいきました!!!!!!!!!!!ひゃっほーーーー!
そして重大な事実が判明。作者であるkohya様に相談したところ、環境づくりに問題がありました。
お、おれはおろか・・・kohya様、ありがとうございます・・・。
今回使用したモデル本体
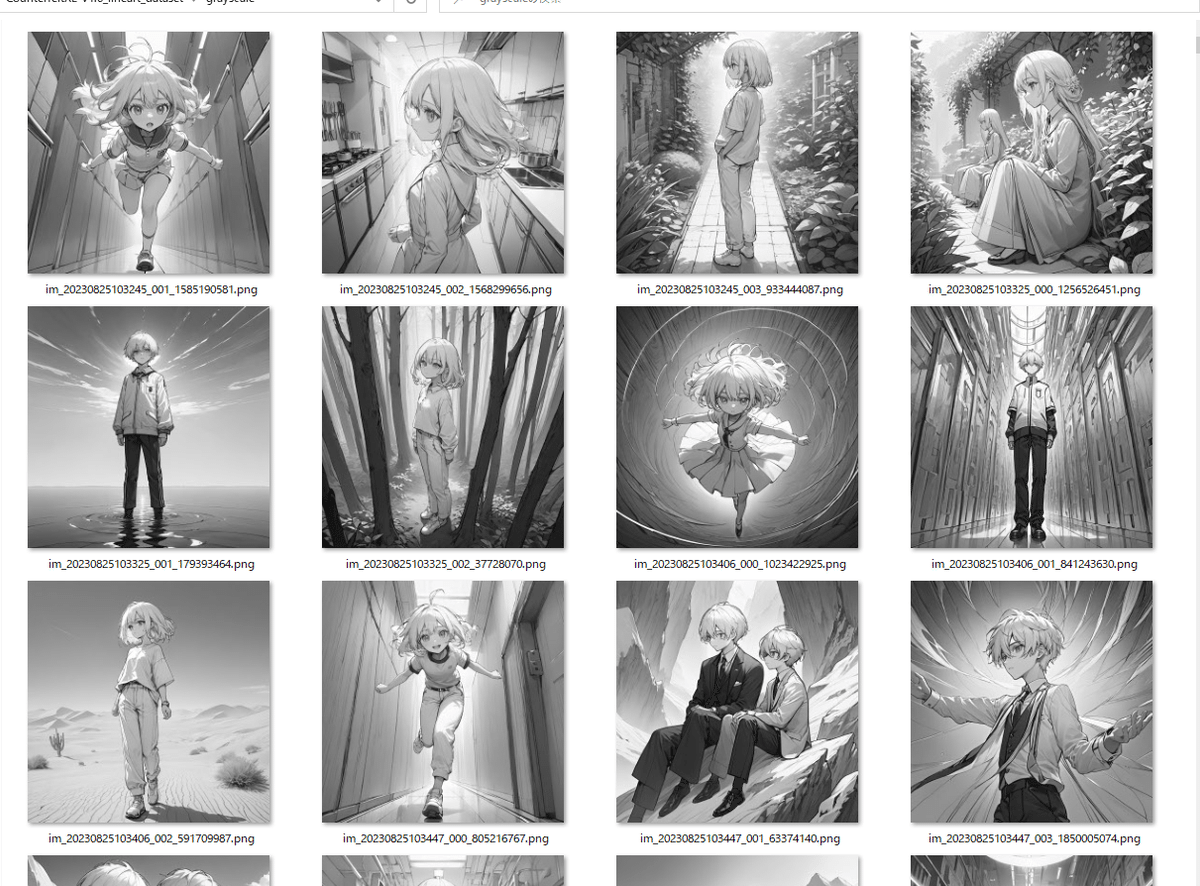
今回使用したデータセット
というわけでようやく学習できた学習環境について書いていきます。
①sd-scripts環境を作る(Winローカル)
ControlNet-LLLite学習用のsd-scriptsの環境作りについてメモしておきます。自分は以下の環境でコードを動かしています。
git clone -b sdxl https://github.com/kohya-ss/sd-scripts.git
cd sd-scripts

python -m venv venv
.\venv\Scripts\activate

pip3 install torch torchvision torchaudio --index-url https://download.pytorch.org/whl/cu117
pip install -U xformers
pip install --upgrade -r requirements.txt
python -m pip install bitsandbytes==0.41.1 --prefer-binary --extra-index-url=https://jllllll.github.io/bitsandbytes-windows-webui

accelerate config
なんか色々聞かれるので以下のように答える。
- This machine
- No distributed training
- NO
- NO
- NO
- all
- bf16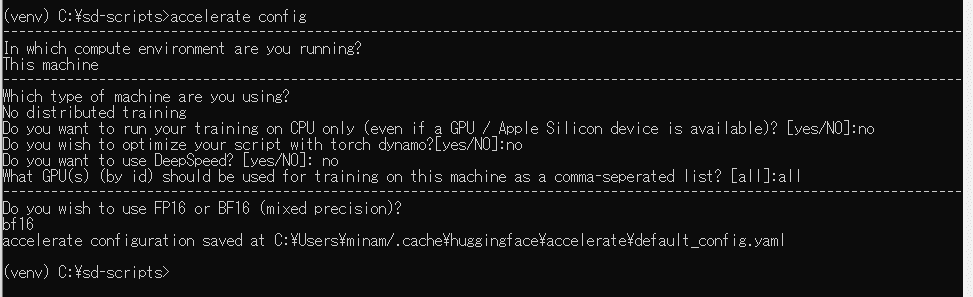
②モデルを作成する
前回作成したモデルのベースのベースになったモデルが後から商用不可モデルになった為、アプリに組み込む自分の用途にはややこしく適さなかったので、新しくモデルを作成します。いうて今回はどシンプルにしました(試行錯誤に疲れたともいう。
のCounterfeitXL-V1.0.safetensorsに
のtest-noline.safetensorsを-2でマージしたモデルを使用。
ディテールをフラットにするのはモデルのクオリティーが下がる気がした(主観)なので今回は避けました。
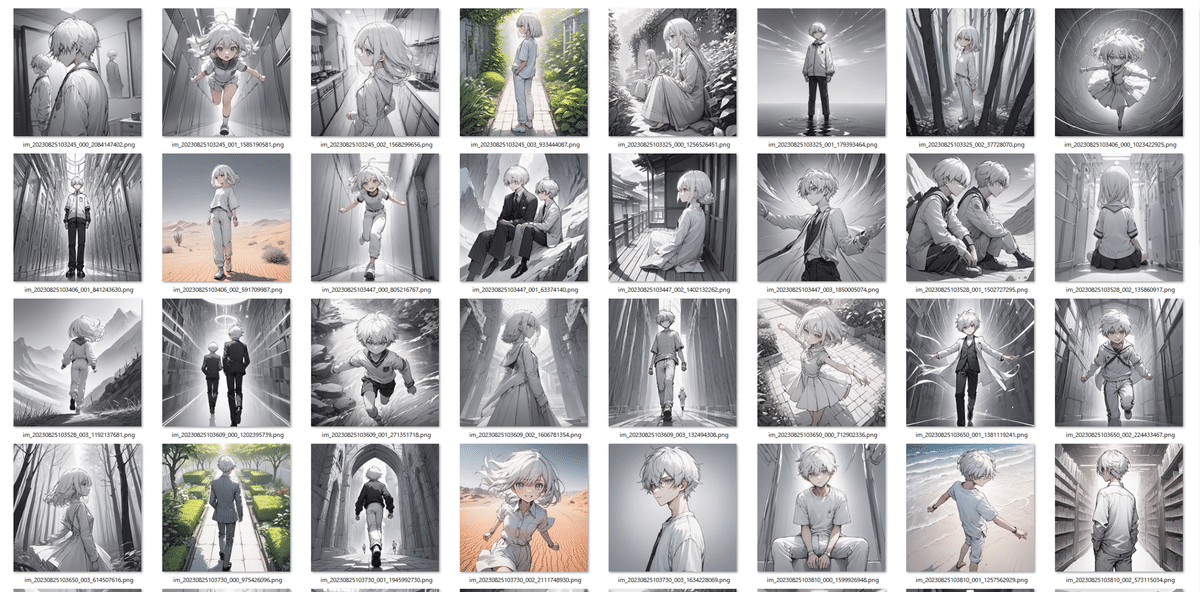
③データセット用の画像を1000枚自動出力する
上記のスクリプトをベースに、極力白い線画にしやすい画像がでるようにとアレンジしました。
男女半々出てくる方がみてて楽しいので『1boy,man』も足したり、シチュが多い方がうれしいので背景の場所を追加したりしました(ただの趣味)
RTX3090で↓のコマンドを2回やってだいたい3.4時間くらいだった気がします。
お高いGPU持っていない人はレンタルGPUサーバー課金するとよいかも。
無料コラボではさすがに無理でした
python sdxl_gen_img.py --ckpt "C:\stable-diffusion-webui\models\Stable-diffusion\CounterfeitXL-V1.0_lineart.fp16.safetensors" --n_iter 1 --scale 10 --steps 36 --outdir "D:\desktop\RoughLine\original" --xformers --W 1024 --H 1024 --original_width 2048 --original_height 2048 --bf16 --sampler ddim --batch_size 4 --vae_batch_size 2 --images_per_prompt 512 --max_embeddings_multiples 1 --prompt "{{portrait|digital art|anime screen cap|detailed illustration monochrome,no color,flat color} of white hair white tone grayscale line art {1girl|1boy,man},{standing|sitting|walking|running|dancing} on white tone grayscale line art {mountain|river|forest|cave|lake|waterfall|castle|desert|park|garden|porch of a Japanese house|japanese-style room|shrine|temple|classroom|living|kitchen|bedroom|cafe|hospital|church|library|office|librarystreet|beach|indoors|outdoors}, {looking at viewer|looking away|looking at another}, {in|wearing} {white toon shirt and white toon pants|white toon schoolwhite toon uniform|white toon casualwearlwhite toon formal wear}}{ |, dynamic pose}, (solo), teen age, {0-1$$smile,|blush,|kind smile,|expression less,|happy,|sadness,} {0-1$$upper body,|full body,|cowboy shot,|face focus,} trending on pixiv, {0-2$$depth of fields,|8k wallpaper,|highly detailed,|pov} beautiful face { |, from below|, from above|, from side|, from behind|, from back} --n nsfw, bad face, lowres, low quality, worst quality, low effort, watermark, signature, ugly, poorly drawn"線画の抽出しやすさにこだわるあまり、そういう嗜癖の猟奇的な殺人鬼みたいに執拗に各種パーツを白くするように指示しています。
白さが!白さが足りないのよぉ!!!
学習する際にnegativepromptは使えないので(真偽不明)、そこで画像を制御しようとするのはやめておきました(例えば黒い服がでてこないようにするとか)(あくまでデフォルトのnegativeのみ)
④キャプションファイルを生成
私の上記のpromptのワイルドカード表記が悪かった為、微妙に色々ぐっちゃグチャのpromptになっていた為、上記のスクリプト微妙に改変しました。
txtGen.py
import glob
import os
from PIL import Image

IMAGES_DIR = "D:/desktop/CounterfeitXL-V1.0_lineart_dataset/original"

def remove_special_chars(text, char):
    # 指定された文字を削除
    return text.replace(char, '')

img_files = glob.glob(IMAGES_DIR + "/*.png")
for img_file in img_files:
    cap_file = img_file.replace(".png", ".txt")
    if os.path.exists(cap_file):
        print(f"Skip: {img_file}")
        continue
    print(img_file)

    img = Image.open(img_file)
    prompt = img.text["prompt"] if "prompt" in img.text else ""
    if prompt == "":
        print(f"Prompt not found in {img_file}")

    # 特定の文字列を削除
    prompt = remove_special_chars(prompt, '{')
    prompt = remove_special_chars(prompt, '}')
    prompt = remove_special_chars(prompt, '(')
    prompt = remove_special_chars(prompt, ')')
    prompt = remove_special_chars(prompt, 'white tone')
    prompt = remove_special_chars(prompt, 'grayscale')
    prompt = remove_special_chars(prompt, 'line art')
    prompt = remove_special_chars(prompt, 'white toon')
    prompt = remove_special_chars(prompt, '    ')
    prompt = remove_special_chars(prompt, '   ')
    prompt = remove_special_chars(prompt, '  ')
    prompt = remove_special_chars(prompt, 'white hair')
    prompt = remove_special_chars(prompt, 'monochrome')
    prompt = remove_special_chars(prompt, 'no color')
    prompt = remove_special_chars(prompt, 'flat color')
    prompt = prompt.replace(',,', ',')
    prompt = prompt.replace(' ,', ',')
    prompt = prompt.replace('in', 'in ')
    prompt = prompt.replace('on', 'on ')


    with open(cap_file, "w") as f:
        f.write("white tone, line art, monochrome, flat color, no color, " + prompt + "\n")  # 改行文字は "\n" です
python txtgen.py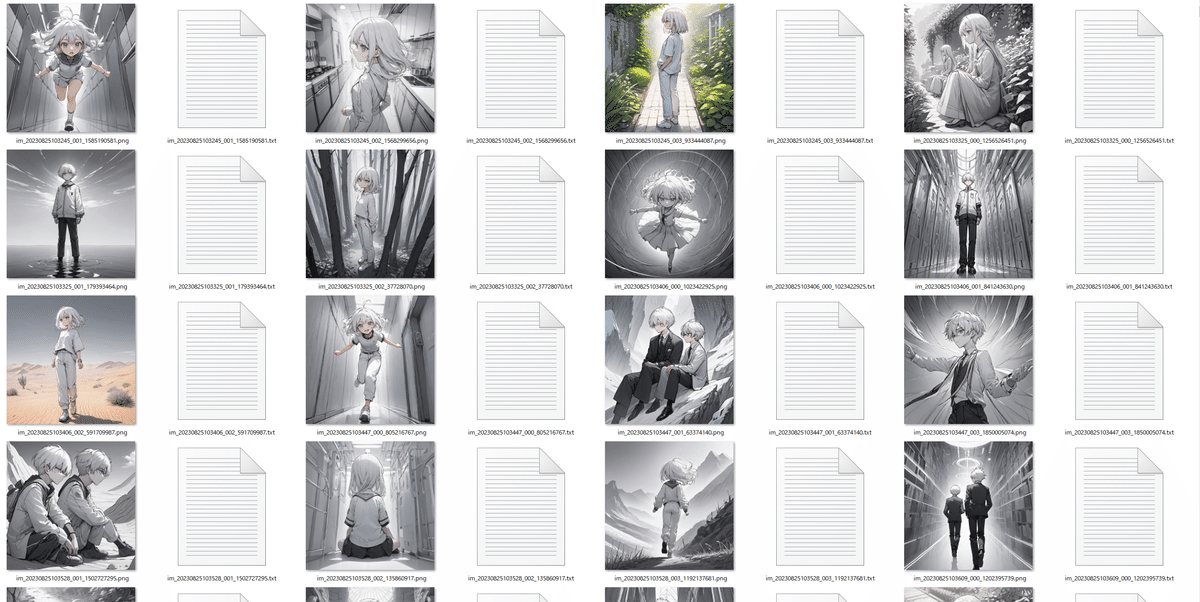
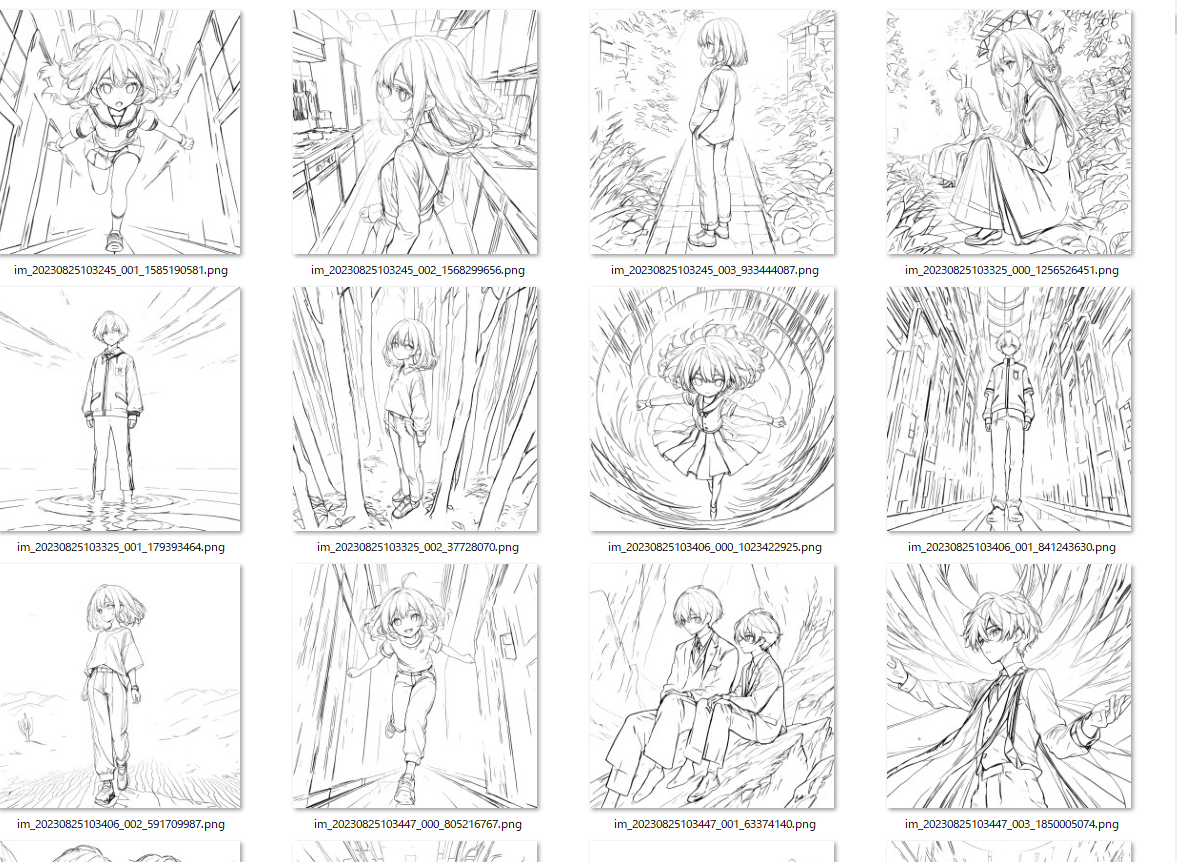
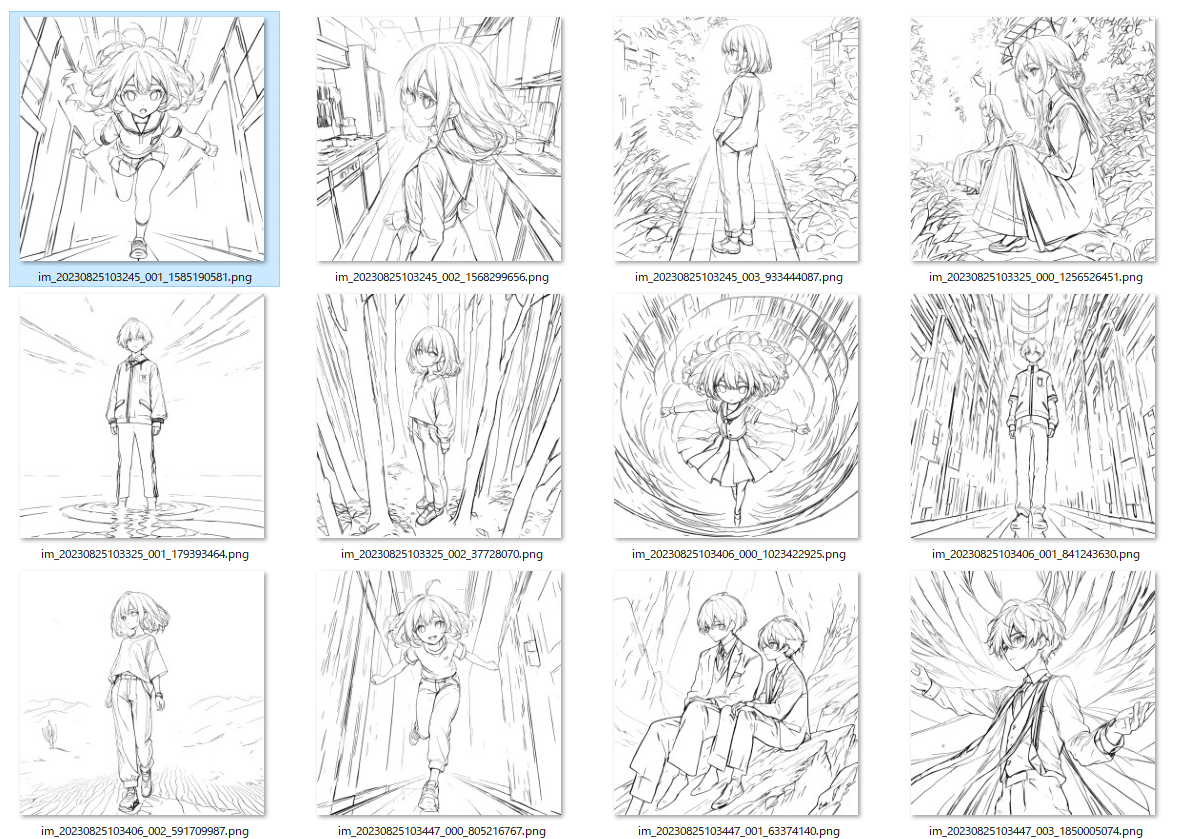
⑤線画抽出
前前回のMangaLineExtraction_PyTorchを利用するコードを再利用します。
線画抽出できました。
⑥グレースケール加工する
grayscale.py
import os
import cv2

def convert_to_grayscale(input_dir, output_dir):
    if not os.path.exists(output_dir):
        os.makedirs(output_dir)

    for filename in os.listdir(input_dir):
        input_path = os.path.join(input_dir, filename)

        if not filename.lower().endswith(('.png', '.jpg', '.jpeg', '.gif', '.bmp')):
            continue

        image = cv2.imread(input_path)

        gray_image = cv2.cvtColor(image, cv2.COLOR_BGR2GRAY)

        output_path = os.path.join(output_dir, filename)

        cv2.imwrite(output_path, gray_image)

if __name__ == "__main__":
    input_directory = "D:\desktop\CounterfeitXL-V1.0_lineart_dataset\original"
    output_directory = "D:\desktop\CounterfeitXL-V1.0_lineart_dataset\grayscale"

    convert_to_grayscale(input_directory, output_directory)
ついでに手動で④のキャプションファイルをグレスケフォルダにコピーしておきます。
⑥sd-scriptsで学習
とりあえず以下のような画像フォルダが2セット準備できました。
前回はいきなりラフと線画を紐づけて学習させてようとしていましたが、実験の為にまずは簡単そうなタスクから回していきます。
そっちの方がepoch数も少なくなるので。
lineartを読み込んだらグレースケールの画像を出力する設定にします。
lineart_dataset.toml
[general]
flip_aug = false
color_aug = false
resolution = [1024,1024]

[[datasets]]
batch_size = 16
enable_bucket = false

    [[datasets.subsets]]
    image_dir = "D:/desktop/CounterfeitXL-V1.0_lineart_dataset/grayscale"
    caption_extension = ".txt"
    conditioning_data_dir = "D:/desktop/CounterfeitXL-V1.0_lineart_dataset/LineArt"
----------------------------
https://github.com/kohya-ss/sd-scripts/blob/sdxl/docs/train_lllite_README-ja.md#%E5%AD%A6%E7%BF%92
lineart_config.toml
pretrained_model_name_or_path = "C:/stable-diffusion-webui/models/Stable-diffusion/CounterfeitXL-V1.0_lineart.fp16.safetensor6s"
max_train_epochs = 6
max_data_loader_n_workers = 4
persistent_data_loader_workers = true
seed = 42
gradient_checkpointing = true
mixed_precision = "bf16"
save_precision = "bf16"
full_bf16 = false
optimizer_type = "adamw8bit"
learning_rate = 2e-4
xformers = true
output_dir = "C:/sd-scripts/models/lineart"
output_name = "lineart"
save_every_n_epochs = 1
save_model_as = "safetensors"
vae_batch_size = 4
cache_latents = true
cache_latents_to_disk = true
cache_text_encoder_outputs = true
cache_text_encoder_outputs_to_disk = true
network_dim = 64
cond_emb_dim = 32
dataset_config = "lineart_dataset.toml"
以下のコマンドを実行。とりあえずRTX3090で6epochほど。
accelerate launch --num_cpu_threads_per_process 1 sdxl_train_control_net_lllite_alt.py --config_file lineart_config.toml⑦再現実験
とりあえずlineart.safetensorsというファイルができたので試しましょう。
元の線画の絵柄がどれくらい保つか実験したいので自分の絵を使用。
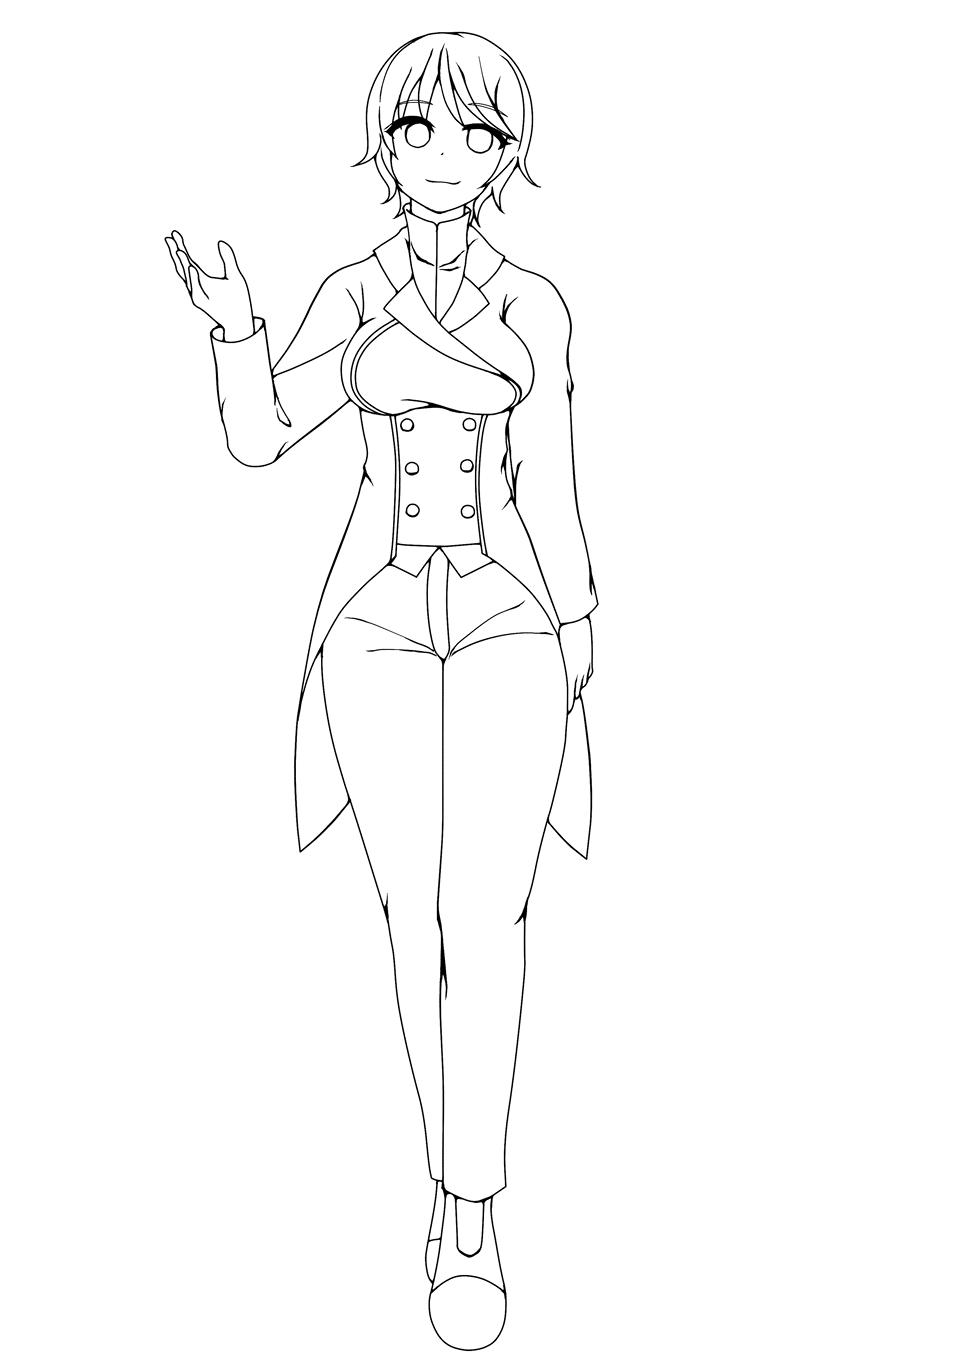
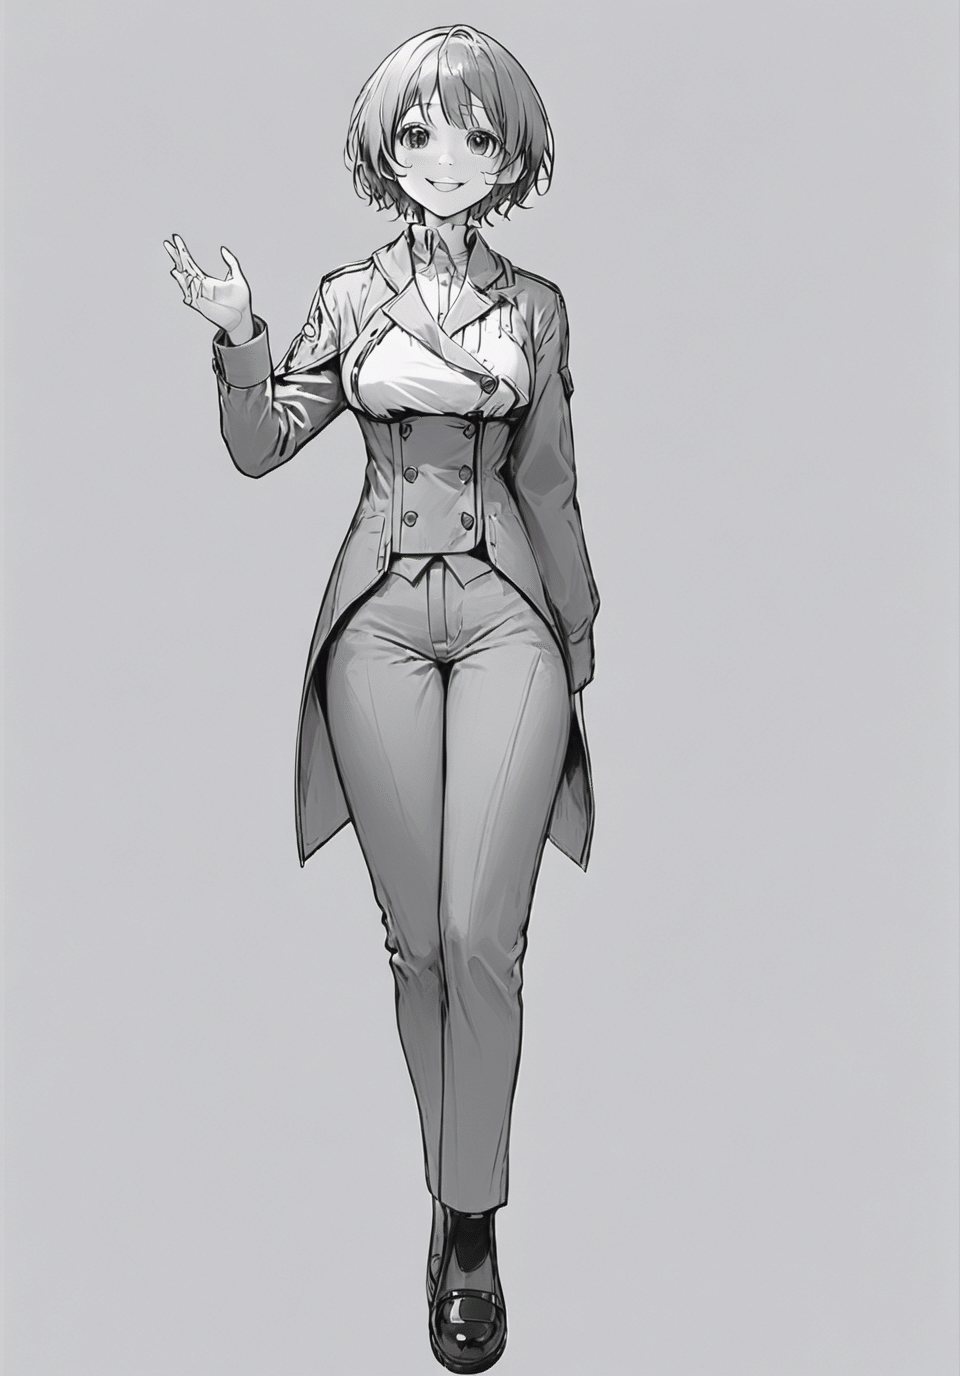
python sdxl_gen_img.py --ckpt "C:\stable-diffusion-webui\models\Stable-diffusion\CounterfeitXL-V1.0_lineart.fp16.safetensors" --control_net_lllite_models "C:\sd-scripts\models\lineart\lineart-000008.safetensors" --guide_image_path "D:\desktop\test.png" --outdir "output" --prompt "grayscale, 1girl, solo, breasts, looking_at_viewer, smile, short_hair, full_body, double-breasted, simple background, white background --n nsfw, bad face, lowres, low quality, worst quality, low effort, watermark, signature, ugly, poorly drawn" --bf16 --W 960 --H 1376 --seed 1234 --xformers
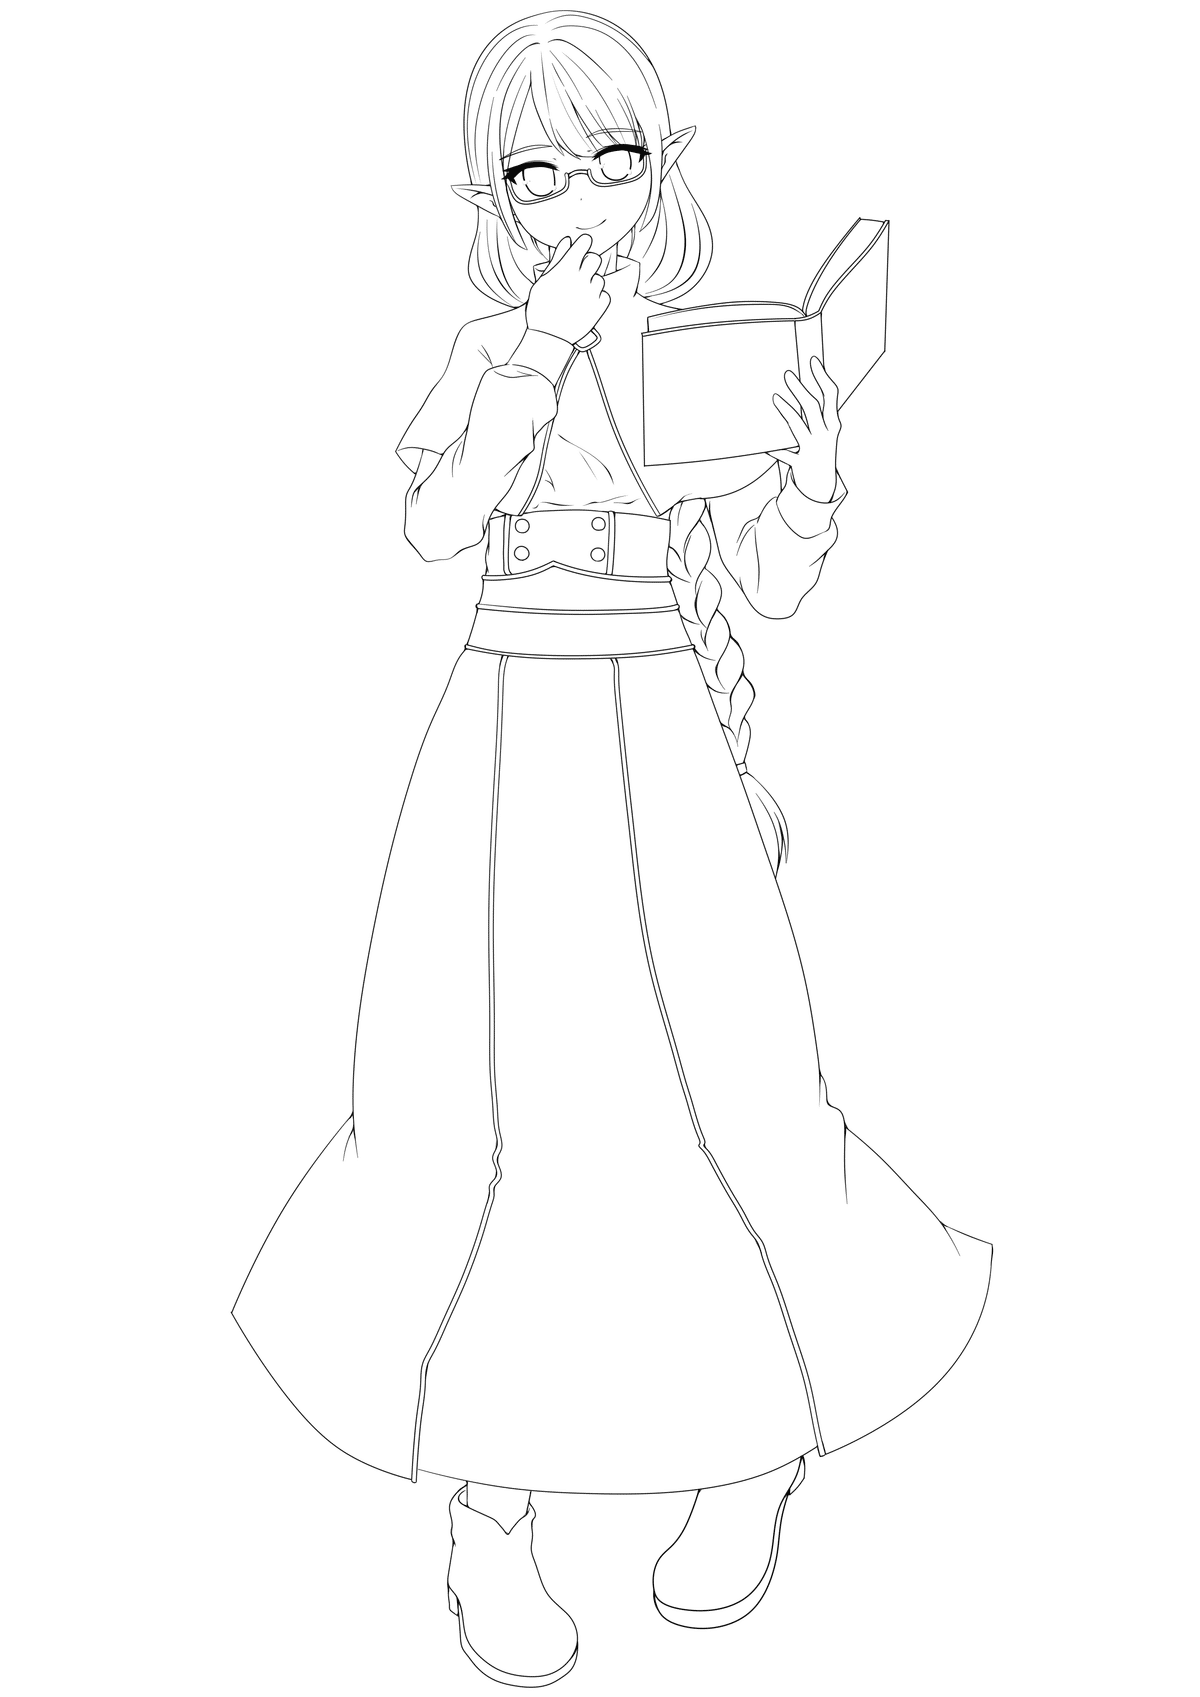
python sdxl_gen_img.py --ckpt "C:\stable-diffusion-webui\models\Stable-diffusion\CounterfeitXL-V1.0_lineart.fp16.safetensors" --control_net_lllite_models "C:\sd-scripts\models\lineart\lineart-000006.safetensors" --guide_image_path "D:\desktop\test.png" --outdir "output" --prompt "grayscale, 1girl, solo, long_hair, looking_at_viewer, smile, bangs, skirt, long_sleeves, holding, very_long_hair, standing, full_body, boots, glasses, pointy_ears, single_braid, elf, holding_book, long_skirt, open_book simple background, white background --n nsfw, bad face, lowres, low quality, worst quality, low effort, watermark, signature, ugly, poorly drawn" --W 960 --H 1376 --seed 1234 --bf16 --xformers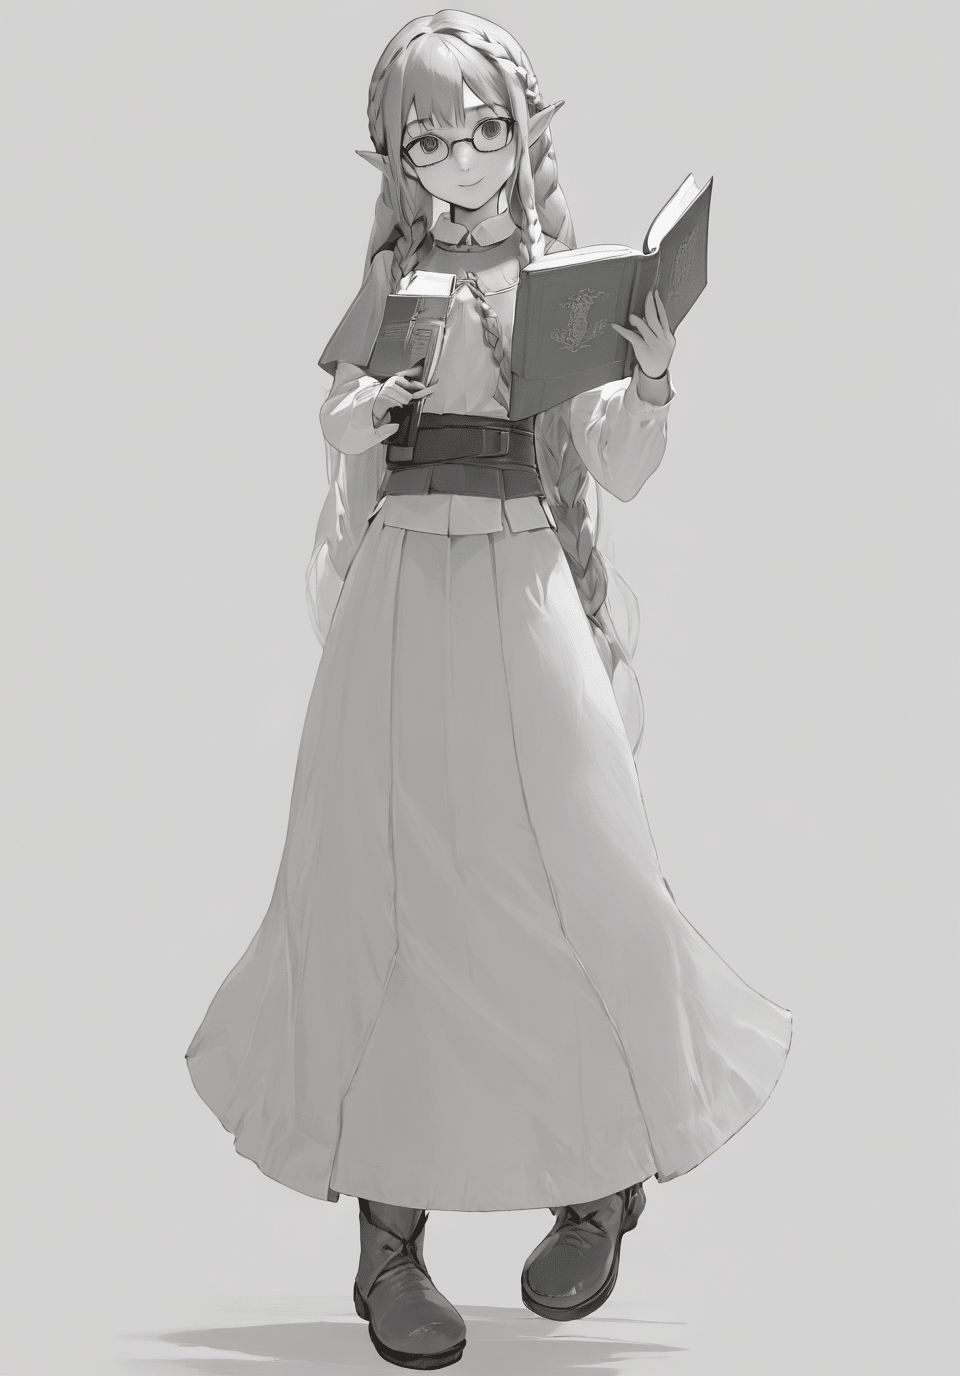
う、うーーーん?あんまり線画の言うことを聞いてくれません
6epoch以上回すと過学習で破綻するので、これ以上ぶん回すわけにもいかずぐぬぬぬ。
データセットの見直しがいるかもしれません。
kohyaさんのcannyと比べてみましょう。
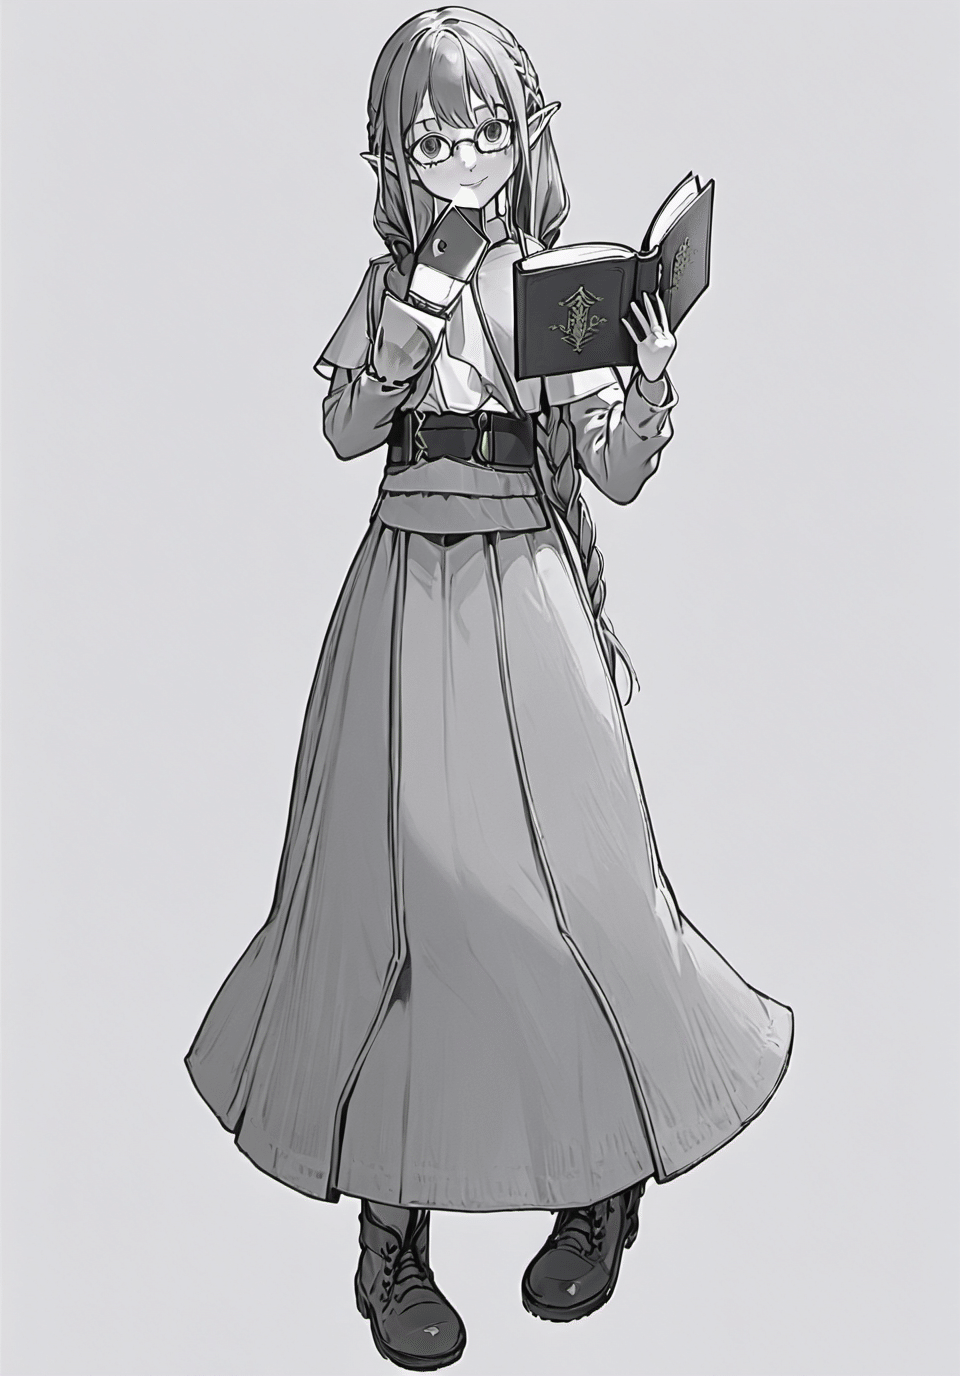
こっちの方がパーツは増えてしまいますが、線画に従ってくれますね・・・!!奥が深いぜ!ControlNet-LLLite!!!
おまけ(Vast.AI編)
試しに久々にレンタルGPUサーバーを借りて遊びました。Linux環境ですが上記とやっていることは同じなのでメモ程度に。
お金があるときにぶん回すロマンだね。

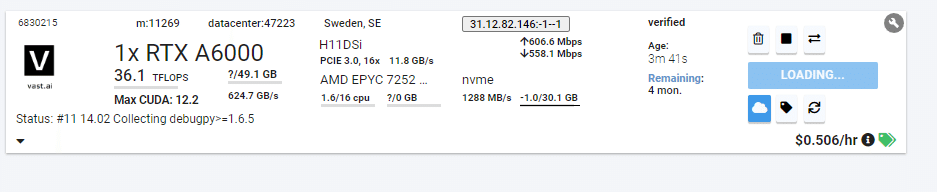
Teslaはbf16非対応注意。HDD容量が24GBとかだと途中でデータセット展開できなくて詰みました(一敗)
git clone -b dev https://github.com/kohya-ss/sd-scripts.git
cd sd-scripts

pip install -U xformers
pip install --upgrade -r requirements.txt
pip install bitsandbytes==0.41.1
pip install scipy

sudo apt-get update
sudo apt-get install nano
sudo apt-get install -y libgl1-mesa-dev
sudo apt-get install unzip


accelerate config
- This machine
- No distributed training
- NO
- NO
- NO
- all
- bf16wget https://huggingface.co/datasets/tori29umai/CounterfeitXL-V1.0_lineart_dataset/resolve/main/CounterfeitXL-V1.0_lineart_dataset.zip
unzip CounterfeitXL-V1.0_lineart_dataset.zip
rm CounterfeitXL-V1.0_lineart_dataset.zip
cp CounterfeitXL-V1.0_lineart_dataset/prompt_txt/*.txt CounterfeitXL-V1.0_lineart_dataset/lineart/
wget https://huggingface.co/tori29umai/CounterfeitXL-V1.0_lineart/resolve/main/CounterfeitXL-V1.0_lineart.fp16.safetensorsnano RoughLine_dataset.toml[general]
flip_aug = false
color_aug = false
resolution = [1024,1024]
[[datasets]]
batch_size =
enable_bucket = false
[[datasets.subsets]]
image_dir = "CounterfeitXL-V1.0_lineart_dataset/lineart"
caption_extension = ".txt"
conditioning_data_dir = "CounterfeitXL-V1.0_lineart_dataset/flat"nano RoughLine_config.tomlpretrained_model_name_or_path = "CounterfeitXL-V1.0_lineart.fp16.safetensors"
max_train_epochs = 40
max_data_loader_n_workers = 4
persistent_data_loader_workers = true
seed = 42
gradient_checkpointing = true
mixed_precision = "bf16"
save_precision = "bf16"
full_bf16 = false
optimizer_type = "adamw8bit"
learning_rate = 2e-4
xformers = true
output_dir = "models"
output_name = "RoughLine"
save_every_n_epochs = 1
save_state = flase
save_model_as = "safetensors"
vae_batch_size = 4
cache_latents = true
cache_latents_to_disk = true
cache_text_encoder_outputs = true
cache_text_encoder_outputs_to_disk = true
network_dim = 64
cond_emb_dim = 32
dataset_config = "RoughLine_dataset.toml"accelerate launch --num_cpu_threads_per_process 1 sdxl_train_control_net_lllite_alt.py --config_file RoughLine_config.toml