ChatGPTを使ってFusion 360の3Dモデリングのスクリプトをつくってもらう方法

ChatGPTとは
OpenAI という会社がつくったAIの一種で、たくさんの文章を学習して人間のように自然な言葉で応答ができるようになったものです。テキストデータを読み込んで、そのデータに基づいて人間のような応答を返します。このAIを利用して、例えば質問に対して答えを返したり、文章を生成したりすることができます。
https://chat.openai.com/chat
Fusion 360とは
コンピュータで3Dモデリング(立体物の設計)を行うソフトウェアの一つです。つまり、建物や車、機械などを、コンピュータ上で立体的にデザインすることができます。また、そのモデルを使って、3Dプリンターで印刷したり、CNCマシンで切削加工をすることもできます。デザインから製品化までの工程を一括で行うことができ、プロダクトデザインやエンジニアリング分野で広く使われています。
https://www.autodesk.co.jp/products/fusion-360/overview
今回つくってもらいたいもの
「Fusion360 script で星型のモデルをつくりたい!」
さっそくChatGPTに聞いてみよう!
1.やってほしいことをできるだけ明確に伝えます。
>Fusion 360 script で星型をつくるスクリプトつくって
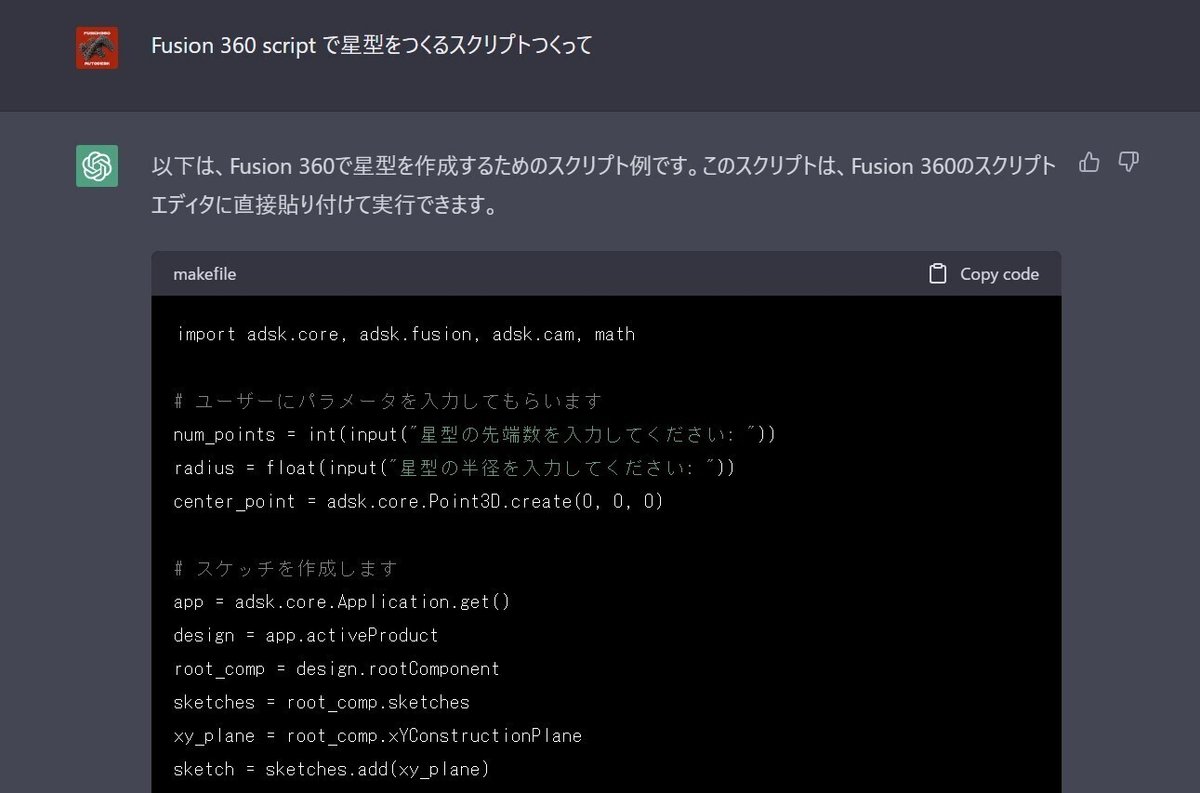
2.下記のようなスクリプトの回答がきました。
Fusion 360 のスクリプトはPythonベースのコードです。
import adsk.core, adsk.fusion, adsk.cam, math

# ユーザーにパラメータを入力してもらいます
num_points = int(input("星型の先端数を入力してください: "))
radius = float(input("星型の半径を入力してください: "))
center_point = adsk.core.Point3D.create(0, 0, 0)

# スケッチを作成します
app = adsk.core.Application.get()
design = app.activeProduct
root_comp = design.rootComponent
sketches = root_comp.sketches
xy_plane = root_comp.xYConstructionPlane
sketch = sketches.add(xy_plane)

# 星型のポイントを計算します
angle_between_points = math.pi / num_points
angle_offset = math.pi / 2
points = []
for i in range(num_points * 2):
    angle = i * angle_between_points + angle_offset
    if i % 2 == 0:
        x = radius * math.cos(angle)
        y = radius * math.sin(angle)
    else:
        x = (radius / 2) * math.cos(angle)
        y = (radius / 2) * math.sin(angle)
    points.append(adsk.core.Point3D.create(x, y, 0))

# 星型を描画します
lines = sketch.sketchCurves.sketchLines
for i in range(len(points)):
    start_point = points[i]
    end_point = points[(i + 1) % len(points)]
    lines.addByTwoPoints(start_point, end_point)

# 3Dオブジェクトを作成します
extrudes = root_comp.features.extrudeFeatures
profile = sketch.profiles.item(0)
distance = adsk.core.ValueInput.createByReal(10)
extrude_input = extrudes.createInput(profile, adsk.fusion.FeatureOperations.NewBodyFeatureOperation)
extrude_input.setDistanceExtent(False, distance)
extrude_feature = extrudes.add(extrude_input)
3.早速Fusion 360 のスクリプトとして実行するためにアドインアイコンからFusion 360 のスクリプトファイルを新規作成します。
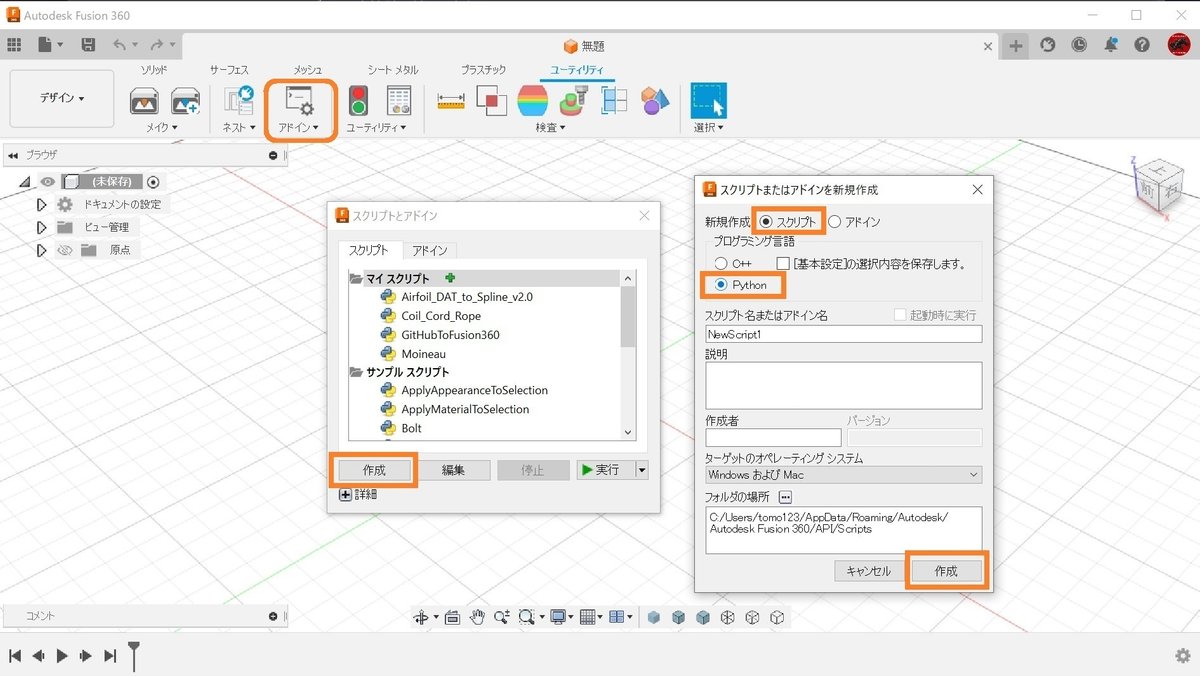
4.初期のスクリプトファイルが作成できたらそれを編集します。
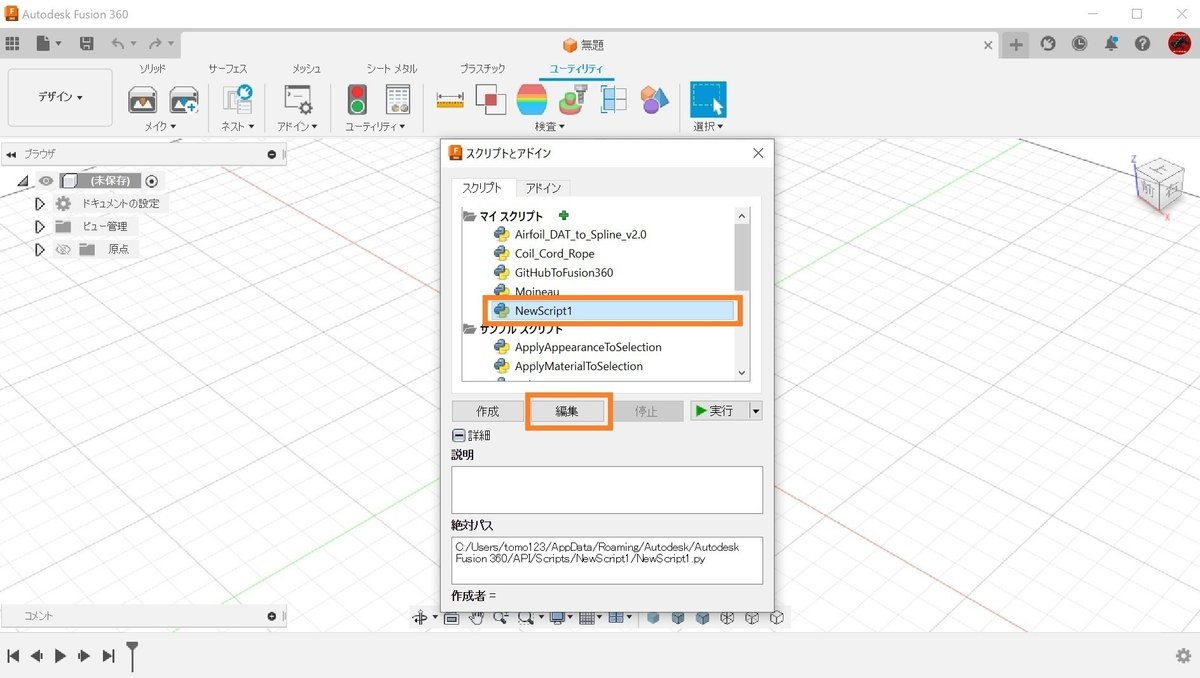
編集ボタンを押す
5.編集ボタンを押すと、スクリプト編集用のVisual Studio Codeの エディターが起動しますので、そこに先程のChatGPTの回答のスクリプトコードを入れ替えで貼り付けて実行してみます。
!!!結果、実行エラーになりました!!!
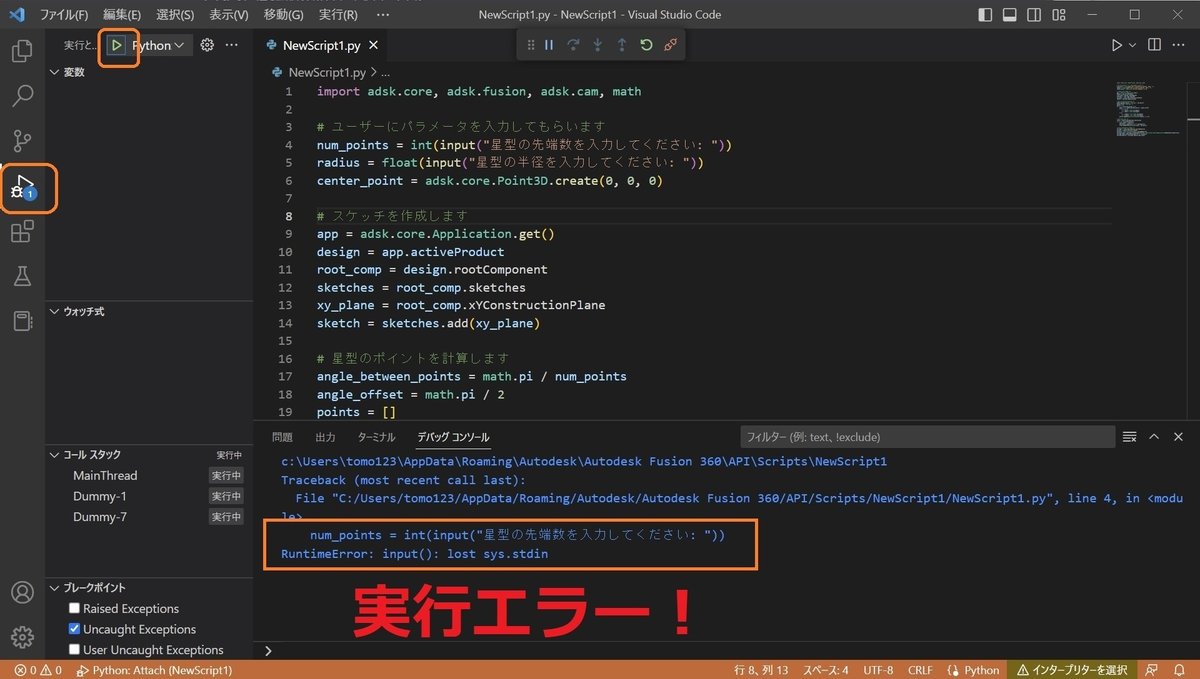
   num_points = int(input("星型の先端数を入力してください: "))
RuntimeError: input(): lost sys.stdin
6.ChatGPTに戻ってエラーの内容を伝えます。
>下記のエラーになります。どのように修正したらいいですか? num_points = int(input("星型の先端数を入力してください: ")) RuntimeError: input(): lost sys.stdin

7.ChatGPTからエラー内容の説明付きで修正されたスクリプトの回答がきました。
>このエラーは、スクリプトがFusion 360のPython環境で実行されているため、標準入力(input関数)がサポートされていないことによるものです。
そのため、代わりにFusion 360のUIを使用してユーザーにパラメータを入力する必要があります。
以下は、UIを使用して星型の先端数と半径をユーザーに入力してもらうためのコード例です。
import adsk.core, adsk.fusion, adsk.cam, math
# ダイアログを表示してユーザーにパラメータを入力してもらいます
ui = None
try:
app = adsk.core.Application.get()
ui = app.userInterface
num_points = ui.inputBox("星型の先端数を入力してください:", "先端数", "5")
radius = ui.inputBox("星型の半径を入力してください:", "半径", "10")
except:
if ui:
ui.messageBox('入力ボックスの表示中にエラーが発生しました。')
num_points = int(num_points[0])
radius = float(radius[0])
center_point = adsk.core.Point3D.create(0, 0, 0)
# スケッチを作成します
app = adsk.core.Application.get()
design = app.activeProduct
root_comp = design.rootComponent
sketches = root_comp.sketches
xy_plane = root_comp.xYConstructionPlane
sketch = sketches.add(xy_plane)
# 星型のポイントを計算します
angle_between_points = math.pi / num_points
angle_offset = math.pi / 2
points = []
for i in range(num_points * 2):
angle = i * angle_between_points + angle_offset
if i % 2 == 0:
x = radius * math.cos(angle)
y = radius * math.sin(angle)
else:
x = (radius / 2) * math.cos(angle)
y = (radius / 2) * math.sin(angle)
points.append(adsk.core.Point3D.create(x, y, 0))
# 星型を描画します
lines = sketch.sketchCurves.sketchLines
for i in range(len(points)):
start_point = points[i]
end_point = points[(i + 1) % len(points)]
lines.addByTwoPoints(start_point, end_point)
# 3Dオブジェクトを作成します
extrudes = root_comp.features.extrudeFeatures
profile = sketch.profiles.item(0)
distance = adsk.core.ValueInput.createByReal(10)
extrude_input = extrudes.createInput(profile, adsk.fusion.FeatureOperations.NewBodyFeatureOperation)
extrude_input.setDistanceExtent(False, distance)
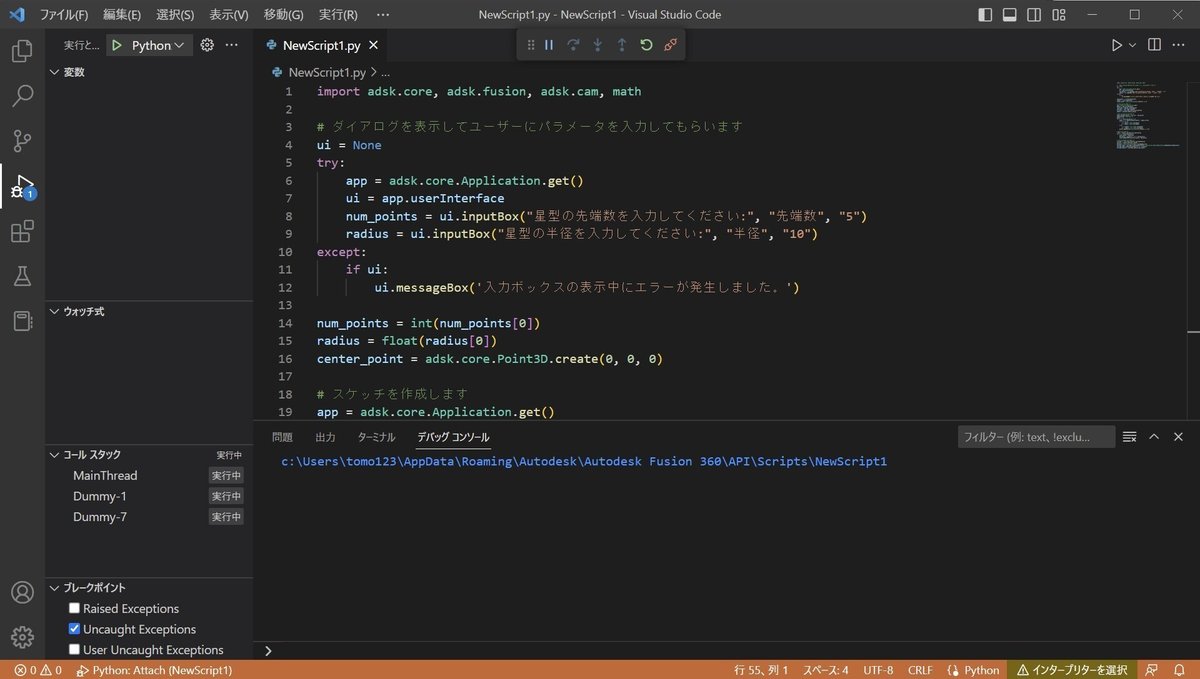
extrude_feature = extrudes.add(extrude_input)8.Fusion360のスクリプト編集用のVisual Studio Codeの エディターに戻って、そこに先程のChatGPTの回答のスクリプトコードを再度貼り付けて実行してみます。
!!!結果、今度はエラーは表示されていません。!!!
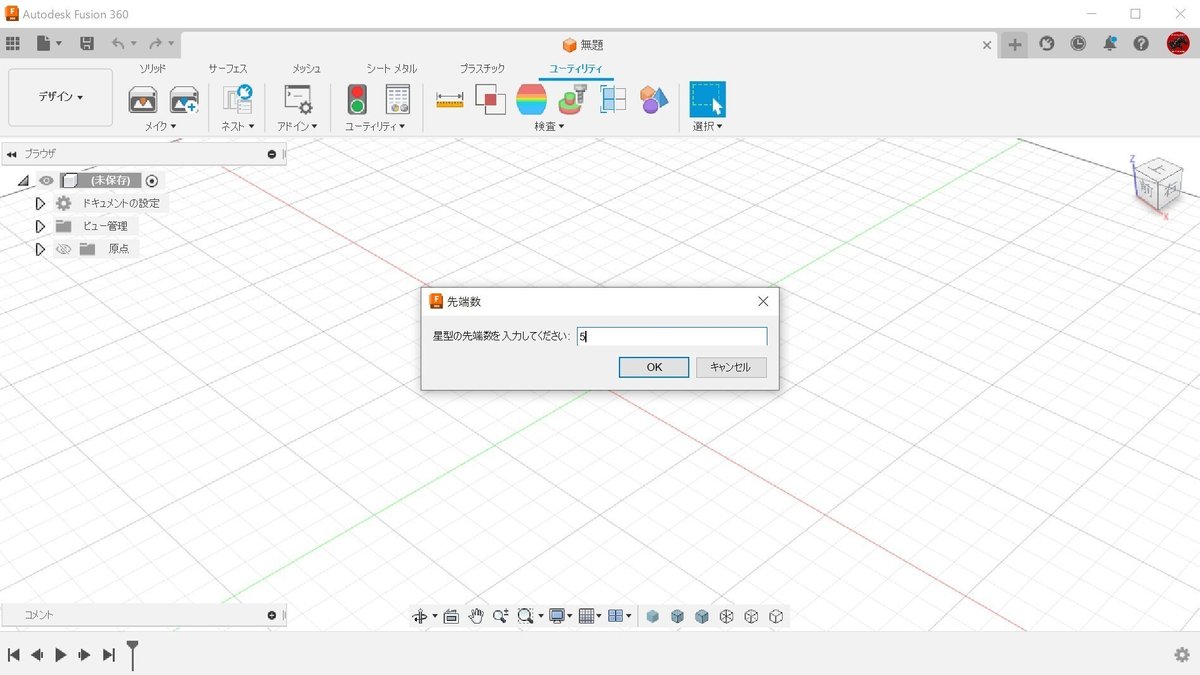
9.デバックモードで実行しているので、Fusion 360 側の画面で実行されているかを確認します。
「星型の先端数を入力してください」のダイアログが表示されています。
そのまま「5」(五角)を指定します。
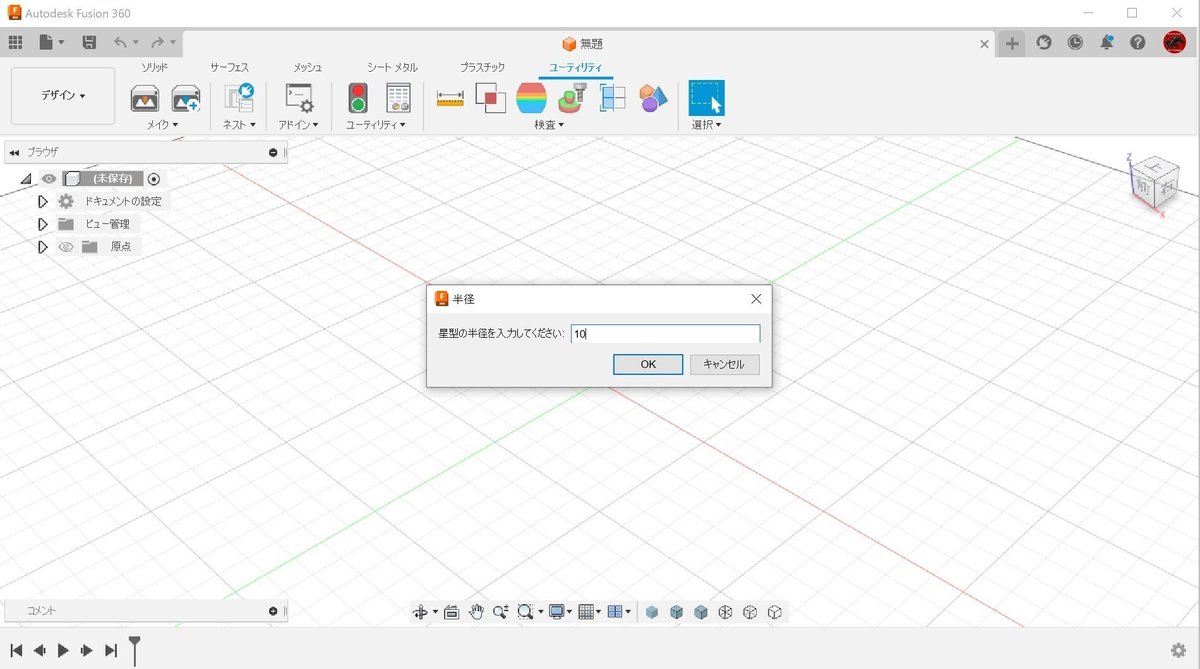
「星型の半径を入力してください」のダイアログが表示されます。
そのまま「10」(cm)で指定します。
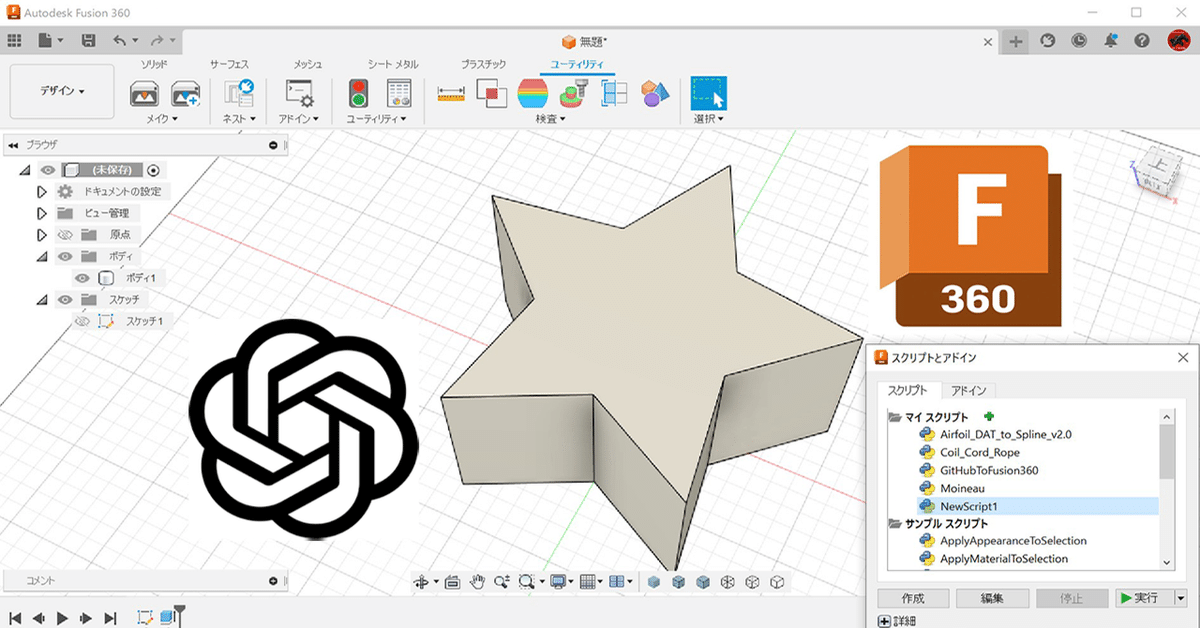
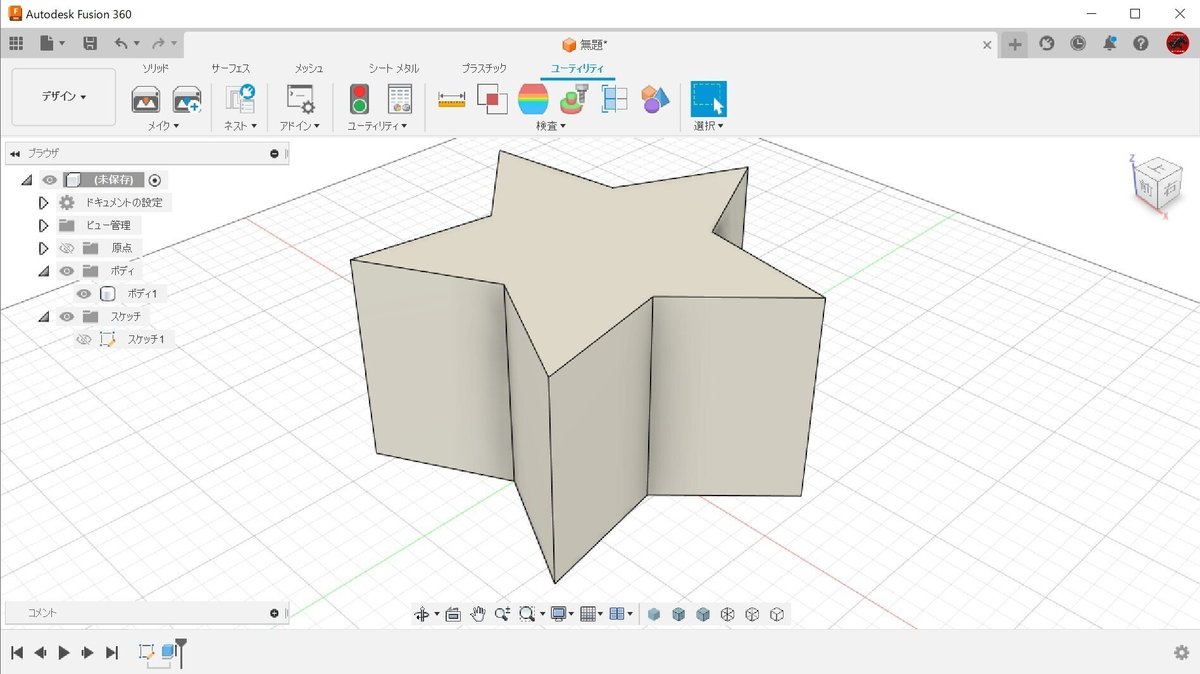
10.その結果、ちゃんと星型の立体モデルをつくってくれました。
スケッチや押し出しコマンドの履歴もあります。
!!!自分でコーティングを考えなくても簡単にできました!!!
補足です
実行できるスクリプトができましたが、使っていてちょっと使いづらいところがあるので、後からでも変更もしてくれるのかやってみました!
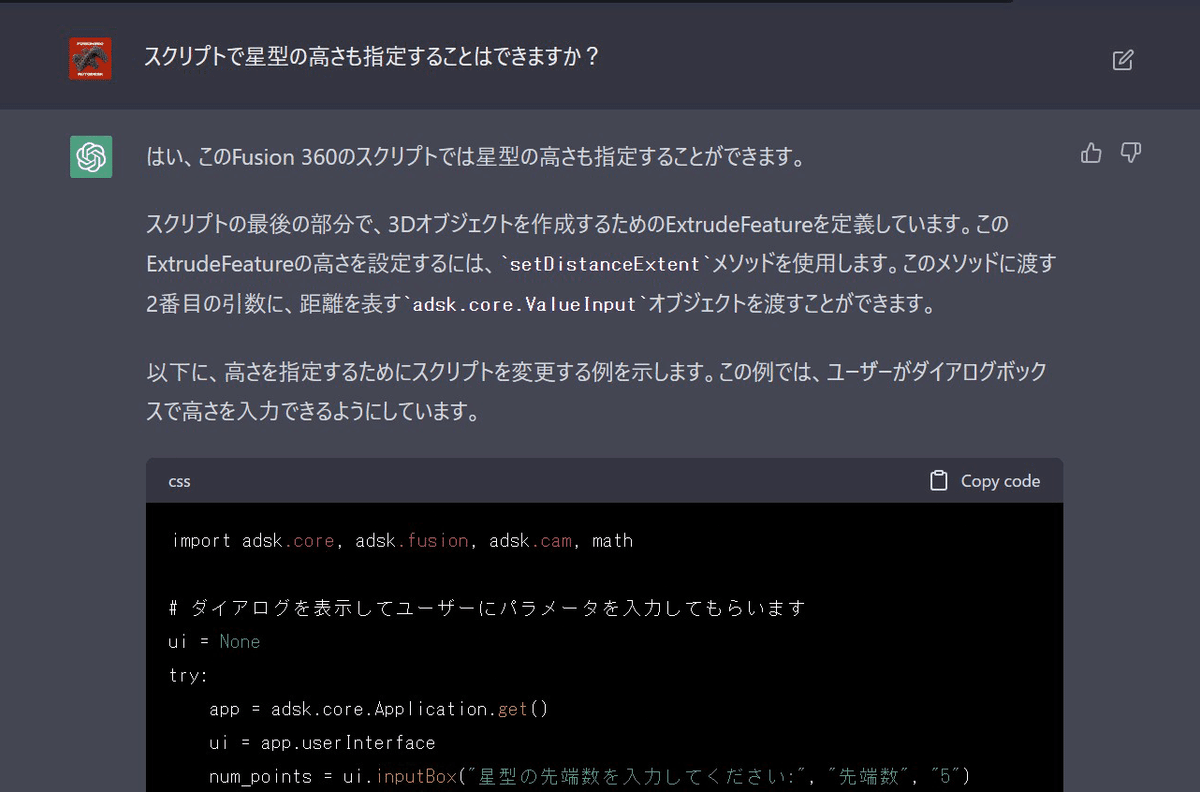
>このFusion 360のスクリプトで星型の高さも指定することはできますか?
>はい、このFusion 360のスクリプトでは星型の高さも指定することができます。
スクリプトの最後の部分で、3Dオブジェクトを作成するためのExtrudeFeatureを定義しています。このExtrudeFeatureの高さを設定するには、setDistanceExtentメソッドを使用します。このメソッドに渡す2番目の引数に、距離を表すadsk.core.ValueInputオブジェクトを渡すことができます。
以下に、高さを指定するためにスクリプトを変更する例を示します。この例では、ユーザーがダイアログボックスで高さを入力できるようにしています。
import adsk.core, adsk.fusion, adsk.cam, math

# ダイアログを表示してユーザーにパラメータを入力してもらいます
ui = None
try:
    app = adsk.core.Application.get()
    ui = app.userInterface
    num_points = ui.inputBox("星型の先端数を入力してください:", "先端数", "5")
    radius = ui.inputBox("星型の半径を入力してください:", "半径", "10")
    height = ui.inputBox("高さを入力してください:", "高さ", "5")
except:
    if ui:
        ui.messageBox('入力ボックスの表示中にエラーが発生しました。')

num_points = int(num_points[0])
radius = float(radius[0])
height = float(height[0])
center_point = adsk.core.Point3D.create(0, 0, 0)

# スケッチを作成します
app = adsk.core.Application.get()
design = app.activeProduct
root_comp = design.rootComponent
sketches = root_comp.sketches
xy_plane = root_comp.xYConstructionPlane
sketch = sketches.add(xy_plane)

# 星型のポイントを計算します
angle_between_points = math.pi / num_points
angle_offset = math.pi / 2
points = []
for i in range(num_points * 2):
    angle = i * angle_between_points + angle_offset
    if i % 2 == 0:
        x = radius * math.cos(angle)
        y = radius * math.sin(angle)
    else:
        x = (radius / 2) * math.cos(angle)
        y = (radius / 2) * math.sin(angle)
    points.append(adsk.core.Point3D.create(x, y, 0))

# 星型を描画します
lines = sketch.sketchCurves.sketchLines
for i in range(len(points)):
    start_point = points[i]
    end_point = points[(i + 1) % len(points)]
    lines.addByTwoPoints(start_point, end_point)

# スケッチ内で立体オブジェクトを作成します
profile = sketch.profiles.item(0)
extrudes = root_comp.features.extrudeFeatures
extrude_input = extrudes.createInput(profile, adsk.fusion.FeatureOperations.NewBodyFeatureOperation)
distance = adsk.core.ValueInput.createByReal(height)
extrude_input.setDistanceExtent(True, distance)
extrude_feature = extrudes.add(extrude_input)
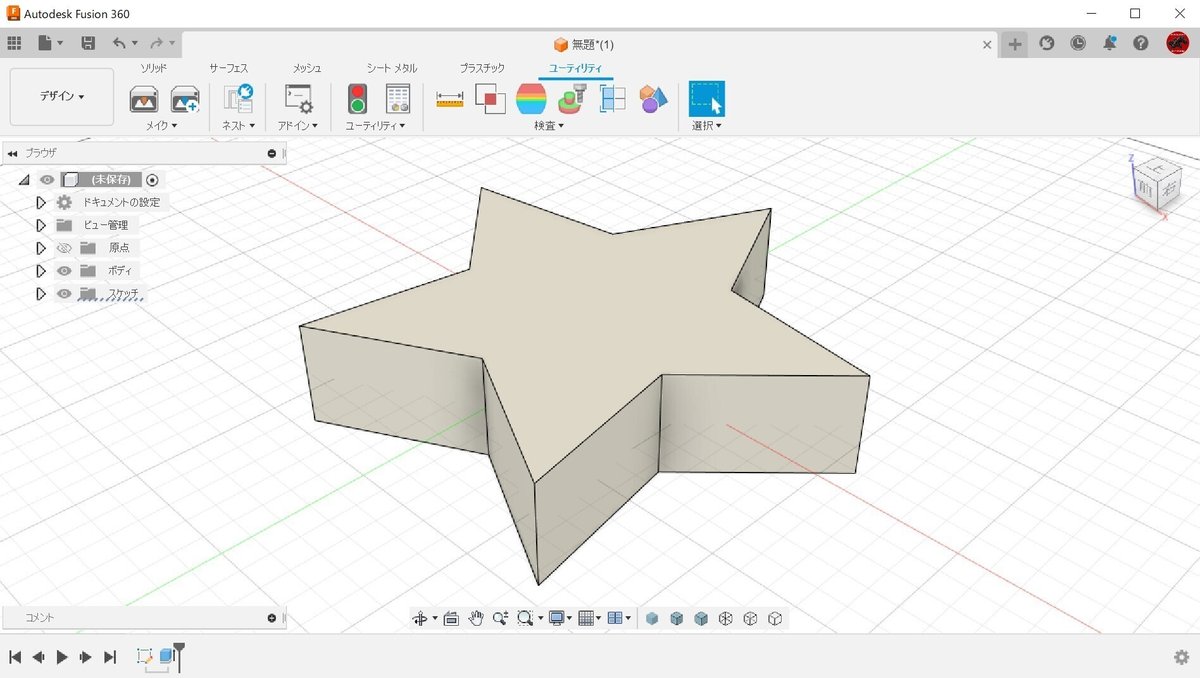
実行してみましたが、ちゃんと高さの指定もできるようになりました!
2(cm)で実行してみます。

指定通りの高さの星型の立体になりました!
いかがでしょうか?
一発で正確な回答をもらうのは難しいと思いますが、何回かトライ・アンド・エラーを繰り返しながらChatGPTの回答の精度を上げていけば、かなり有益な回答を得られることがわかりました。